Add a client
Where to find your clients, the two ways to add one, and where their insurance and care plan go.
4 parts · 2 minClientsFor the office
The lesson plays on a sample agency, so nothing you do in it changes anything. Open any item in the lesson's panel to read about it, and press See how to watch it done.
What this lesson covers
Everything the lesson says, part by part.
- 1
On the way: Your clients are under Patients in the sidebar.
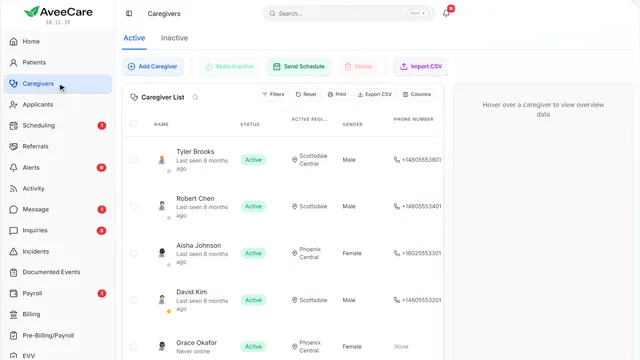
This is your Patients page
Every client you care for, and everything about them: visits, care plans, medications, insurance and billing.
In the sidebar under Patients. It is always there.
On this page
Add clients one at a timeType them in, or send their family a link
Add Patient opens a short form. A name and an address is all it takes to start scheduling visits for them.
See how jumps ahead to part 2: Two ways to add a client.
Read the guideImport clients in bulkBring in a spreadsheet of everyone at once
Upload a spreadsheet of your clients. Only first and last name are required, and you see every row before anything is saved.
Read the guideSee how shows:
- Import opens here Drop in a spreadsheet, or download our template so the columns already match.
- The columns it understands are listed Dates as year-month-day, and a service type from the list shown.
Make clients inactiveFor someone you no longer serve. Their records stay
Tick clients in the list, then Make Inactive. Their visits, notes and billing are kept, and you can make them active again.
Read the guideSee how shows:
- Tick them, then Make Inactive The button counts how many you ticked.
Record where clients came fromA hospital, a doctor, a family friend
Tick clients and set their referral source, so you can see later which sources send you the most clients.
See how shows:
- Referral source Set it for many clients at once.
- 2
On the way: Add Patient is at the top of the list.
Two ways to add a client
Fill it in yourself, or send the client or their family a secure link to do it.
Patients, then Add Patient at the top of the list.
On this page
Manual AddYou type in what you know
Best when you have their details from the intake call. Next you choose how much to fill in now.
See how jumps ahead to part 3: How much to fill in now.
Remote AddThey fill it in themselves
Send a secure link by email. The client or their family enters their own details, and you check them before they are saved.
Read the guideSee how shows:
- Remote Add Make the link, then copy it or have us email it.
- 3
How much to fill in now
Just the basics gets them on the schedule today. Full setup takes insurance, care plan, medications and more in one sitting.
Add Patient, then Manual Add.
On this page
Just the basicsA name and an address
The least we need to schedule visits. Everything else goes on their record later, a tab at a time.
See how jumps ahead to part 4: Just the basics.
Add their insurance informationMedicaid, private insurance, a second payer
In Full setup, the billing section takes their insurance company, member ID, Medicaid ID and a second insurance if they have one. You can also add or change it later from their record.
Read the guideSee how shows:
- Full setup Every section of the client is on one form.
- Insurance, billing and compliance Turn it on and the insurance fields open: the payer, their member ID and a second insurance.
Add a care planWhat the caregiver does on each visit
A care plan lists the tasks for each visit and the goals they serve. Caregivers see it on every visit and tick the tasks off. It is not part of this form: once the client is added, open their record’s Care Plans tab and start from a ready-made plan, or Create from an assessment you have already filled in.
Read the guideSee how shows:
- Write or update a care plan
- Open a client, then Care Plans Click a client’s name, then the Care Plans tab.
- Care Plans Add tasks, how often they happen and the goal they serve. Caregivers see them on every visit and tick them off.
- Start from an assessment “Create from an assessment” lists the assessments filled in for this client. Pick one and a draft plan is made from its answers for you to check and activate.
- 4
Just the basics
A name and an address, and they are ready for their first visit.
Add Patient, Manual Add, then Just the basics.
On this page
Their addressWhere the caregiver goes
It puts them on the map, gives caregivers directions and is where clock-ins are checked against.
See how shows:
- Name and address That is all this form asks for.
Everything else, laterEach part has a tab on their record
Care plans, medications, contacts, insurance, authorizations, forms and their Drive of files each have their own tab on the client’s record.
Read the guideSee how shows:
- Find your way around a client’s record
- Open a client Click a client’s name in the list. Their record opens on Overview.
- Overview: who they are and what is coming up Contact details, diagnoses, the next visits and anything that needs attention.
- Care Plans: what the caregiver does Tasks and goals for each visit. A plan can be drafted from an assessment form.
- Schedule: their visits Their calendar on its own, with Send Schedule to email it to them or their family.
- Everything else has a tab Medications, allergies, contacts, authorizations, billing, forms, files in Drive, notes and incidents each have their own tab.
At the end
Now you know how to add a client
Watch next
 Recommended