Bulk Patient Import lets you create a whole spreadsheet of patients at once instead of running the Add Patient wizard one by one. AveeCare reads your CSV, shows a row preview before commit, then imports row by row with a live progress bar. Use this when you're migrating from another platform or onboarding a fresh list of clients in one pass.
Quick answer
Open Patients, click Import CSV in the action bar above the Patient List, click Choose File and pick your CSV. AveeCare shows a Preview block under the form. If the rows look right, click Import N Patient(s). The progress bar runs through and your new patients land on the Active tab (or the Inactive tab if you ticked “Import patients as Inactive”).
CSV format AveeCare expects
There is no column mapping step. Your CSV header row has to use the exact column names AveeCare expects, in any order. The Import modal shows a live example with two sample rows so you can copy the header line directly.
Required columns (11):
firstName,lastNamedob(date of birth, formatYYYY-MM-DD)gender(Male, Female, etc.)address,city,state,zipCodeprimaryLanguageemailAddress,phoneNumber
Optional columns:
middleName,goesByNameserviceType(one ofSkilledNursing,PhysicalTherapy,Hospice,StandardCare)fallRisk(true/falseor1/0)primaryDiagnosisDescriptionnote
1. Open the Import CSV modal
Click Import CSV in the Patients action bar.
It's the rightmost button in the row above the Patient List, next to Add Patient, Make Inactive, and Delete. The button is enabled for every admin, no payment method needed.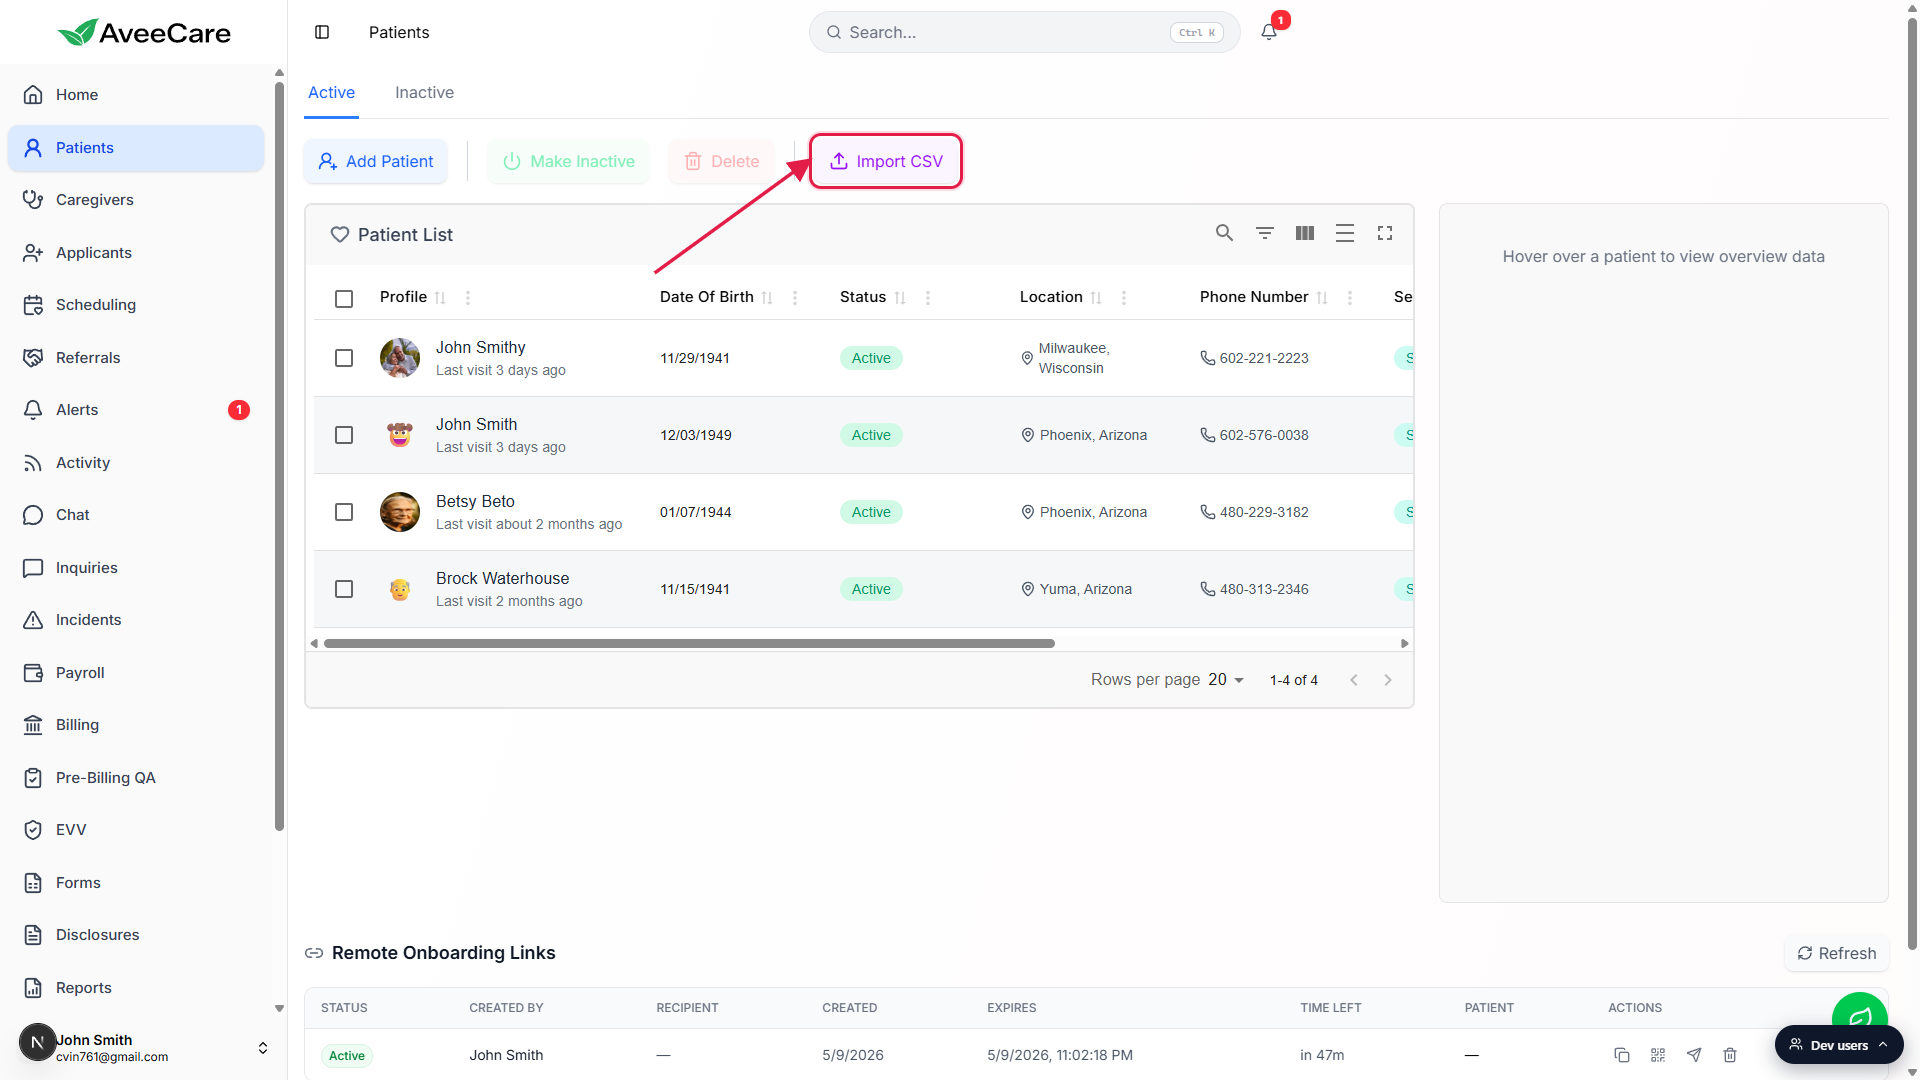
The Import Patients from CSV modal opens full-screen.
The top of the modal lists the required columns, then shows a CSV Format Example table with two sample rows so you can copy the header line if you don't already have it.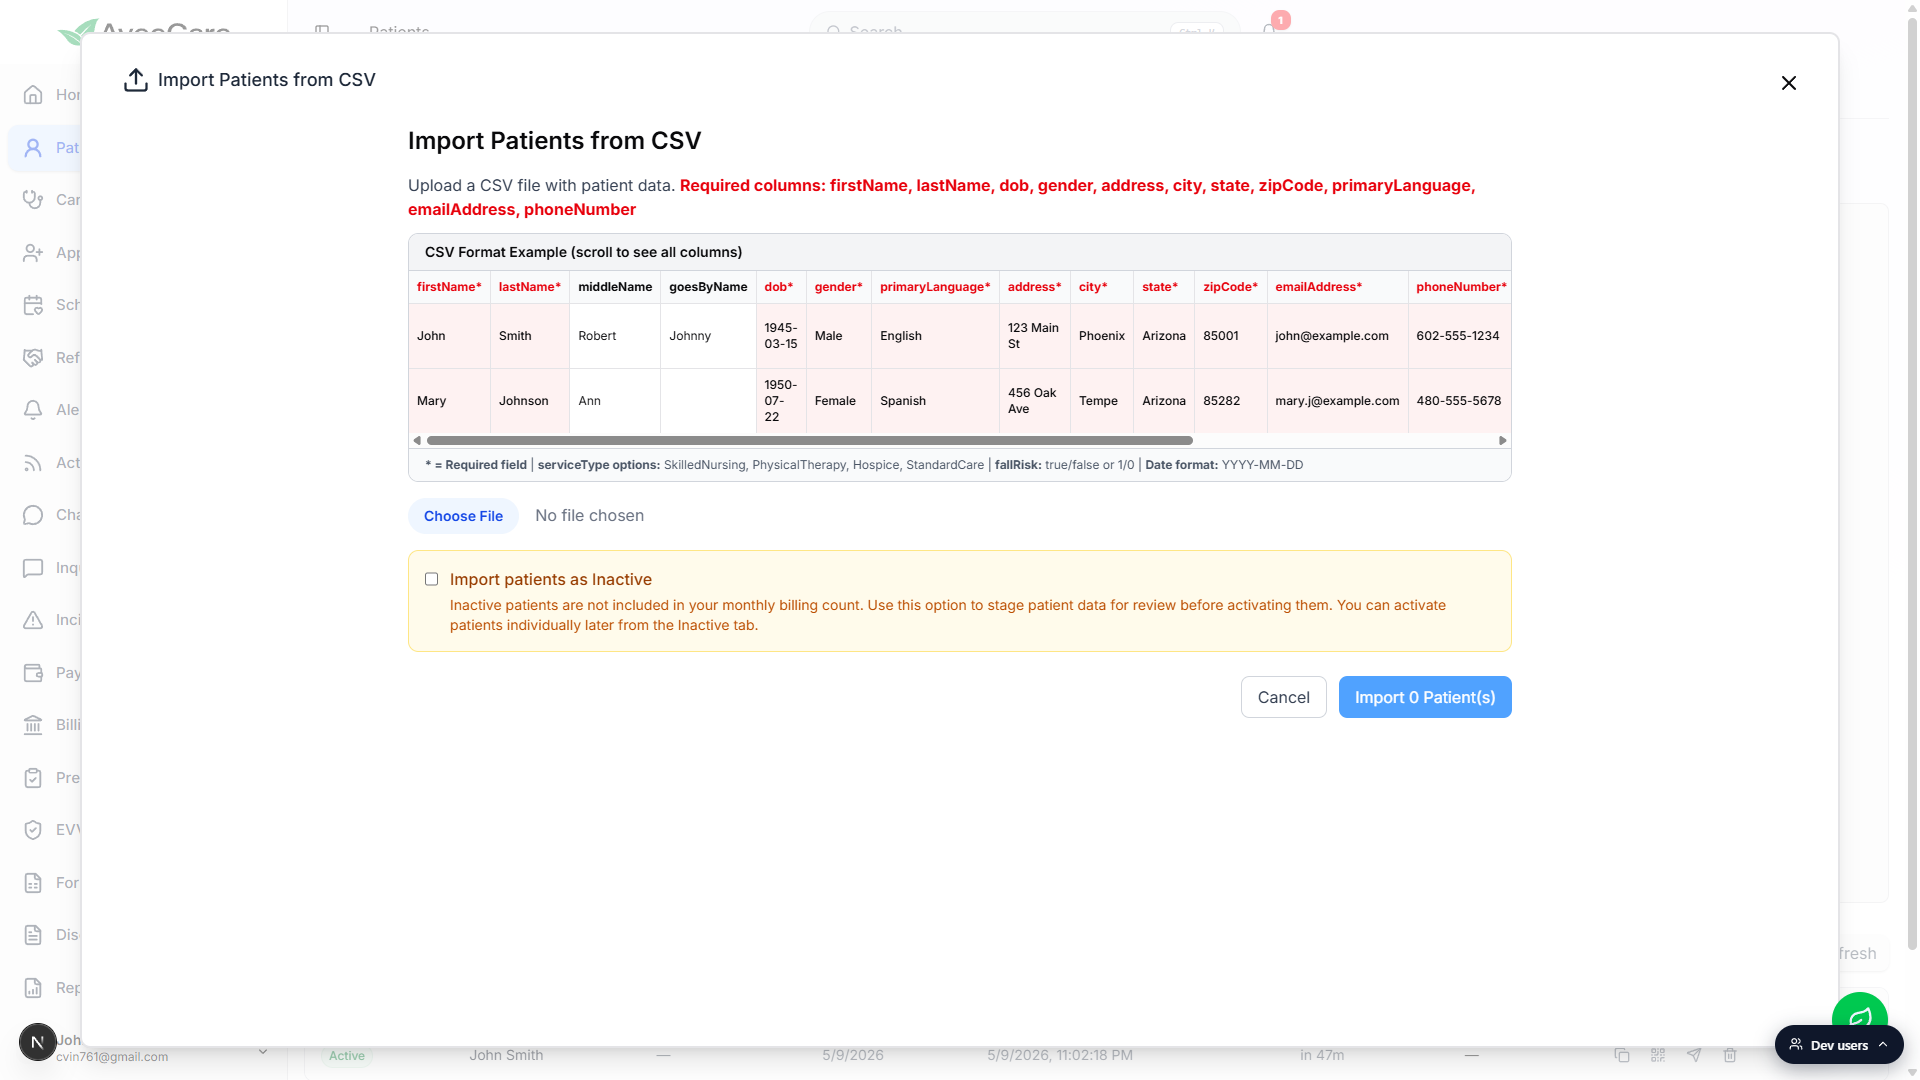
2. Choose your CSV and check the preview
Click Choose File and pick your CSV from disk.
Only files with a.csvextension show up in the file picker. Excel.xlsxfiles have to be exported as CSV first.AveeCare reads the file and shows a Preview (N rows) block.
The Preview table shows every column AveeCare picked up from your file plus the actual values in each row, exactly as it will import them. The footer button updates from “Import 0 Patient(s)” to the real row count so you know how many records will be created.
Spot-check the preview before clicking Import.
Look at the date column for off-by-one issues, the state column for two-letter vs full-name mismatches, and the email and phone columns for stray quotes or whitespace. If anything looks wrong, click Cancel, fix the spreadsheet, and re-upload.
3. Decide Active or Inactive on import
Leave the toggle off to land patients on the Active tab.
This is the default. New patients are immediately visible to schedulers and counted toward your monthly billing.Tick Import patients as Inactive to stage them quietly.
The yellow callout in the modal explains the billing impact: inactive patients are not counted toward your monthly billing. Use this when you're bulk-loading a list to clean up first and want to flip people on one at a time from the Inactive tab later.
4. Click Import and watch the progress
Click Import N Patient(s) in the bottom-right of the modal.
AveeCare creates patients one at a time and shows “Importing patient X of N...” under a progress bar that fills to 100%. Don't close the tab while it's running.When the bar hits 100%, the modal closes and the Patients table refreshes.
Imported rows appear at the top of the Active tab (or Inactive tab if you ticked the toggle). The pagination footer updates to reflect the new total count.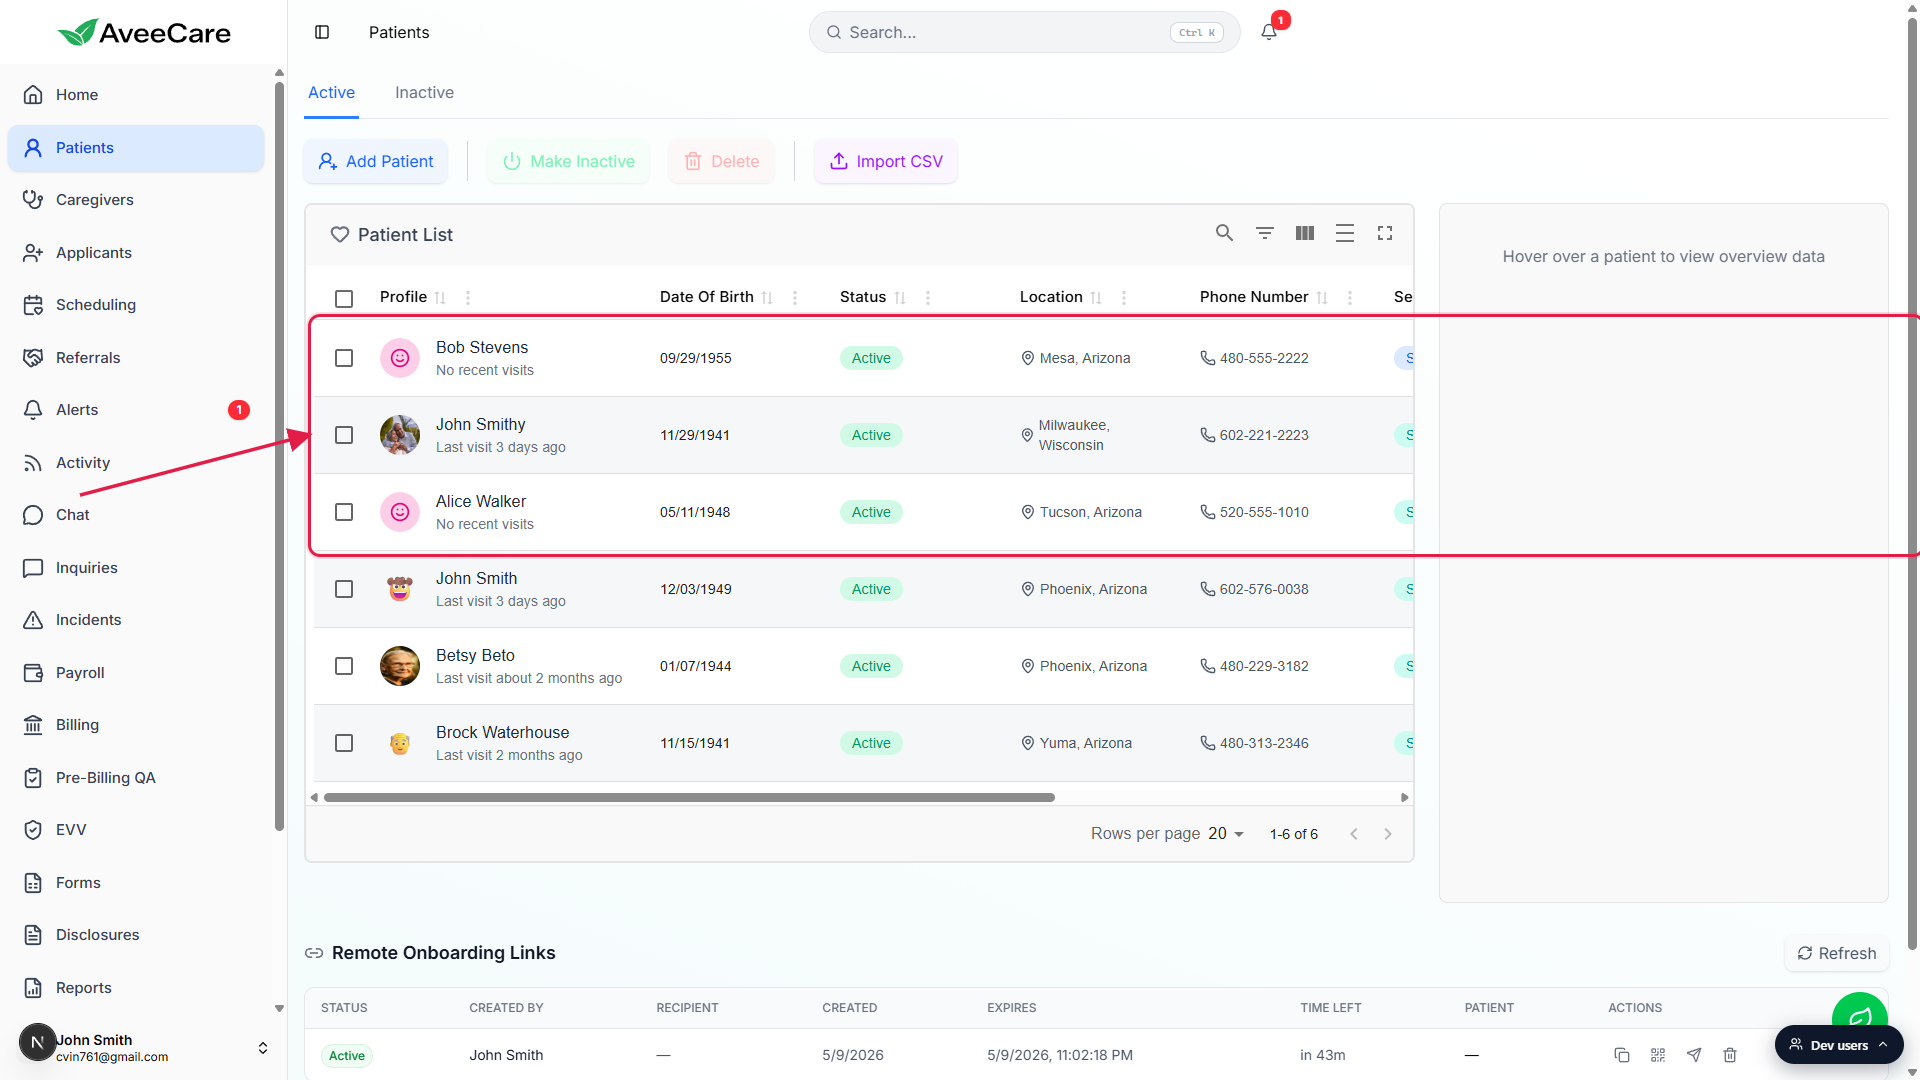
Common pitfalls
- Wrong header names. AveeCare matches columns by exact header name.
first_nameorFirstNamewill not map tofirstName. Copy the header row from the CSV Format Example table inside the modal to be safe. - Date format mismatches. The dob column has to be
YYYY-MM-DD.03/15/1945or15-Mar-45will fail row validation. Reformat the column in Excel before exporting. - Service type capitalization. The serviceType column accepts
SkilledNursing,PhysicalTherapy,Hospice, andStandardCare. Mixed case values likeskilled nursingorstandard carewill not match. - Smart quotes. Spreadsheet apps sometimes save smart quotes that break the CSV parser. Save the file as plain UTF-8 CSV (Excel: “CSV UTF-8 (Comma delimited)”) before uploading.
- Forgetting to flip them Active. If you ticked “Import patients as Inactive”, the rows are NOT visible on the default Active tab. Switch to the Inactive tab to find and activate them.
- Closing the modal mid-import. The progress bar runs server-side as one row at a time. Closing the tab before it hits 100% can leave the run partially complete. Wait for the bar.