Billing and payroll feel like four different systems, but in AveeCare they all live across four tabs on the same Settings page. Get these right in one sitting and every visit you schedule from then on inherits the right invoice prefix, the right payment terms, the right payroll provider, and the right clearinghouse for insurance claims.
1. Fill in your business identity (NPI, Tax ID, Medicaid ID)
The three regulatory identifiers, plus your business phone, hours, and timezone, live on the Business Settings tab. Set them once. Everything else in this guide depends on these being correct.
Open Settings. The Business Settings tab is already selected.
The tab strip reads Business Settings, My Notifications, Company Notifications, Subscription & Billing, Payment Integrations, Clearinghouse & Claims, Payroll, Locations, API Keys, Account. You'll touch four of these in this guide.
Set Business Phone, Business Hours of Operation, and Timezone.
Timezone is the most important field on the page. It drives every visit, payroll, and EVV timestamp downstream. Get this right before you schedule anything serious. The business hours window also prevents accidental scheduling outside your operating hours.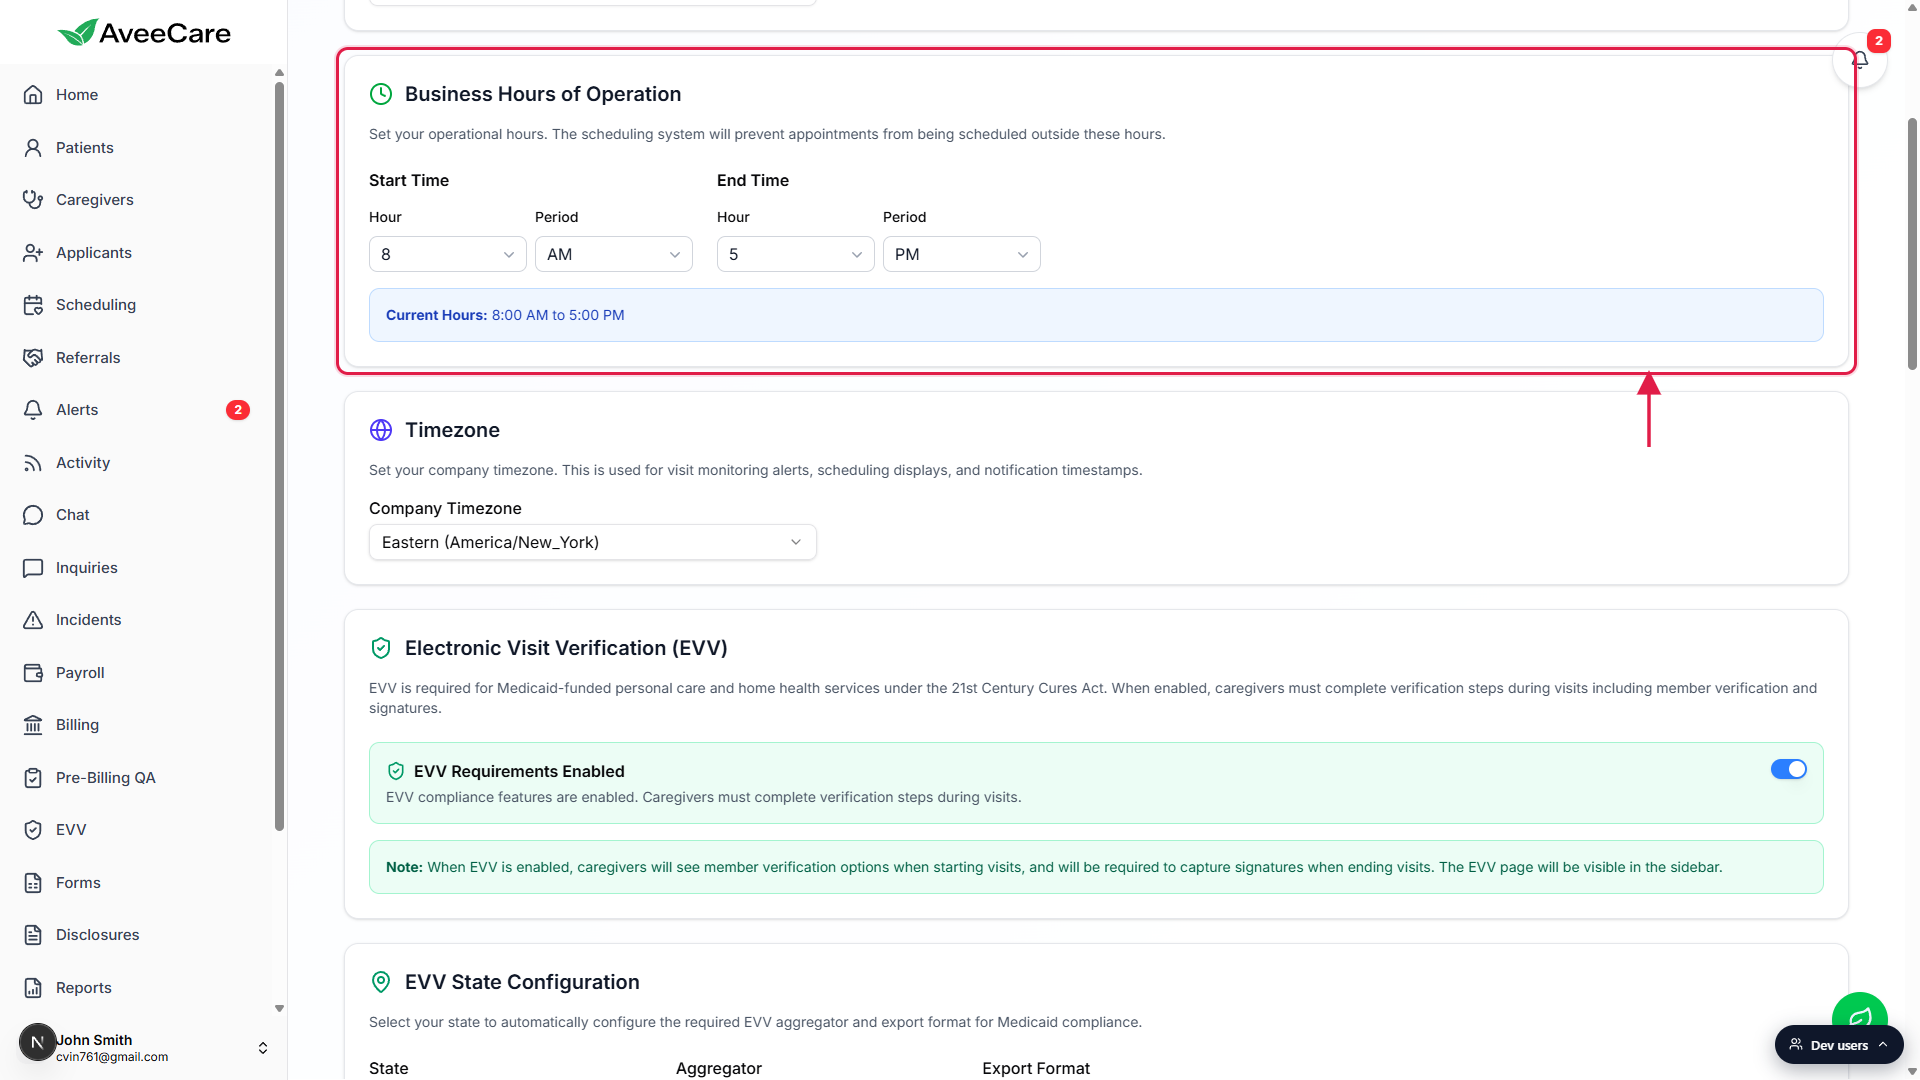
Fill in the EVV Provider Information block: State Medicaid Provider ID, NPI, Tax ID.
These three are what aggregators and clearinghouses check on every Medicaid or Medicare claim. NPI is your 10-digit National Provider Identifier. Tax ID is your federal EIN. State Medicaid Provider ID is issued by your state Medicaid authority. The full field reference is in Business settings.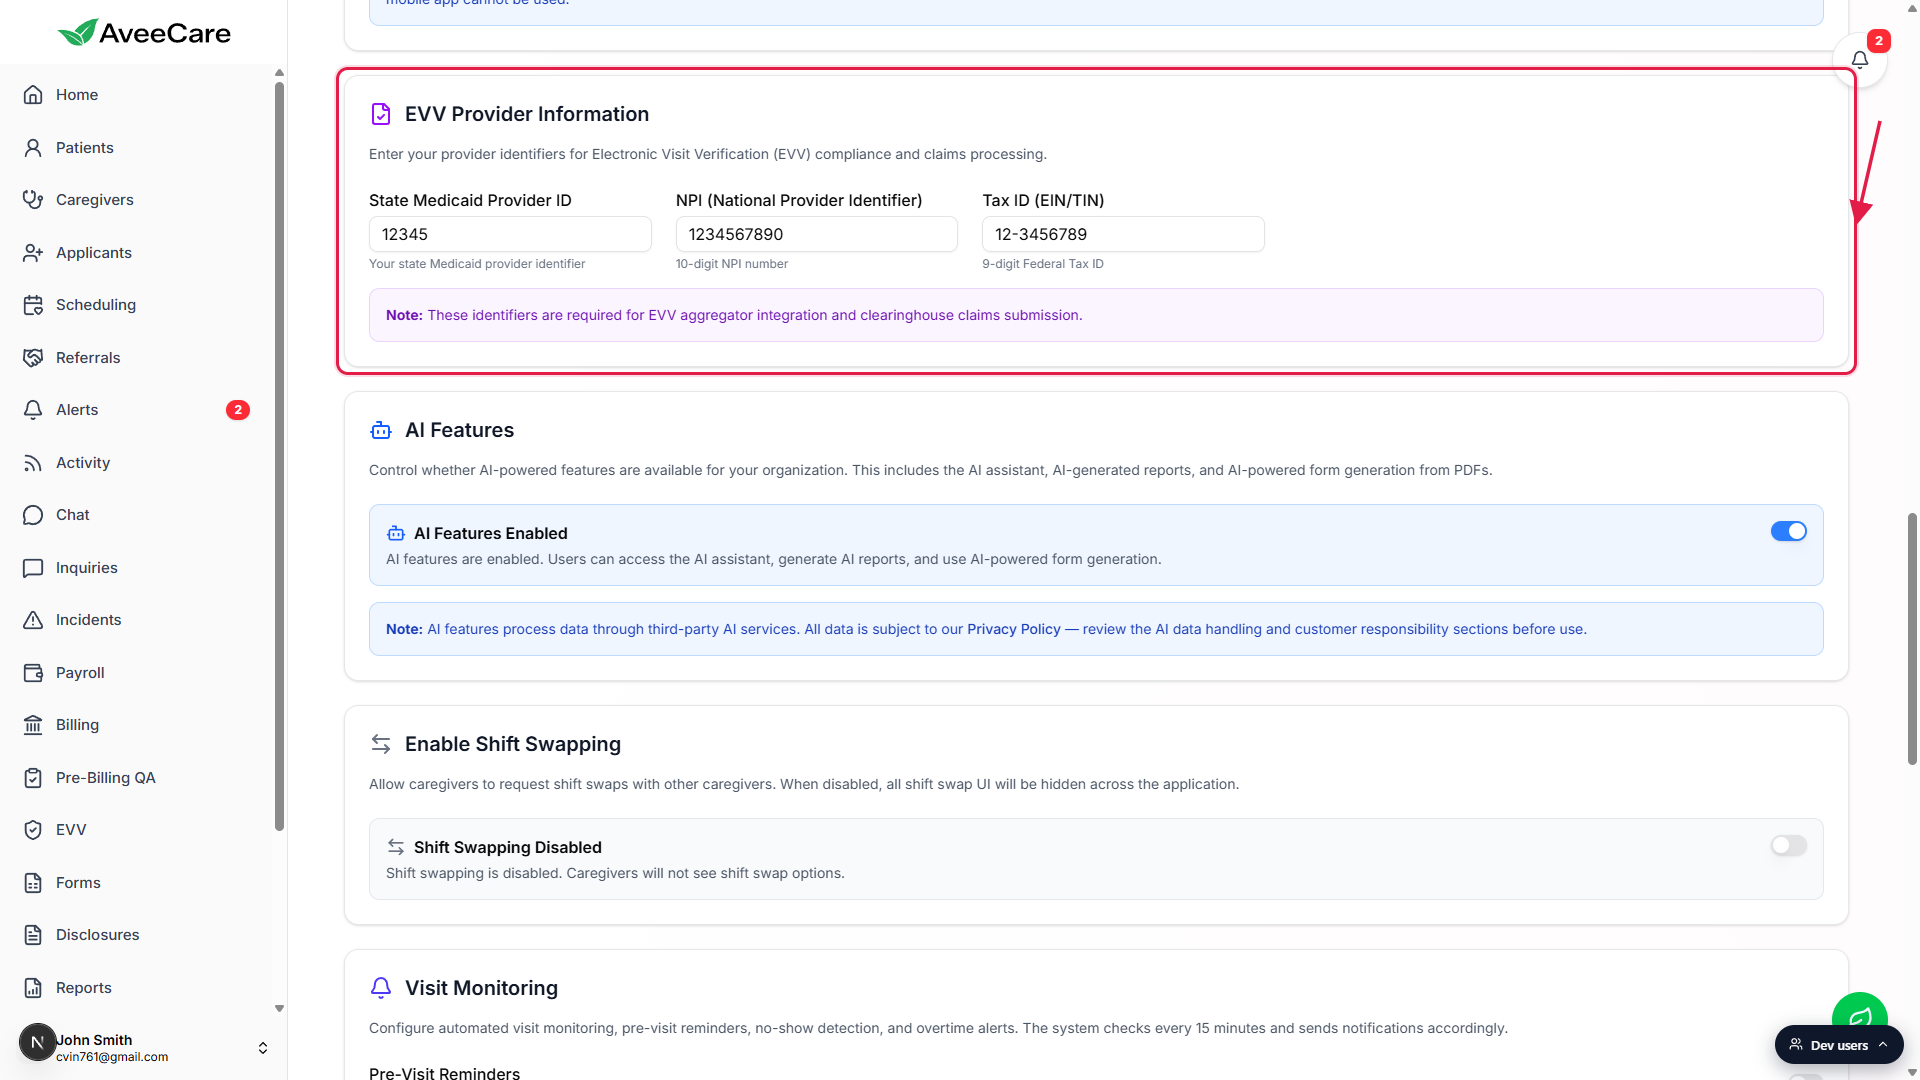
Click Save Business Settings at the bottom right of the tab.
One Save button persists every change on the tab. If the page feels long, that's by design. Business Settings is one tab, not a wizard.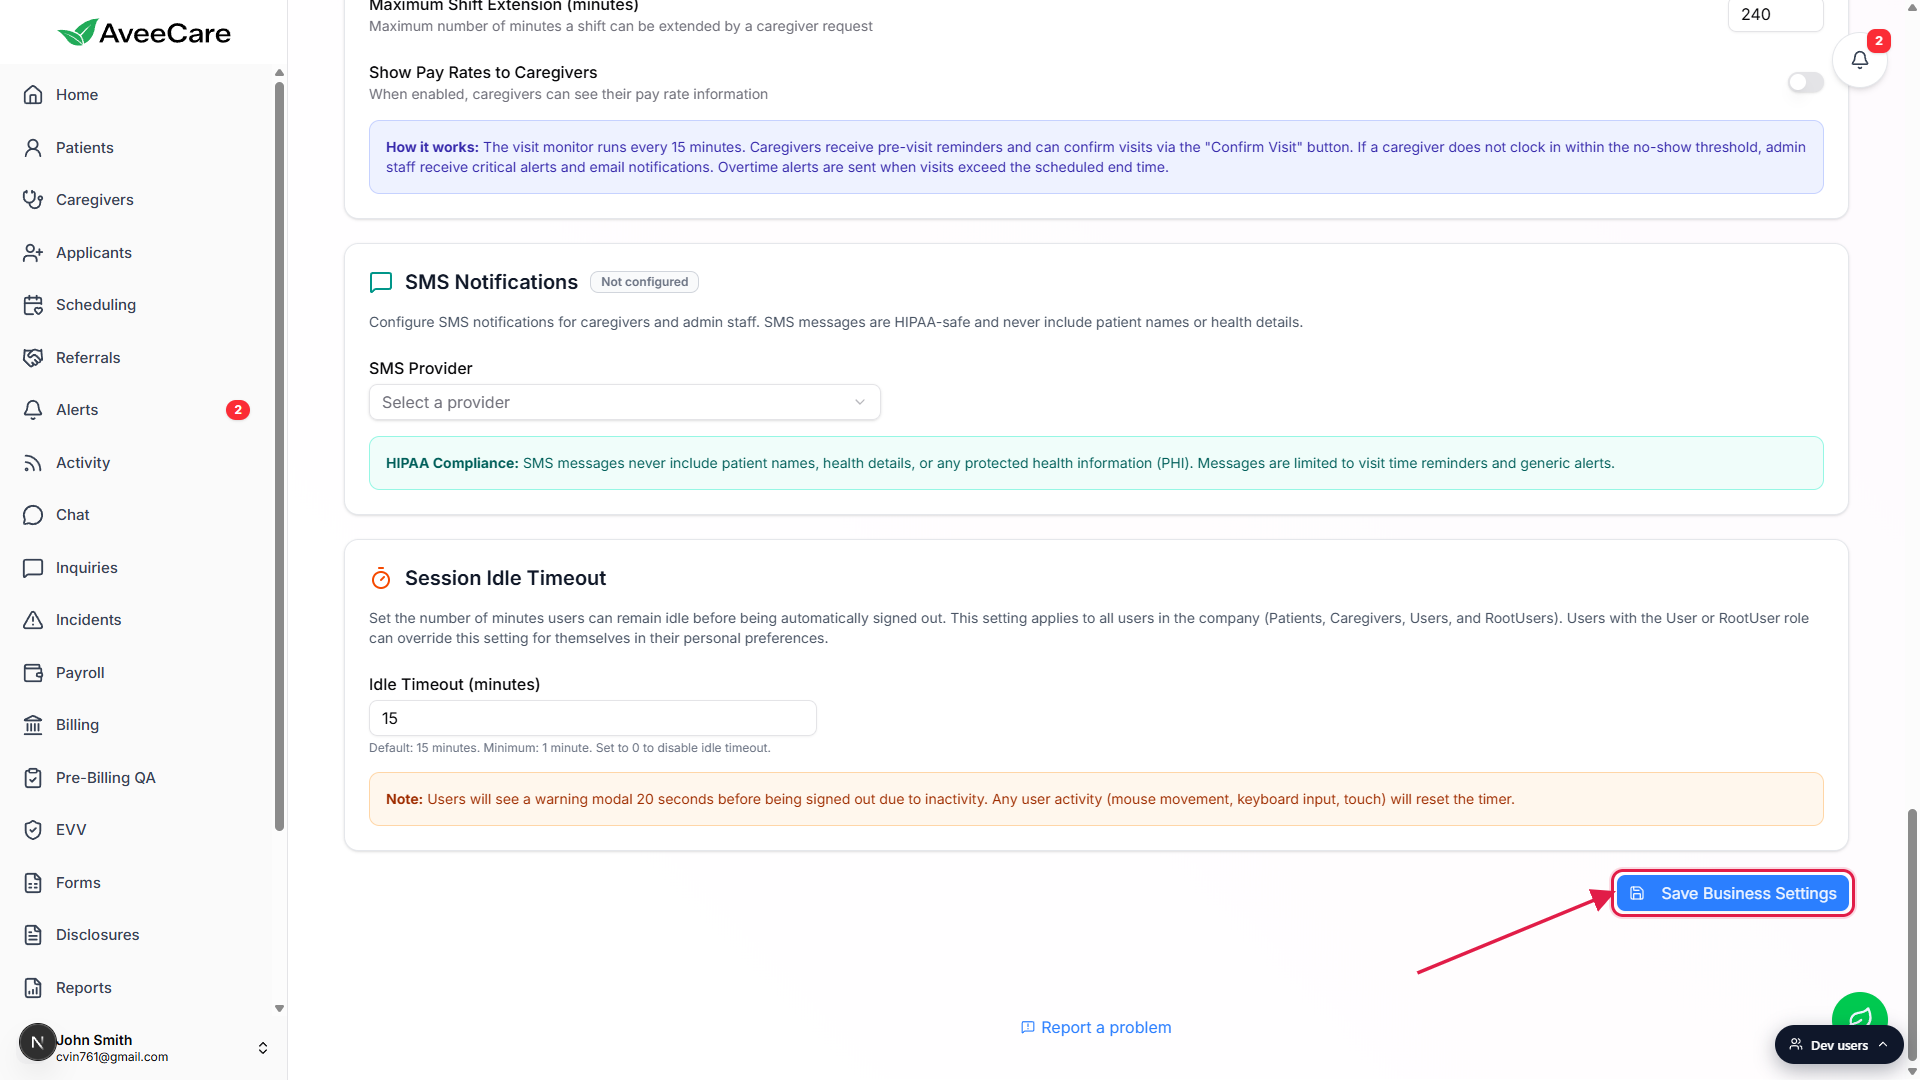
2. Set agency-wide billing defaults
Default Billing Settings is the block of invoice values every new patient inherits: payment terms, invoice prefix, default tax rate, an overdue warning window, and the company-wide auto-bill toggle. Per-patient overrides on the patient Billing tab beat these defaults whenever a real invoice is generated.
Click the Payment Integrations tab in the tab strip.
Payment Integrations sits to the right of Subscription & Billing. On narrow screens, use the right scroll-arrow on the tab strip to bring it into view.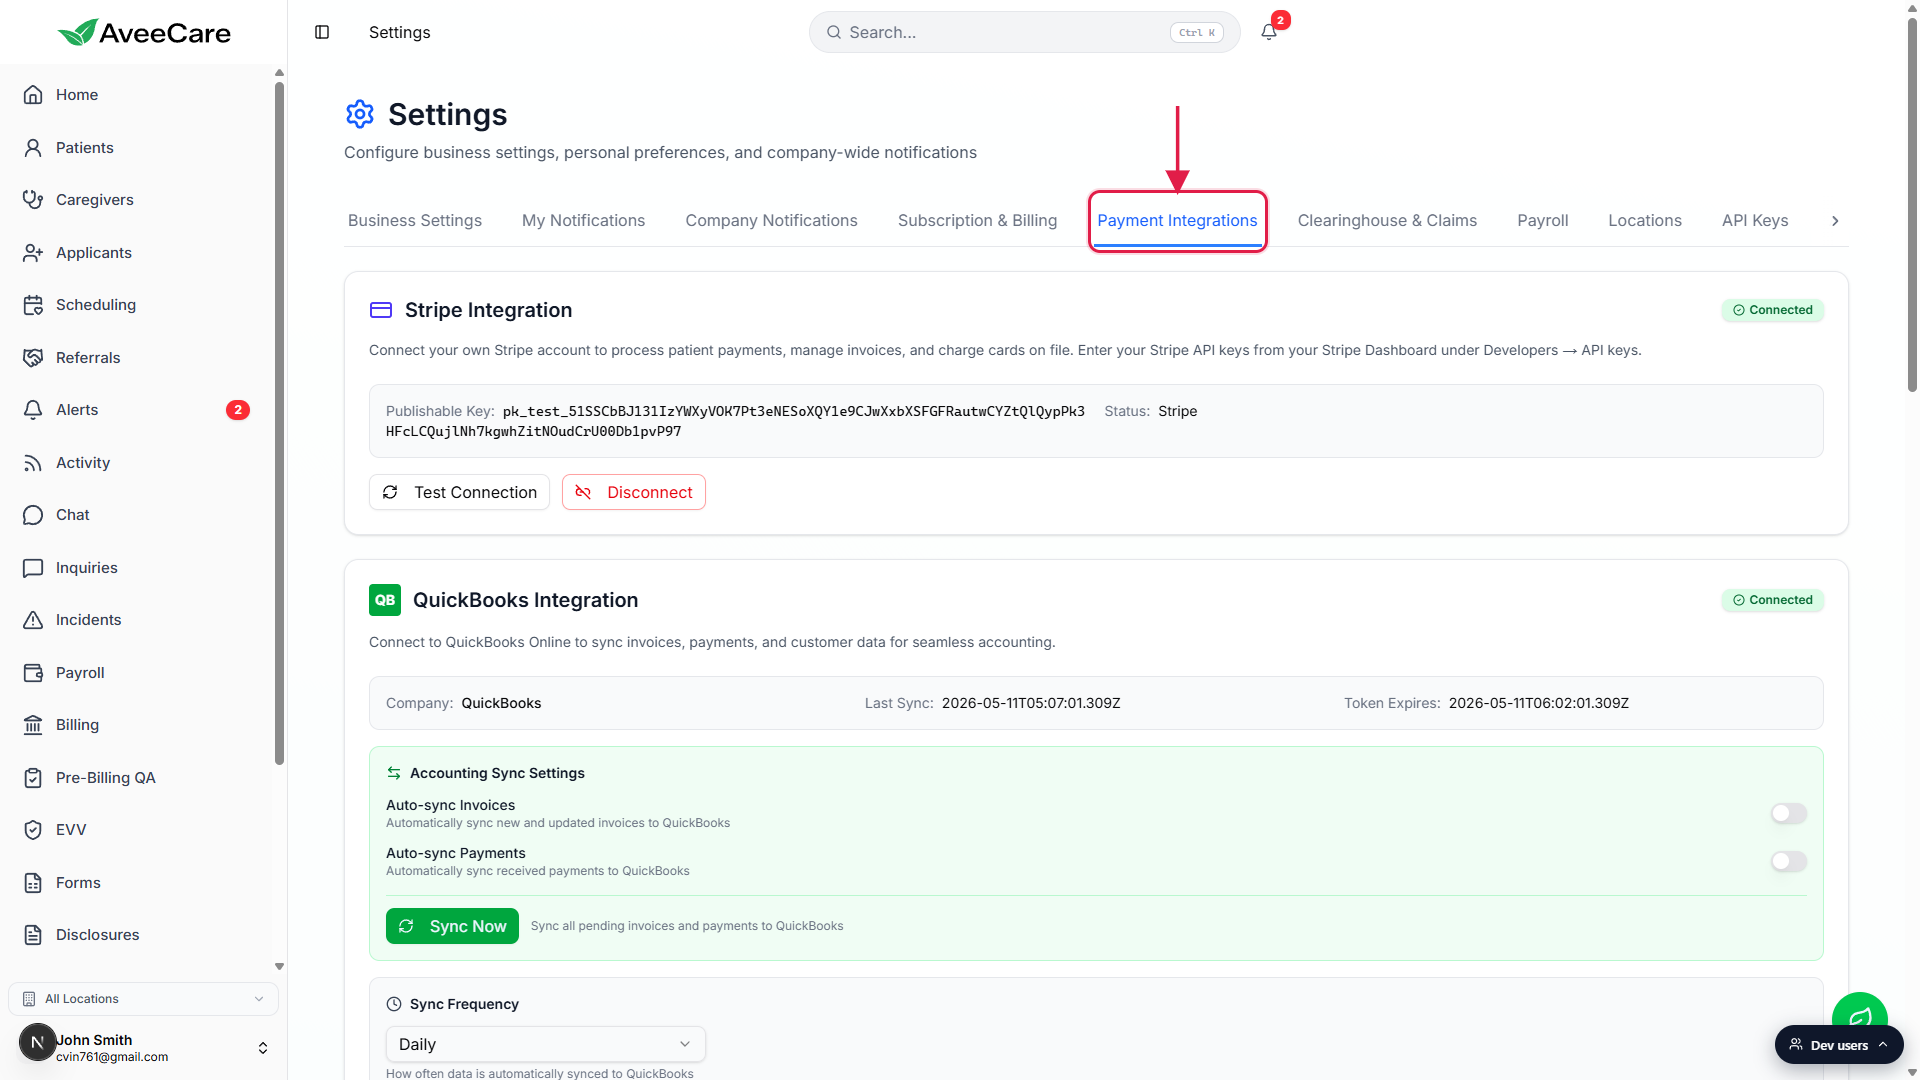
Scroll past Stripe, QuickBooks, Square, and PayPal to the Default Billing Settings card.
The Default Billing Settings card has a green dollar-sign icon and the helper text “Configure company-wide default settings for invoicing and billing.”Set Default Payment Terms, Invoice Prefix, Default Tax Rate, and Overdue Warning.
Payment Terms ships with Due on Receipt, Net 15, Net 30 (default), Net 45, and Net 60. Invoice Prefix defaults toINV-and stamps every new invoice number. Default Tax Rate is a percent. Overdue Warning is the number of days past due before AveeCare flags the invoice. The full field reference is in Billing defaults.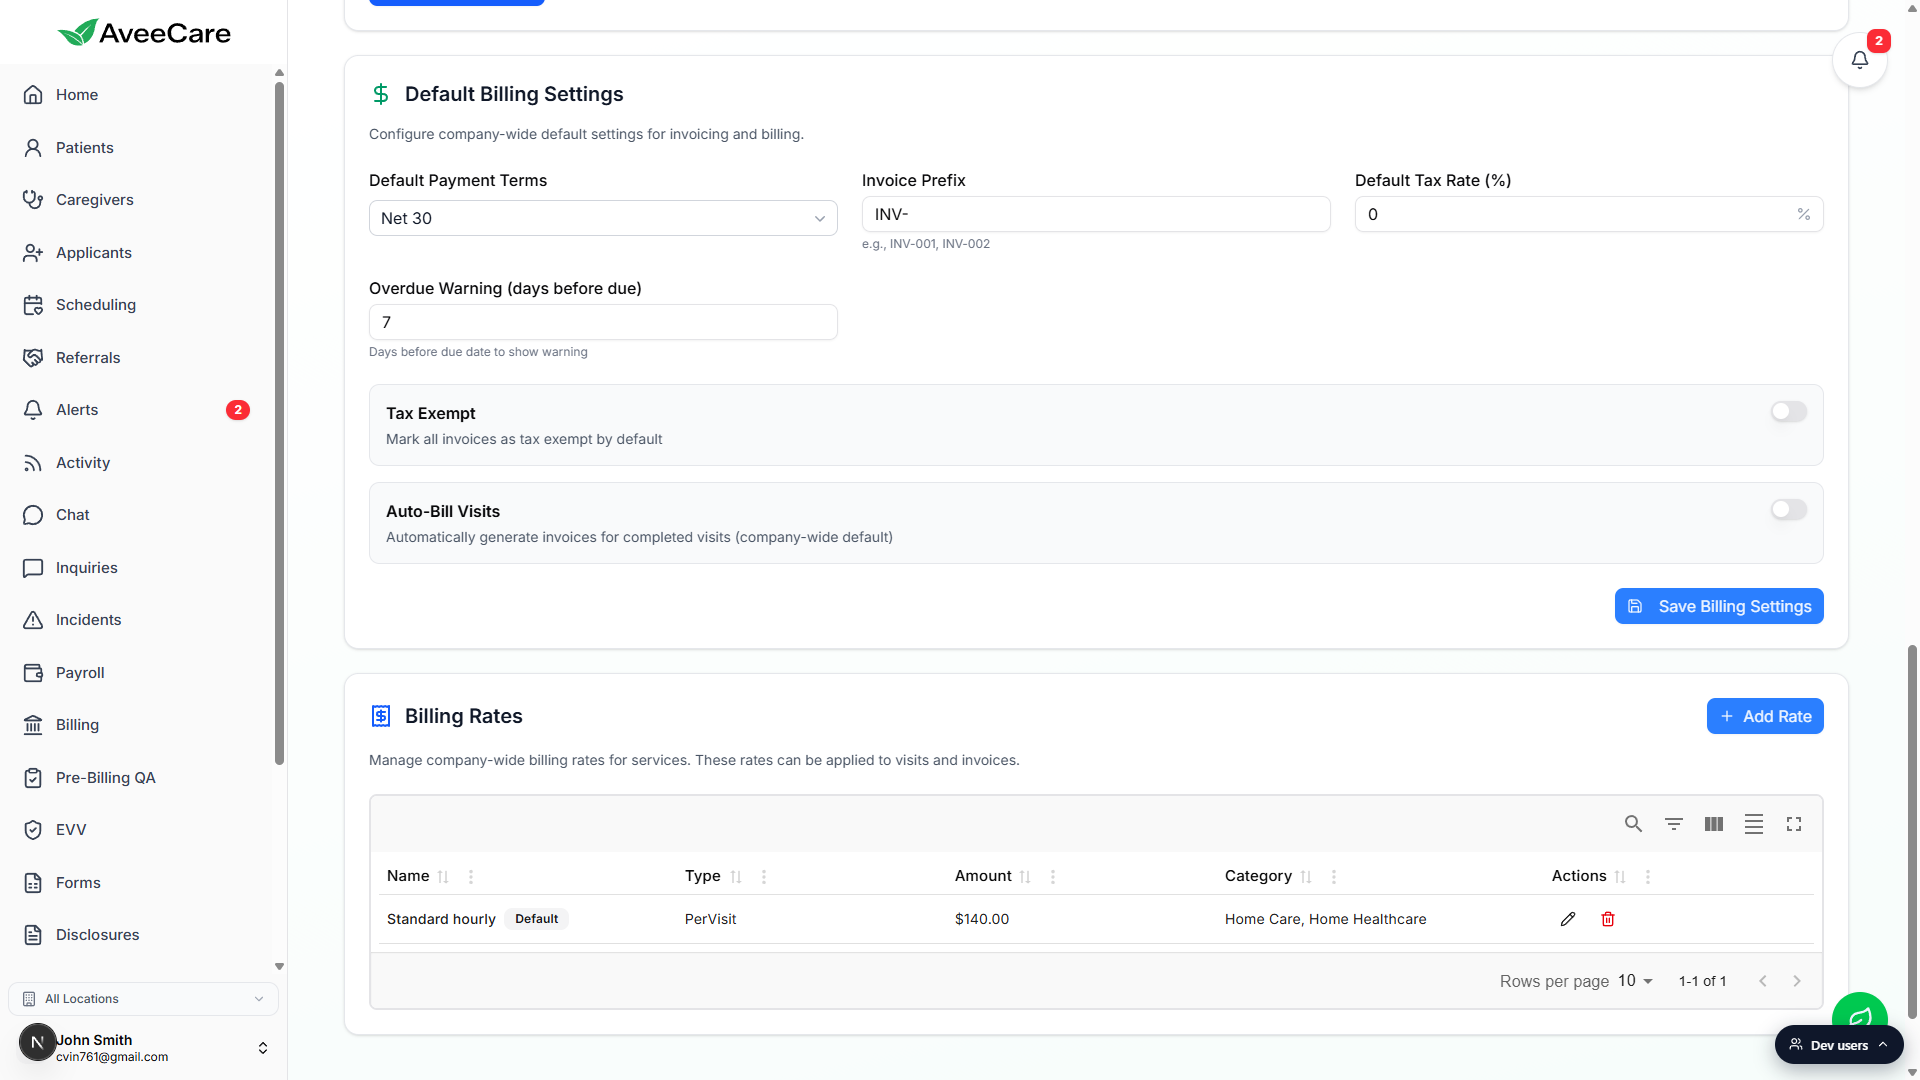
Flip Tax Exempt and Auto-Bill Visits if you want them on, then click Save Billing Settings.
Tax Exempt zeroes out tax on all new invoices. Auto-Bill Visits drafts an invoice automatically when a visit is marked billable. Both can also be overridden per patient.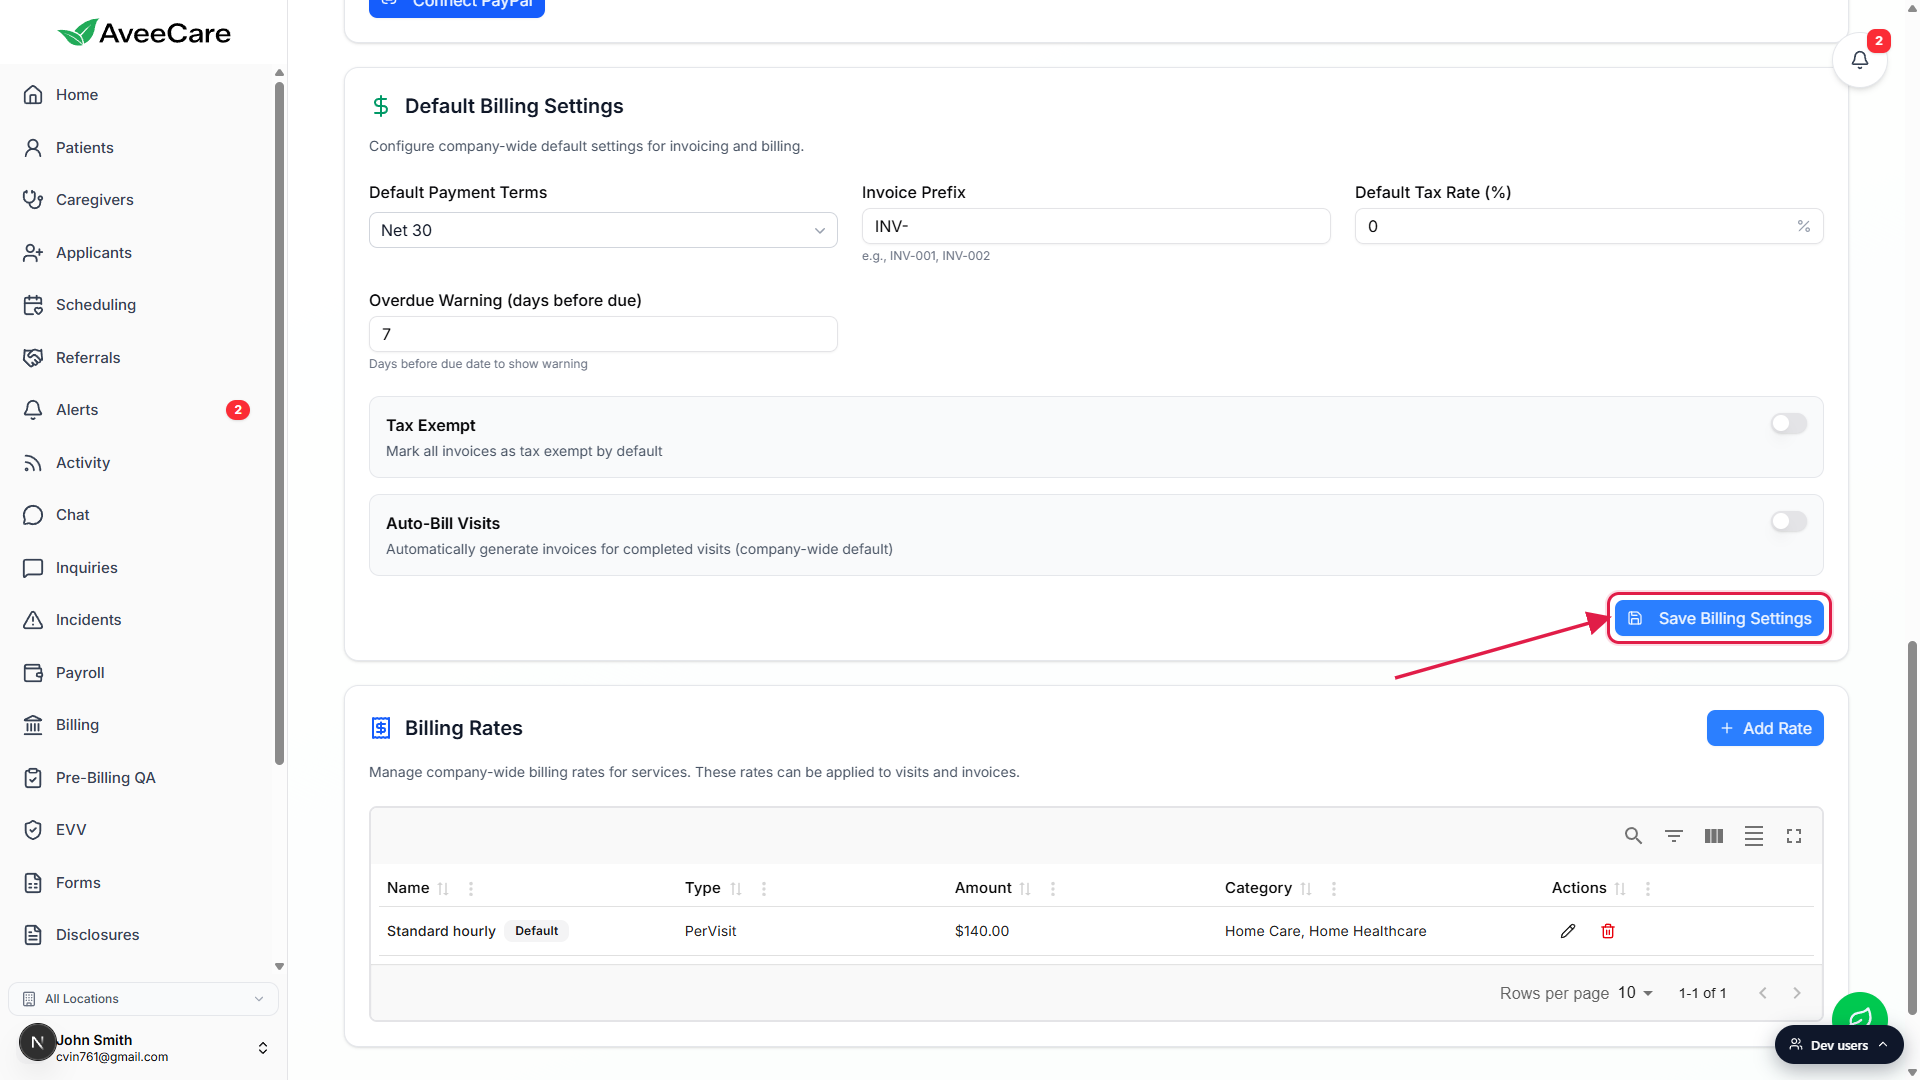
3. Connect a payroll provider (QuickBooks, Paychex, or Manual)
Payroll lives on its own tab. Connect a real provider if you have one, or pick Manual Processing if you'll run payroll outside AveeCare and just record the result.
Click the Payroll tab in the Settings tab strip.
Scroll past Pay Frequency, Overtime Rules, Default Pay Rates, and Automation Settings to the Provider Integration card.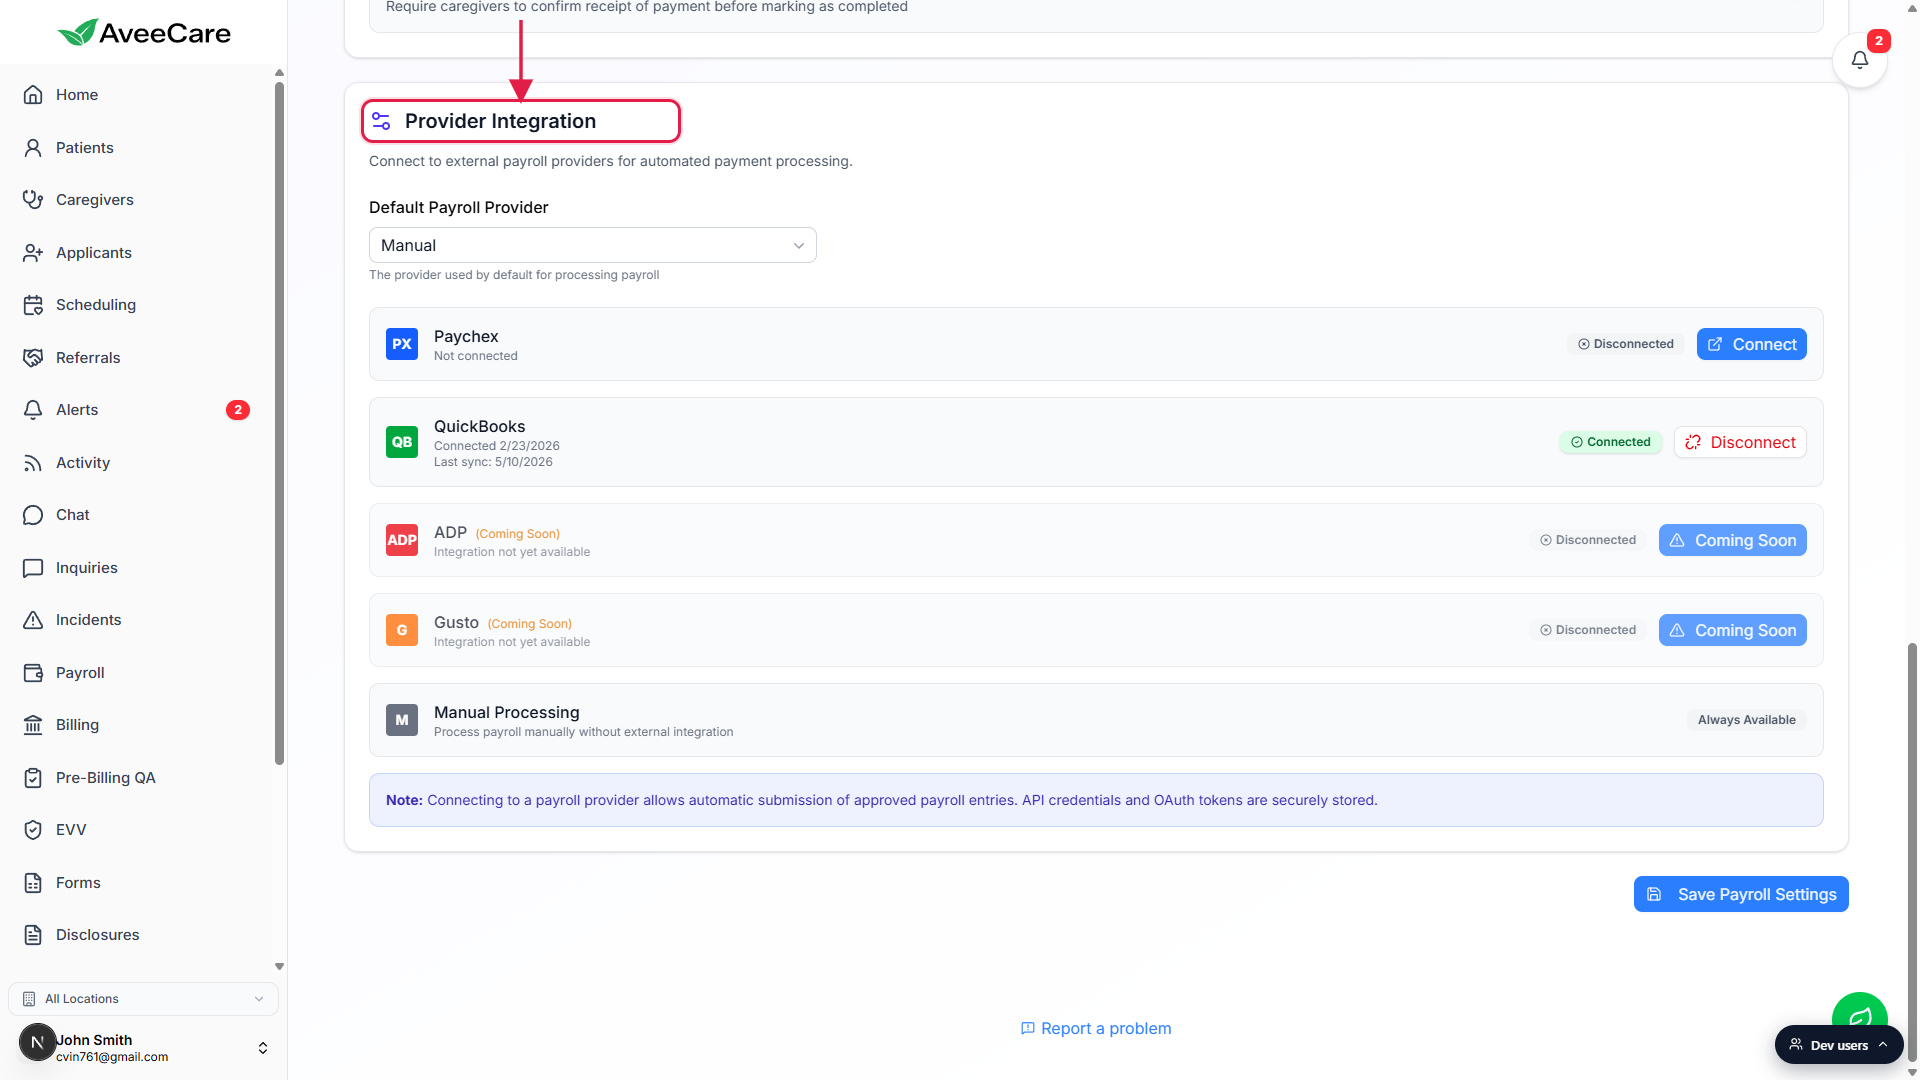
Pick a Default Payroll Provider at the top of the card.
QuickBooks and Paychex are live. ADP and Gusto are listed with a Coming Soon pill. Manual Processing is always available for agencies running pay outside AveeCare.Click Connect next to QuickBooks (OAuth popup) or Paychex (API credentials).
QuickBooks opens an OAuth popup. After you grant access, the pill flips green to Connected with a connection date and a Last sync timestamp. Paychex expands into a credentials form for the Paychex Flex API Key and Client Secret from the Paychex Flex developer portal. The full reference is Payroll integration.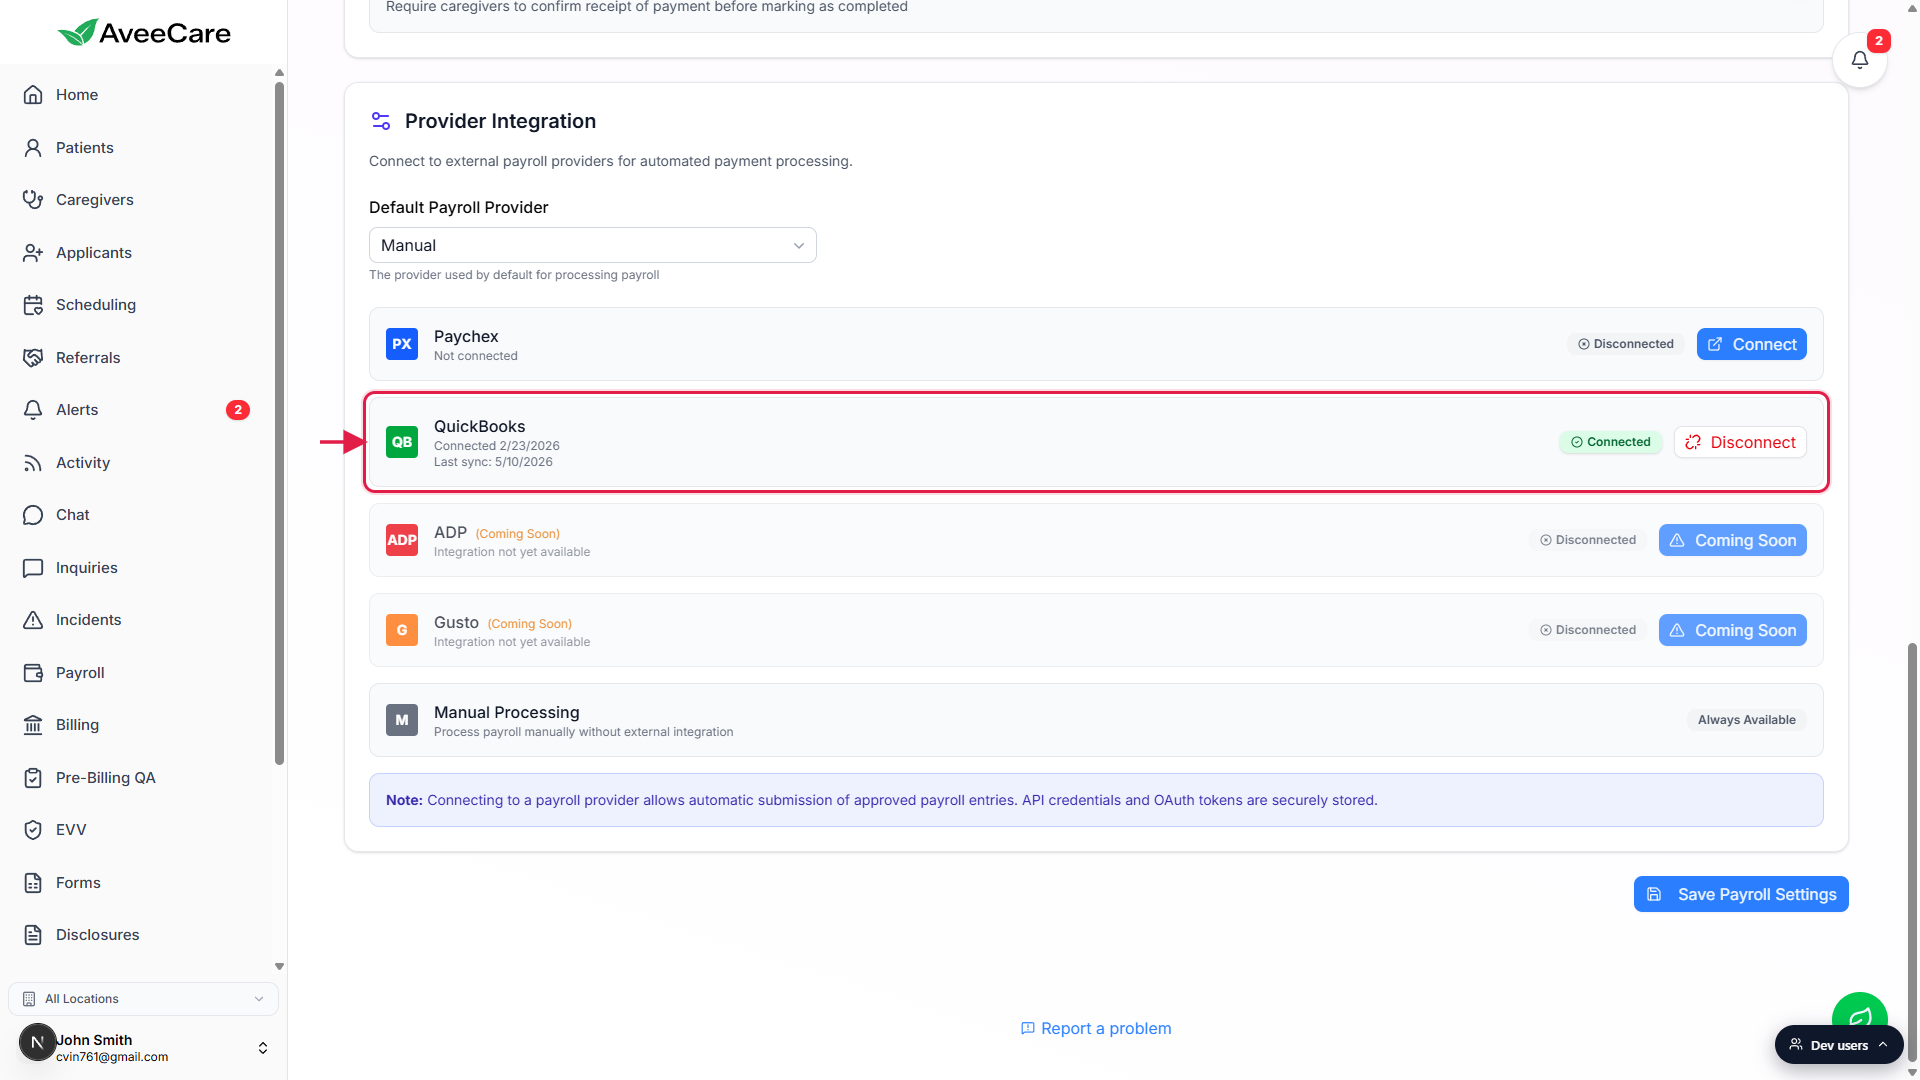
If your provider is not live yet, keep Manual Processing as the default.
ADP and Gusto are Coming Soon. Run pay outside AveeCare and use the per-row Mark Paid / Mark Unpaid action on the Payroll page to record the result inside AveeCare. The Run a payroll batch guide covers the weekly workflow.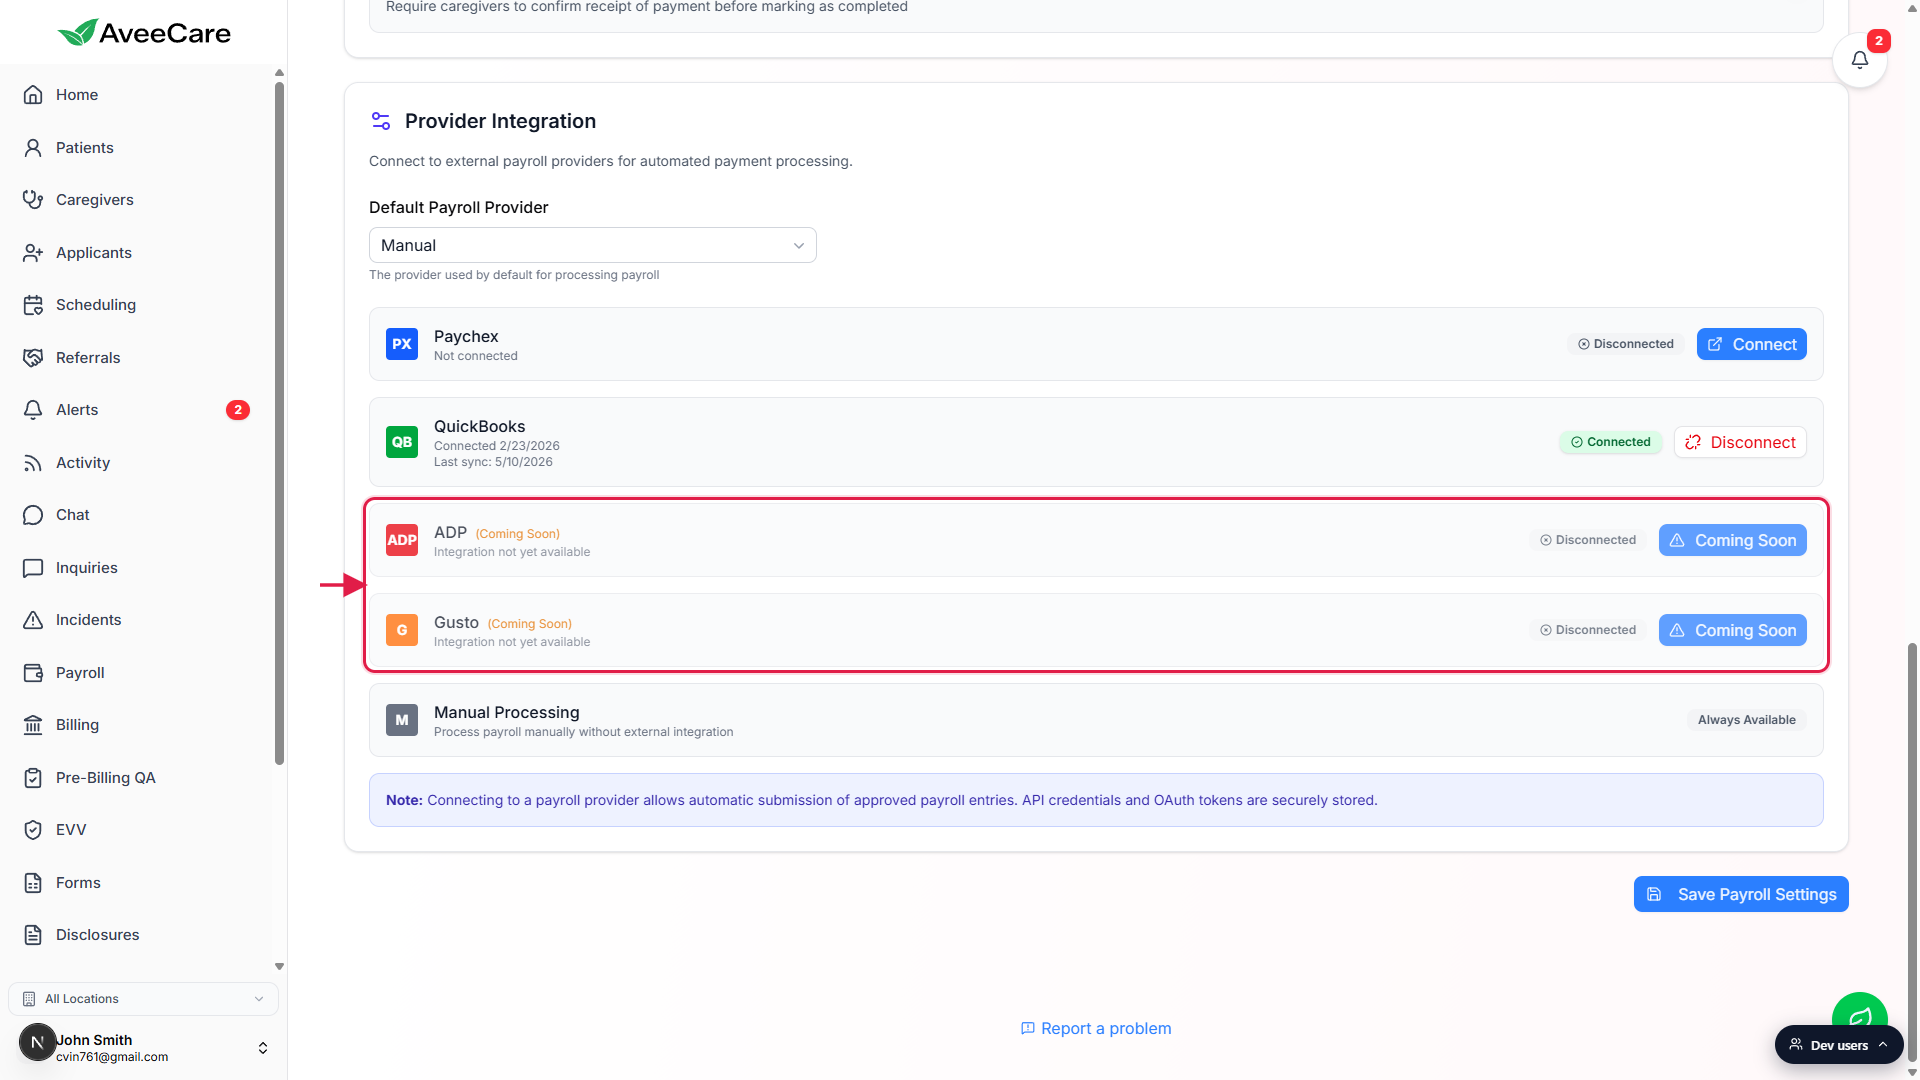
4. Configure your clearinghouse for insurance claims
Skip this step if you only bill private pay. If you bill Medicaid, Medicare, or commercial insurance, every claim goes through a clearinghouse.
Click the Clearinghouse & Claims tab in the tab strip.
The Clearinghouse Provider card sits at the top of the tab. AveeCare ships with Optum as the production-ready provider.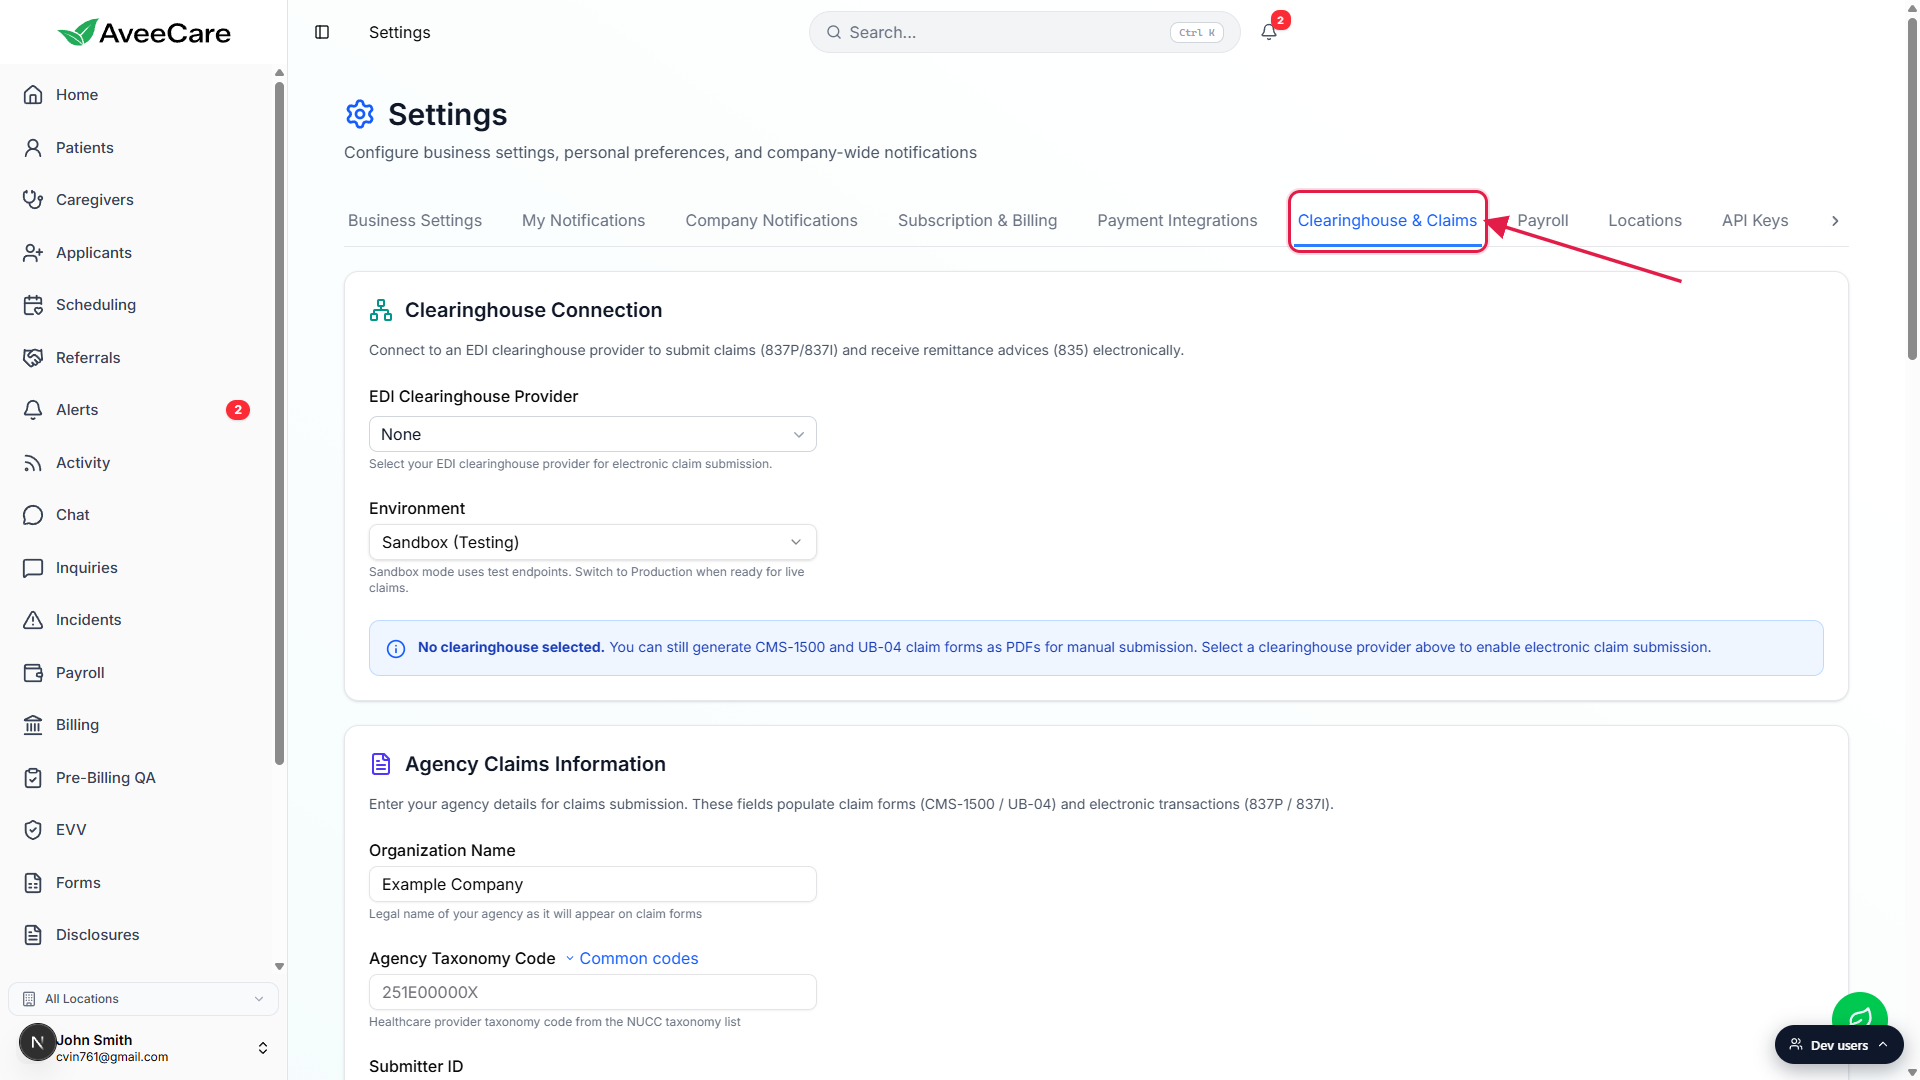
Pick a Clearinghouse Provider and an Environment.
Optum is the live option. The environment dropdown has Production and Sandbox; pick Sandbox first if you want to test a claim end-to-end before going live.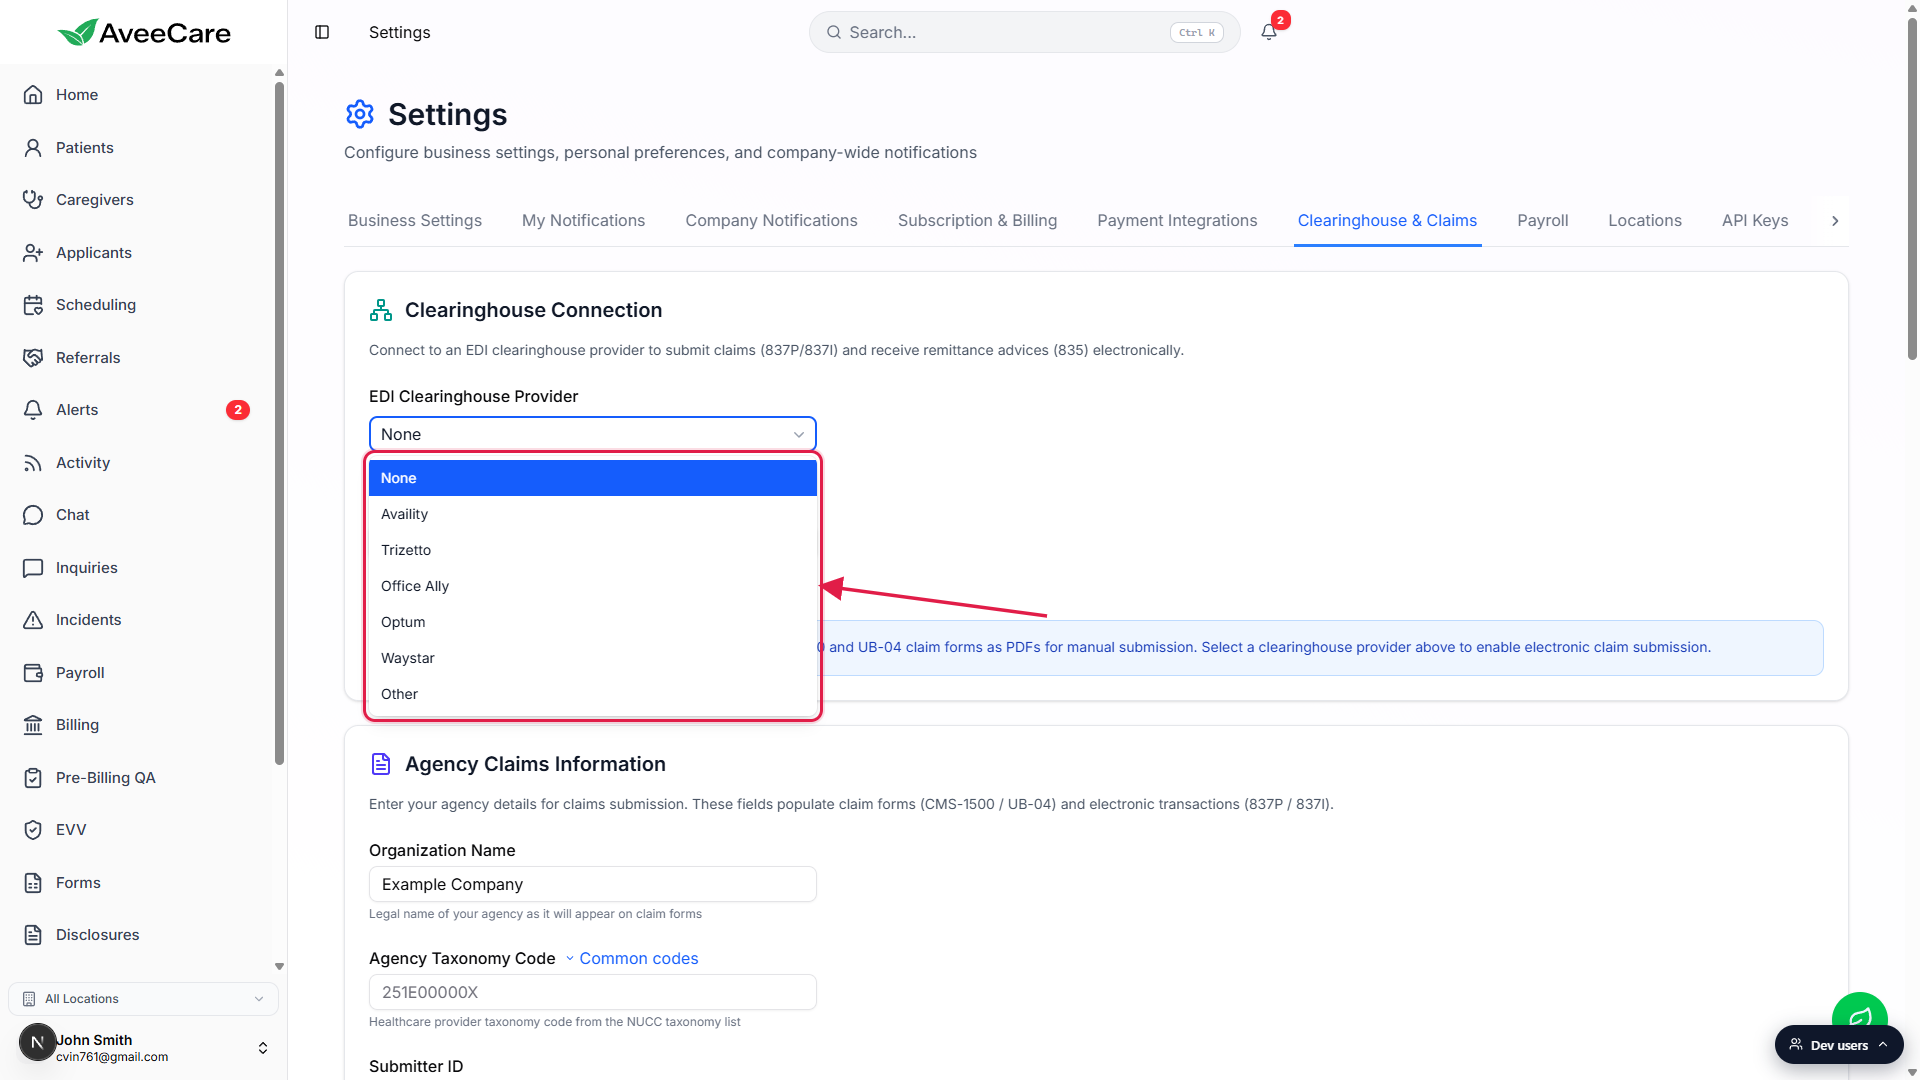
Fill the Agency Claims Information block: Submitter ID, taxonomy, and agency address.
Submitter ID is issued by the clearinghouse when you register. Taxonomy here is the agency-level taxonomy code, not the caregiver-level one. Agency address goes on every claim envelope. Full reference: Clearinghouse settings.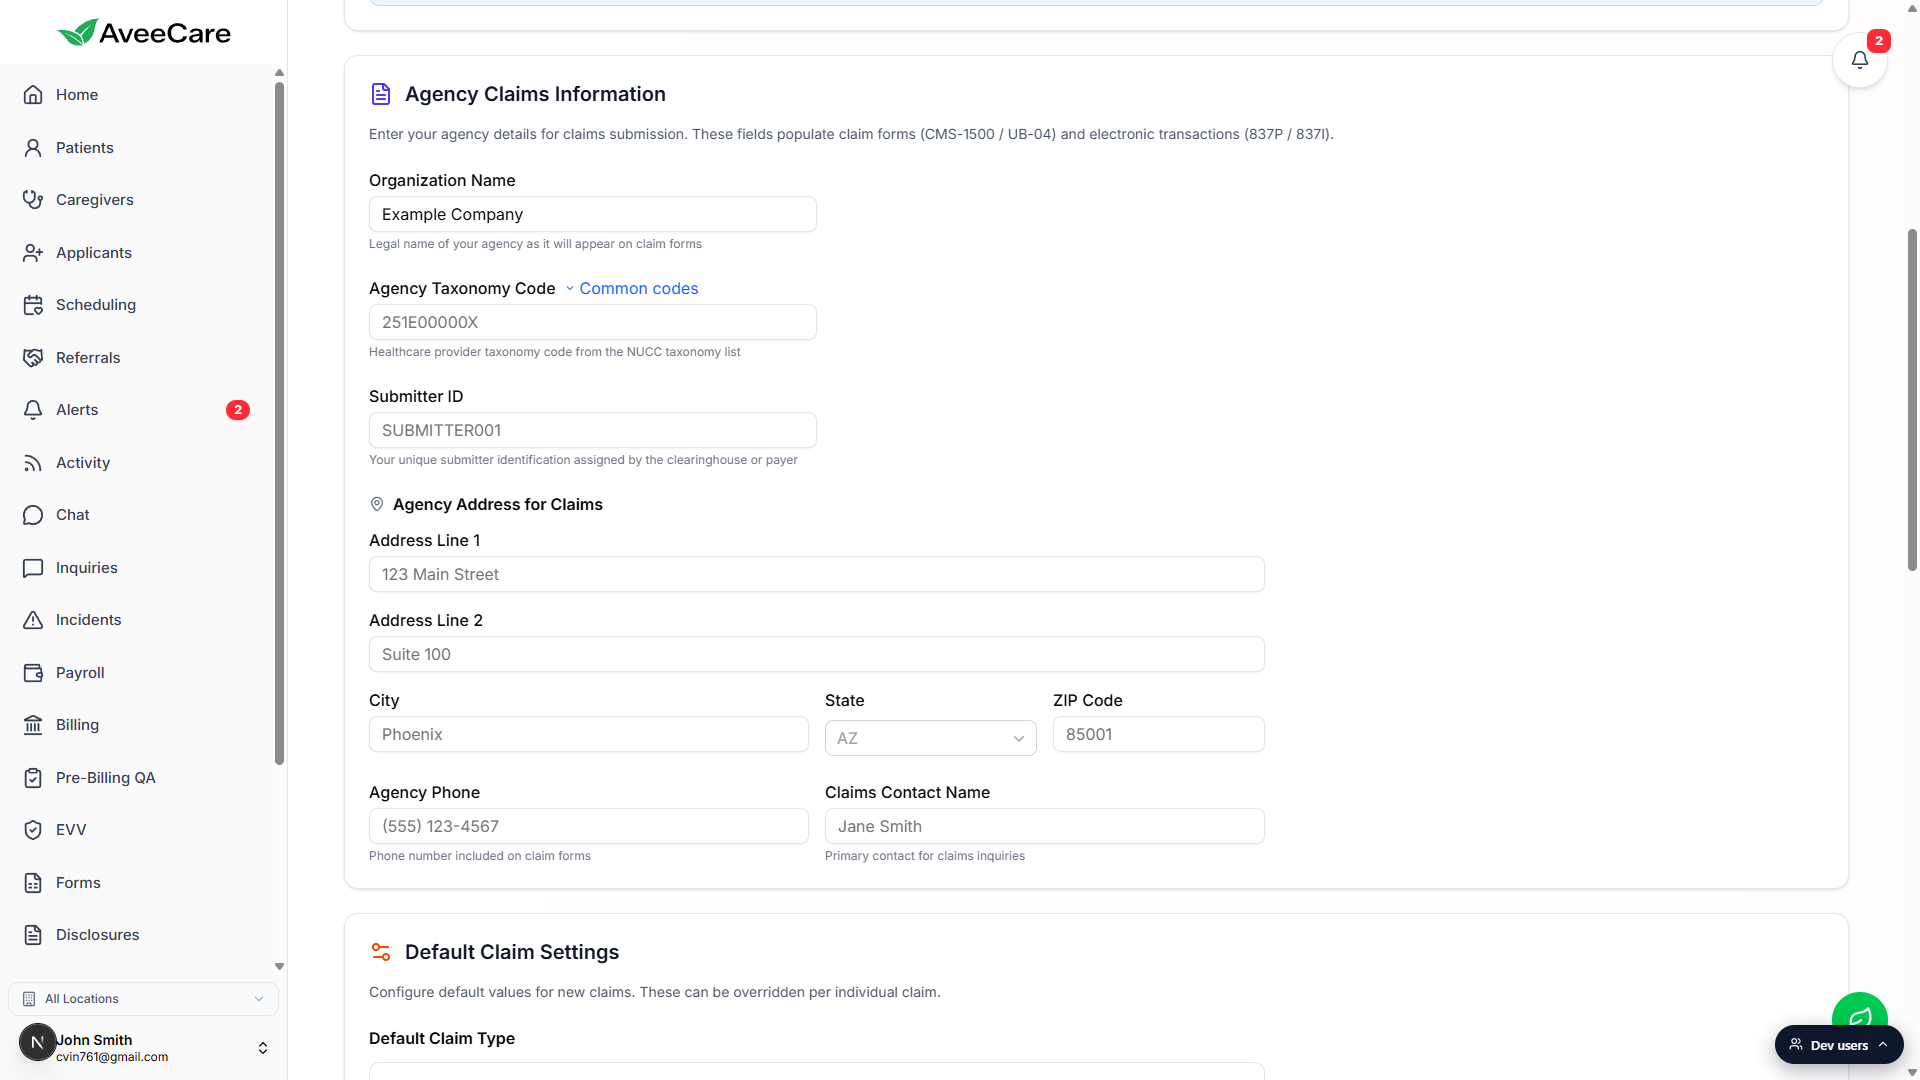
Click Save at the bottom of the tab.
Once saved, the Billing page can submit insurance claims through this clearinghouse. The first real submission is covered in Submit a CMS-1500 claim.
5. Verify defaults flow through to a real invoice and a real pay run
Before you bring on real clients, sanity-check that the values you just saved are actually showing up where they need to. A five-minute loop catches typos that would otherwise hit a real patient invoice or pay stub.
Schedule a single test visit on /scheduling with a caregiver and a patient.
Use a date in the past so it can be billed and paid immediately. The Your first week guide covers scheduling step-by-step.Open /billing and confirm the invoice draft uses your prefix and payment terms.
Click Create Invoice on the Billing page. Confirm the generated invoice number starts with your Invoice Prefix and that the due date matches Invoice Date plus your Default Payment Terms window.Open /payroll and confirm the visit appears with the right pay rate and provider link.
The visit should land in the Unpaid tab with the pay rate set on the caregiver record. If you connected a provider, the per-row Send badge shows that provider. Full reference: Payroll stat cards.
Related
- Business settings
- Billing defaults
- Payroll integration
- Clearinghouse settings
- Submit a CMS-1500 claim
- Run a payroll batch