AveeCare's CMS-1500 Simple wizard turns a stack of completed Medicaid or Medicare visits into a clean professional (837P) claim in three steps. No CMS-1500 codebook needed. The wizard auto-fills everything it can from the patient, visit, caregiver, and company records, then walks you through any gaps with a Readiness Check that gates Next until the claim is actually submittable.
1. Open Billing and find the visits you want to bill
Most claims start from a completed, billable visit row on the Billing page. The patient needs an insurance record on file (Medicaid, Medicare, or commercial). If they don't, set it up on the patient's Billing tab first.
Open Billing. Scroll the Visit Billing table to the Actions column on the right.
The Actions column has the per-row action icons. On narrow screens you may need to scroll the table horizontally. The full reference is in Invoices tab.Filter to the visits you want on one claim.
Filter by patient and date range so the visits you want to bill are easy to find. Most agencies submit one claim per patient per month, covering every billable visit for that period.
2. Click the per-row shield to open the CMS-1500 wizard
There's no separate Claims tab. The CMS-1500 wizard is the per-row shield icon on Billing. Reference: Claims tab.
Click the small blue shield icon on a visit row whose patient has insurance.
Hover the icon to see the tooltip Generate insurance claim (837P). Rows where the patient has no insurance on file don't show the shield at all. If you don't see it, open the patient's Billing tab and add the insurance first.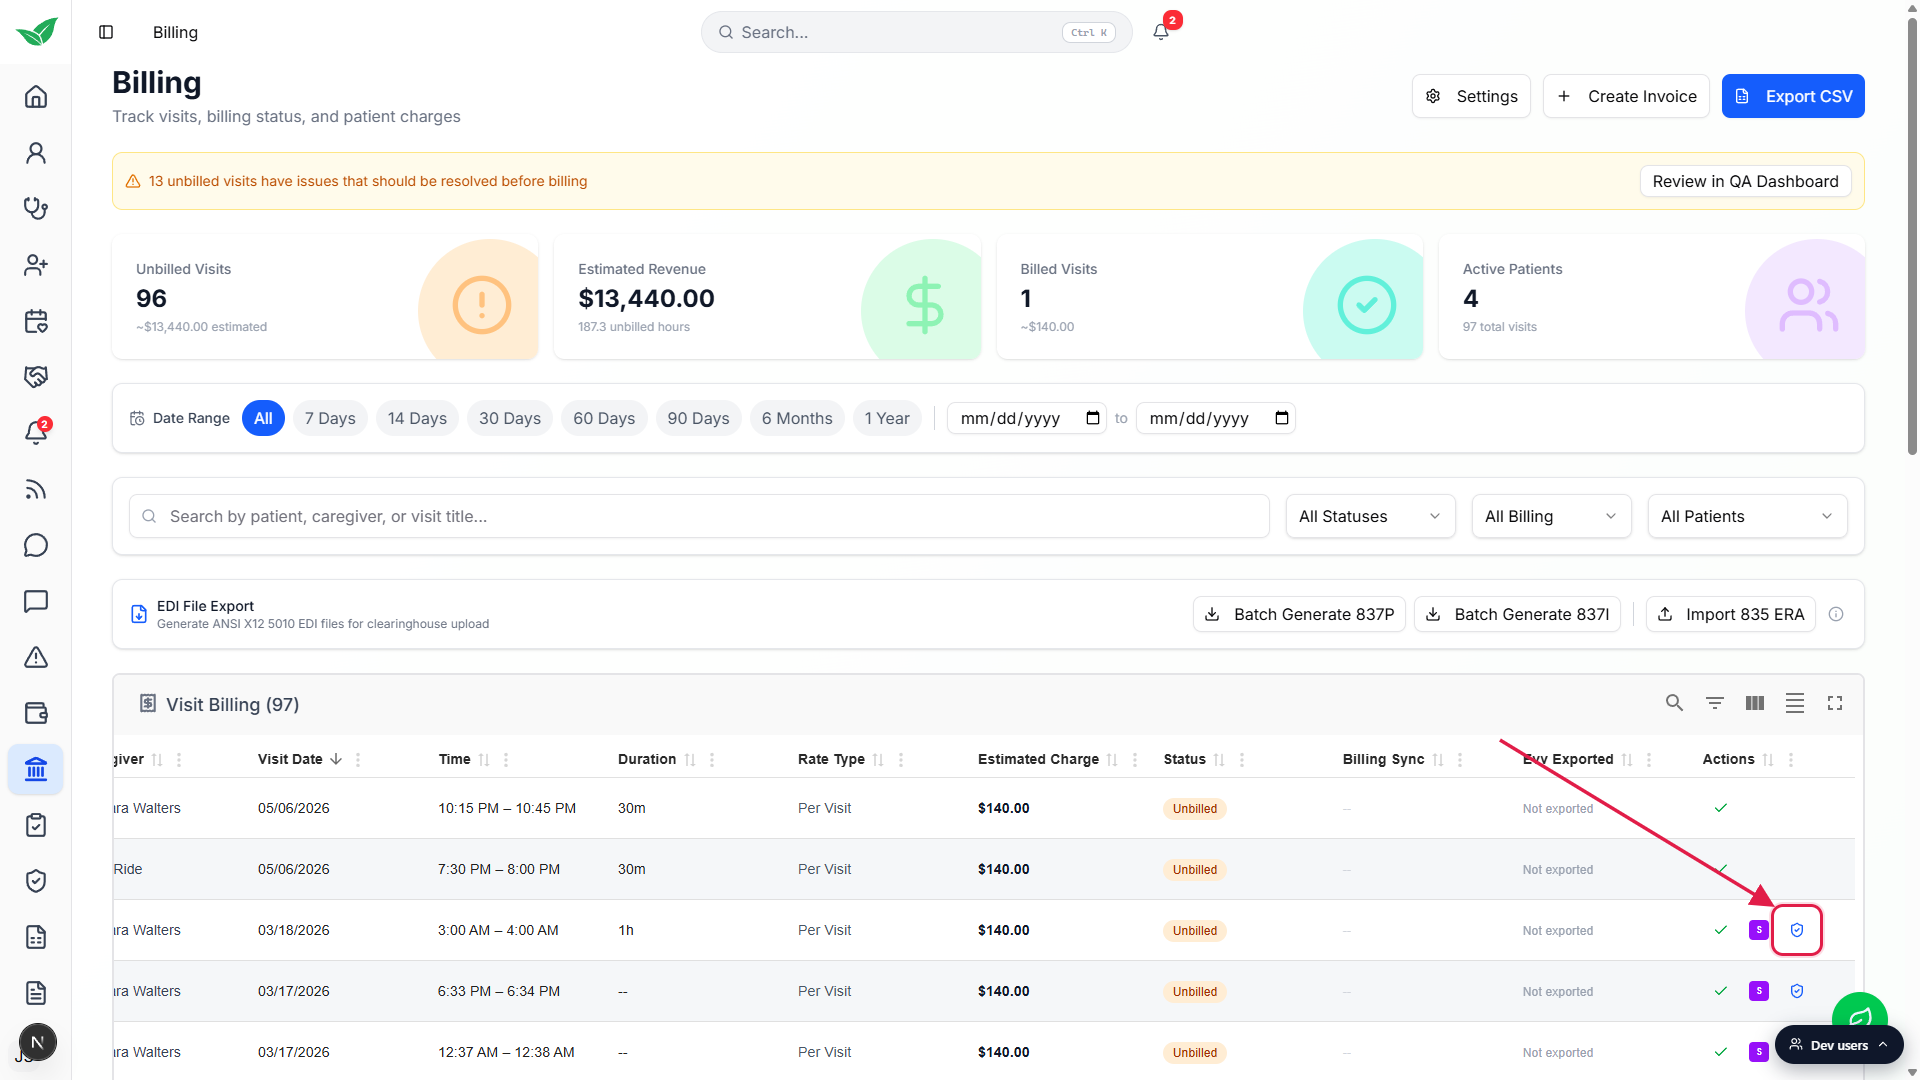
The CMS-1500 Professional Claim (837P) modal opens on the Simple tab.
The Simple tab is selected by default. It's the three-step guided wizard most agencies use. The Advanced tab next to it exposes the full 30+ CMS-1500 box surface for billers who want every box. Both tabs share state, so you can switch at any time.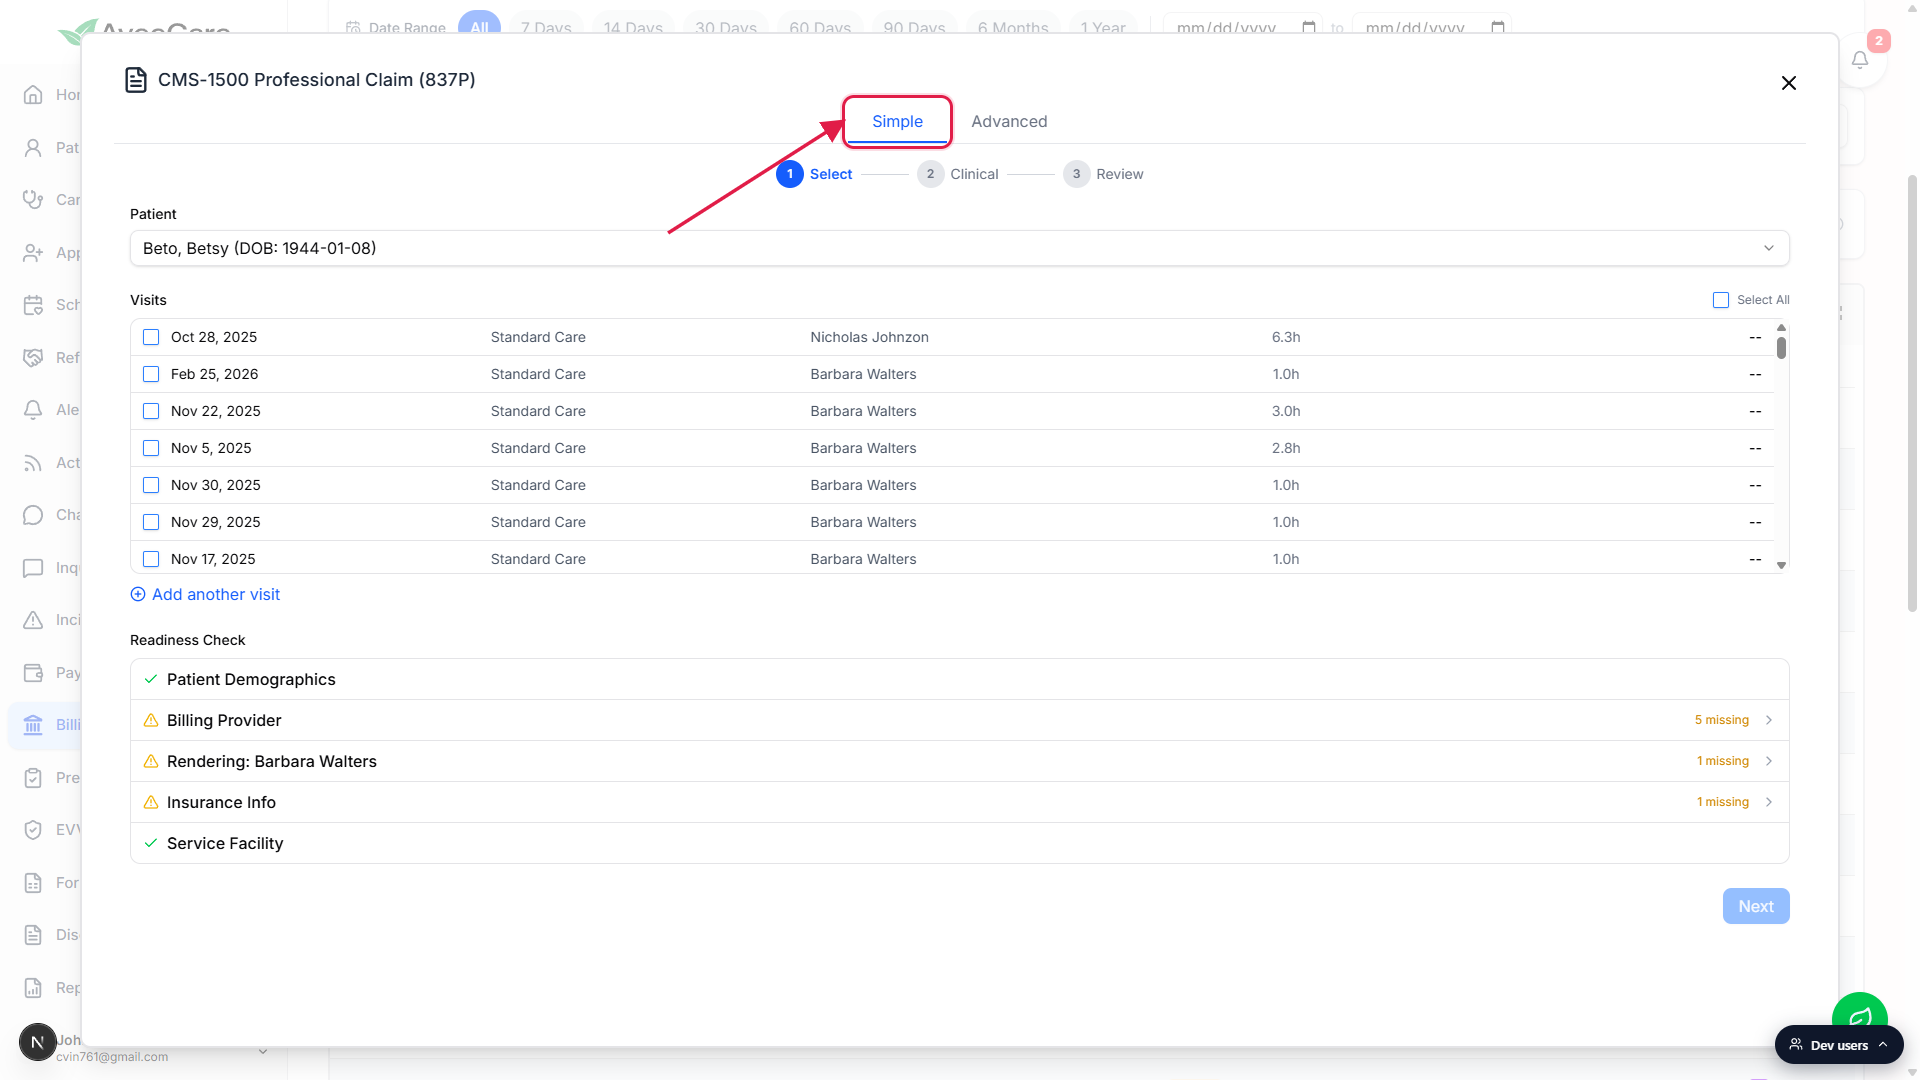
3. Select: pick visits and clear the Readiness Check
Step 1 is where most rejections get caught before they happen. The Readiness Check audits five CMS-1500 segments against the records you have on file, and Next stays disabled until every row passes.
Confirm the patient at the top of the modal.
The patient is preselected from the row you clicked. Use the Patient dropdown to switch if needed.Tick the visits to include on this claim.
The Visits list shows every billable visit for the selected patient. Use individual checkboxes for a targeted claim or Select All at the top right to bill the whole list. Click Add another visit if you need a manual service line not tied to a real visit.Clear every row in the Readiness Check before clicking Next.
The check audits Patient Demographics, Billing Provider, Rendering Provider (one entry per assigned caregiver), Insurance Info, and Service Facility. A row marked N missing is expandable: click into it, fill the missing field inline, save, and the row turns green. Full reference: Auto-validate before submit.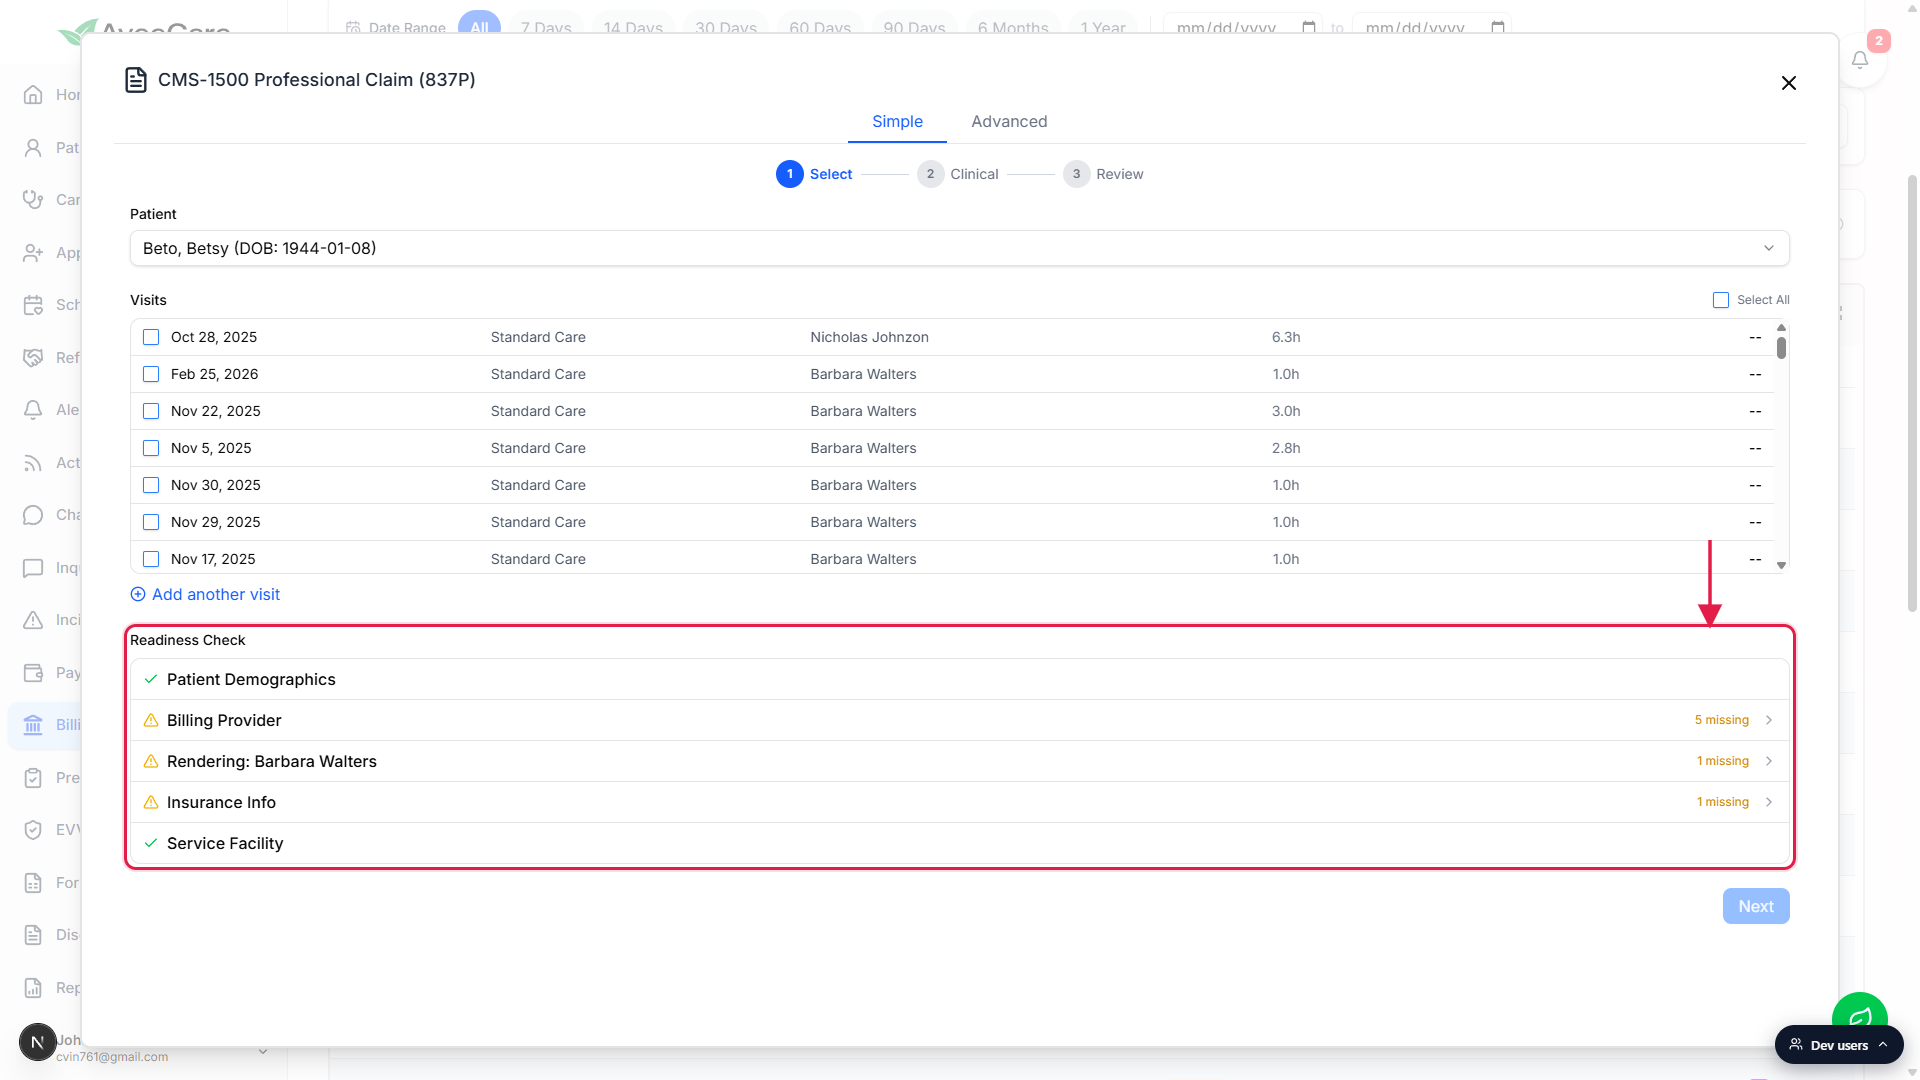
When every row is green, click Next.
The wizard advances to Clinical. The Readiness Check itself stays at the bottom of the wizard as a quick reference for the rest of the flow.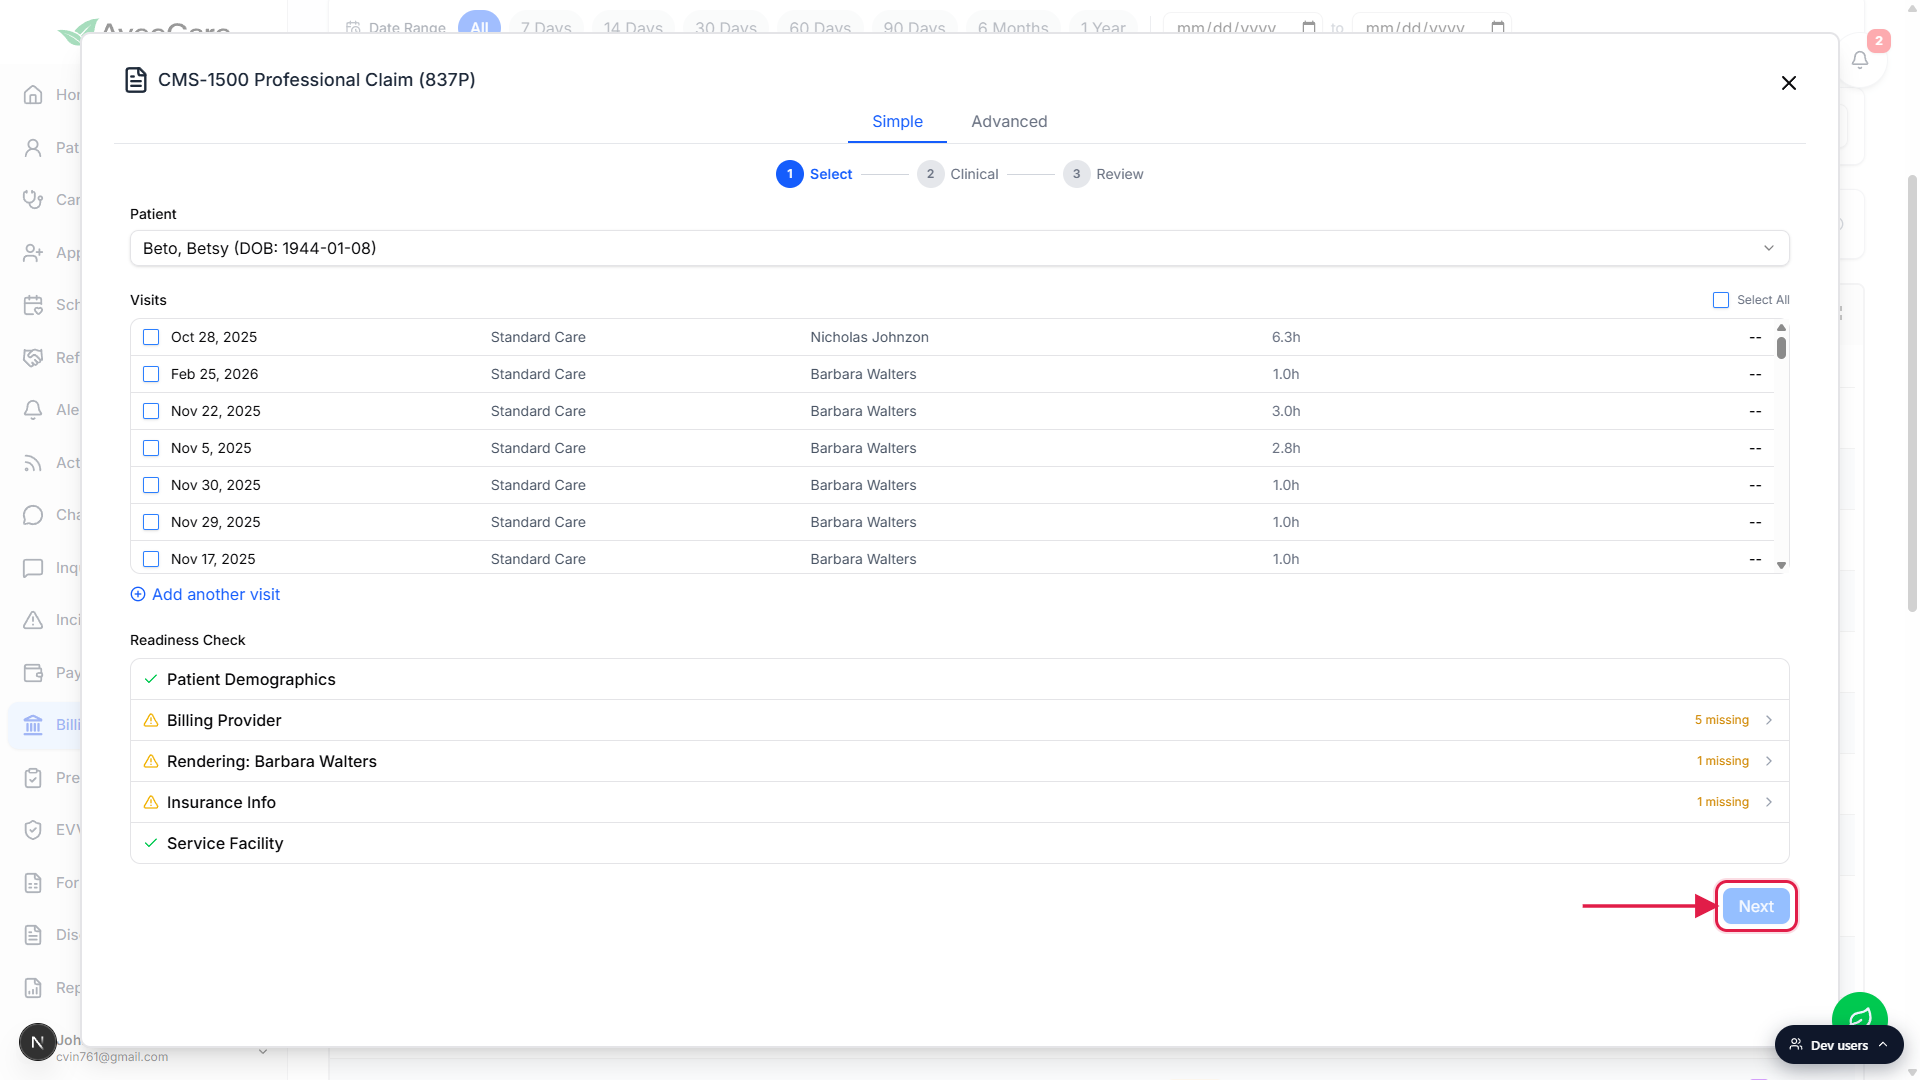
4. Clinical: add ICD-10 codes and confirm service lines
Type into the Diagnosis Codes (ICD-10) search at the top.
Two or more characters narrows to home-health-relevant codes. Click an entry to add it. The claim supports up to 12 codes (pointers A through L). If your tenant has claim presets set up for this service type, a Suggested Diagnoses row appears above the search and lets you add preset diagnoses in one click.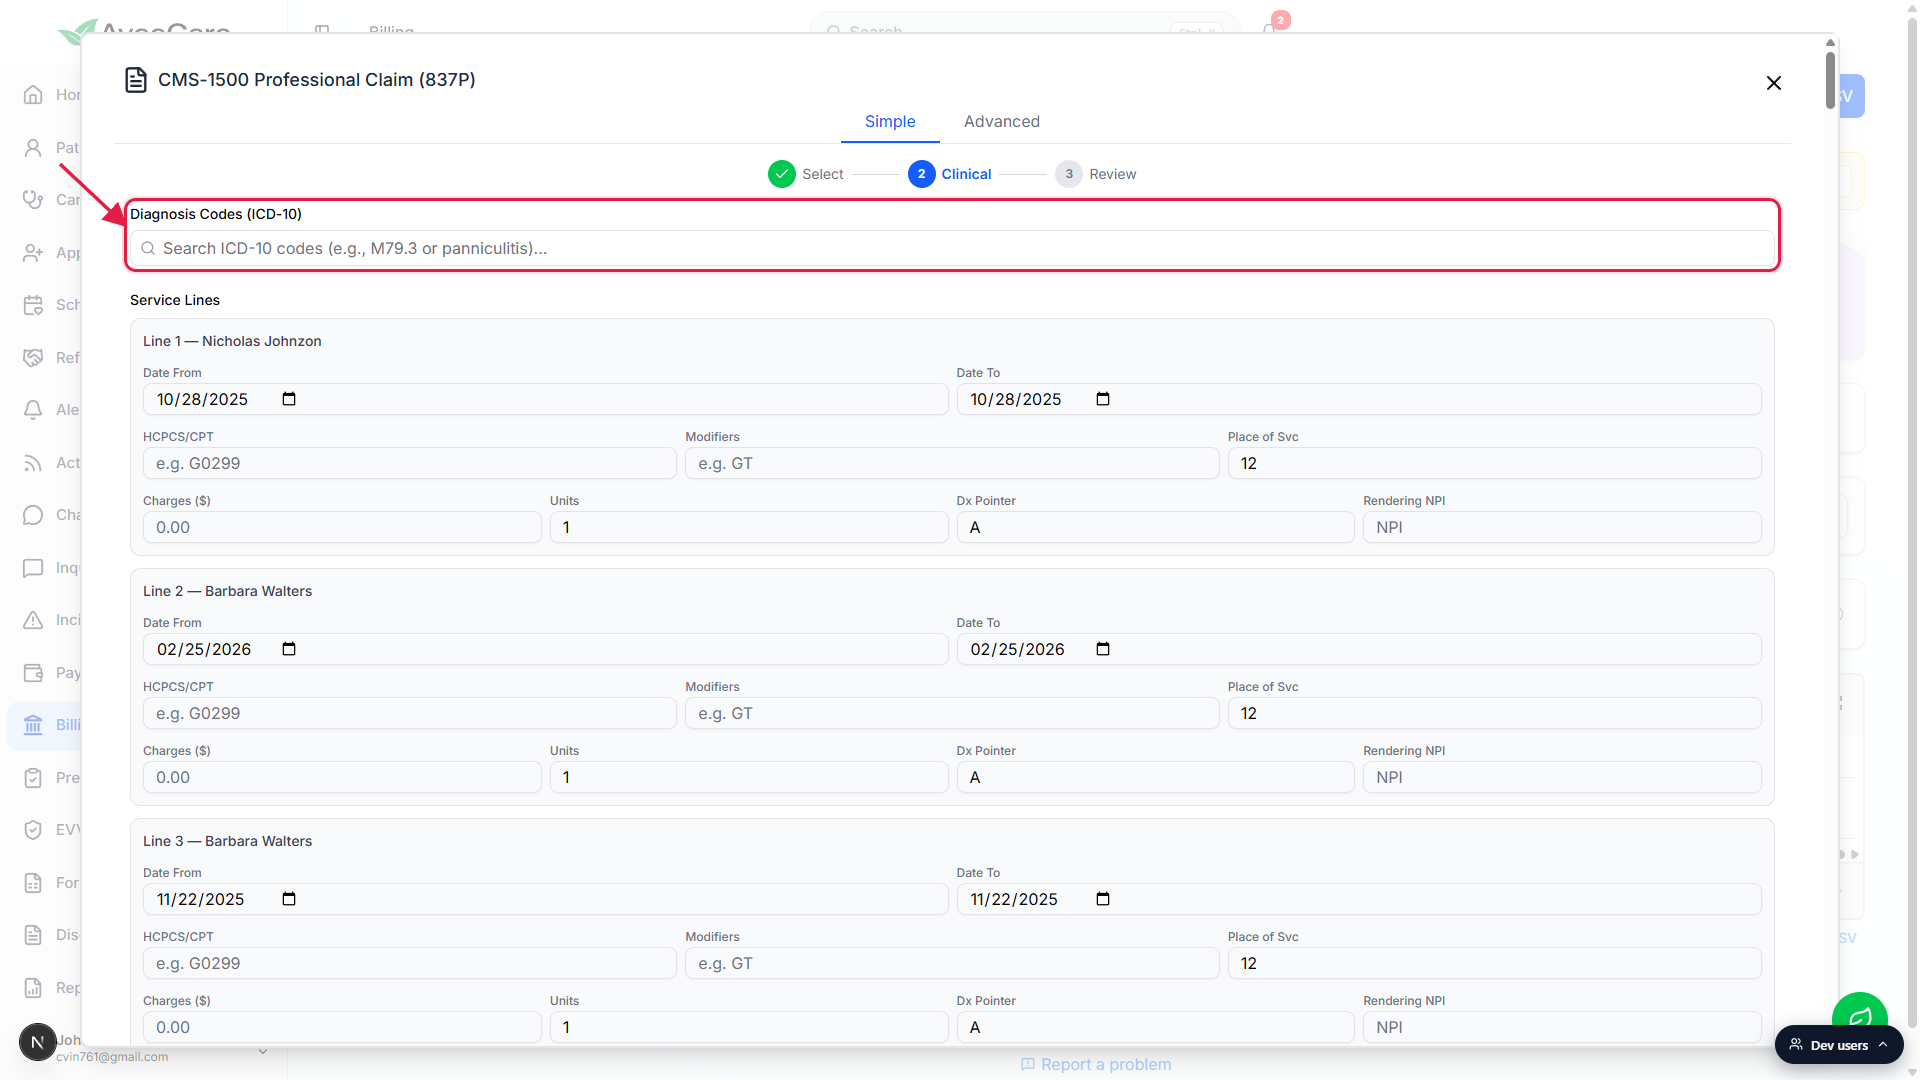
Confirm the auto-built Service Lines, one per ticked visit.
Each selected visit gets a service line with date, HCPCS/CPT, modifiers, place of service (12 = home by default), charges, units, diagnosis pointer, and the rendering caregiver's NPI. Most fields prefill from the visit or the matching claim preset. Manually added lines start blank and need every field filled.Attach a prior authorization number if the payer required one.
Expand + Add prior authorization # below the service lines and enter the auth number. It maps to CMS-1500 box 23. The authorization itself lives on the patient's Insurance authorizations tab.
5. Review and submit (or generate the X12 837P file)
Read the Claim Summary and Provider Summary cards.
The Review step lays out the final 837P in plain language: Patient, DOB, Insurance Type, Insurance ID, Payer Name, Group #, Subscriber on the left; Billing Provider, Billing NPI, Tax ID, Rendering Provider on the right. Click Edit on either card to jump back to the right step and fix something.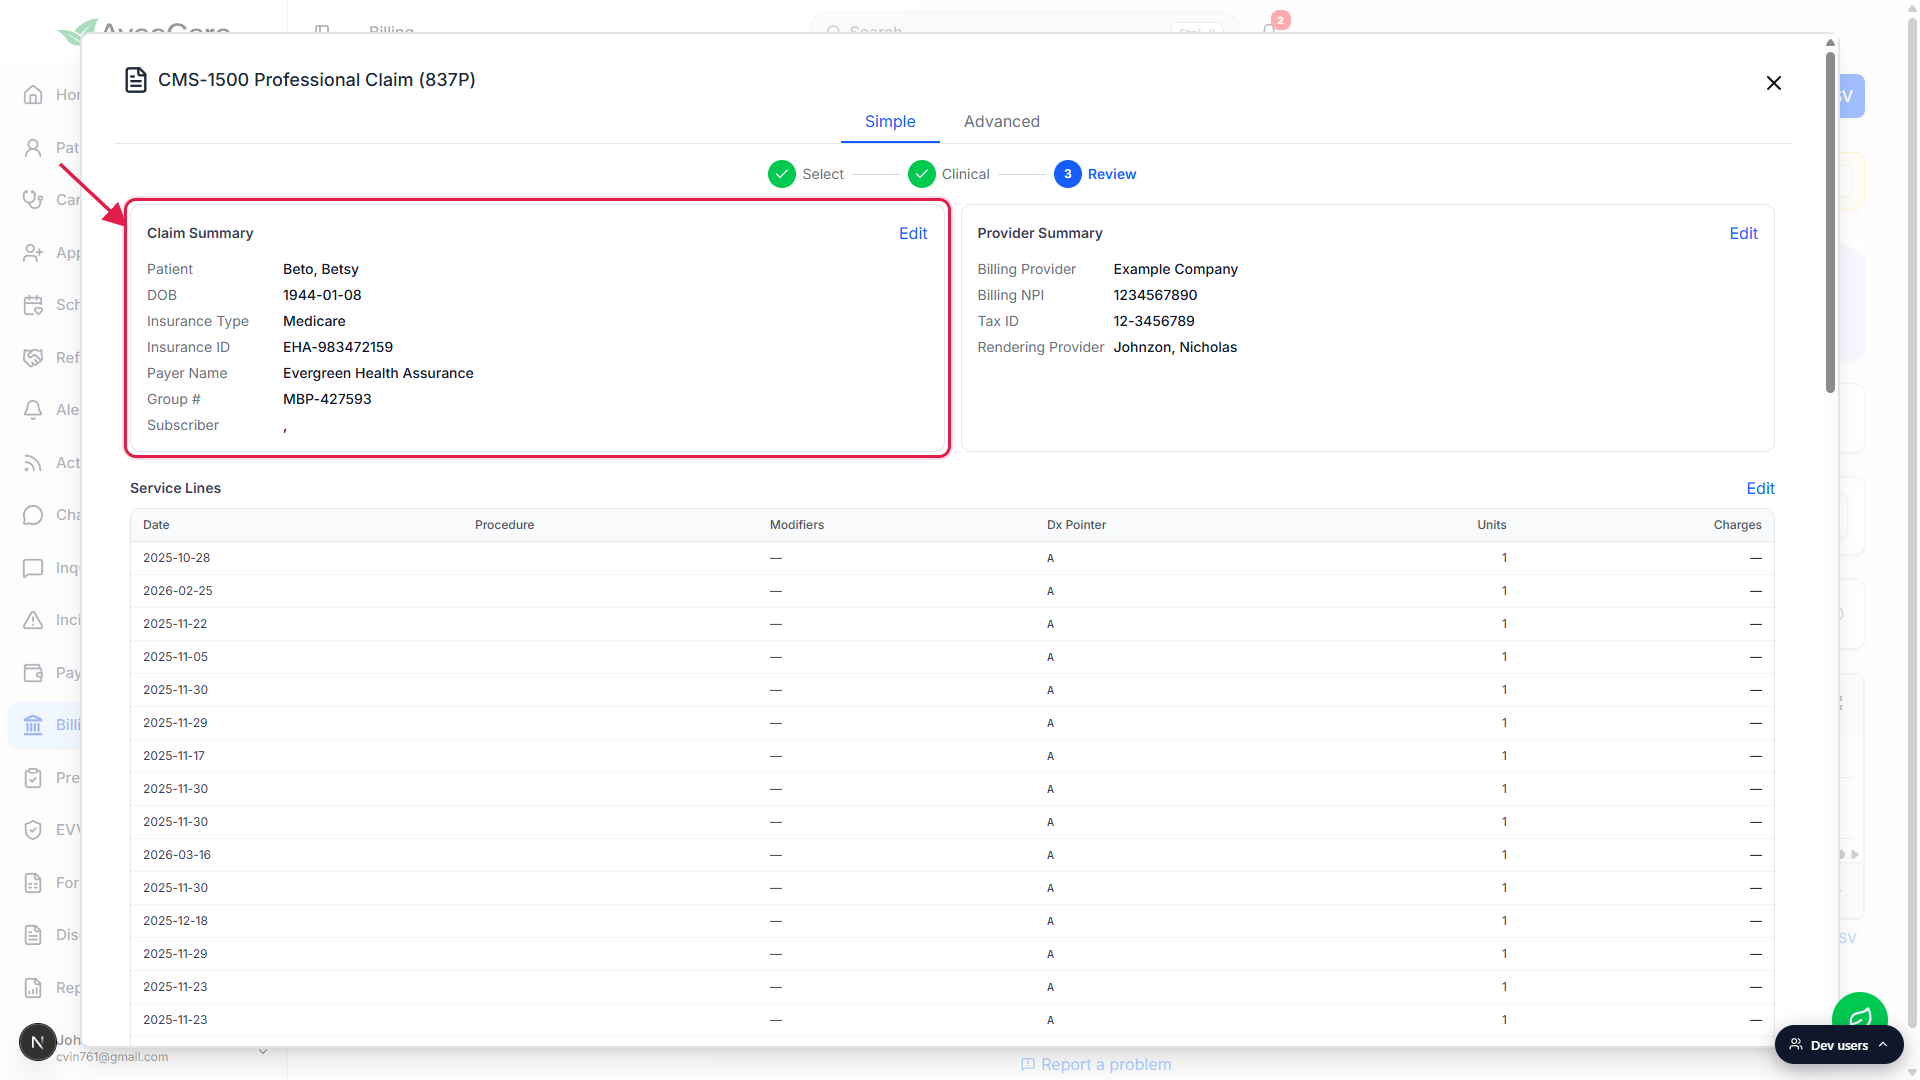
Submit to Clearinghouse for direct delivery, or Generate X12 for a file download.
Submit to Clearinghouse sends the 837P directly through your configured clearinghouse (see Clearinghouse settings). Generate X12 downloads the file so you can upload it to the payer's portal manually if you don't use a clearinghouse. Both options live in the Submit actions row at the bottom of Review.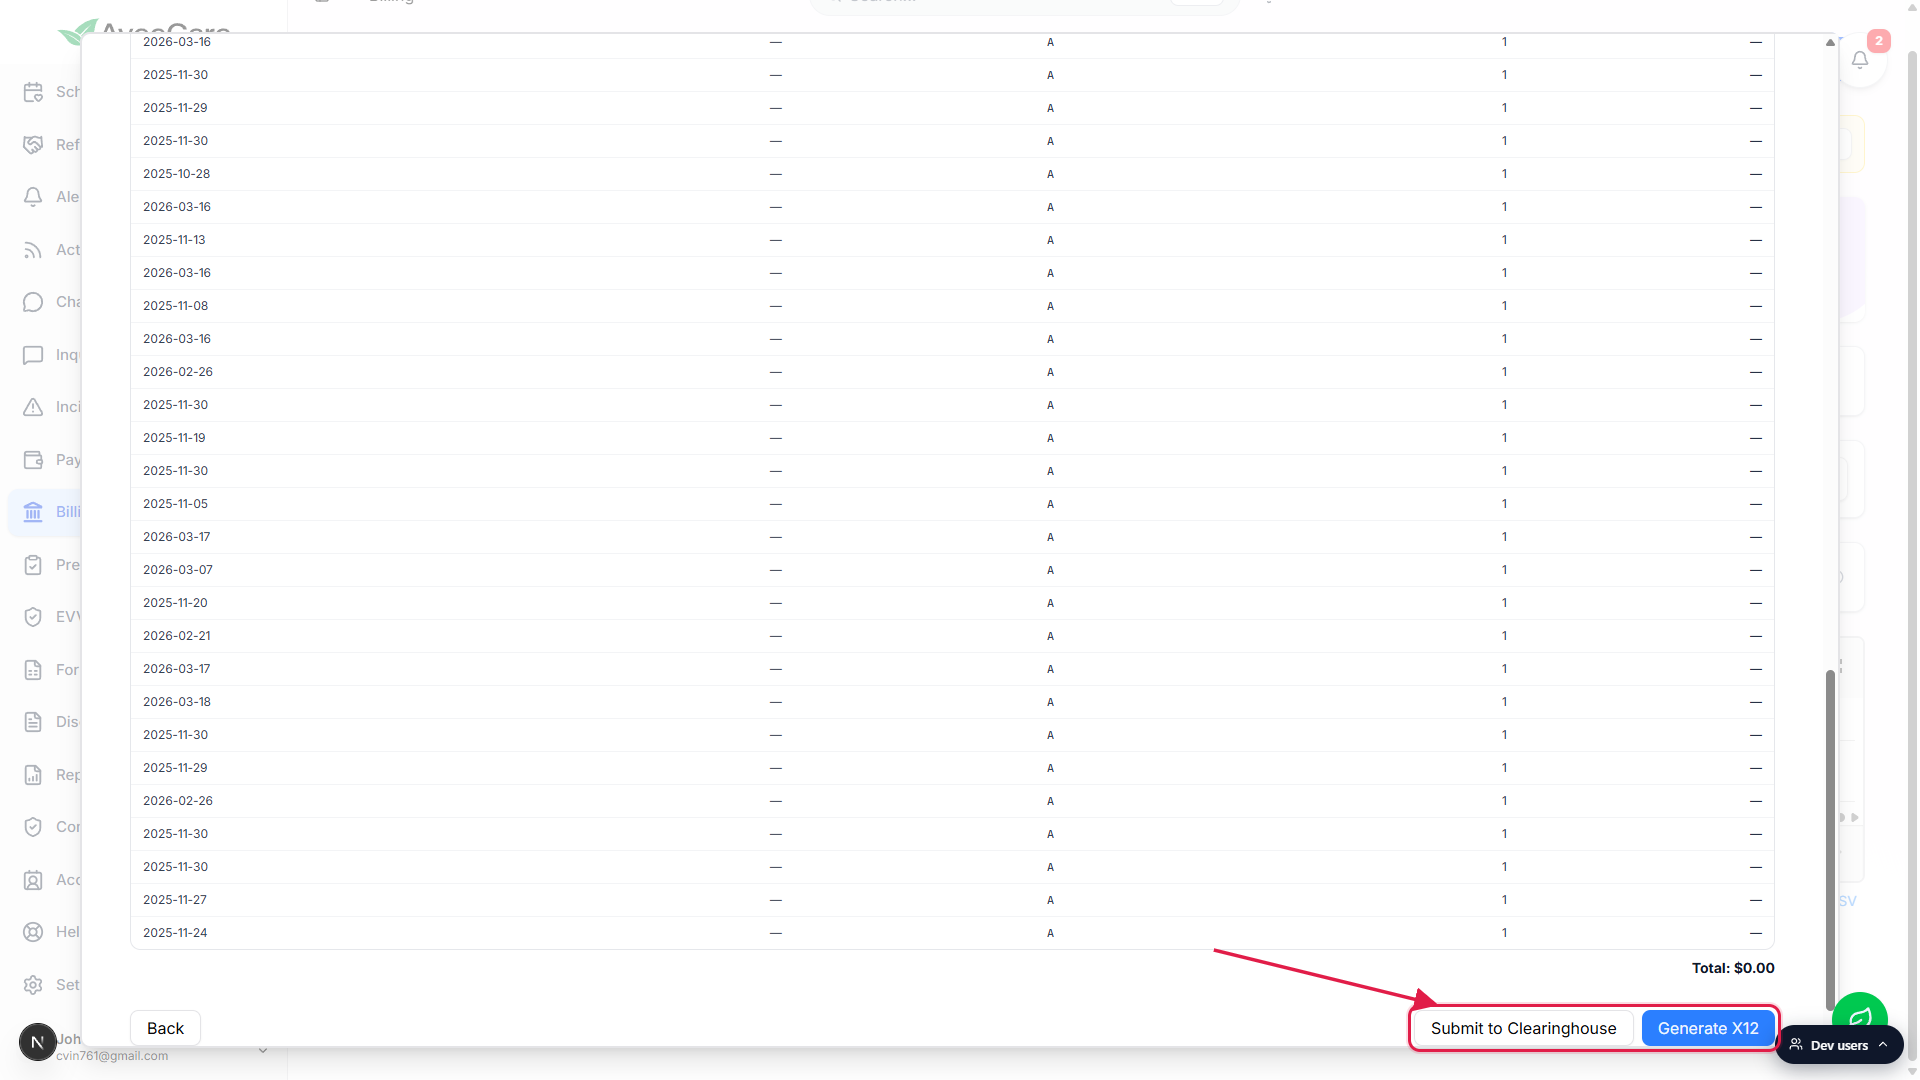
Watch /billing for the response.
Once the payer responds (835 ERA), AveeCare matches the response to the claim automatically. Open the patient's Billing tab to see the claim status. Reference: ERA files (835).
Related
- CMS-1500 Simple wizard
- CMS-1500 Advanced form
- Auto-validate before submit (Readiness Check)
- Claims tab
- ERA files (835)
- Clearinghouse settings