The CMS-1500 Simple wizard is AveeCare's three-step guided form for sending a professional (837P) claim to a payer. It opens on the Billing page from the per-row shield icon, defaults to the Simple tab, and walks Select then Clinical then Review. The wizard auto-fills as much CMS-1500 data as it can from the patient, visit, and company records, and gates progress with a Readiness Check so you cannot submit a claim that's missing a required segment.
Quick answer
Open Billing, scroll the Visit Billing table right, and click the small blue shield icon on a row whose patient has insurance on file. The CMS-1500 Professional Claim (837P) modal opens on the Simple tab at step 1, Select. Pick the patient, tick the visits to bill, clear any Readiness Check warnings, then step through Clinical (diagnosis codes + service lines) and Review. Click Generate X12 to download the 837P file or Submit to Clearinghouse to send it directly.
Simple vs Advanced
The CMS-1500 modal opens on the Simple tab by default. Simple is the three-step guided wizard most home care agencies use day-to-day. The Advanced tab next to it exposes the full 30+ CMS-1500 box surface for billers who need to override individual fields. You can switch between tabs at any time; the wizard and the advanced form share the same underlying claim state.
1. Open the CMS-1500 wizard from a visit row
Click Billing in the left nav, then scroll the table right.
The shield icon lives in the Actions column at the far right of Visit Billing. On a 1080p screen you may need to scroll the table horizontally to expose it.Click the small blue shield icon on a row whose patient has insurance.
The hover tooltip reads Generate insurance claim (837P). Rows without an insurance record on the patient do not show this icon. The CMS-1500 Professional Claim (837P) modal opens on the Simple tab.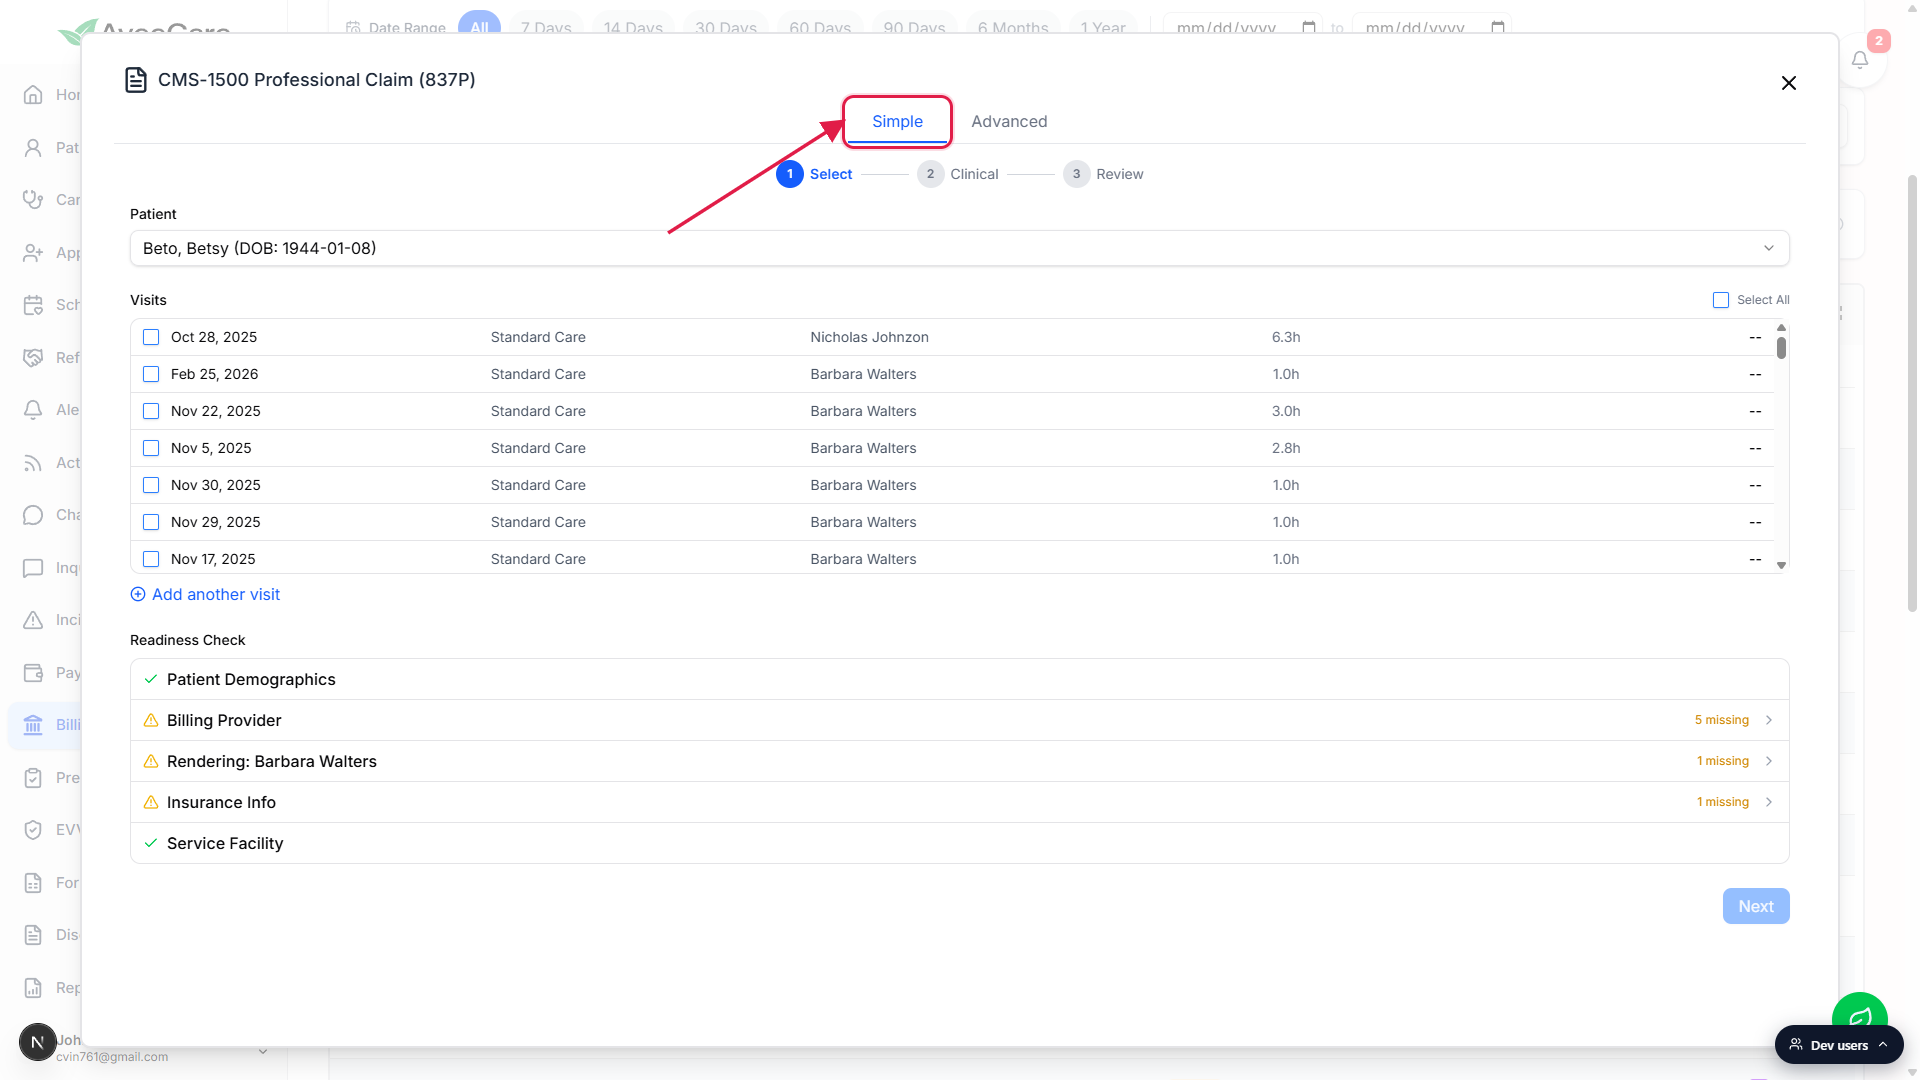
2. Select: pick patient, visits, and pass Readiness Check
Confirm or change the patient at the top of the modal.
If you opened the wizard from a row, the patient is preselected from that visit. You can switch patients from the Patient dropdown without closing the modal.Tick the visits to include on this claim.
The Visits list shows every billable visit for the selected patient. Use individual row checkboxes for a targeted claim, or tap Select All at the top right to bill the whole list. You can also click Add another visit to add a manual service line that isn't tied to a real visit.Clear the Readiness Check warnings before clicking Next.
The Readiness Check at the bottom audits five CMS-1500 segments against the patient, company, caregiver, and visit records: Patient Demographics, Billing Provider, Rendering Provider (one entry per assigned caregiver), Insurance Info, and Service Facility. A row marked N missing is expandable. Click into it, fill the missing field, save, and the row turns green. Next stays disabled until every row passes.
3. Clinical: add diagnosis codes and confirm service lines
Search Diagnosis Codes (ICD-10) at the top of the Clinical step.
Type two or more characters into the ICD-10 search to filter home health relevant codes; click an entry to add it. The wizard supports up to 12 codes (pointers A through L). If you have claim presets configured for this service type, a Suggested Diagnoses row appears above the search and lets you one-click any preset diagnosis onto the claim.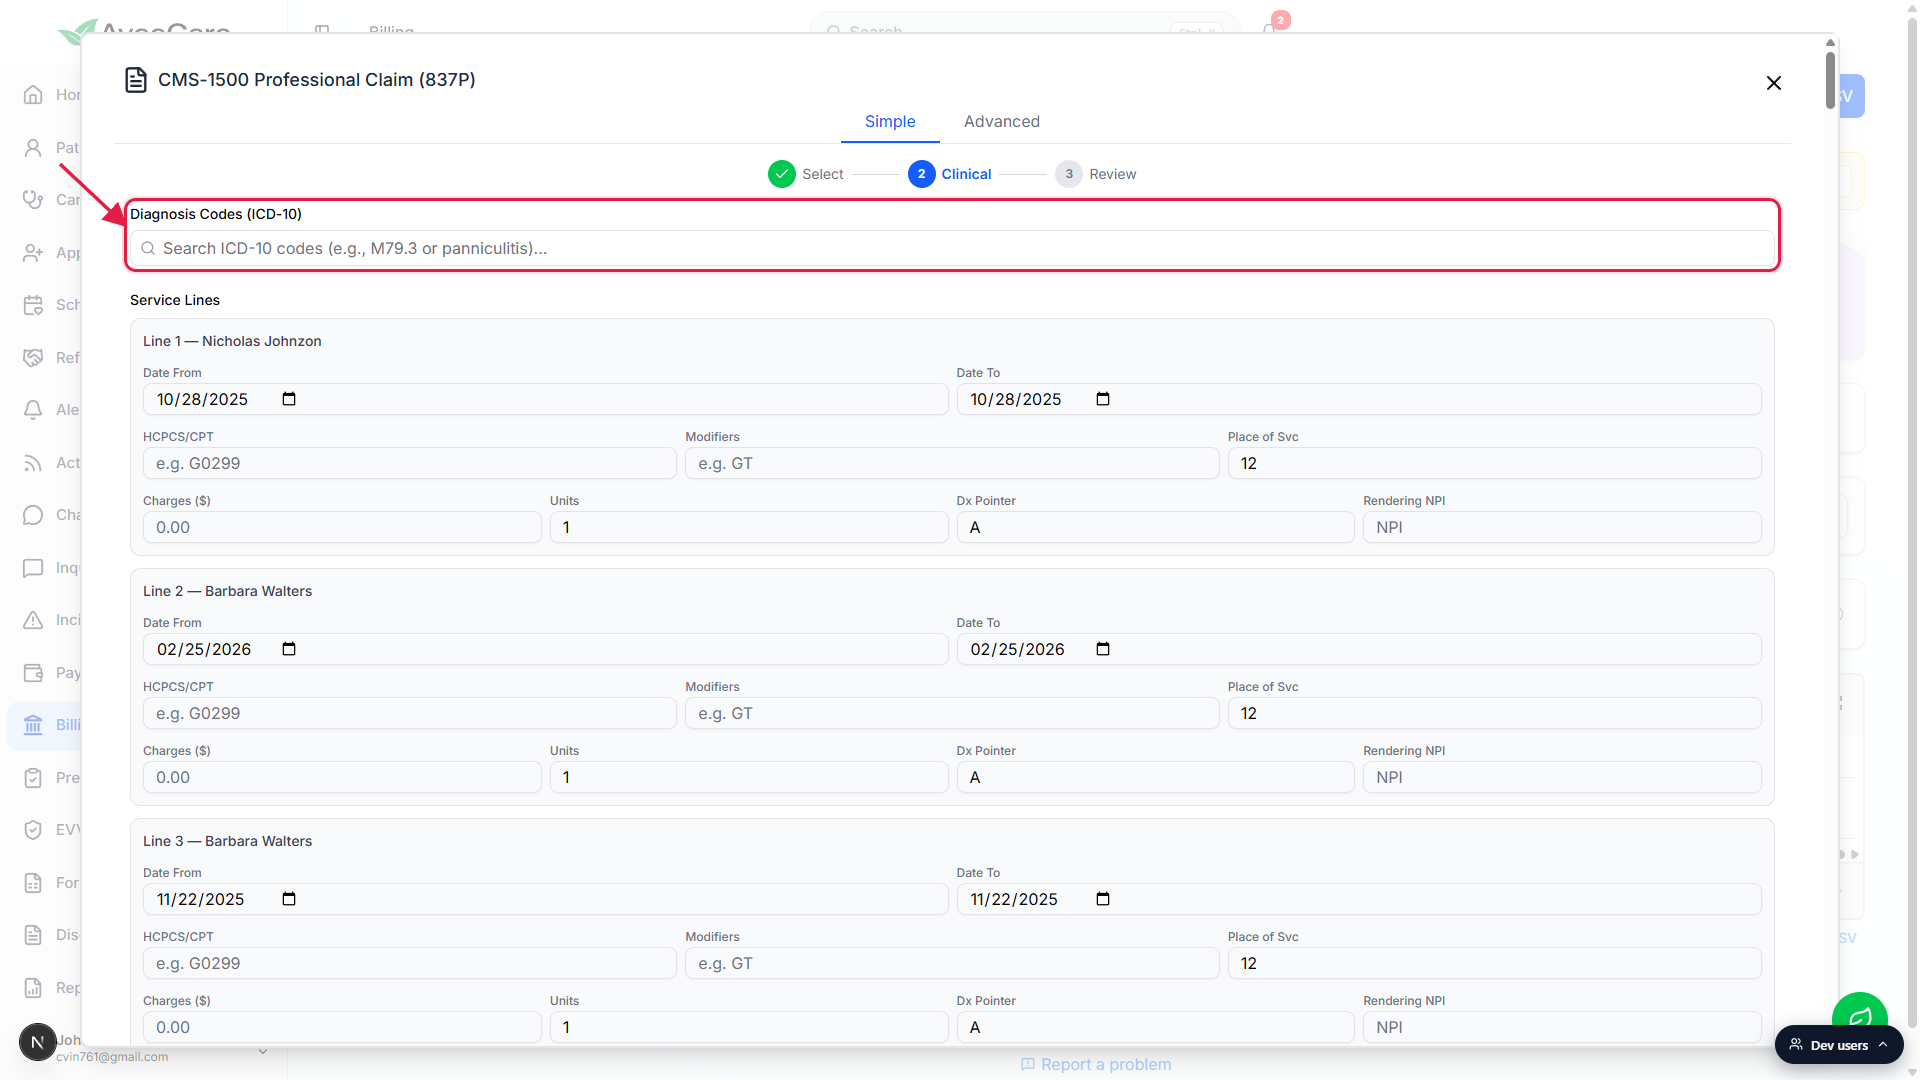
Confirm the auto-built Service Lines, one per ticked visit.
Each selected visit gets a service line with date, HCPCS/CPT code, modifiers, place of service (12 = home by default), charges, units, diagnosis pointer, and the rendering caregiver's NPI. Most fields are prefilled from the visit or the matching claim preset. Adjust as needed. Manually added lines start blank and need every field filled in.Optional: expand Add prior authorization # to attach an auth.
If the payer required prior auth for these visits, click + Add prior authorization # below the service lines and enter the auth number. It maps to CMS-1500 box 23.
4. Review: confirm and submit the claim
Read the Claim Summary and Provider Summary cards at the top.
The Review step lays out the final 837P in plain language: Patient, DOB, Insurance Type (Medicare, Medicaid, Other), Insurance ID, Payer Name, Group #, and Subscriber on the left; Billing Provider, Billing NPI, Tax ID, and Rendering Provider on the right. Click Edit on either card to jump back to the right step and fix something.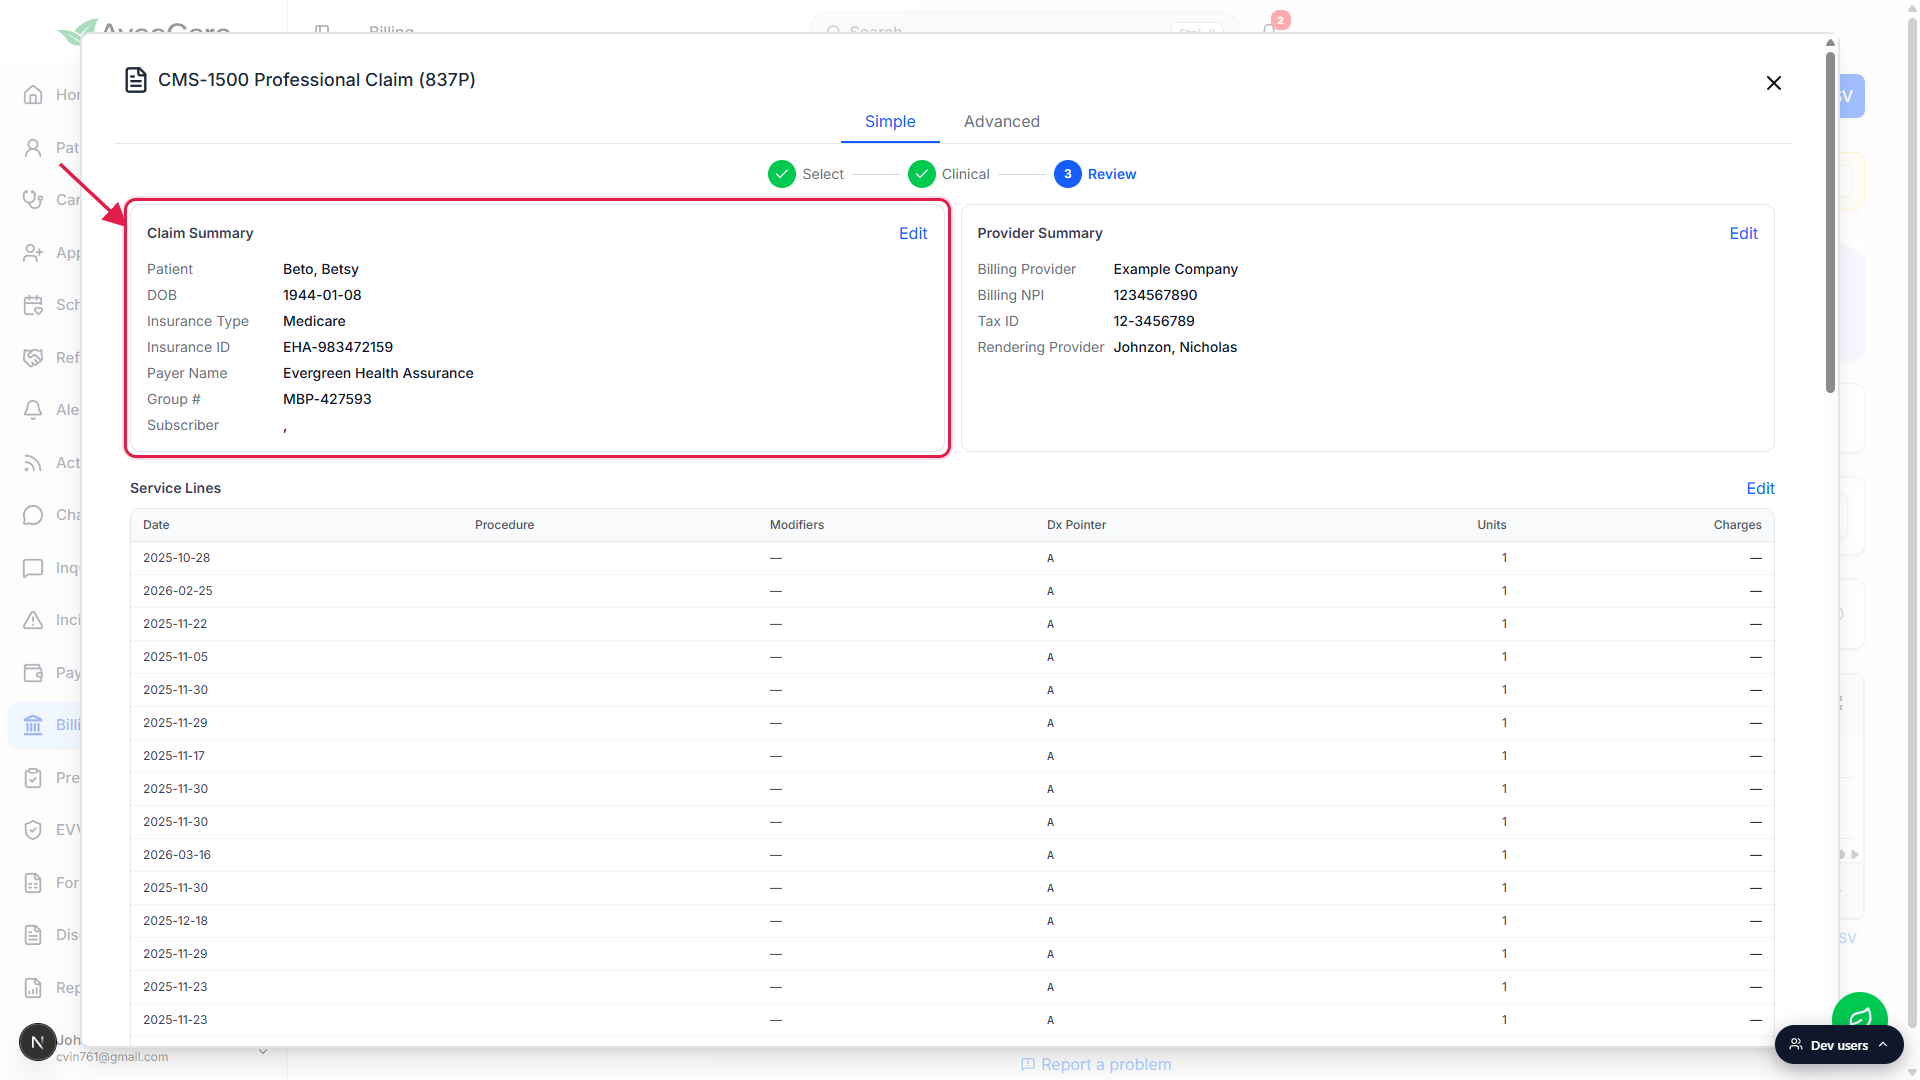
Scroll the Service Lines table to spot-check codes and charges.
The full table of service lines (one row per visit) renders below the summary cards, with a Total at the bottom. This is your last chance to spot an obviously wrong charge or modifier before the file leaves AveeCare.Click Generate X12 to download the 837P, or Submit to Clearinghouse to send it.
Generate X12 packages the claim into an ANSI X12 5010 837P file and downloads it locally. Upload that file to your clearinghouse portal (Availity, Trizetto, Office Ally, Optum, Waystar). Submit to Clearinghouse requires an active clearinghouse connection in Settings and ships the file straight from AveeCare. After submission, the claim's Status badge on the Visit Billing table moves through Submitted, Acknowledged, and finally Paid (or Rejected / Denied).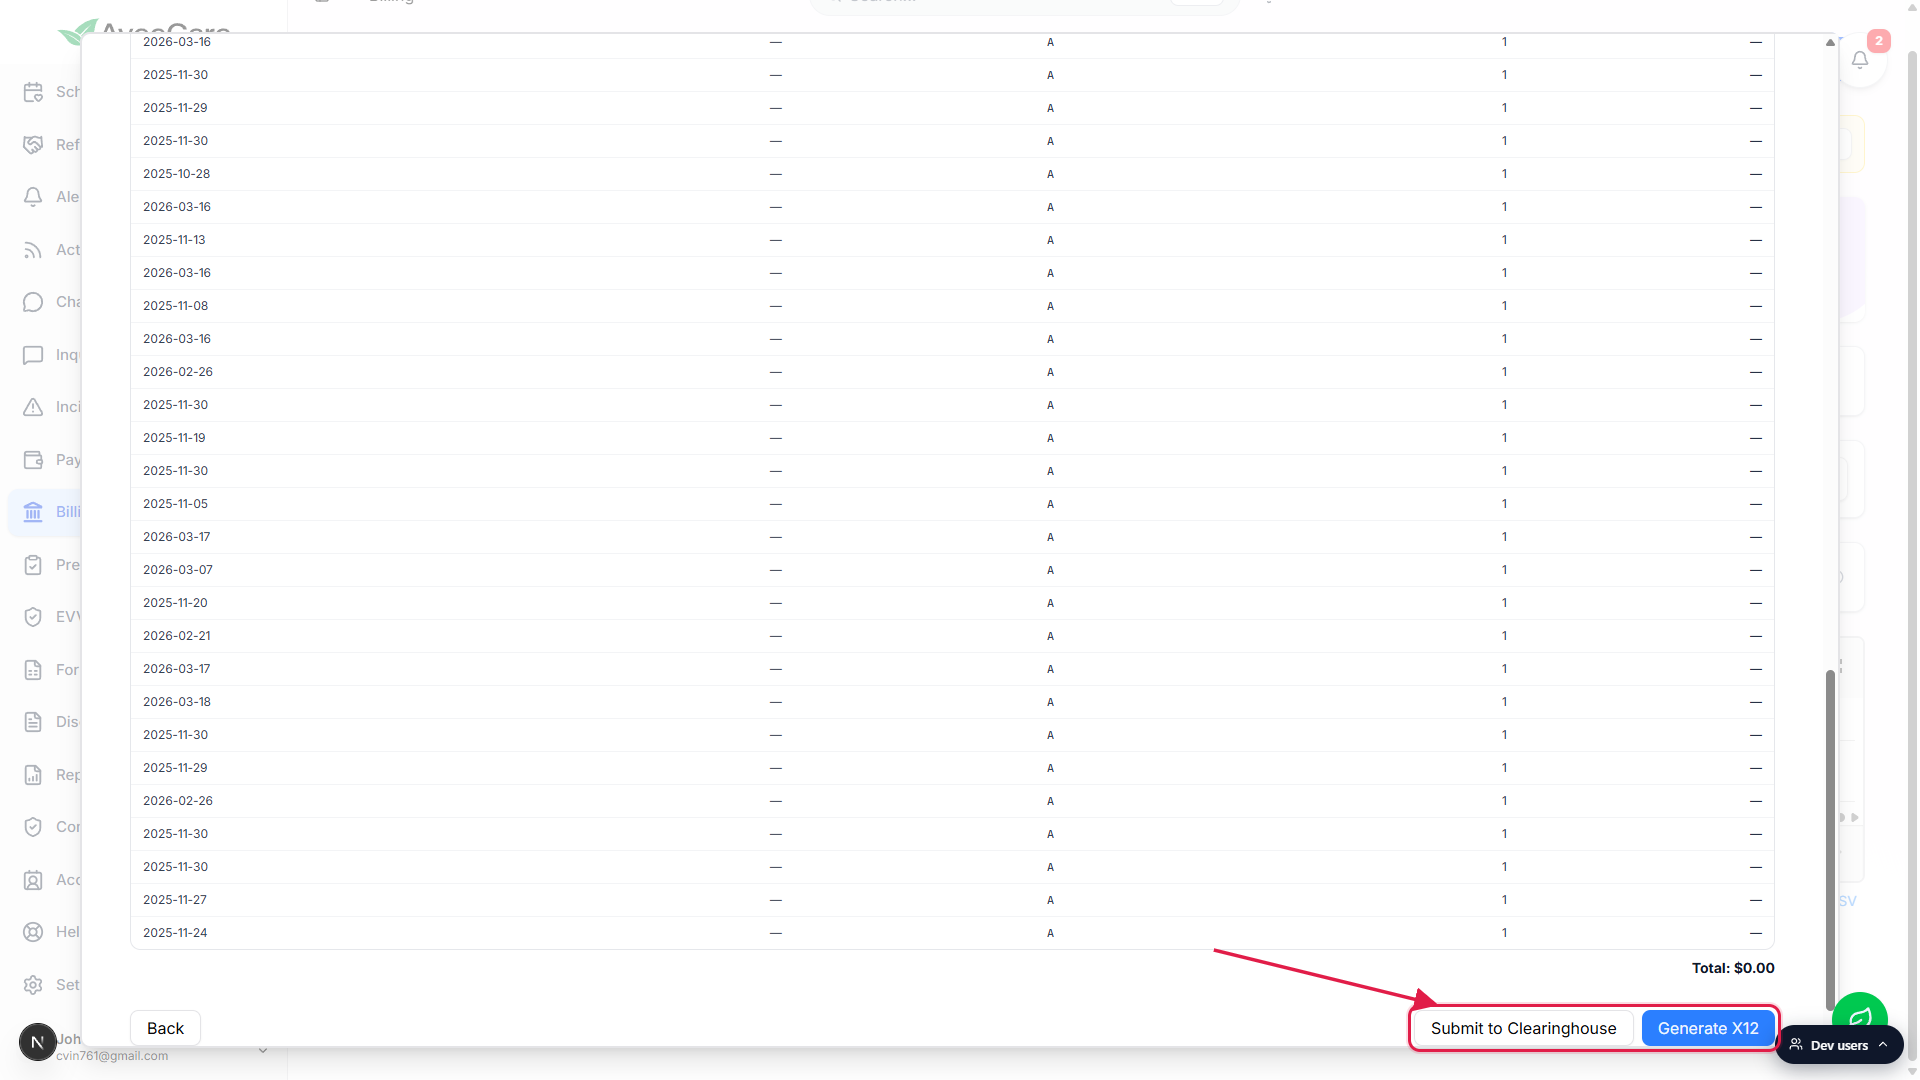
Common pitfalls
- Next is disabled on Select. The Readiness Check is gating you. Expand every yellow N missing row, fill the missing fields inline, save, and the row turns green. Once all rows are green, Next activates.
- No shield icon on the row. The Generate insurance claim button only shows up for visits whose patient has insurance on file. Add an insurance record on the patient's Insurance tab and the icon will appear on subsequent visits.
- Diagnosis codes blocked at 12. CMS-1500 box 21 supports pointers A through L, so the wizard caps you at 12 diagnosis codes. If you need to add a 13th, remove one of the existing entries first.
- Wrong place of service. The wizard defaults Place of Svc to 12 (home). If you billed a visit at an assisted living facility, the patient's home, a hospital discharge bridge visit, or anywhere else, change the POS code on the service line before Review.
- Submit to Clearinghouse fails with no connection. This button only works after you have configured a clearinghouse connection in Settings. Without one, use Generate X12 to download the file and upload it to your clearinghouse portal by hand instead.
- Switching to Advanced loses nothing. The Simple wizard and the Advanced form share the same claim state, so flipping tabs mid-claim is safe. Use Advanced when you need to override a CMS-1500 box that the wizard doesn't expose.