A weekly payroll batch in AveeCare is one page: /payroll. Pick the date range, scan the totals, filter to Unpaid, push to your provider (or run pay manually), then bulk Mark Paid to close it out. This guide walks the whole loop end-to-end.
1. Open Payroll and pick the date range
Open Payroll from the sidebar.
The page has five stat tiles at the top, a Date Range bar below them, a Search and filter bar, and the Visit Compensation table at the bottom.Pick a preset chip or set custom dates.
Preset chips ship with 7, 14, 30, 60, 90 days, 6 months, and 1 year. Click Custom to set explicit start and end dates for a specific pay period. The whole page (stats and table) recomputes against the range you pick. Full reference: Payroll date-range filtering.
2. Read the five stat tiles to confirm the period’s totals
The stat tiles are the fastest sanity check. If your usual weekly Unpaid count is around 90 and you're looking at 12, you set the wrong range. Catch it here before you start clicking buttons.
Read the five tiles: Unpaid Visits, Estimated Owed, Paid Visits, Mileage, Active Caregivers.
Unpaid Visits is what you're about to process. Estimated Owed is the dollar figure for that count using each caregiver's pay rate. Paid Visits is the historical count in the range. Mileage totals miles logged. Active Caregivers is how many had visits in the period. Reference: Payroll stat cards.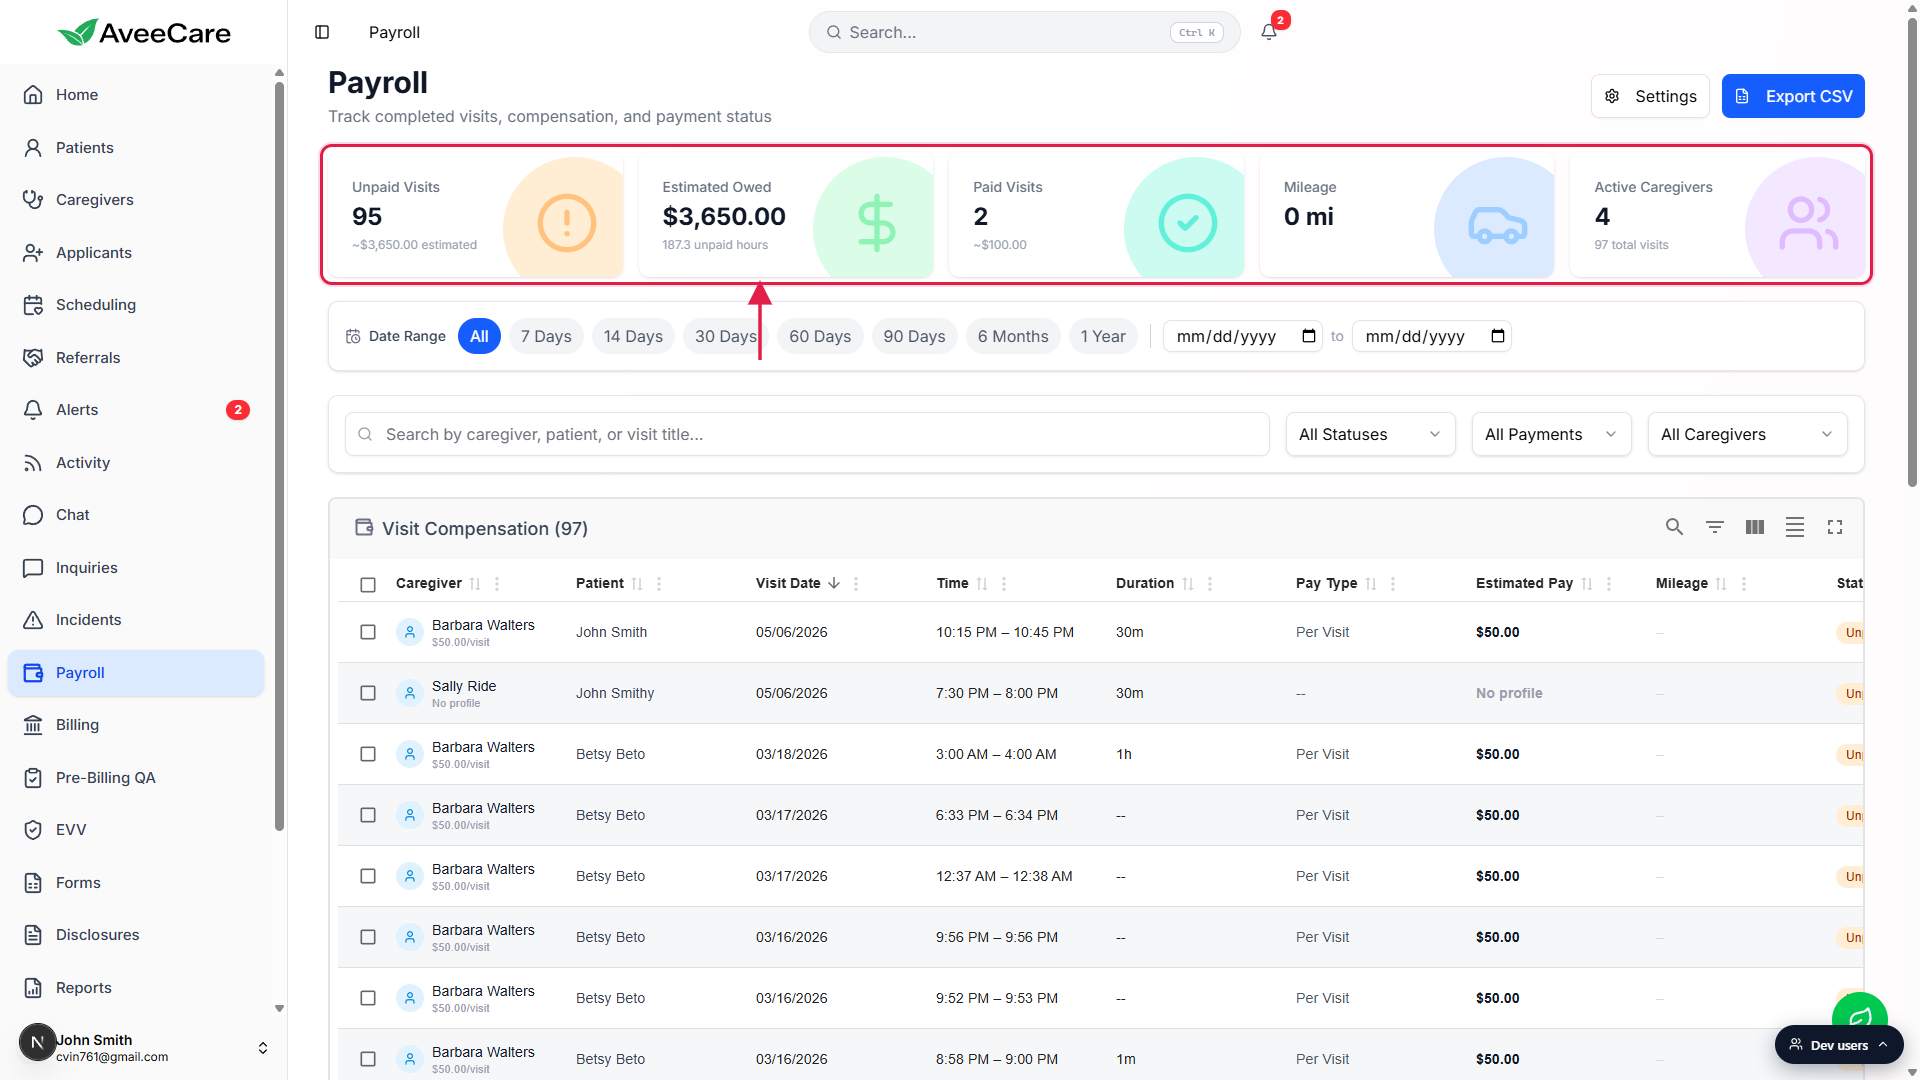
Click the Unpaid Visits tile to drill the table to just those rows.
The tile doubles as a filter. Clicking it applies the Unpaid-only filter on the table below.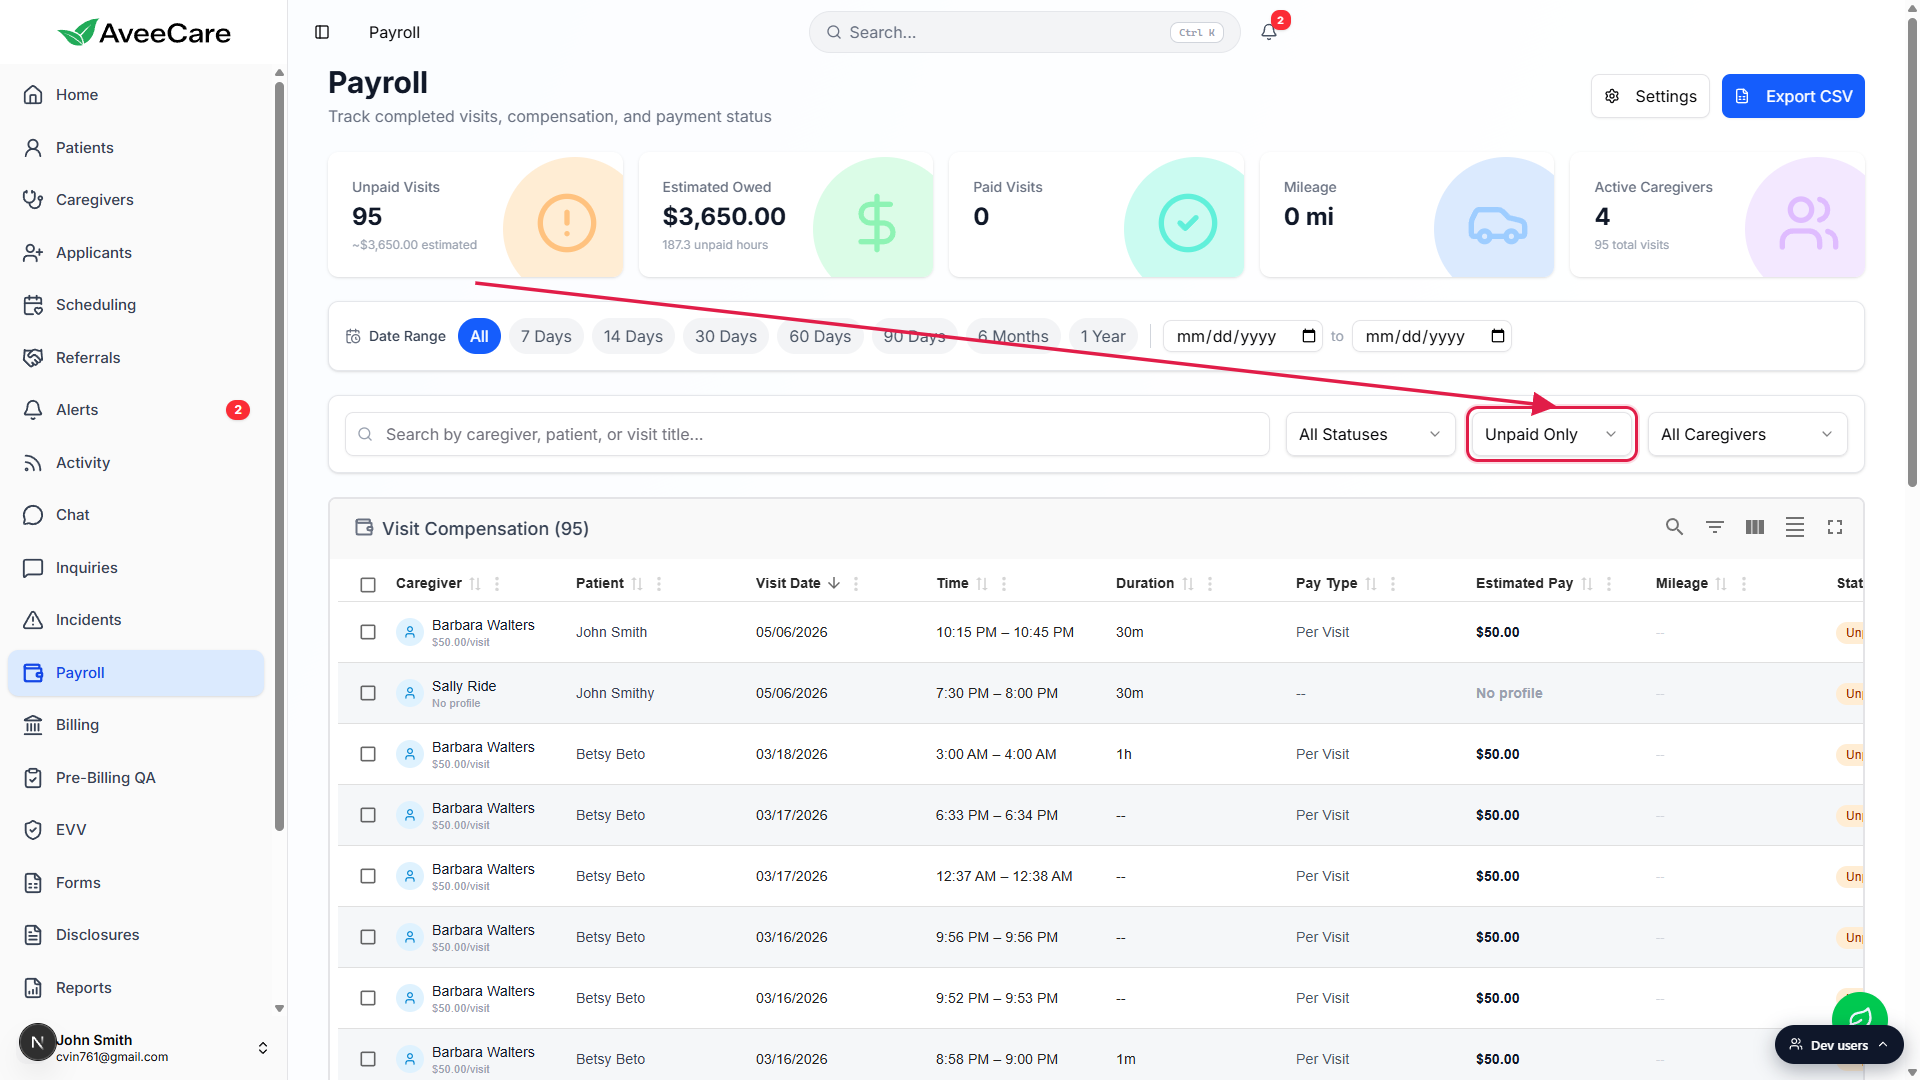
3. Filter the Visit Compensation table to Unpaid Only
In the filter bar, set the Payment filter to Unpaid Only.
The table title shows the matching count: for example, Visit Compensation (97). That's your batch for this run.
Optionally narrow further by caregiver, visit status, or service type.
Multi-state agencies often split the batch by office or caregiver. The filter combinations are unrestricted; pick whatever matches how you actually run pay. Full reference: Visit-compensation table.
4. Send rows to QuickBooks or Paychex (or run pay manually)
How you actually pay caregivers depends on which provider you wired up in Settings → Payroll. Three patterns are common:
QuickBooks or Paychex connected: click the per-row Send badge on each unpaid row.
The right-edge Actions column has a small QB or PX badge. Click it and AveeCare creates a payroll entry for that visit using the caregiver's pay rate, tacks on mileage reimbursement automatically when applicable, and queues the entry for the provider. The Provider Sync column flips yellow Queued, then green Submitted once the provider accepts. Reference: Send to payroll provider.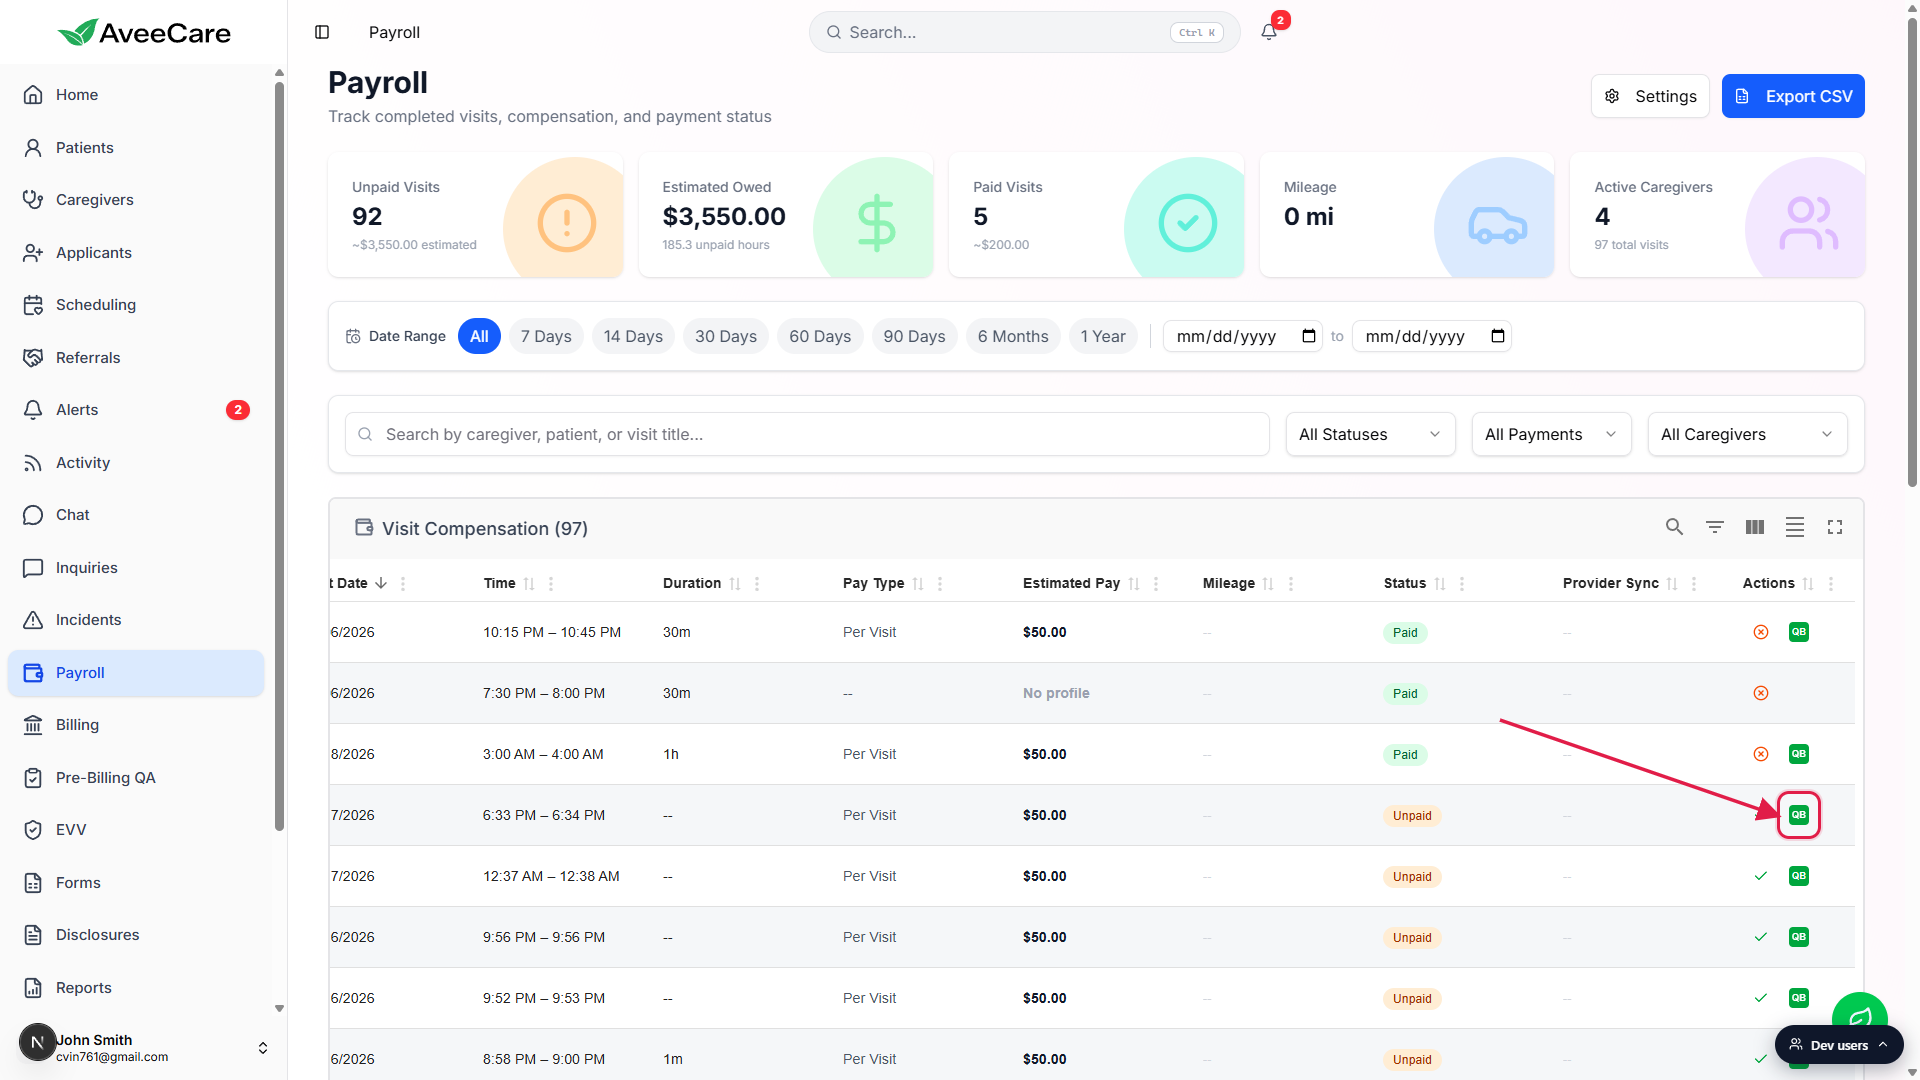
Manual Processing: run pay outside AveeCare and skip to step 5.
If you process payroll outside AveeCare entirely (your accountant, ADP, Gusto, or any platform that's not live yet), do the run in that system, then come back to AveeCare and bulk Mark Paid to record the result here.ADP or Gusto: pick Manual Processing as the default until they go live.
Both are listed under Provider Integration with Coming Soon pills. Once ADP or Gusto becomes live, you can flip the default in Settings → Payroll and the per-row Send badges start showing the new provider.
5. Bulk Mark Paid to close the batch
Whether you sent to a provider or ran pay manually, the last step is the same: tell AveeCare these visits are paid. Bulk Mark Paid is faster than clicking the per-row check on each one.
Select the visits you just paid.
Use the header checkbox to select every visible row on the current filtered view, or tick individual rows. The selection count shows in the bulk-action toolbar that slides in at the top of the table.
Click Mark Paid in the bulk-action toolbar.
Every selected row flips to Paid. The Unpaid Visits tile drops by that count, and Paid Visits goes up. Reference: Bulk Mark Paid / Unpaid.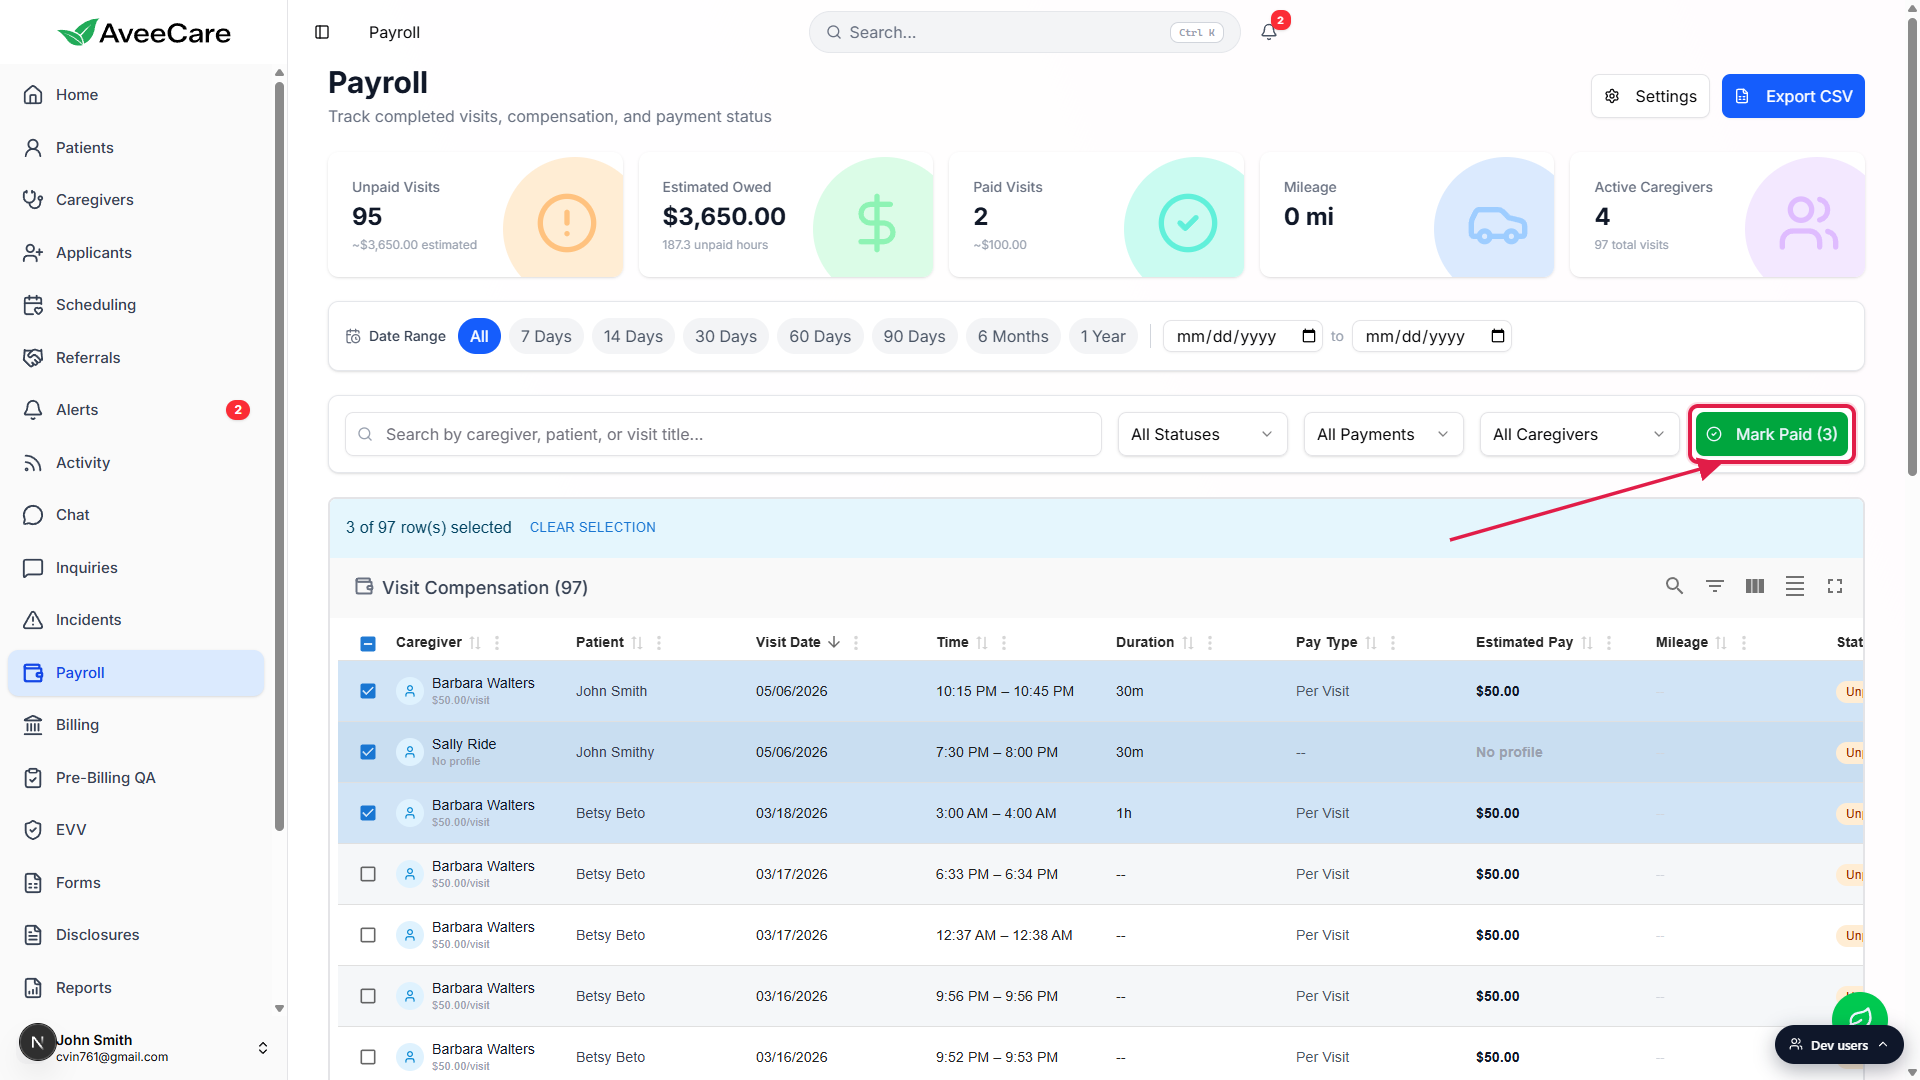
Spot-check Unpaid Visits is back to zero (or whatever you expect).
If anything's left, it's usually a visit you missed in the filter (different caregiver, different office, different status). Adjust filters and run a second pass.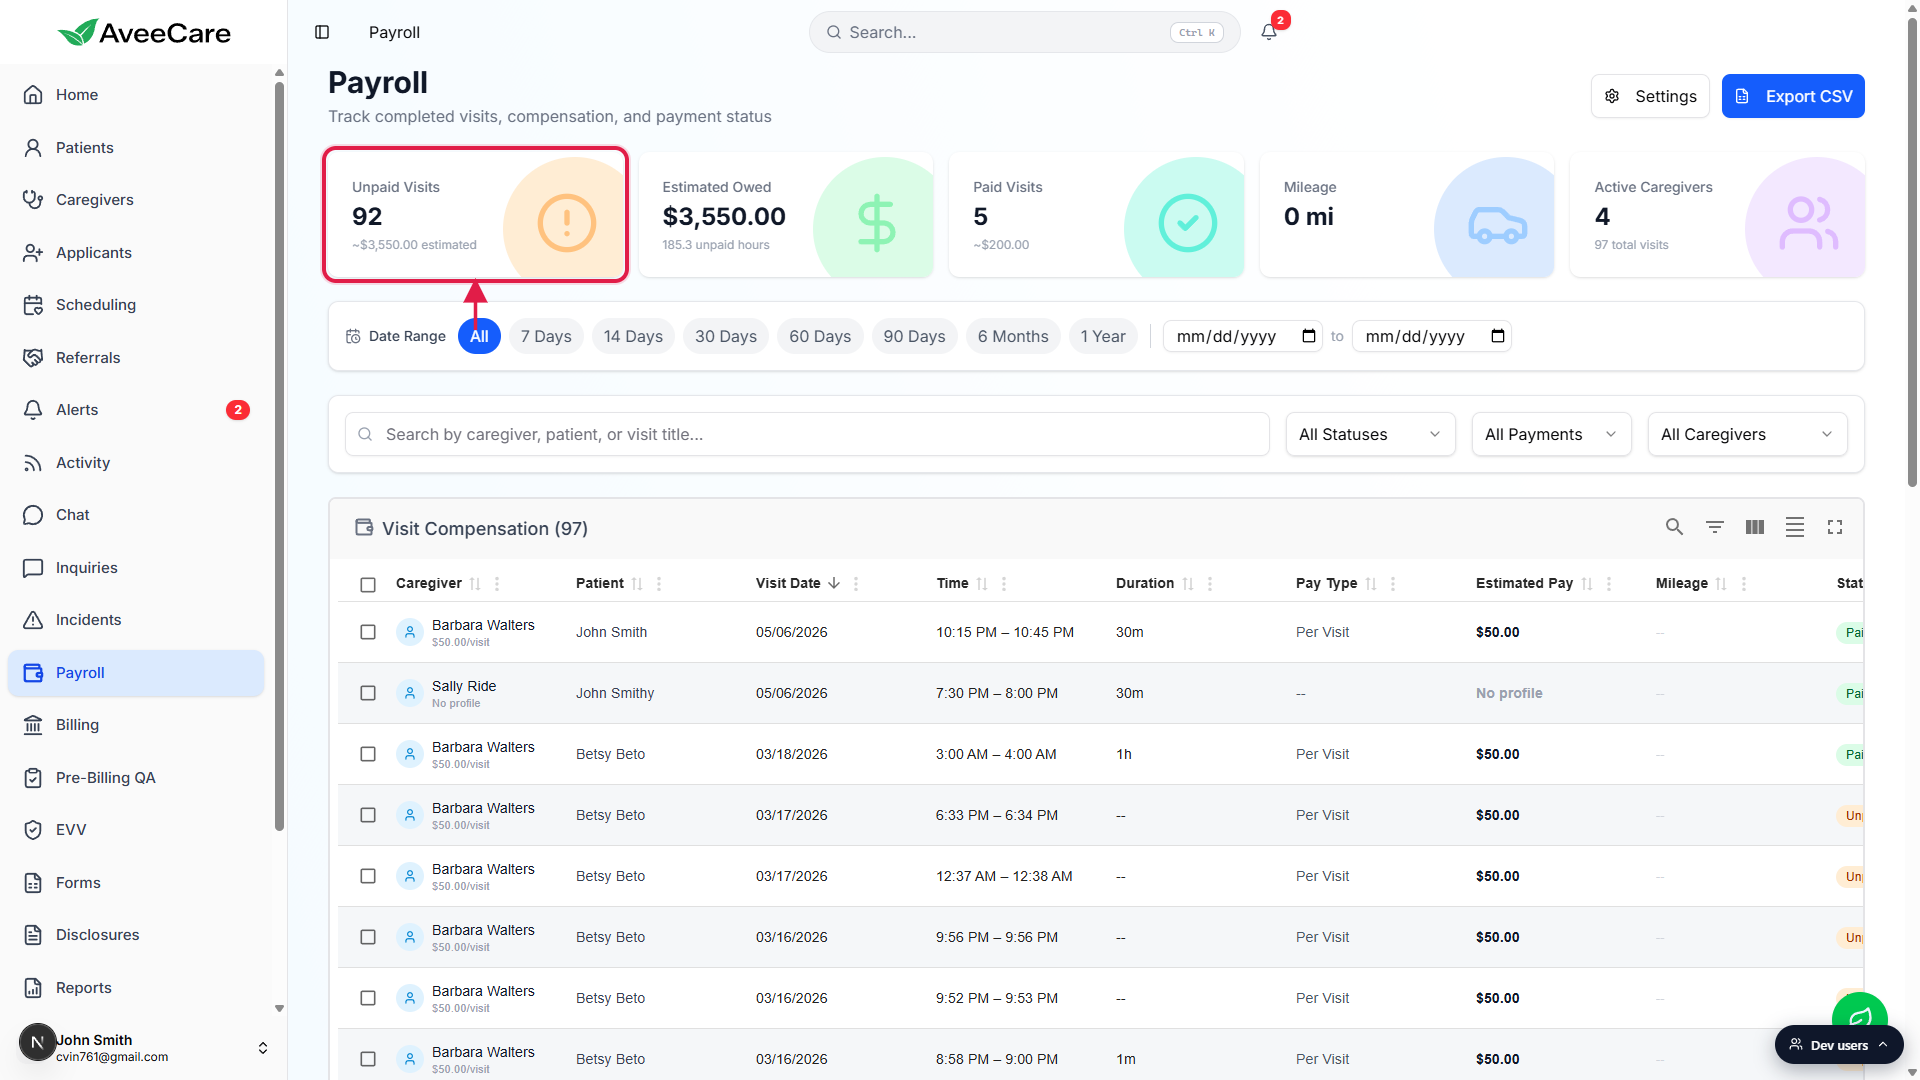
Related
- Payroll date-range filtering
- Payroll stat cards
- Visit-compensation table
- Bulk Mark Paid / Unpaid
- Send to payroll provider
- Payroll integration