Send to payroll provider is the per-row push action on the Visit Compensation table. Each visit row carries a tiny provider badge (QB for QuickBooks, PX for Paychex) in the Actions column. Click it, AveeCare creates a payroll entry for that visit and queues it for the provider, and the Provider Sync column on the row flips from a quiet dash to a colored status badge you can hover for detail.
Quick answer
Open Payroll. Find the row you want to send. In the rightmost Actions column click the small QB badge (or PX badge if the caregiver is wired to Paychex). A toast confirms the send and the Provider Sync column on that row turns yellow with a Queued badge. Once the provider accepts the entry, that badge flips green to Submitted.
Which providers can I send to today
AveeCare ships push integrations for two providers and shows placeholders for two more:
- QuickBooks. Live. OAuth flow, surfaces a green QB badge on Payroll rows once the caregiver has an external worker ID linked under their payroll profile.
- Paychex. Live. Same flow, blue PX badge. Caregivers can be linked to one provider, the other, or both.
- ADP and Gusto. Listed in Settings under Provider Integration with a Coming Soon badge. Not pushable today. Use Manual Processing in the meantime.
- Manual Processing. Always available. Skip the push entirely, run pay outside AveeCare, then bulk Mark Paid to record the result.
1. Connect QuickBooks or Paychex in Settings
Open Settings, choose the Payroll tab, and scroll to Provider Integration.
The Provider Integration card lists every supported provider with a Connected or Disconnected pill and a Connect / Disconnect button on the right. QuickBooks shows the date it was connected once OAuth finishes.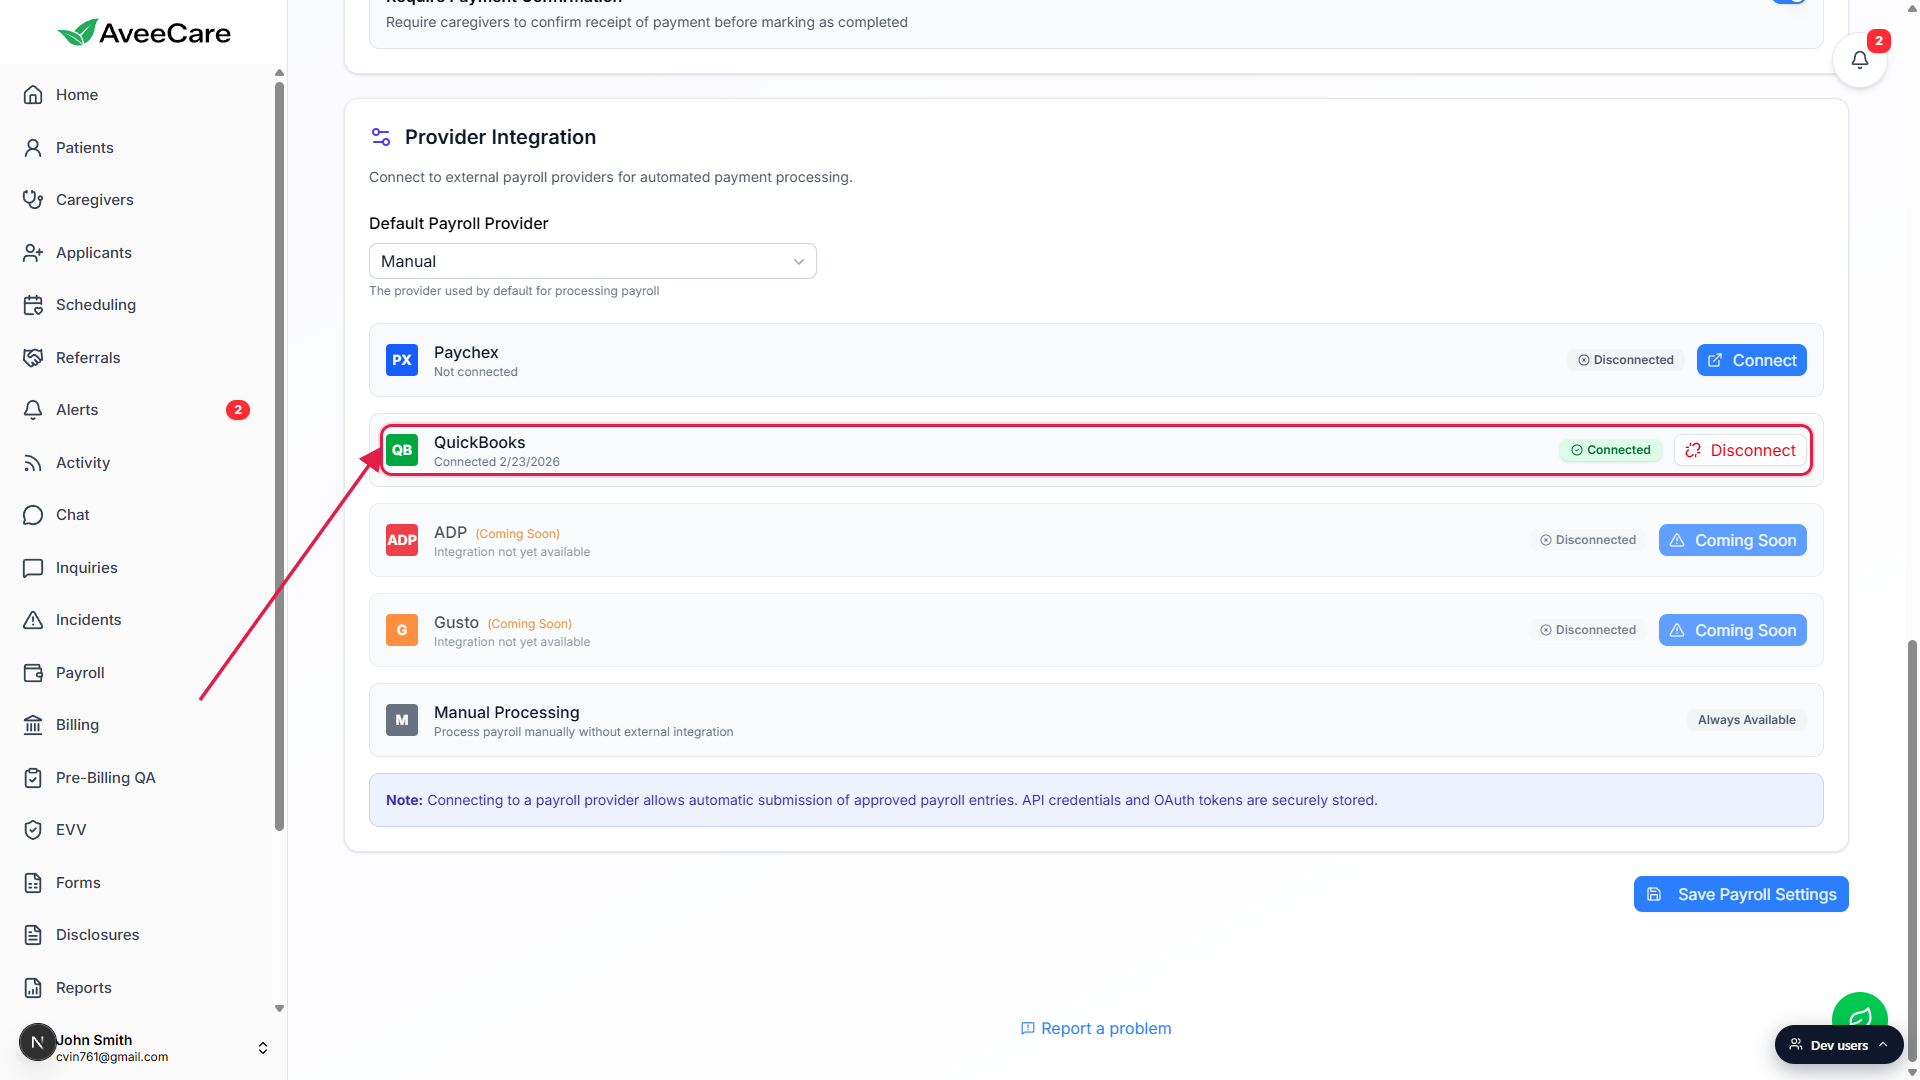
Click Connect next to QuickBooks or Paychex. Finish the OAuth handshake in the popup.
The popup opens the provider sign-in. After you grant access, the card flips to a green Connected pill with the date stamp. The Default Payroll Provider dropdown above the card lets you pick which provider AveeCare should treat as the default for new caregivers.Link each caregiver to their external worker ID.
The Send badge only shows up on rows whose caregiver has a worker ID for that provider. Open Caregivers, pick the caregiver, scroll to the Payroll tab on their profile, and paste the external worker ID. Without the link, the row will not show a QB or PX button at all.
2. Filter the Payroll table to the visits you want to send
Open Payroll from the sidebar.
The header carries Settings and Export CSV. Below it, the five stat tiles (Unpaid Visits, Estimated Owed, Paid Visits, Mileage, Active Caregivers), then the Date Range bar, then the Search and filter bar, then the Visit Compensation table.Narrow the table by Date Range, Payment Status, Caregiver, or Visit Status.
Most agencies push only Unpaid visits, so flip the All Payments filter to Unpaid Only first. The count in the table title (for example, Visit Compensation (97)) tells you exactly how many rows match the active filter.
3. Click the QB or PX badge on each row
Find the Actions column on the right edge of the table.
Each row shows a green check or orange X (the inline Mark Paid / Mark Unpaid button), then one small provider badge per linked integration. If the caregiver is wired to both providers, both badges appear side by side.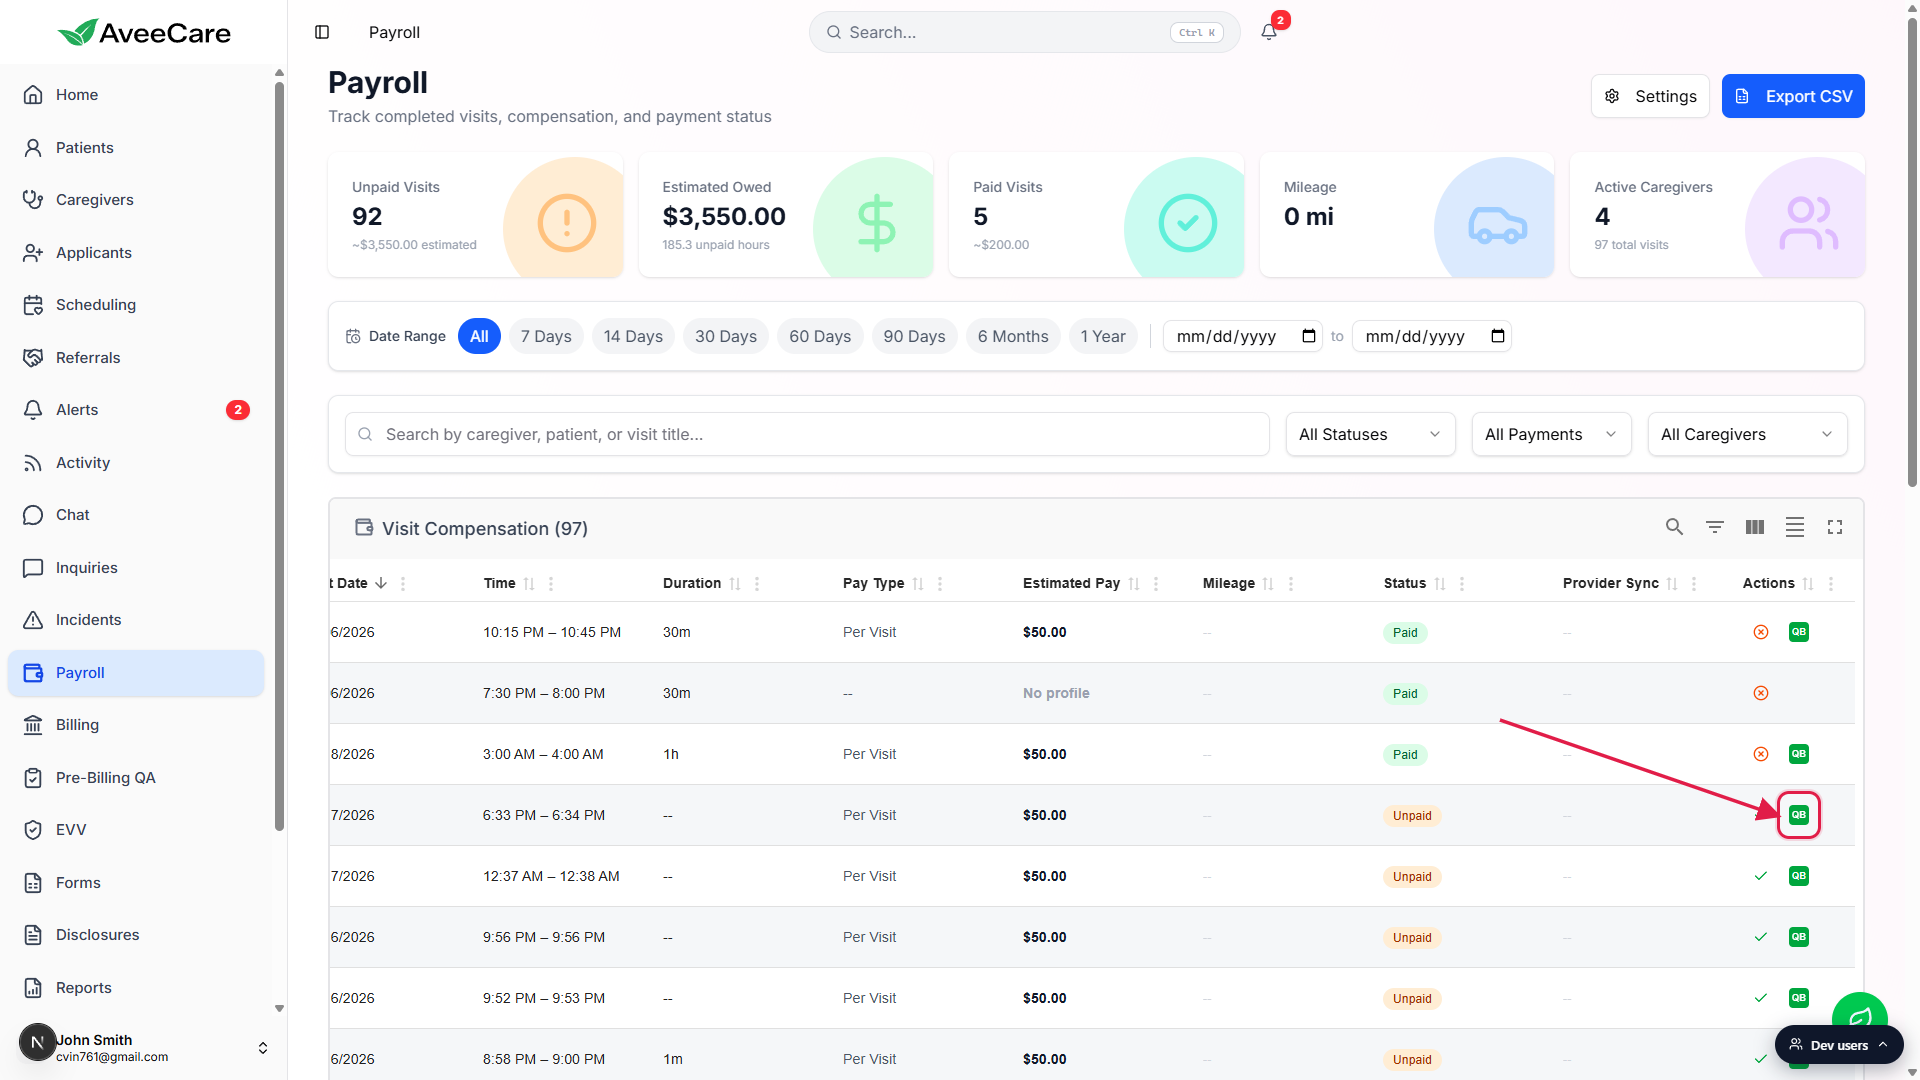
Click the badge for the provider you want.
AveeCare creates a payroll entry for that single visit, pulls the caregivers pay rate from their profile, automatically tacks on mileage reimbursement when travelDistanceMiles is set, and queues the entry for the provider. A toast at the bottom reads Visit queued for QuickBooks sync (or Paychex sync). There is no preflight modal, no confirm step, the click does it.Repeat for each row you want to push.
There is no bulk Send to Provider button today. Each row is its own click. For a large run, narrow the filter to a single caregiver first so you can move down a tight list without losing your place.
4. Watch the Provider Sync column for status
A yellow Queued badge means AveeCare has handed the entry off and is waiting for the provider.
Hover the badge for a tooltip that reads Waiting to be submitted to QuickBooks (or Paychex). This is the normal post-click state for a few seconds to a few minutes depending on provider load.
The badge flips green to Submitted when the provider accepts the entry.
The tooltip then reads Successfully submitted to QuickBooks with the External ID returned by the provider. That External ID is your audit link, click into the provider account and search for it to see the matching batch.If the badge flips red to Failed, hover it for the error.
The tooltip carries the providers error message and the timestamp. Common causes are an unlinked caregiver, a closed pay period in QuickBooks, or a stale OAuth token. Reconnect the integration under Settings if the error mentions auth.
Common pitfalls
- No QB or PX badge on the row. The caregiver has not been linked to that provider yet. Open Caregivers, pick the caregiver, go to their Payroll tab, and paste the external worker ID. The badge appears as soon as the link is saved.
- Send badge is grayed out and shows a spinner. A push is already in flight for that row. AveeCare disables the button until the response comes back so you cannot double-submit the same visit.
- Sending does not Mark Paid. Send hands the entry to the provider. Marking the row Paid in AveeCare is a separate flip. Most agencies wait for the provider to confirm the pay run, then use Bulk Mark Paid to close out the AveeCare side.
- ADP and Gusto are not live yet. Settings shows them with Coming Soon pills. Choose Manual Processing as the default provider for now and run pay externally.
- Reversing a push from inside AveeCare. There is no Unsend button. Cancel the batch inside the provider (QuickBooks Payroll or Paychex Flex), then the Provider Sync badge on the row updates to Cancelled with a gray tooltip.