Provider Integration is the card on the Payroll settings tab where you wire AveeCare to your real payroll system. Once a provider shows Connected, the per-row Send badges on the Payroll page can push visits to it. Today the live providers are QuickBooks and Paychex. ADP and Gusto are listed with Coming Soon pills.
Quick answer
Open Settings, click the Payroll tab, scroll to the Provider Integration card. Pick a Default Payroll Provider, then click Connect next to QuickBooks or Paychex and finish the OAuth or credentials handshake. The pill on the right flips from gray Disconnected to green Connected with the date stamp.
Providers you can wire up today
The Provider Integration card lists every supported provider in the same shape, with a status pill on the right and a Connect or Disconnect button next to it:
- QuickBooks. Live. OAuth popup handshake. After you grant access, the pill turns green Connected with the connection date and a Last sync timestamp.
- Paychex. Live. Click Connect, the card expands into a credentials form for the Paychex Flex API Key (Client ID) and Client Secret. Paste both from the Paychex Flex developer portal and click Connect again.
- ADP and Gusto. Listed with a Coming Soon pill and an Integration not yet available helper line. The Connect button shows a warning icon and the text Coming Soon. Pick Manual Processing as your default until these go live.
- Manual Processing. Always Available. No external account. Run pay outside AveeCare, then use the per-row Mark Paid / Mark Unpaid action on Payroll to record the result.
1. Open Settings and switch to the Payroll tab
Click Settings in the sidebar, then click the Payroll tab in the row of tab buttons.
The Payroll tab sits between Clearinghouse and Claims and Locations. Scroll past Pay Frequency, Overtime Rules, Default Pay Rates, and Automation Settings until you see the Provider Integration card.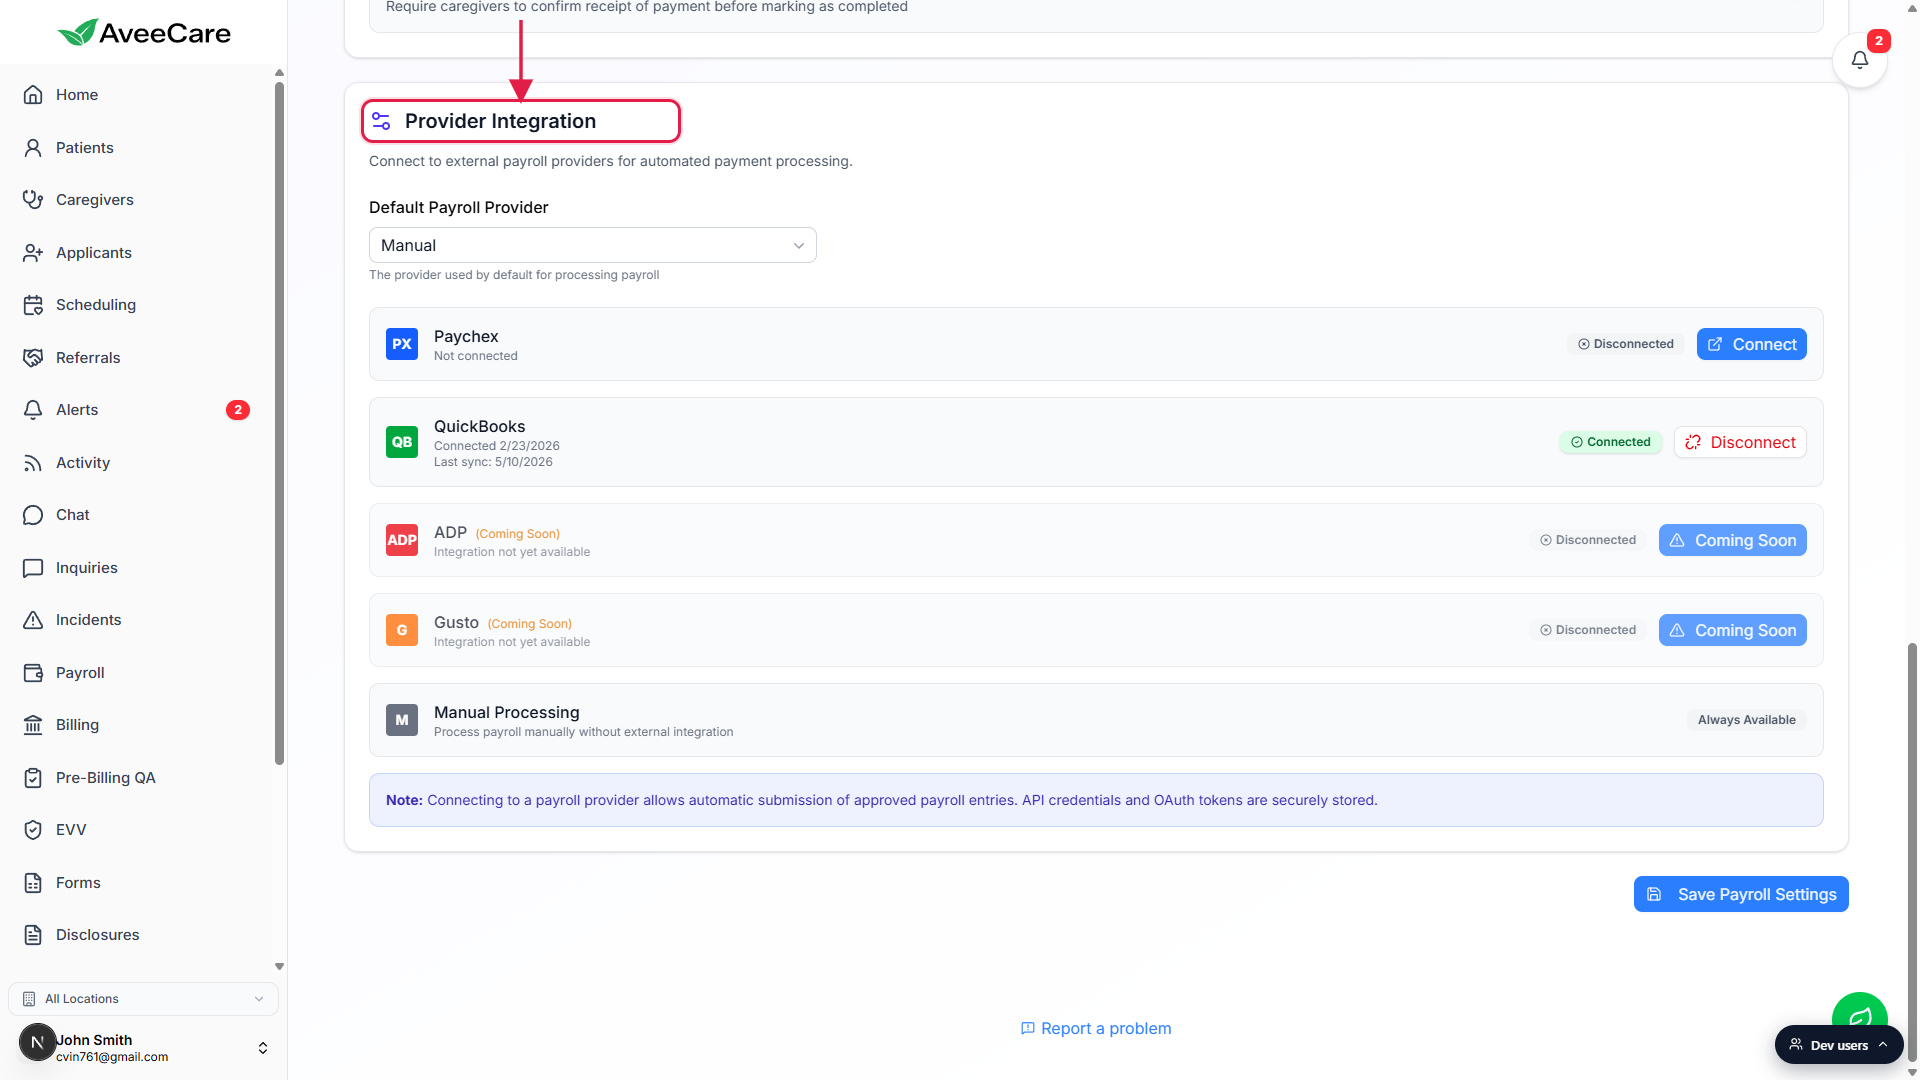
2. Pick a Default Payroll Provider
Use the Default Payroll Provider dropdown at the top of the card.
The choices are Paychex, QuickBooks, ADP, Gusto, and Manual. This default decides which provider AveeCare treats as primary for new caregivers and where the default Send badge points on the Payroll page. You can change it any time without disconnecting anyone.Pick Manual if you have not connected a provider yet.
Manual is the safe default. Visits still appear on the Payroll page, you just process pay outside AveeCare and mark rows Paid when finished.
3. Connect QuickBooks or Paychex
Click Connect on the QuickBooks row.
A small OAuth popup opens at Intuit, asks you to sign in to your QuickBooks Online company, and asks for permission. After you approve, the popup closes and the row flips to a green Connected pill with a date stamp like Connected 2/23/2026 and a Last sync line.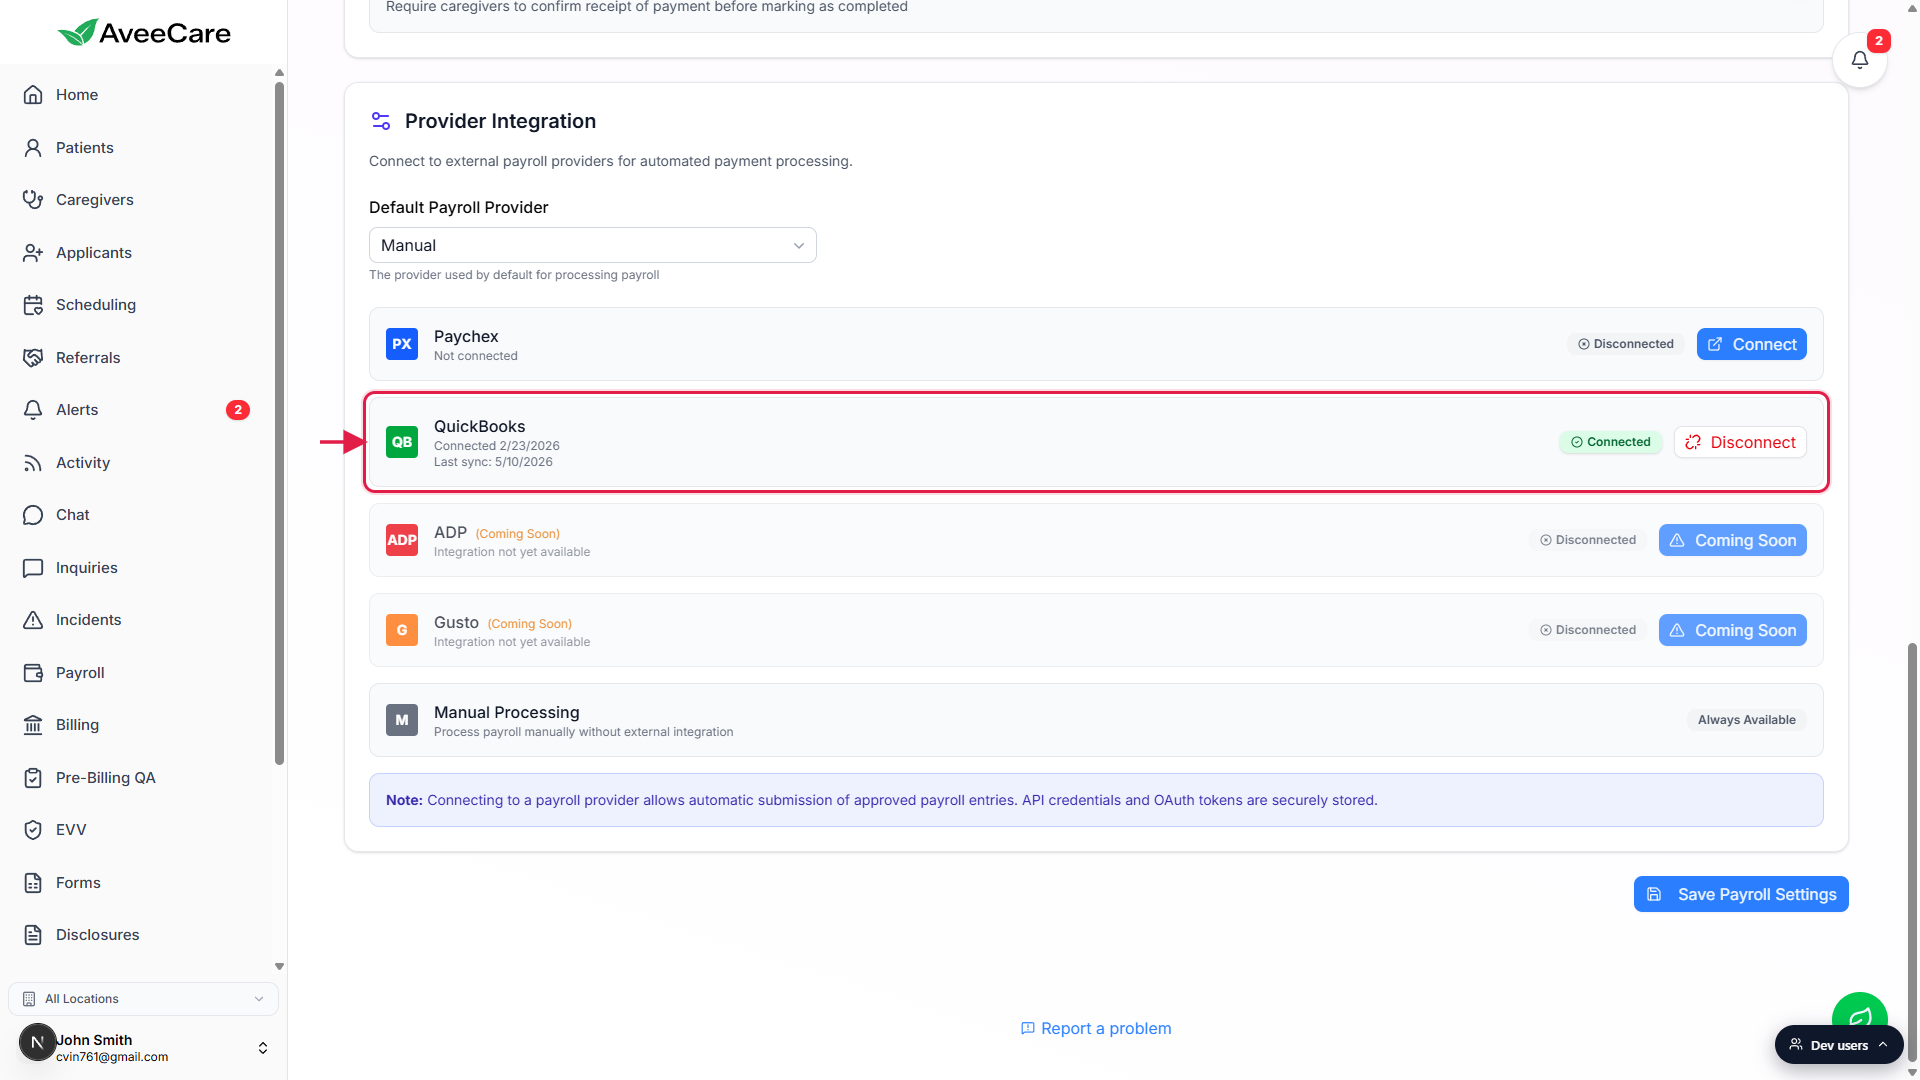
Click Connect on the Paychex row to expand the credentials form.
The card unfolds with two fields: API Key (Client ID) and Client Secret. Find both in Paychex Flex under Company Settings, Integrated Apps. Paste them in, click the inner Connect button, and the row updates to Connected. Click Cancel on the form to back out without saving.Link each caregiver to their external worker ID afterward.
Connecting the company is step one. The per-row Send badges on Payroll only appear for caregivers whose profile carries a worker ID for that provider. Open Caregivers, pick the caregiver, open the Payroll tab on their profile, and paste the external worker ID. See Caregiver payroll and pay rate for the field location.
4. Read the Connected, Disconnected, and Coming Soon states
A green Connected pill plus a Disconnect button means the integration is live.
The row also shows the connection date and a Last sync date when AveeCare has talked to the provider at least once. Click Disconnect to open a confirmation dialog that reads Disconnect QuickBooks? with a warning that disconnecting will prevent automatic payroll submission until reconnected. The dialog also lists pending and approved payroll counts if the disconnect would strand in-flight work.A gray Disconnected pill plus a blue Connect button means the row is ready to wire up.
Paychex sits in this state by default until you finish the API credentials form. The helper line under the provider name reads Not connected.A Coming Soon pill plus a grayed Coming Soon button means the provider is not live yet.
Both ADP and Gusto show this state today. The helper line under each name reads Integration not yet available. Pick Manual Processing as the default for now. We will flip the Connect buttons live without requiring a Payroll workflow change on your side.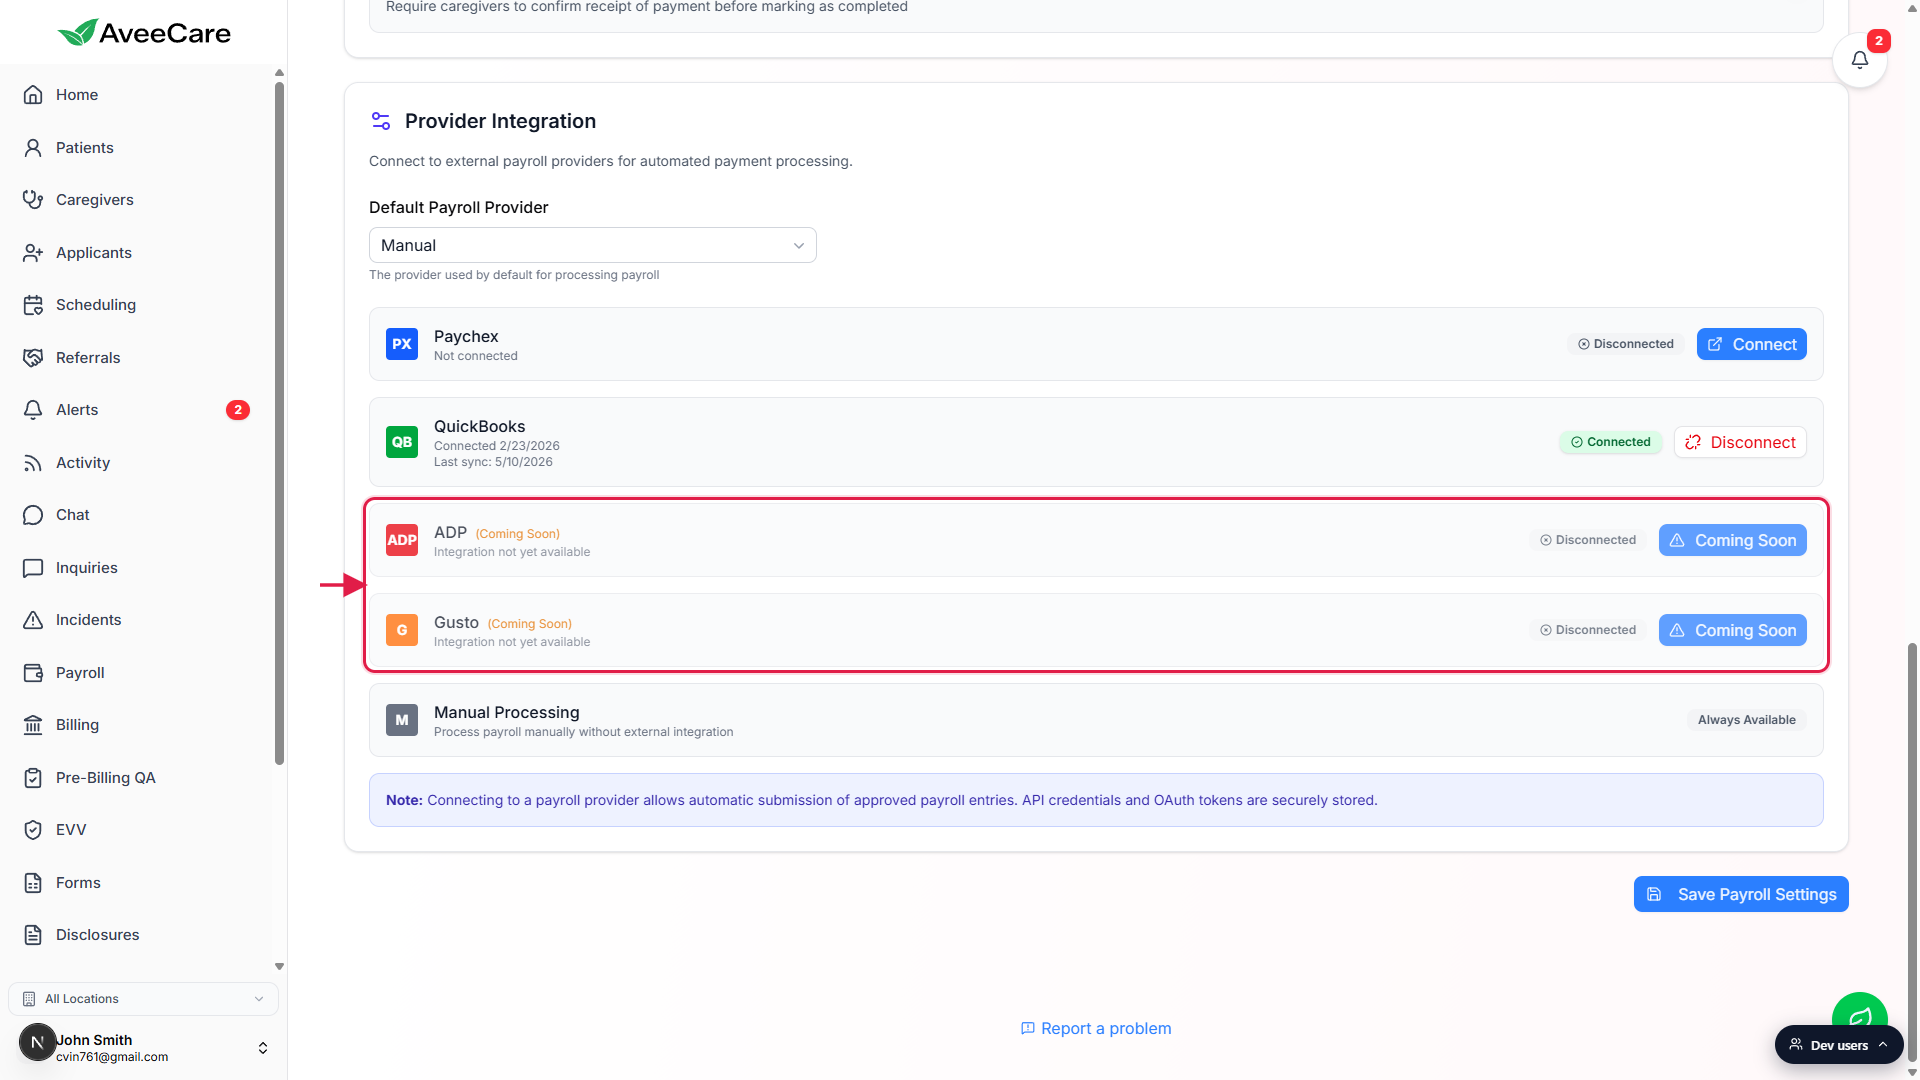
Click Save Payroll Settings at the bottom of the tab.
Connecting a provider saves the integration on its own, but the Default Payroll Provider dropdown is part of the parent Payroll settings form. Hit Save Payroll Settings to lock the default choice in.
Common pitfalls
- Popup blocked. The QuickBooks OAuth flow opens in a browser popup. If your browser blocks it, you see a toast that says Popup blocked by your browser. Please allow popups for this site and try again. Whitelist localhost or app.aveecare.com and retry the Connect click.
- Paychex credentials missing scope. If the Paychex Flex API key is missing the right scopes, the inner Connect button fails with a toast carrying the Paychex error. Reissue the key in Paychex Flex under Company Settings, Integrated Apps and paste again.
- Disconnect strands in-flight pay. The disconnect dialog surfaces pending and approved payroll counts when the disconnect would leave entries hanging. Finish or cancel those entries before clicking Disconnect, or accept that they will need to be re-pushed after you reconnect.
- ADP or Gusto picked as default. The dropdown lets you pick them, but the Send badge will not push because the integrations are not live. Leave the default on Manual, QuickBooks, or Paychex.
- Forgetting to link caregiver worker IDs. Connecting the tenant does not automatically map caregivers. The Send badges only appear for caregivers whose profile has an external worker ID for that provider.