The Business Settings tab is the company-level identity for your AveeCare tenant. One tab holds your business phone, hours of operation, timezone, EVV configuration, and the three regulatory identifiers (NPI, Tax ID, and State Medicaid Provider ID) that aggregators and clearinghouses check on every claim.
Quick answer
Open Settings. The first tab, Business Settings, is already selected. Update the Business Phone Number, Business Hours of Operation, Timezone, and the EVV Provider Information block (State Medicaid Provider ID, NPI, Tax ID) as needed, then click Save Business Settings at the bottom right of the tab. One Save button persists every change on the tab.
1. Open Settings and land on the Business Settings tab
Click Settings in the sidebar.
Settings opens on the Business Settings tab by default. The tab strip across the top reads Business Settings, My Notifications, Company Notifications, Subscription and Billing, Payment Integrations, Clearinghouse and Claims, Payroll, Locations, API Keys, Account.
Scroll through to see the full field set on one tab.
Business Settings is one long tab, not a wizard. The sections in order: Business Phone Number, Business Hours of Operation, Timezone, Electronic Visit Verification (EVV), EVV State Configuration, Telephony EVV Backup, EVV Provider Information, AI Features, Enable Shift Swapping, Visit Monitoring, SMS Notifications, Session Idle Timeout.
2. Set Business Phone, Hours, and Timezone
Enter the Business Phone Number at the top of the tab.
This number appears on patient and caregiver dashboards as the go-to contact for your agency. It is a single phone number field, not a list.Set Business Hours of Operation with Start Time and End Time.
Pick an Hour and Period (AM or PM) for both Start Time and End Time. A blue summary line below the dropdowns reads Current Hours: 8:00 AM to 5:00 PM so you can confirm the resolved window. The scheduling system prevents appointments from being scheduled outside this window.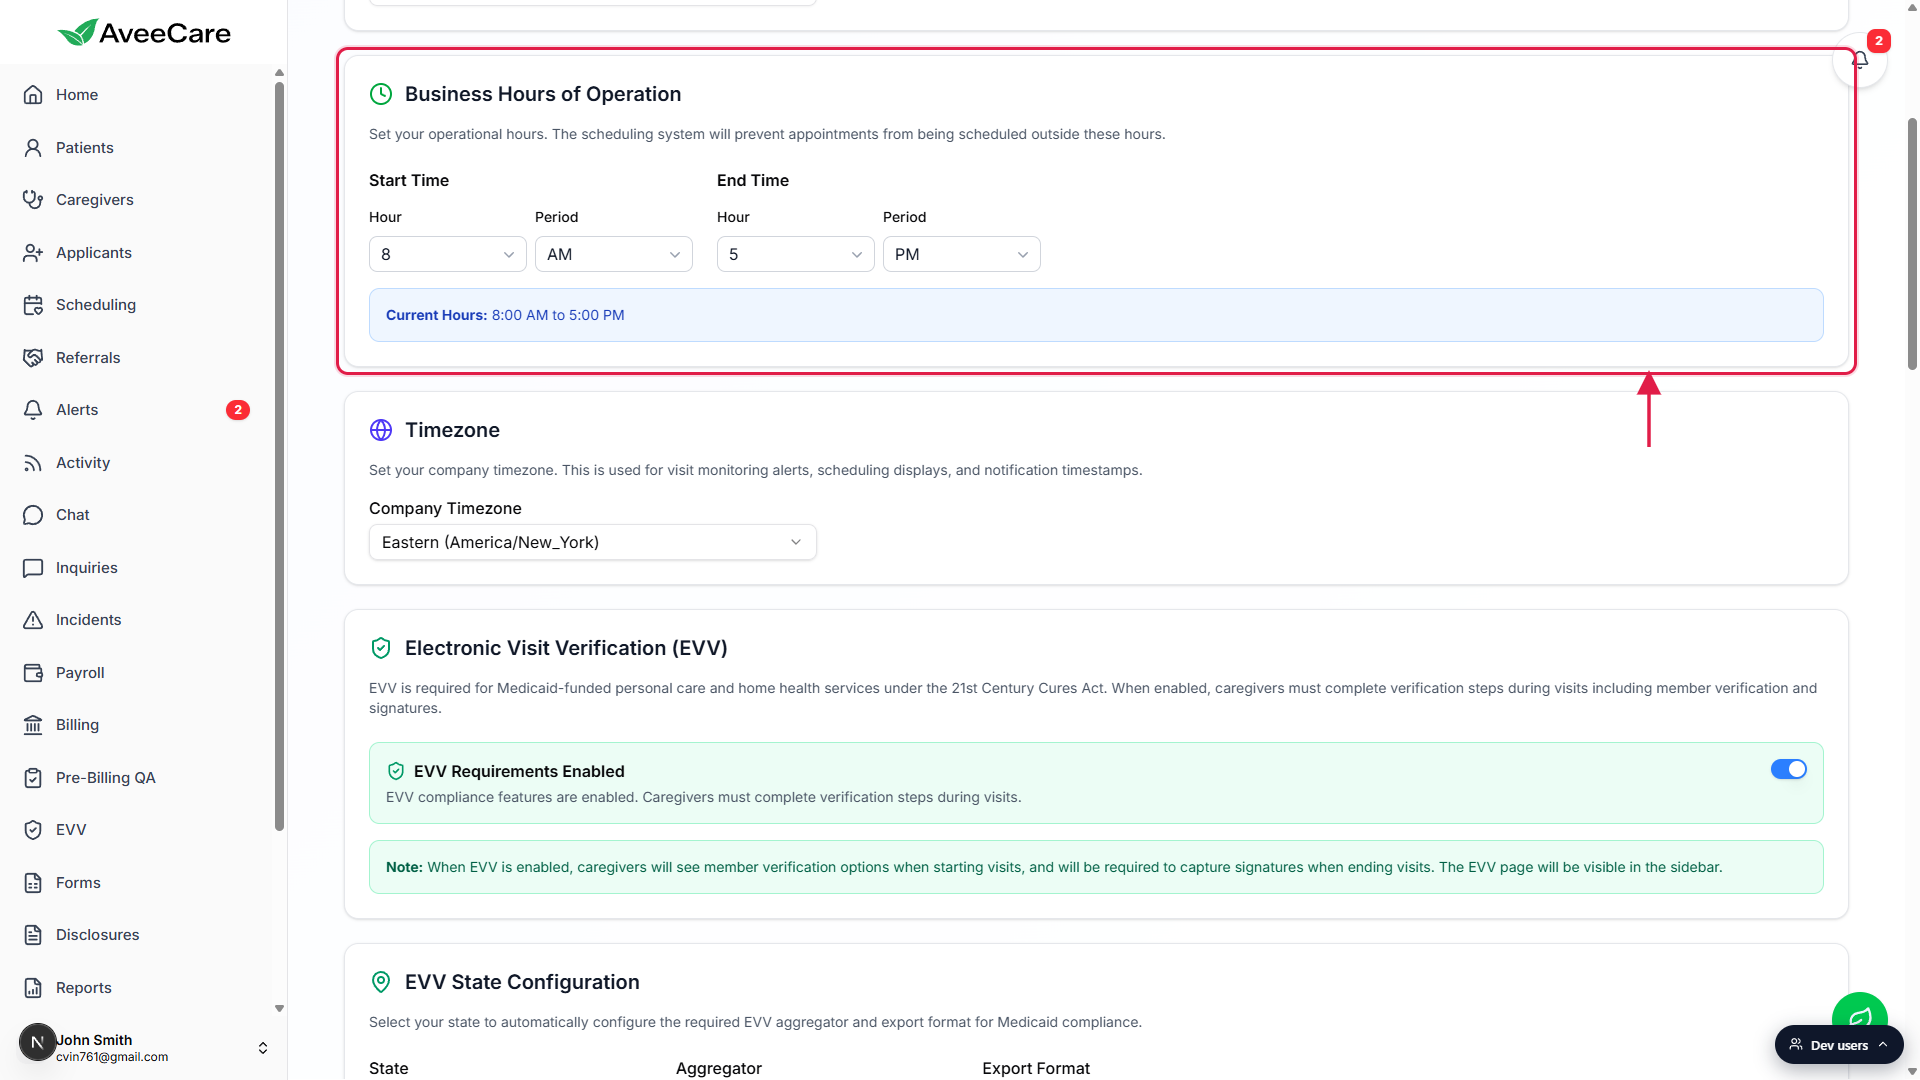
Pick a Company Timezone from the Timezone dropdown.
The Timezone selection drives visit monitoring alerts, scheduling displays, and notification timestamps. Default is Eastern (America/New_York). Pick the timezone your agency operates in even if you have caregivers visiting across state lines, individual visits can use their own timezone in the visit wizard.
3. Fill in NPI, Tax ID, and State Medicaid Provider ID
Scroll down to the EVV Provider Information section.
Three text fields sit side by side: State Medicaid Provider ID (your state Medicaid identifier), NPI (National Provider Identifier) (your 10-digit number from CMS), and Tax ID (EIN/TIN) (your 9-digit Federal Tax ID). A purple Note below the row reminds you that these are required for EVV aggregator integration and clearinghouse claims submission.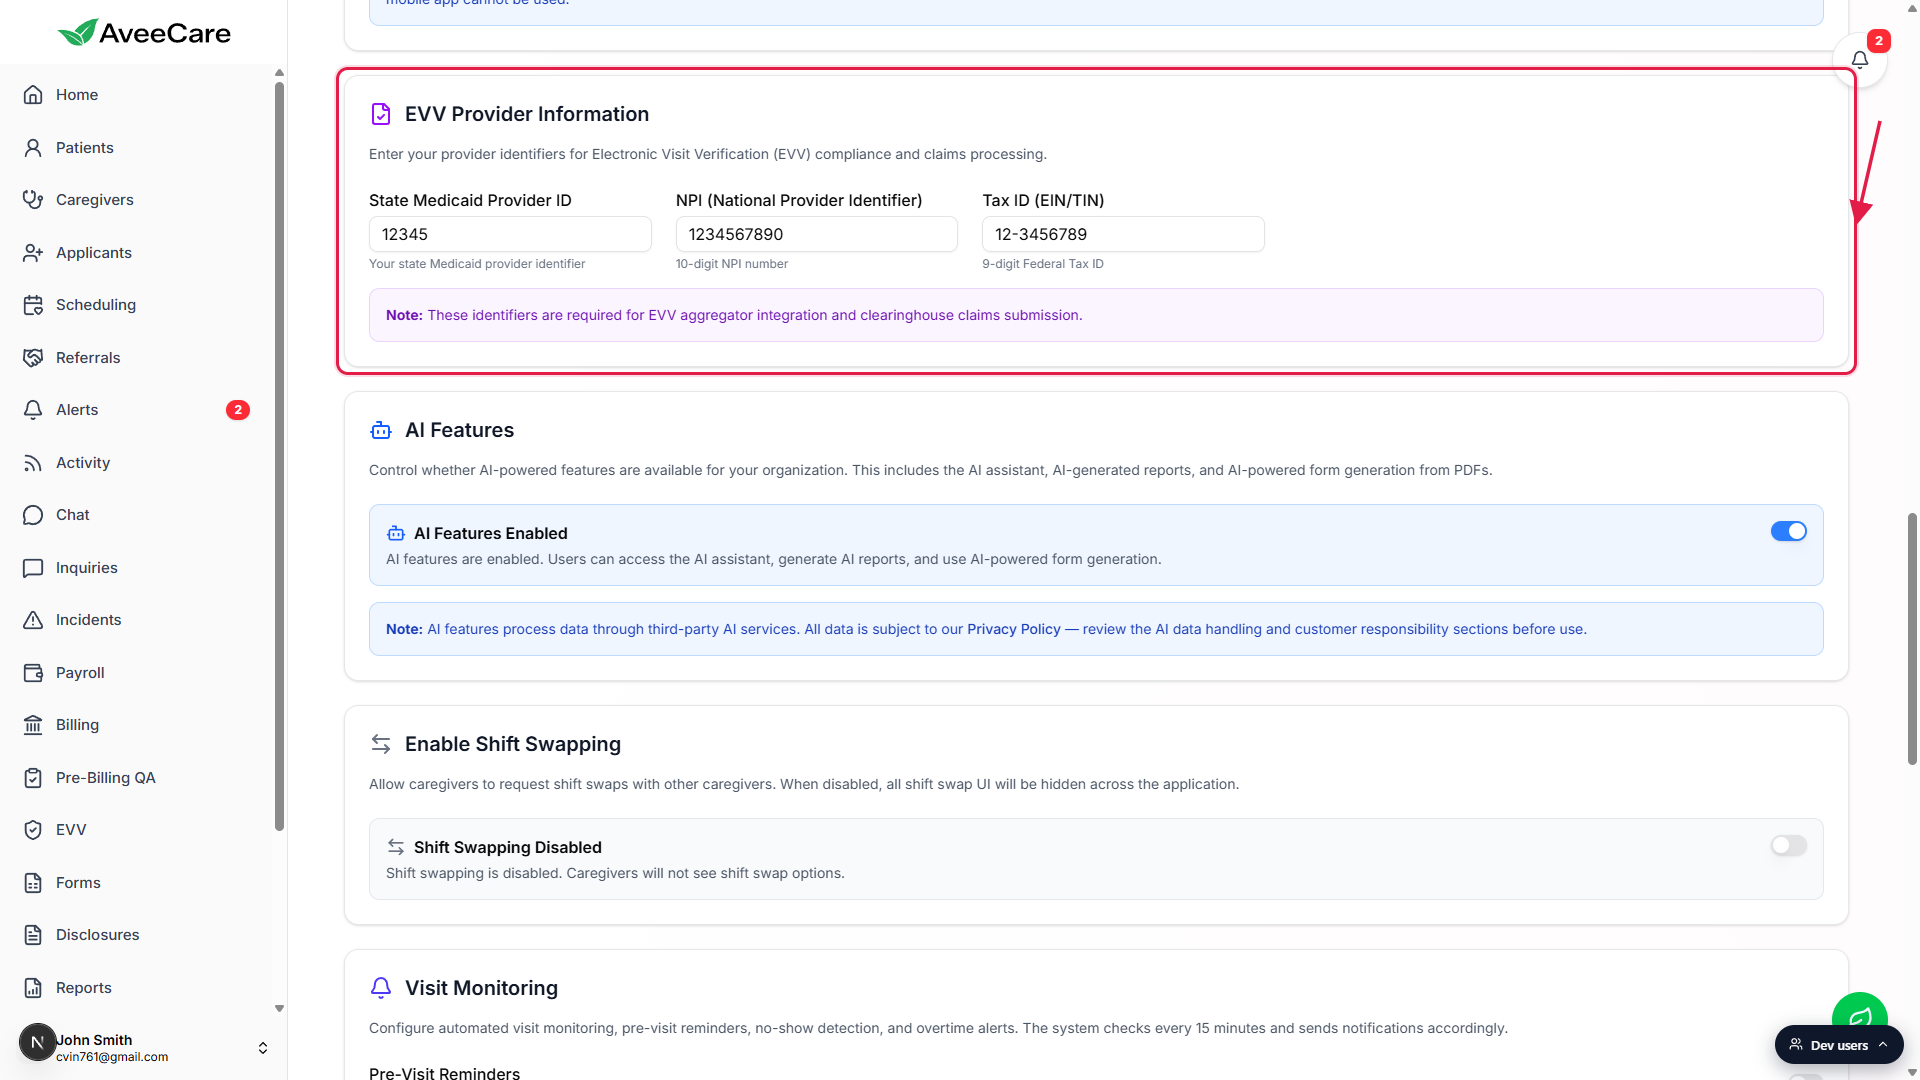
Double-check the values match what your state Medicaid office issued.
NPI is from CMS, not your state Medicaid office. Tax ID is your IRS-issued EIN or TIN, not your business license number. State Medicaid Provider ID is the agency-level number your state Medicaid office assigned at enrollment. Aggregators reject submissions when any of the three is wrong.
4. Save Business Settings at the bottom of the tab
Scroll to the bottom and click Save Business Settings.
There is one Save button at the bottom right of the tab. It commits every change on the tab in one transaction. There is no per-section save, so do all your edits, then save once.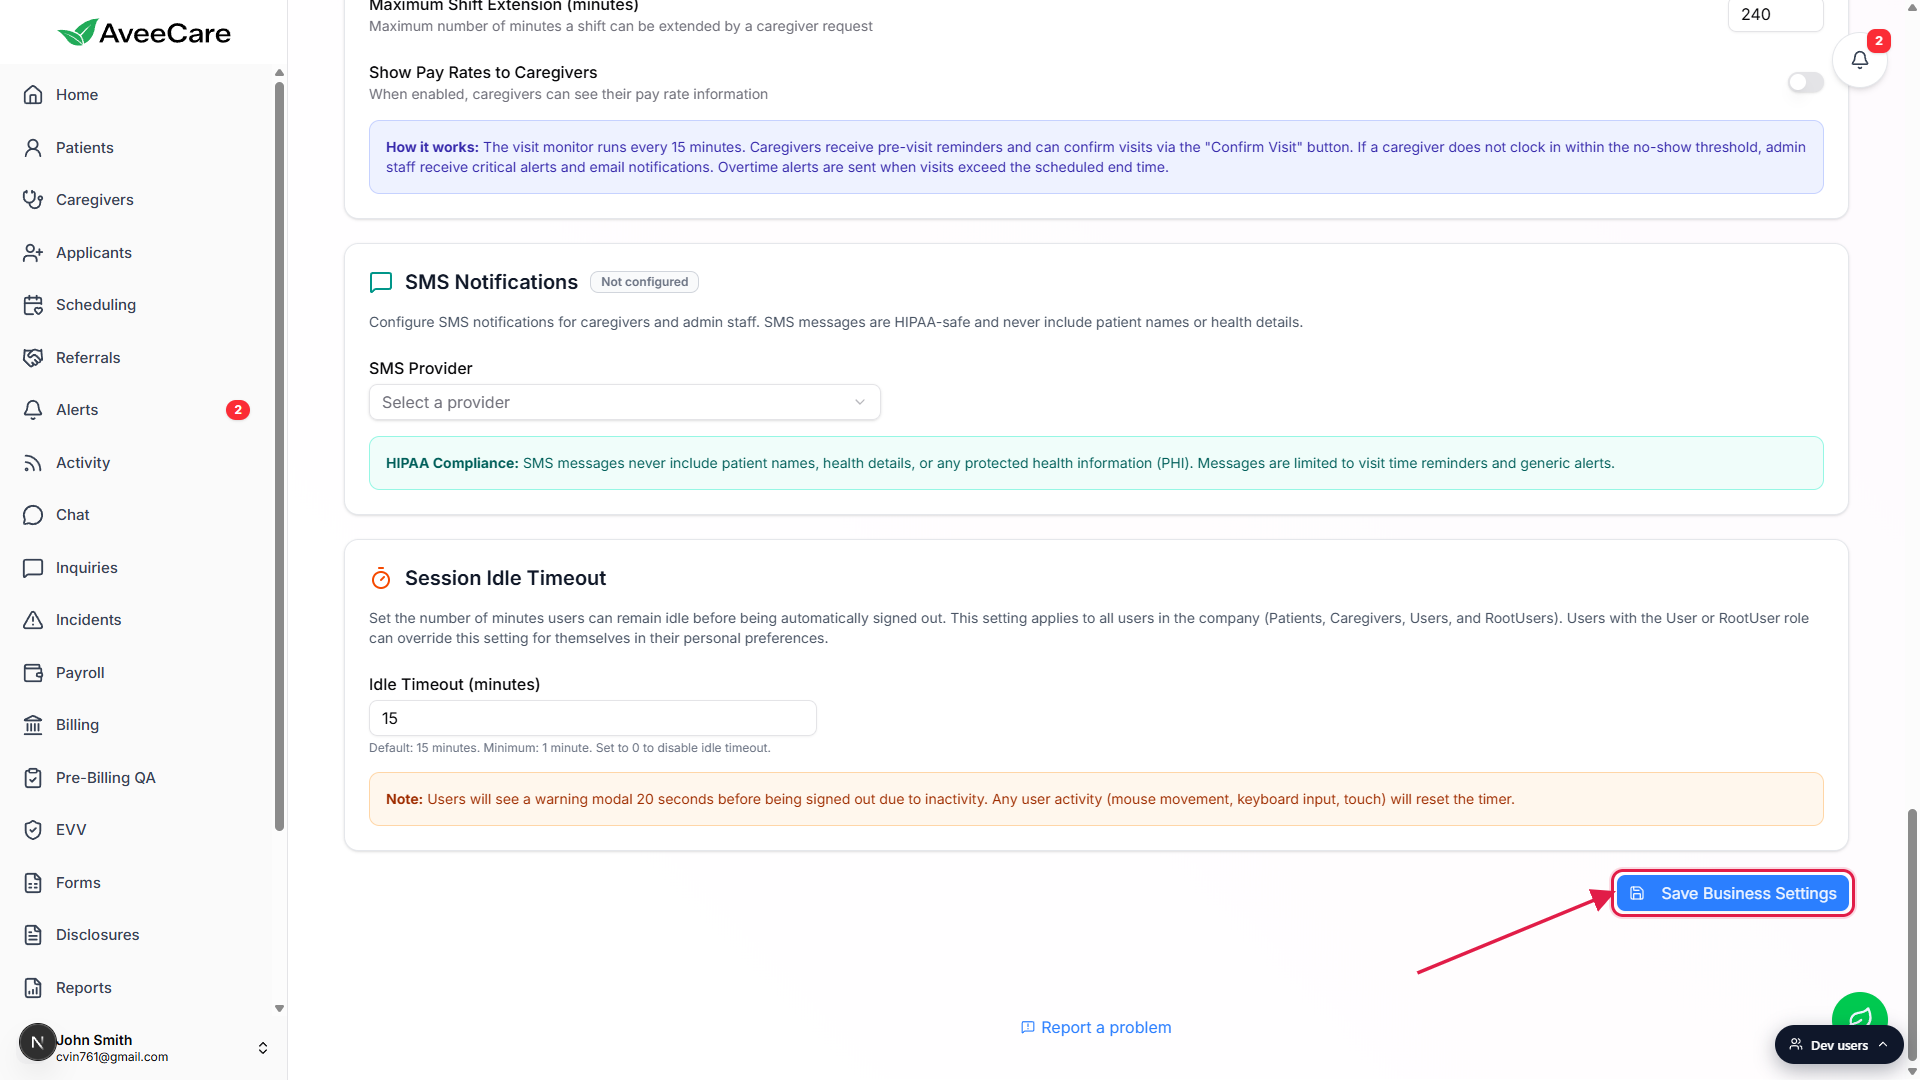
Confirm the save took.
Changes persist immediately. If you toggled EVV on or off, the EVV sidebar item appears or disappears on the next page load. If you changed Timezone, scheduled visits keep their original local time, only new visits use the new default.
Common pitfalls
- Mixing up NPI and State Medicaid Provider ID. NPI is your 10-digit federal identifier from CMS. State Medicaid Provider ID is a separate agency-level number your state Medicaid office issued at enrollment. Putting one in the other field causes aggregator rejections on the very first export.
- Forgetting to click Save Business Settings. The tab has dozens of fields and one Save button at the bottom right. Edit a phone number, navigate to another tab, and the change is gone. Save before leaving the tab.
- Setting Hours of Operation too tight. Schedules outside the window get blocked. If your earliest morning visit is 7 AM, Start Time needs to be 7 AM or earlier, not 8 AM. Same for late evening shifts and End Time.
- Wrong Timezone after a move. Visit monitoring alerts, no-show detection, and pre-visit reminders all key off the company Timezone. If you switched offices to a new timezone, update Timezone first or your alerts fire at the wrong hour.
- Turning EVV off temporarily and forgetting. When the EVV Requirements toggle is off the EVV page disappears from the sidebar entirely and exports cannot run. If your team reports missing verification prompts at clock-out, this is the first toggle to check.