EVV in AveeCare is configured per company on the Business Settings tab, not as a separate per-state record set. You pick one default state from a 51-option list (50 states plus District of Columbia), the aggregator and export format auto-fill from that state, and a Compliance Checklist spells out every other field that state requires before exports work.
Quick answer
Open Settings. The EVV stack lives on the Business Settings tab, scrolled down past Business Hours and Timezone. Toggle EVV Requirements Enabled, pick your state from the State dropdown, and the Aggregator and Export Format dropdowns auto-fill. Fill in your NPI, Tax ID, and State Medicaid Provider ID further down the page, then click Save Business Settings.
Where it lives
AveeCare ships one EVV configuration per company, not one row per state. The State dropdown on Business Settings sets the default state the EVV exporter uses for that company. If your agency operates in multiple states with multiple Medicaid contracts, change the State dropdown before exporting that batch (the EVV page also has its own State filter that overrides per-export). Six sections make up the full EVV stack:
- Electronic Visit Verification (EVV). Master on/off toggle (EVV Requirements Enabled / Disabled).
- EVV State Configuration. State, Aggregator, Export Format dropdowns plus the Compliance Checklist.
- Telephony EVV Backup. Phone-based clock-in fallback when GPS or the mobile app is unavailable.
- EVV Provider Information. State Medicaid Provider ID, NPI, Tax ID for aggregator submission.
1. Open Settings and turn EVV on
Click Settings in the sidebar, then make sure Business Settings is the active tab.
Settings opens on the Business Settings tab by default. The EVV stack lives roughly halfway down, between Timezone and AI Features.Flip the EVV Requirements toggle on if it is currently disabled.
The toggle reads EVV Requirements Disabled when off and flips to EVV Requirements Enabled when on. While disabled the EVV page is hidden from the sidebar entirely. Once on, every section below (State Configuration, Telephony Backup, Provider Information) renders.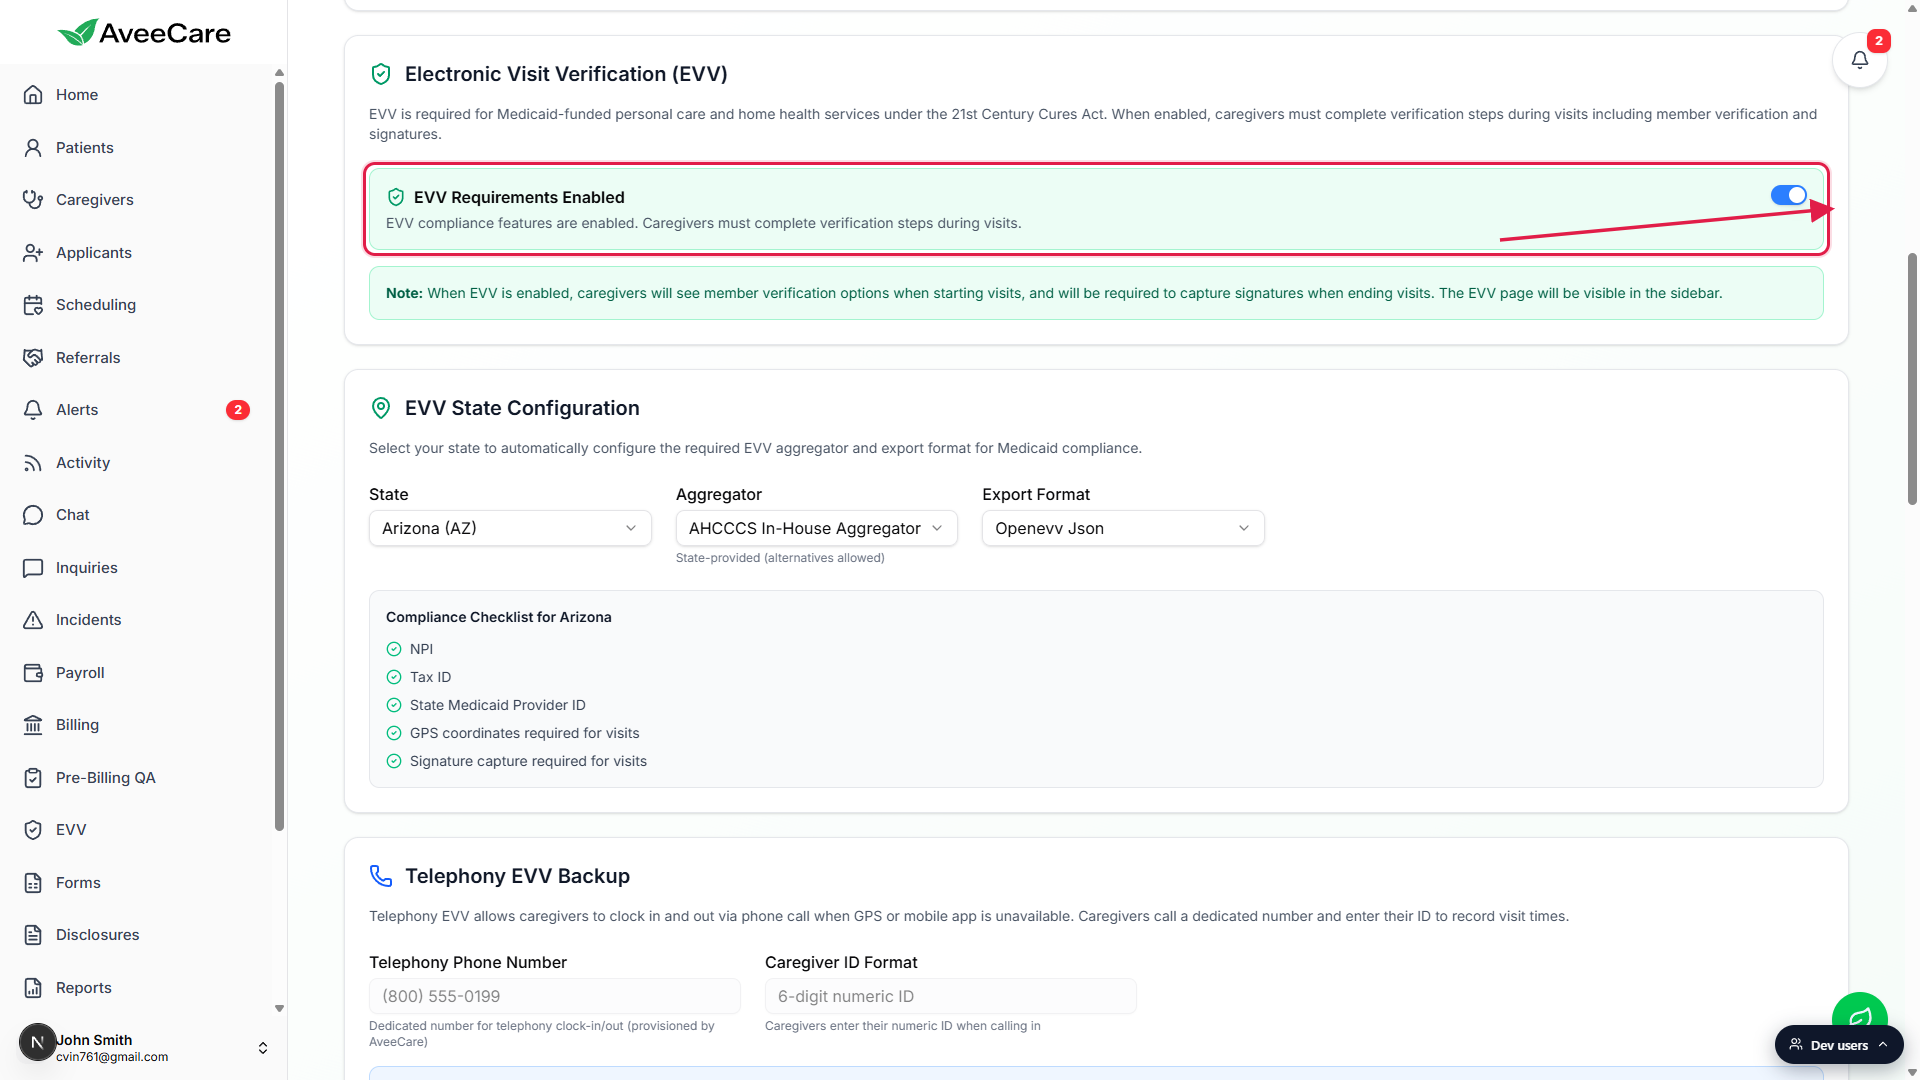
2. Pick your state and let aggregator and format auto-fill
Open the State dropdown in the EVV State Configuration card.
The list has 51 entries (all 50 states plus District of Columbia), alphabetical, each shown as State Name (XX). A check mark appears next to your current pick. Scroll or start typing to jump.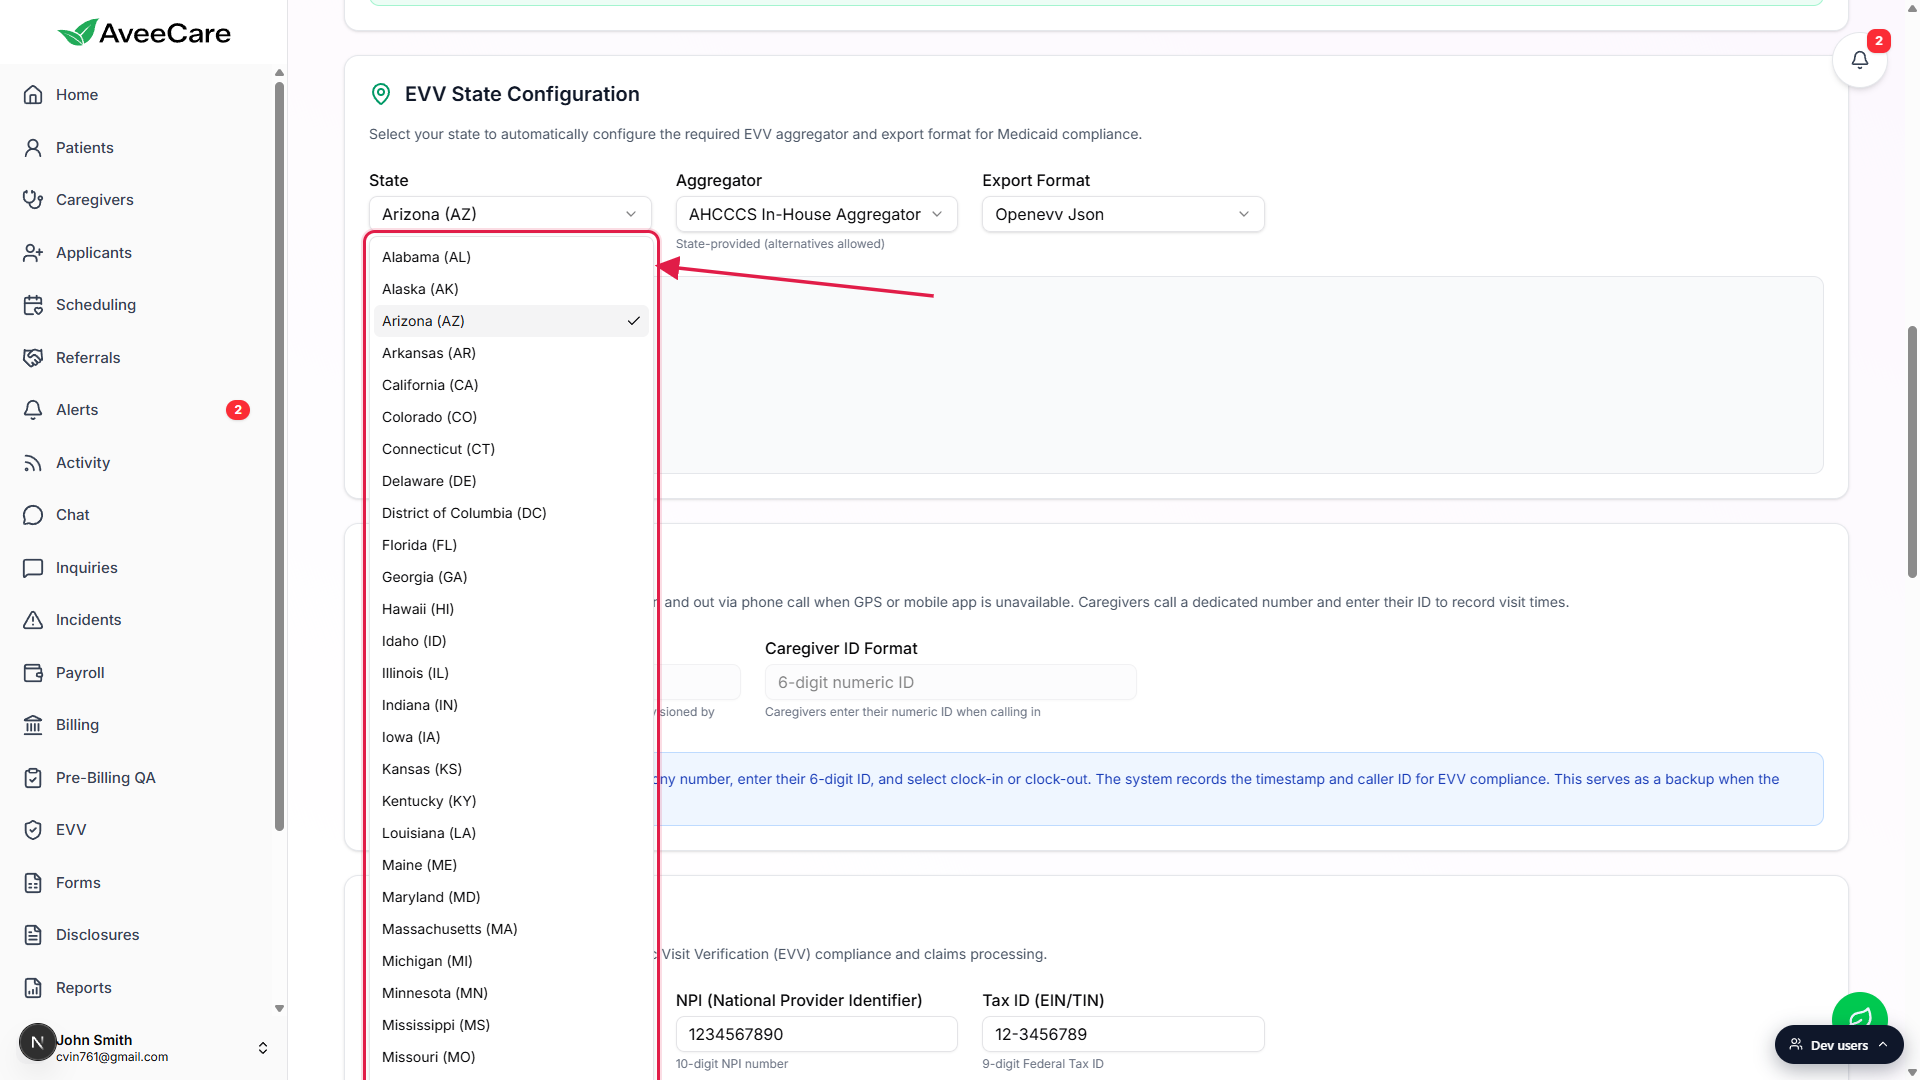
Pick a state. Aggregator and Export Format auto-fill from that state.
Each state ships with a default aggregator (HHAeXchange, Sandata, Tellus, AuthentiCare, CareBridge, AHCCCS In-House, Therap, Netsmart, or the state-run option). A small note under the Aggregator dropdown reads State-mandated (no alternatives) for closed-model states like Texas, State-provided (alternatives allowed) for open-model states like Arizona, Provider selects vendor for provider-choice states, or MCO-directed vendor selection for managed care states.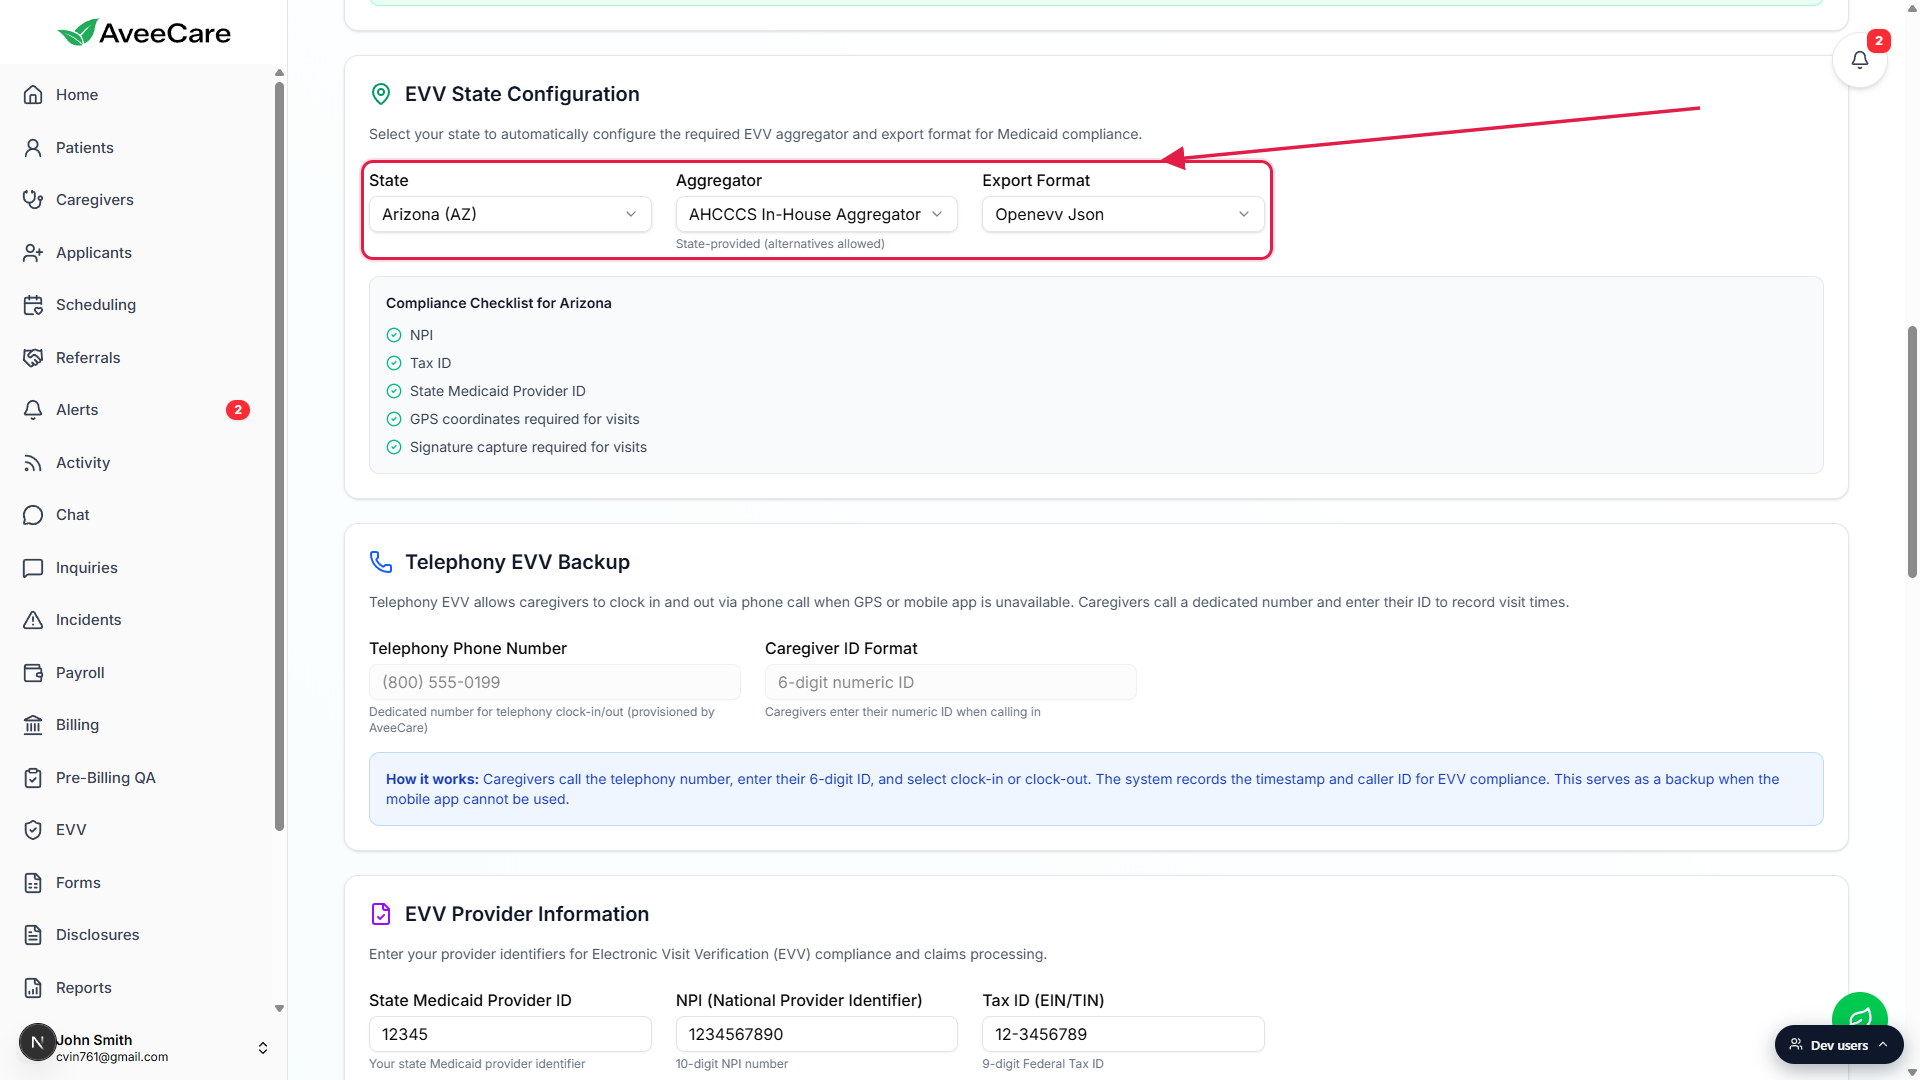
If your contract uses an alternate format, override the Export Format dropdown.
The Export Format dropdown lists every format the chosen aggregator supports. For most states that is one or two choices; pick whichever matches your aggregator paperwork.
3. Walk the Compliance Checklist for that state
A Compliance Checklist for <state> panel renders below the dropdowns.
The checklist is computed from the state config. It always lists NPI, Tax ID, and State Medicaid Provider ID, then adds state-specific rows like GPS coordinates required for visits, Signature capture required for visits, Caregiver SSN required by state, Service authorization number required by state, Reason codes required by state, and Telephony backup required by state depending on what that state mandates.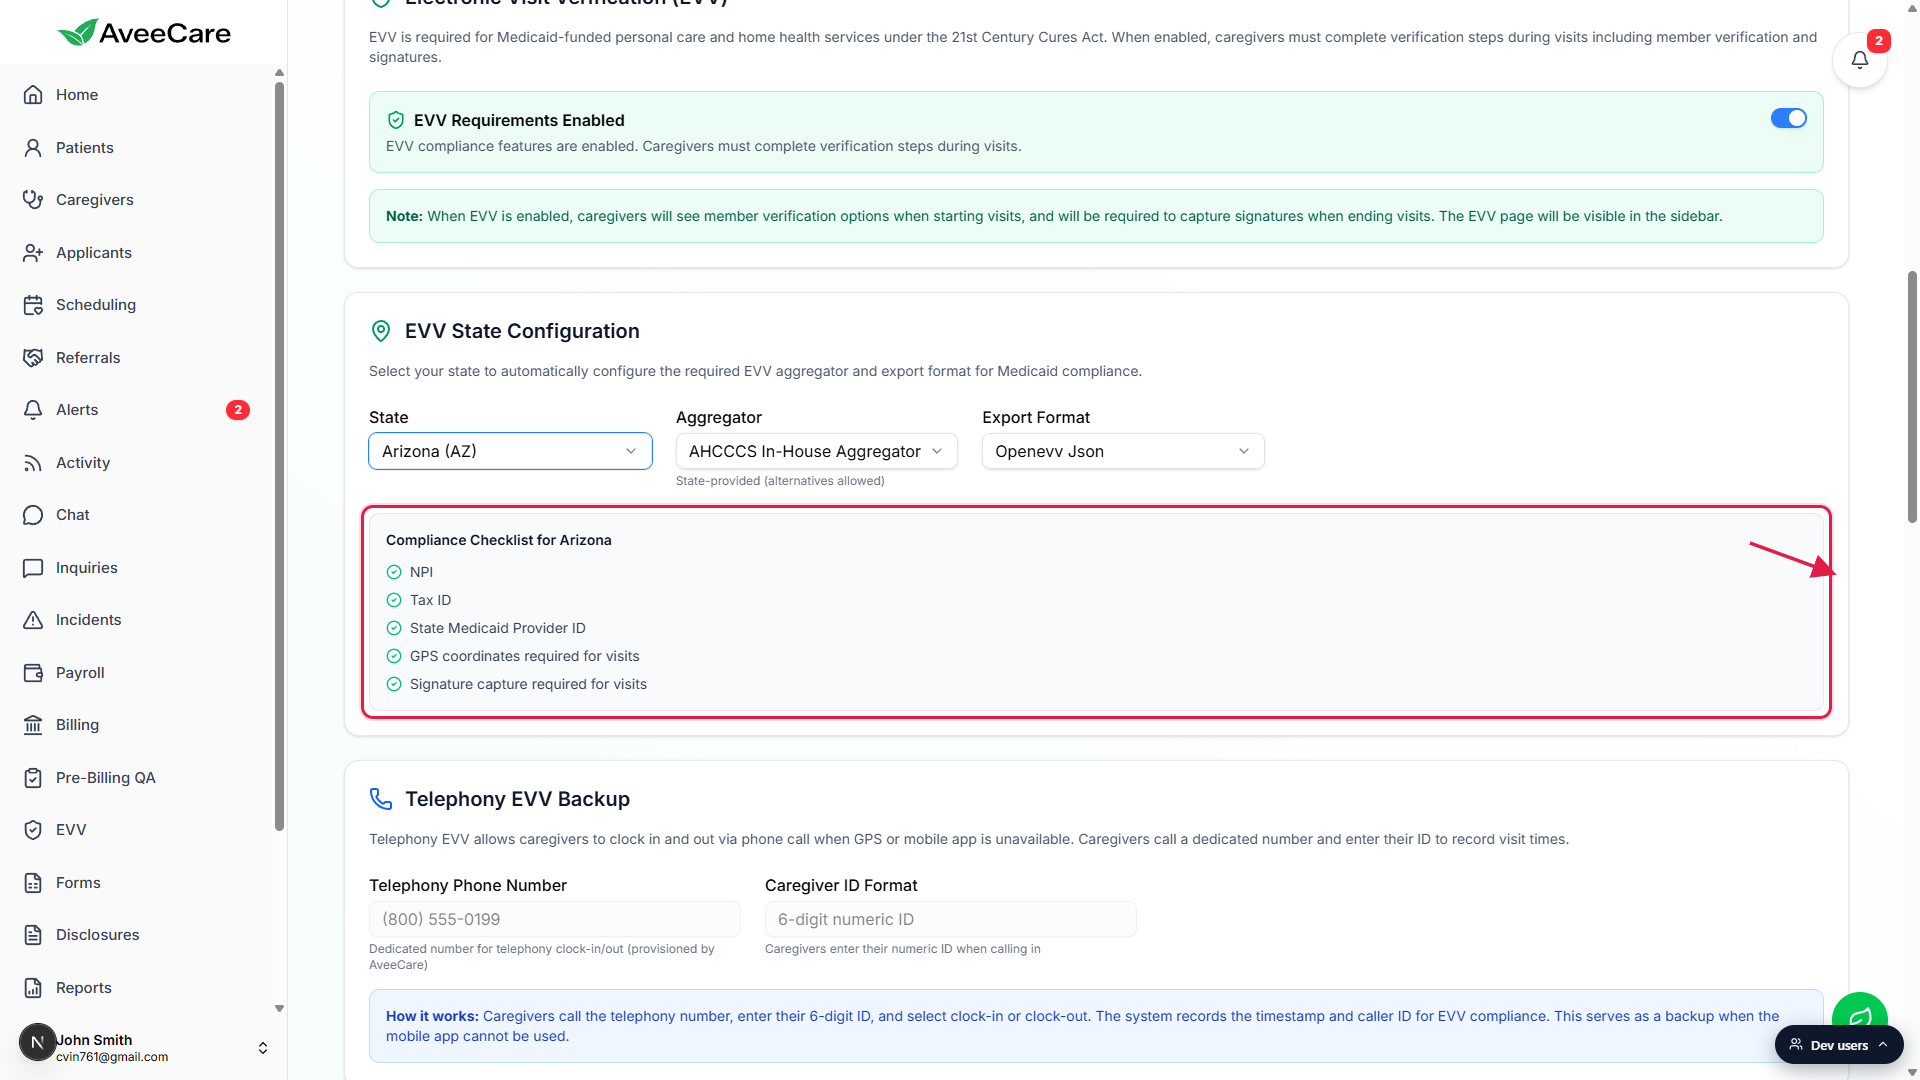
Each row shows a green check (configured) or amber warning (missing).
Missing rows have a Fix Now link that scrolls you straight to the matching field on the same Settings page. For NPI, Tax ID, and State Medicaid Provider ID that means EVV Provider Information. For visit-level requirements it is informational (the field is set per-visit, not per-company).
4. Fill in NPI, Tax ID, and State Medicaid Provider ID
Scroll down to the EVV Provider Information section.
Three text fields sit in a row: State Medicaid Provider ID (your state Medicaid identifier, max 20 characters), NPI (your 10-digit National Provider Identifier), and Tax ID (your 9-digit Federal Tax ID, EIN or TIN). All three are required for aggregator submission.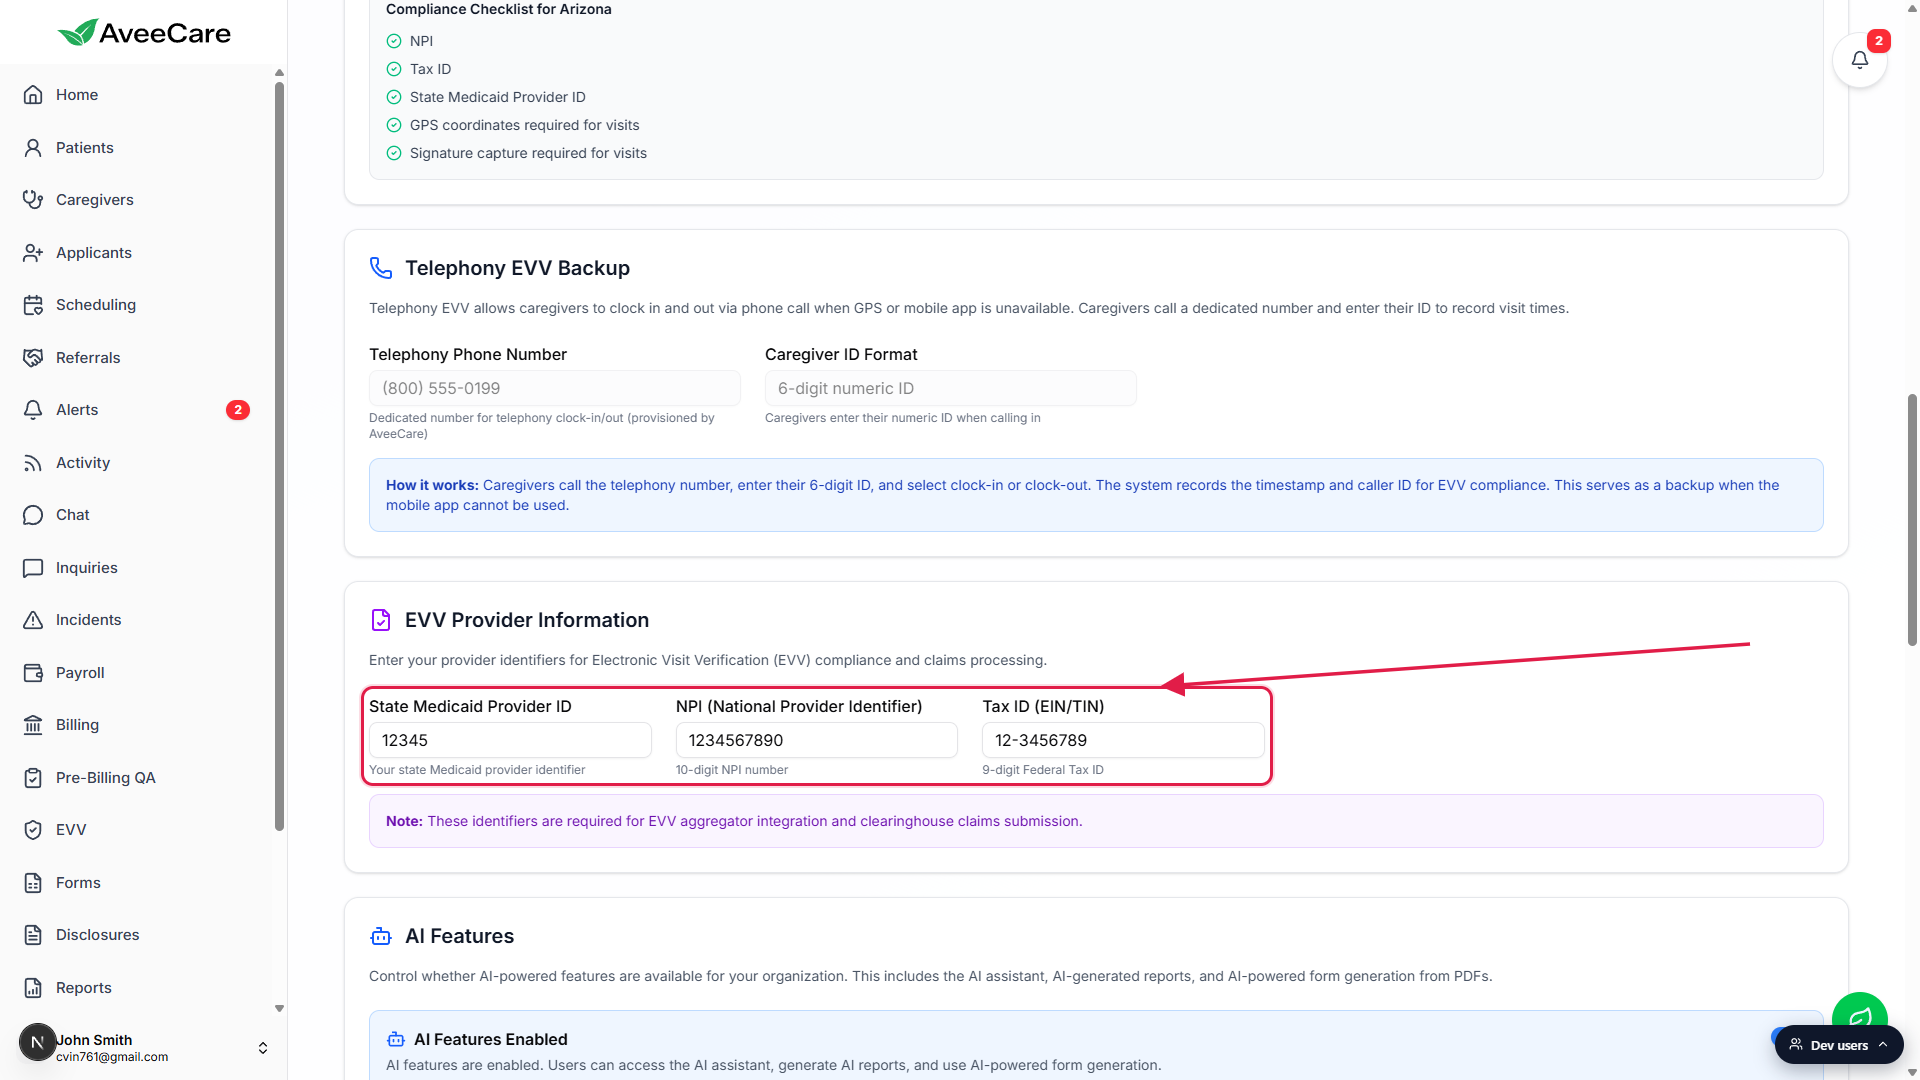
Save Business Settings at the bottom of the page.
The single Save Business Settings button at the bottom of the tab persists every change on the tab including EVV. There is no per-section save. After save, the Compliance Checklist refreshes and any rows you populated flip from amber to green.Test before you trust it.
Run a single completed visit through the EVV page (set the Status filter to Completed, check one row, click Export Selected) and confirm your aggregator accepts the file. Do this in your aggregator's test or sandbox environment if they offer one. Coordinate with your state Medicaid contact before the first production submission.
Common pitfalls
- Looking for a per-state row list. AveeCare does not ship a per-state grid. It ships ONE default state on Business Settings, plus a State filter on the EVV page itself for switching between contracts at export time. If your agency operates in five states, you change the State filter on the EVV page before each aggregator submission.
- Saving the wrong identifiers. NPI is your 10-digit National Provider Identifier from CMS, not your state Medicaid number. Tax ID is your 9-digit EIN/TIN, not your business license number. State Medicaid Provider ID is the agency-level number your state Medicaid office issued at enrollment. The aggregator rejects submissions when any of the three is wrong.
- Toggling EVV off temporarily and forgetting. When EVV is disabled the EVV page disappears from the sidebar entirely, GPS still records but caregivers stop seeing the verification prompts at clock-out, and exports cannot run. If your team reports missing verification steps, this is the first toggle to check.
- Switching states without resetting Export Format. Picking a new state auto-fills Aggregator and Export Format to that state's defaults. If you previously hand-picked a non-default format on the old state, the new state overwrites it with its own default. Re-confirm Export Format every time State changes.
- Ignoring amber rows on the Compliance Checklist. The amber rows are the fields the aggregator will bounce on. Click Fix Now to jump to each missing field. A green checklist is the minimum bar for the aggregator to accept your first submission.