1. Add your first client
Two ways to do this. Type their info in directly, or send the intake form by email and let the client fill it out. The email path is faster.
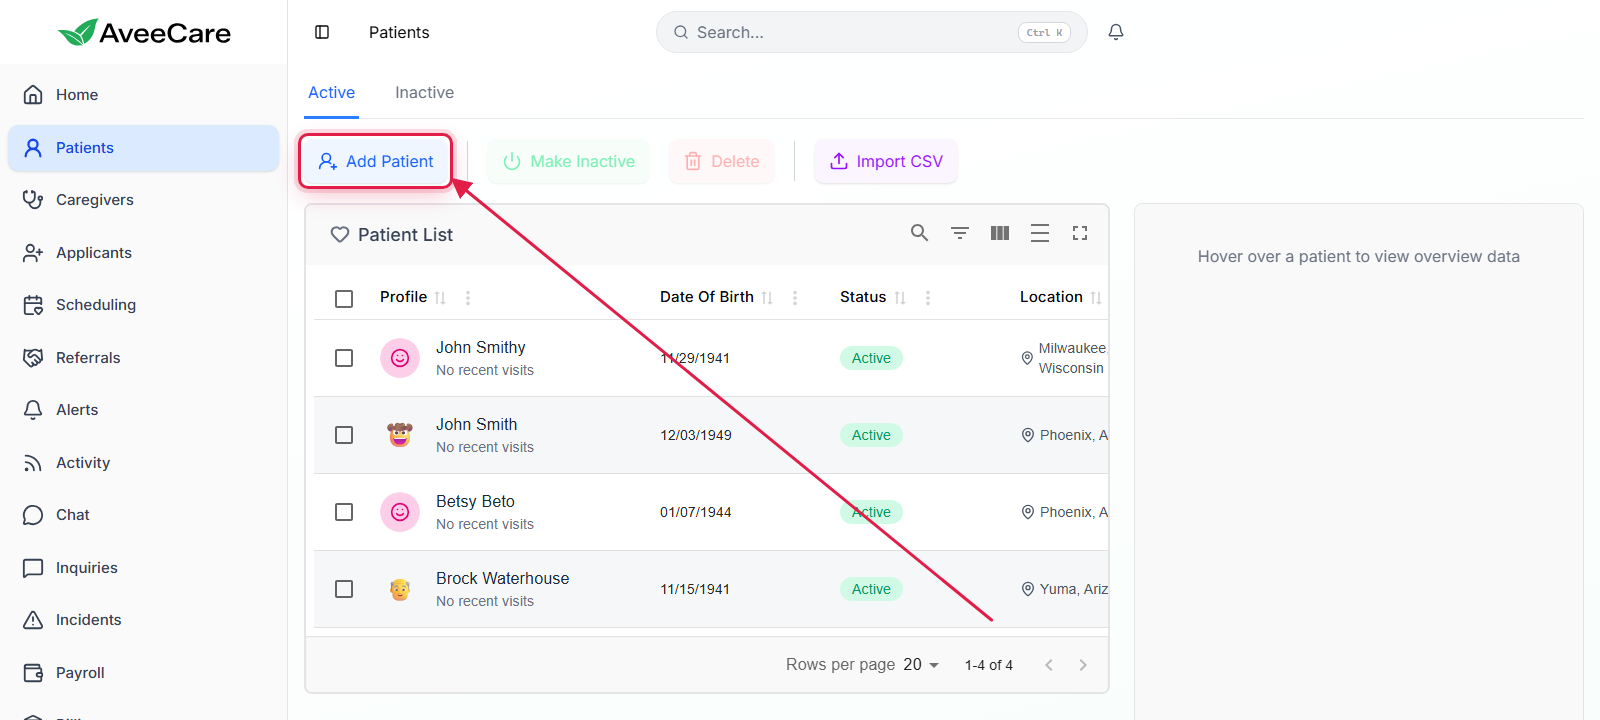
On the Patients page, click Add Patient (top-left of the table).
Pick how to onboard: Remote (email a link) or Manual (type it in).
Manual is the path covered here. Remote is the same flow but the client fills out the form themselves. See Send an intake form by email →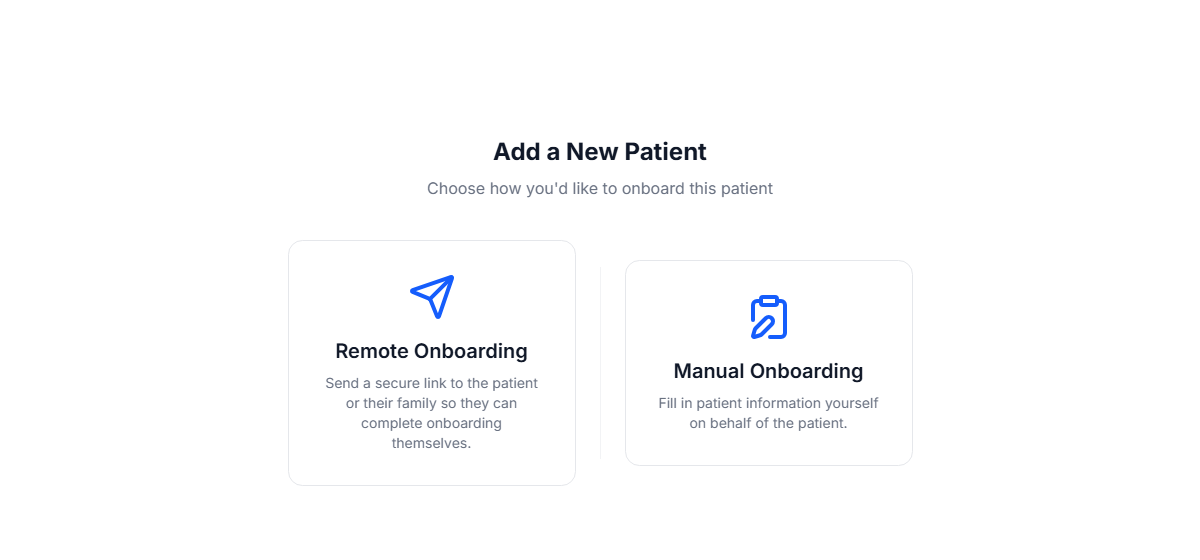
Walk the wizard: General Info, Contact Info, Medical Info, Care Goals, then Review.
Skip optional fields for now. You can edit any of them later from the patient detail page.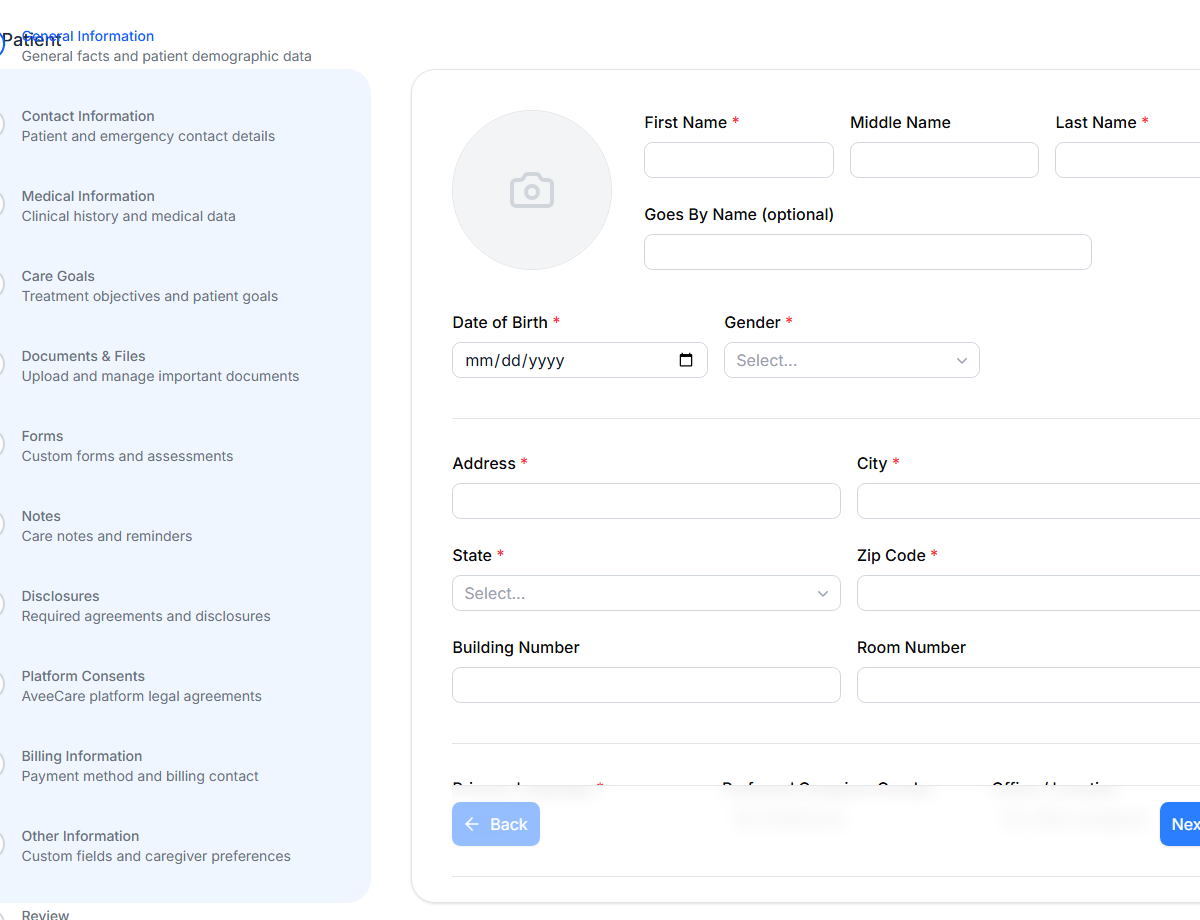
Click through to Review and Save. You land on the patient overview tab.
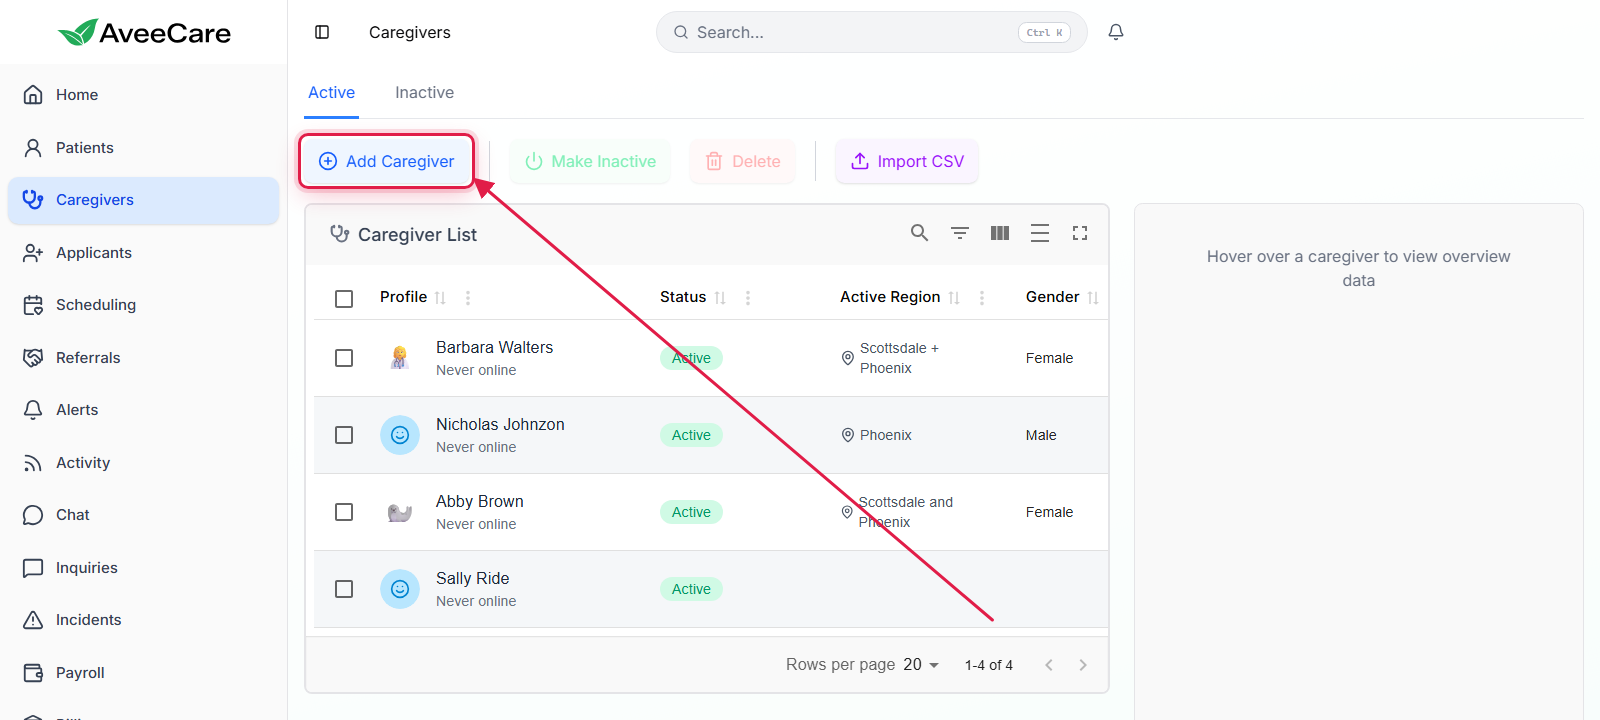
2. Add your first caregiver
On the Caregivers page, click Add Caregiver.
Fill in name, date of birth, address, and primary language.
Pay rate and certifications come up later in the same wizard. The fields you fill here drive notifications, payroll, and EVV downstream.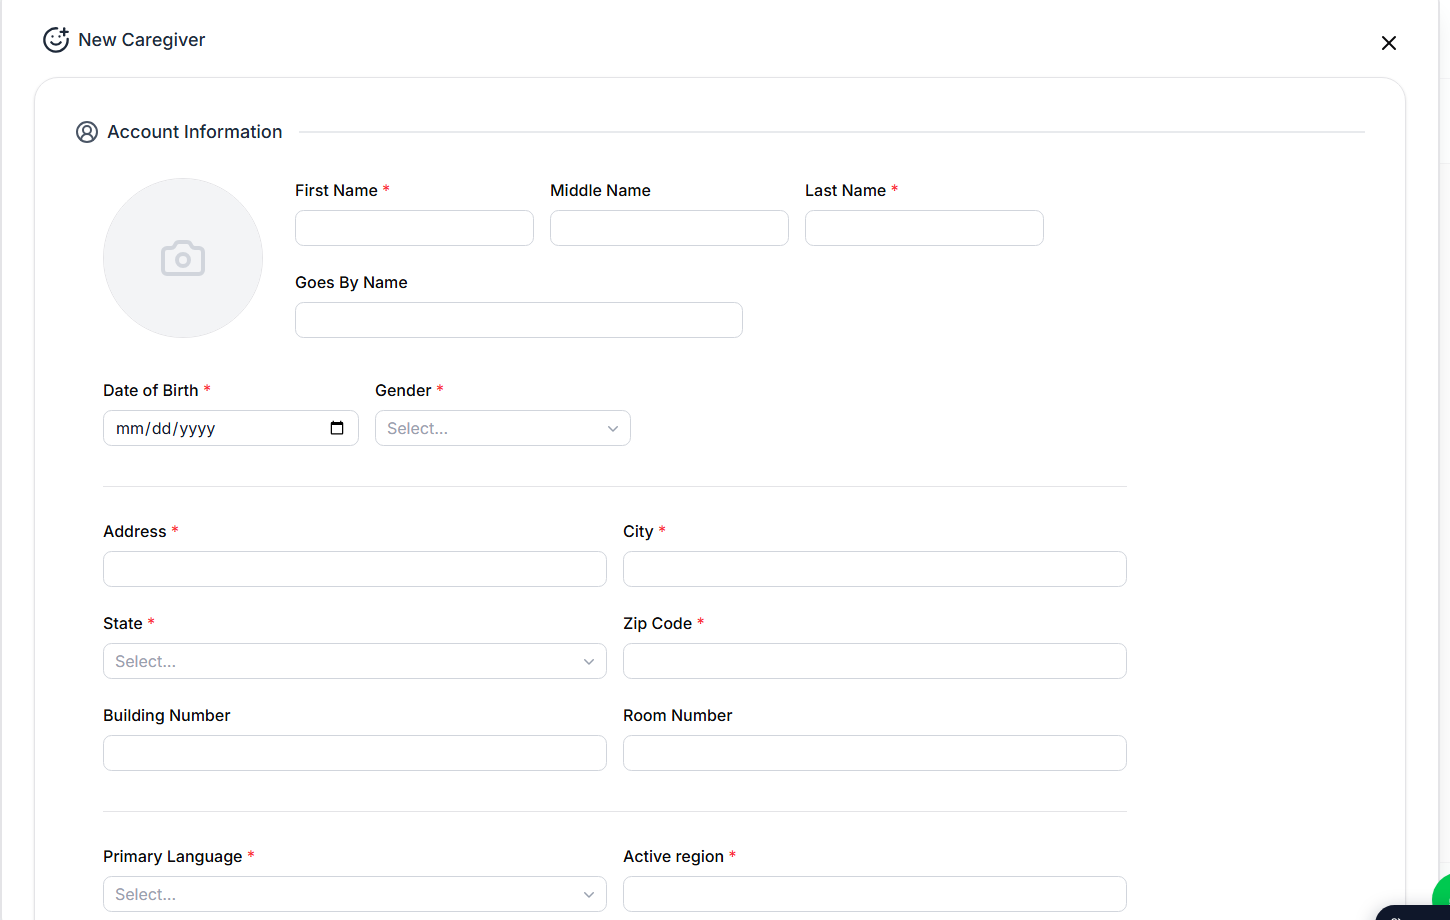
Add at least one active certification before you save.
The expiration date drives the Credential Expirations alert on your dashboard. Skip this and you lose the warning.Set the default pay rate. Save.
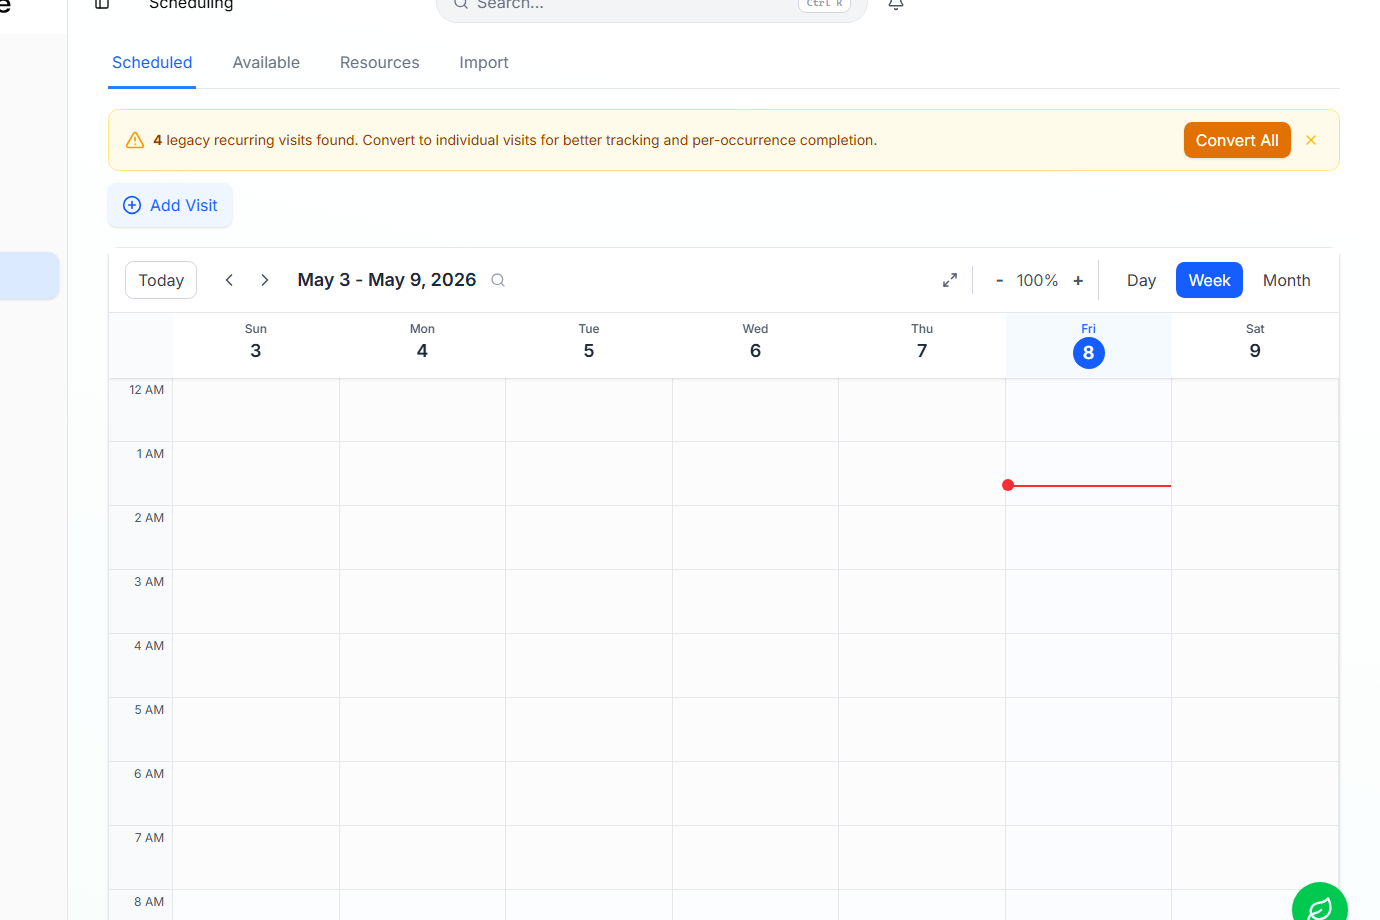
3. Put a visit on the calendar
On the Scheduling page, click Add Visit (above the calendar).
Or drag-and-drop on the calendar grid for the same modal.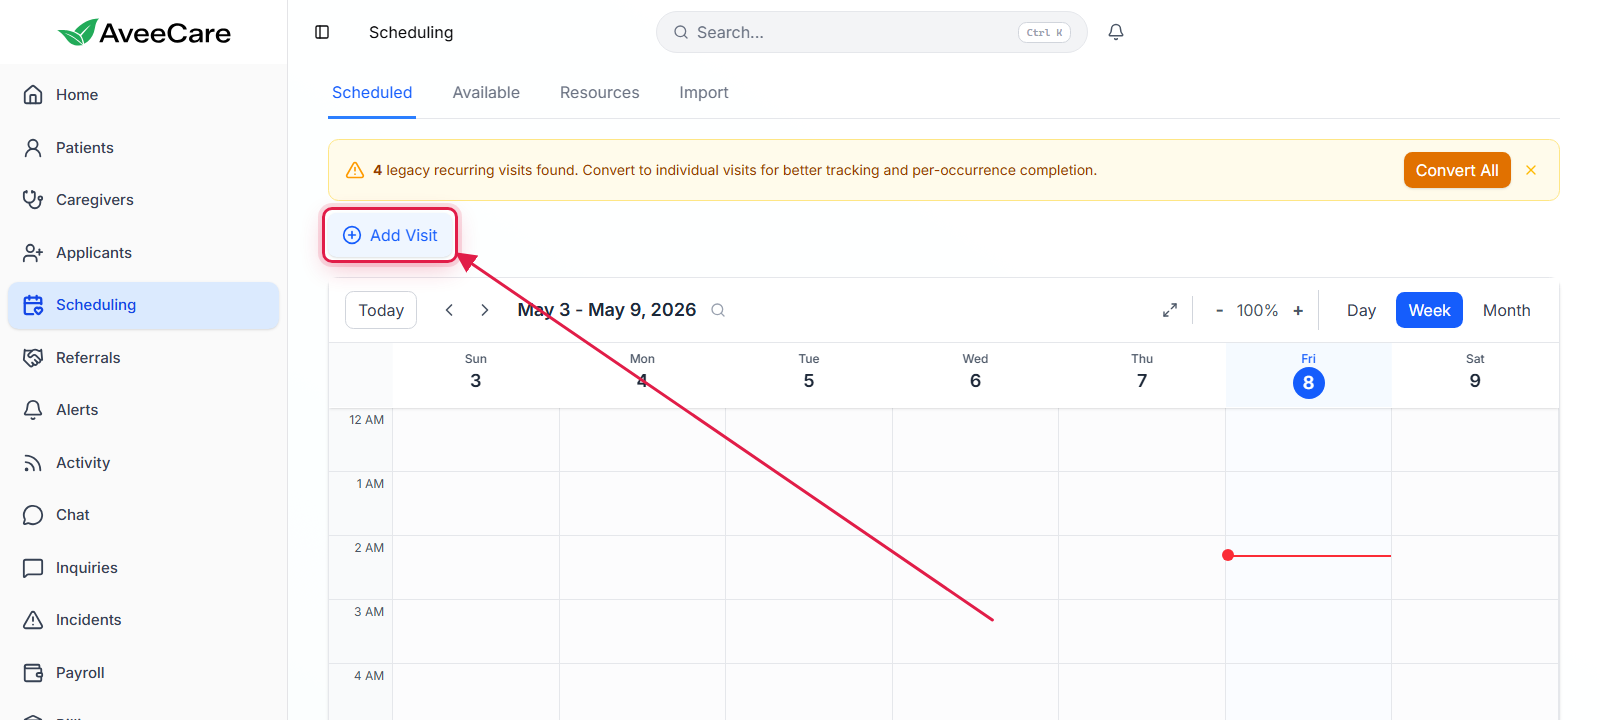
Walk the visit wizard: Patient, Caregiver, What, When, Where, Details, Review.
Each step is a single decision. You can hop back to a previous step at any time by clicking its chip at the top.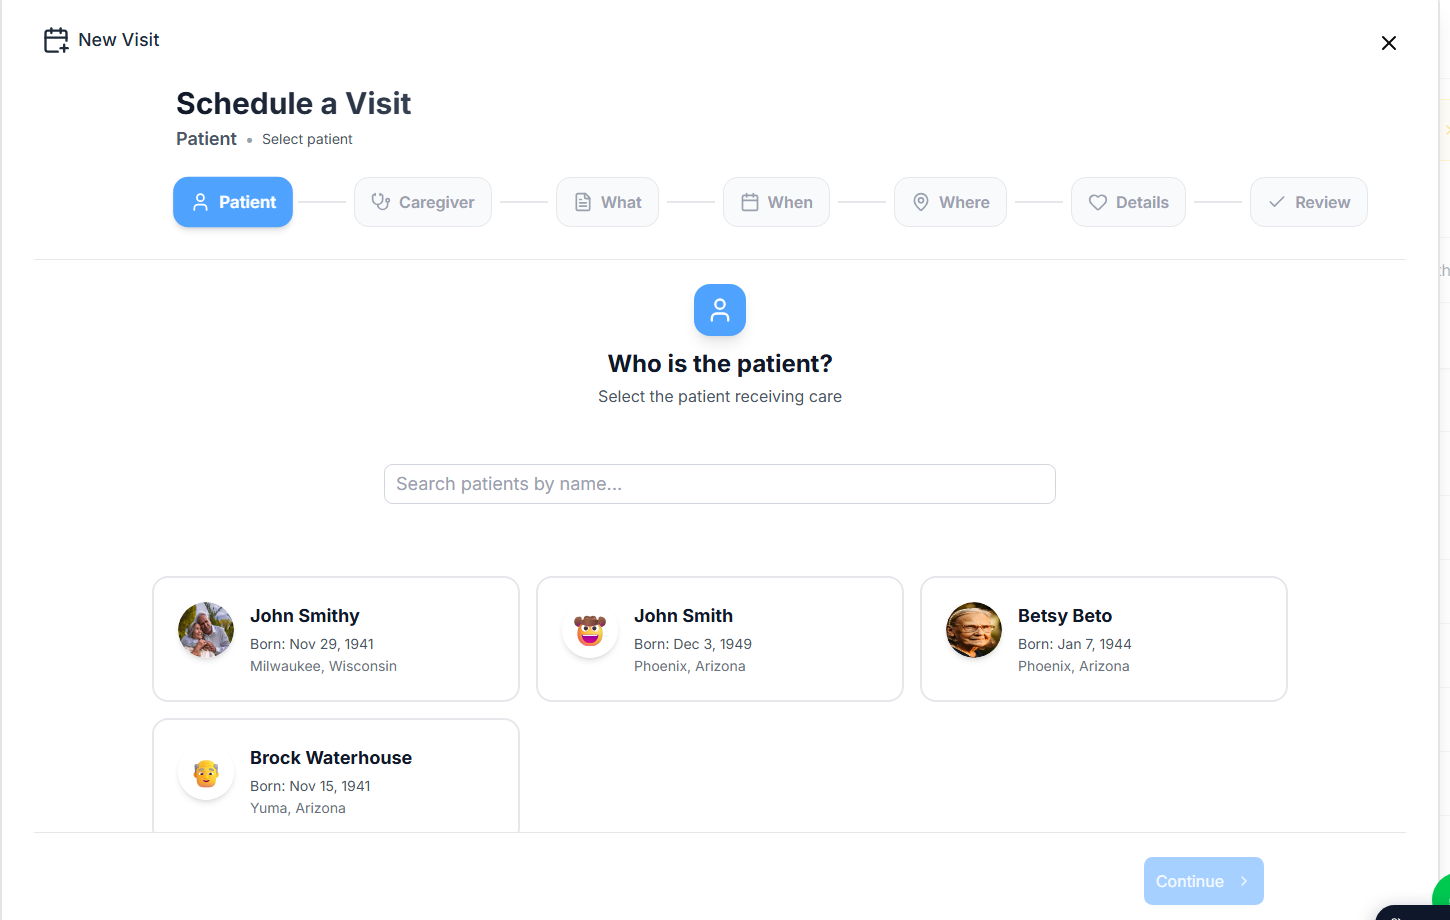
On the When step, toggle Repeat if this is a standing weekly visit.
Read the Recurring visits guide when you want a real series.Save. The visit lands on the calendar and the caregiver gets a notification on their phone.
4. Bill the visit
After the caregiver completes the visit, it shows up as Unbilled on the Billing page. Send the first invoice now or let auto-bill handle it.
Open Billing. Stat cards at the top tell you what is unbilled and estimated.
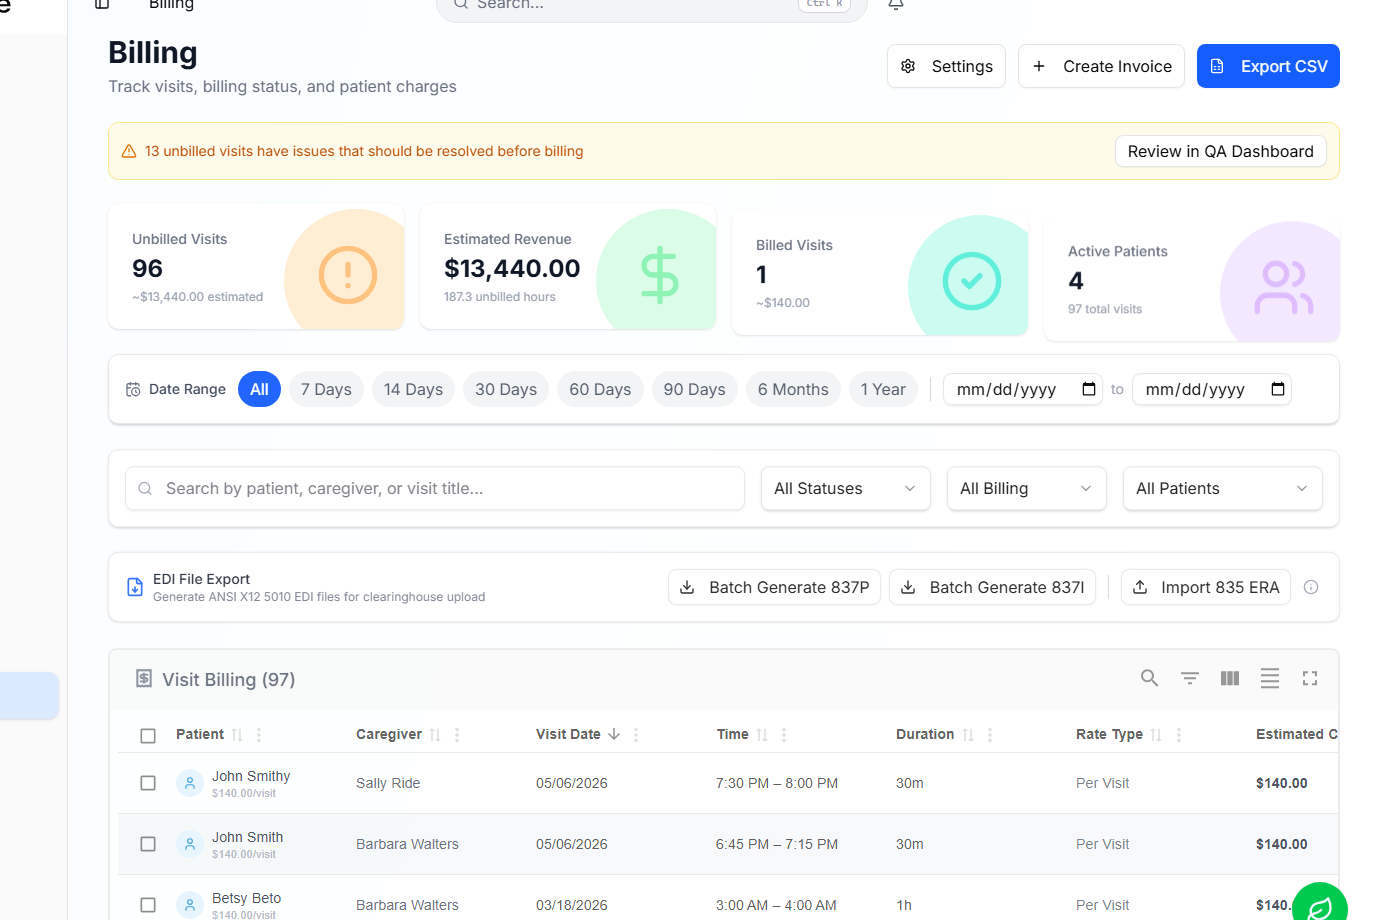
Click Create Invoice (top right).
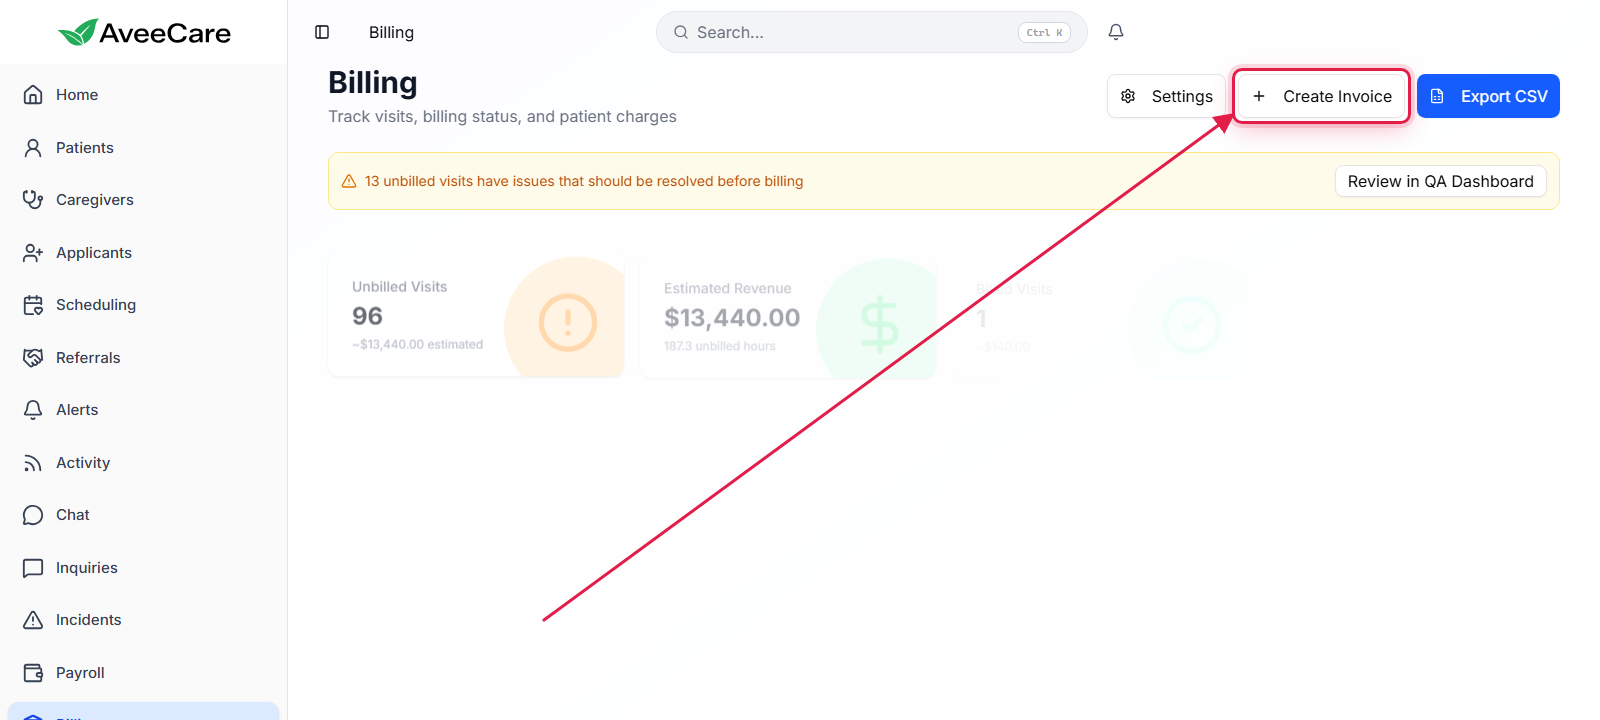
Pick the patient and the date range.
Visits in that window appear on the invoice automatically.Review, then click Send.
The patient gets a payment link by email. With auto-pay set up, the card is charged on send.
Before you go live
These can wait until after your first test visit, but you'll want them done before you bring on real clients.
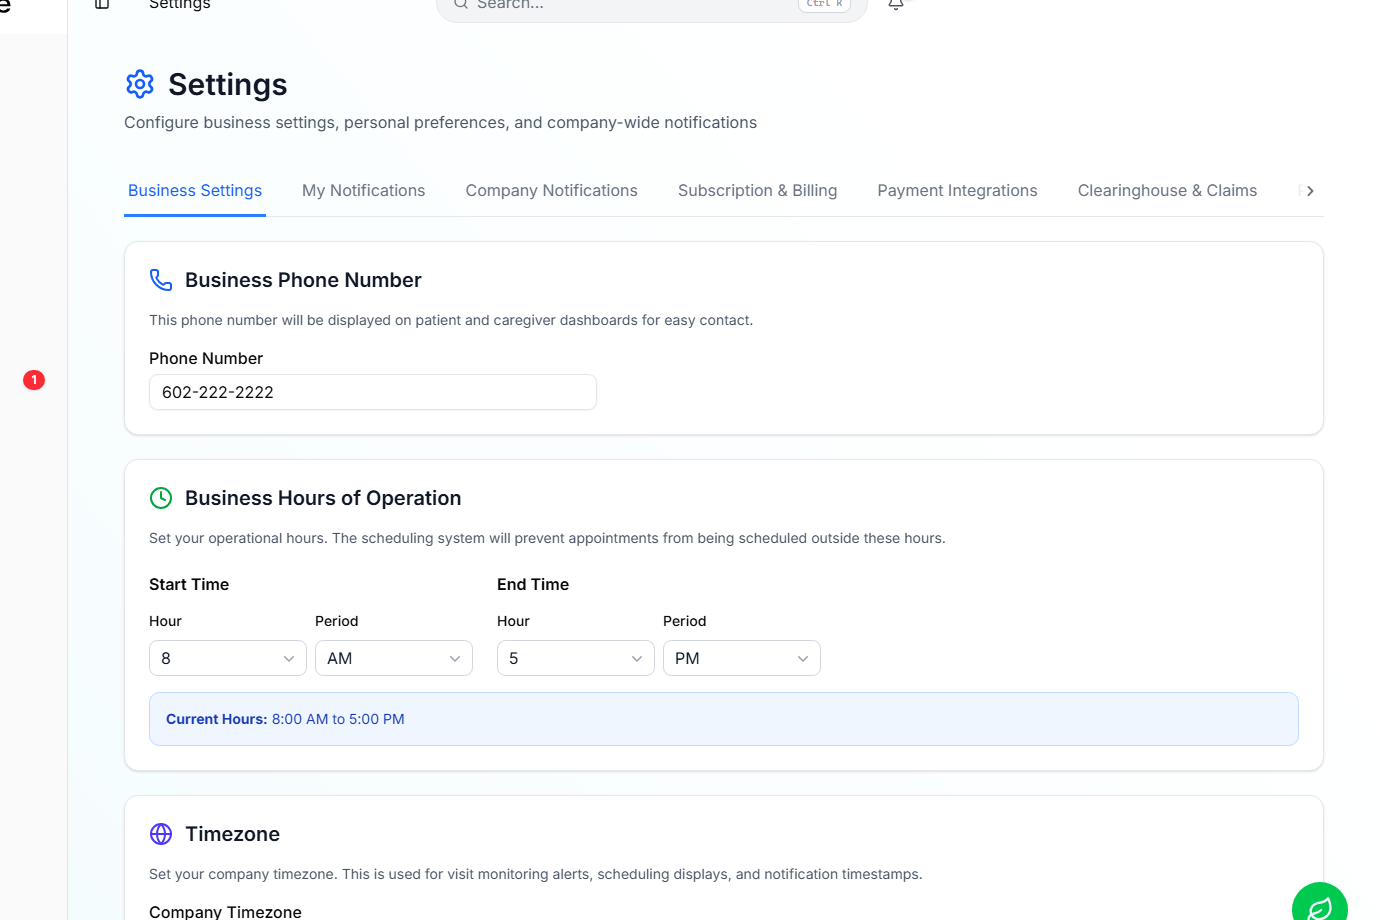
Confirm company info
Settings has Business Phone Number, Business Hours of Operation, Timezone, NPI, State Medicaid Provider ID, and Tax ID. The timezone here drives every visit, payroll, and EVV timestamp downstream, so get it right before you schedule anything serious.
Open Settings. Business Settings is the first tab and the one to start with.
Add a payment method
Your first month is free with no card on file. Add a card any time during the trial. Cards are processed by Stripe, never stored in AveeCare.
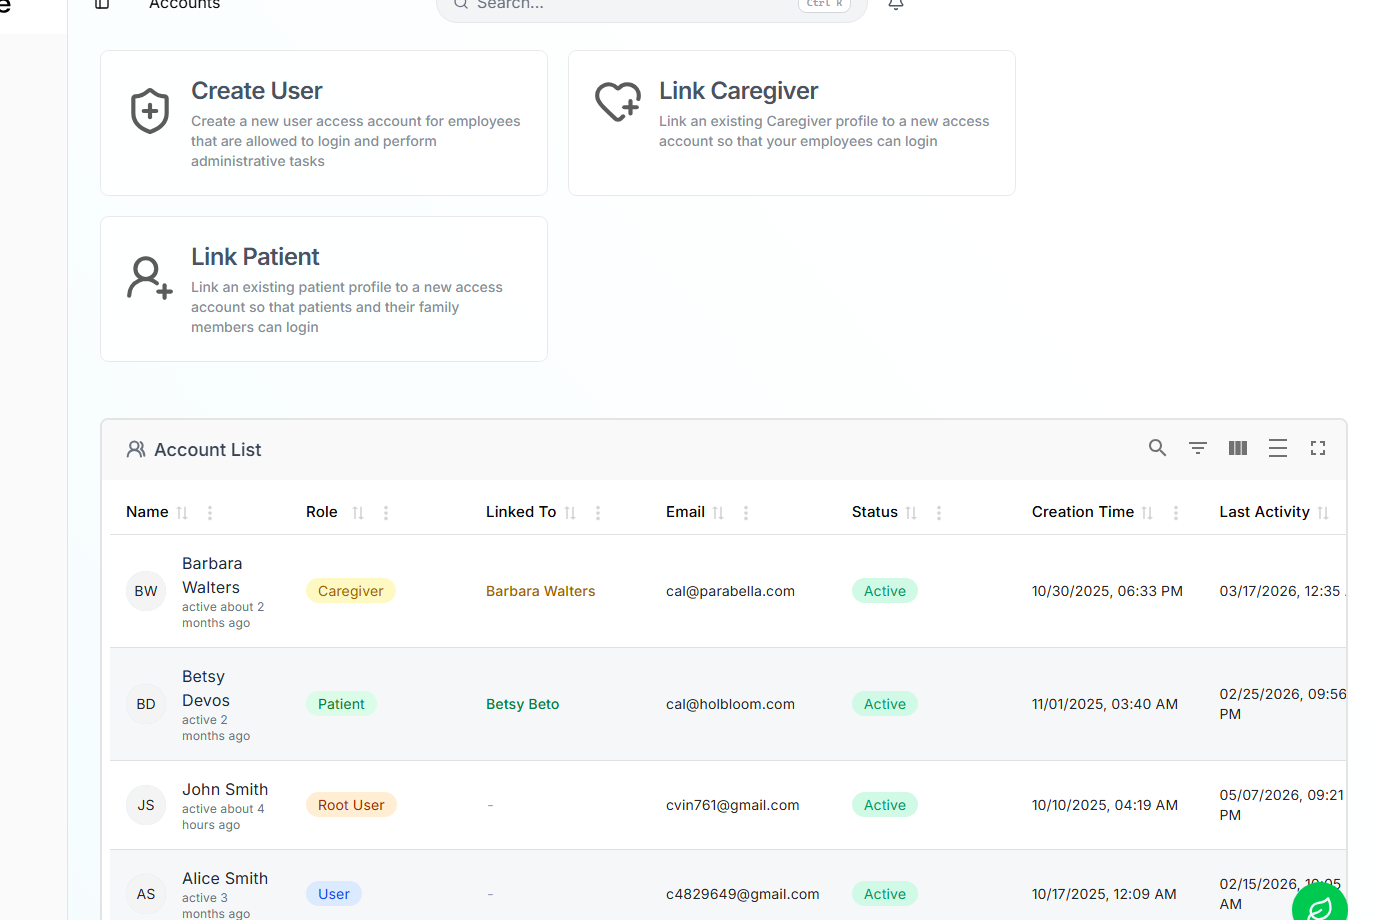
Invite your team
Roles you'll typically use:
- Root User: full access including settings and billing. Owners only.
- User: full access except destructive admin actions.
- Caregiver: sees only their assigned visits.
- Patient: sees only their own visits and invoices.
On Accounts, pick Create User, Link Caregiver, or Link Patient.
Create User makes a new admin/staff login. Link Caregiver turns an existing caregiver record into a login. Link Patient does the same for a patient (or their family).