New Caregiver is a single long form, not a multi-step pill wizard, that captures everything needed to schedule and pay a caregiver. You walk eleven sections from name and address through NPI, certifications, EVV compliance, and access account, then click Create Caregiver.
Quick answer
Open Caregivers, click Add Caregiver at the top-left of the action bar. The New Caregiver form opens in a full-screen modal. Fill the starred fields under Account Information and Contact Information, add at least one certification, set the Caregiver Status, and click Create Caregiver at the bottom. The new caregiver lands in the Active tab of the Caregivers table.
Wizard sections at a glance
New Caregiver scrolls top to bottom in one form. There are no step pills and no Next button between sections, so you can fill anything in any order before you Create.
- Account Information. Profile photo, first/middle/last name, Goes By Name, DOB, gender, address, primary language, Active region, office, SSN.
- Contact Information. Email and one or more phone numbers.
- Provider Credentials. NPI, taxonomy code, state license, license expiry, plus a Common Taxonomy Codes reference.
- Certifications. One or more certs with name, date obtained, and expiration date. CNA, CPR, First Aid, and so on.
- Specializations. Free-text specialty areas like Dementia Care or Wound Care, with descriptions.
- Forms. Optional intake or assessment forms built from the form preset library.
- Notes. Free-text notes about the caregiver.
- Disclosures. Required agreements such as the HIPAA Privacy Notice, only shown if disclosures are enabled in your tenant.
- Files. Optional uploads (ID scans, certification documents, photos), up to 50 MB each.
- EVV Compliance. Live-In Caregiver, On-Site (Facility), and Paper Timesheet Attestation flags.
- Other Information. Caregiver Status (Active, On Leave, Inactive) and the Create Caregiver Access Account toggle.
1. Open Caregivers and click Add Caregiver
Click Add Caregiver at the top-left of the action bar.
It is the first button in the action bar above the Caregiver List card. Beside it sit Make Inactive, Delete, and Import CSV. Add Caregiver is always live; the middle two grey out until you tick a row.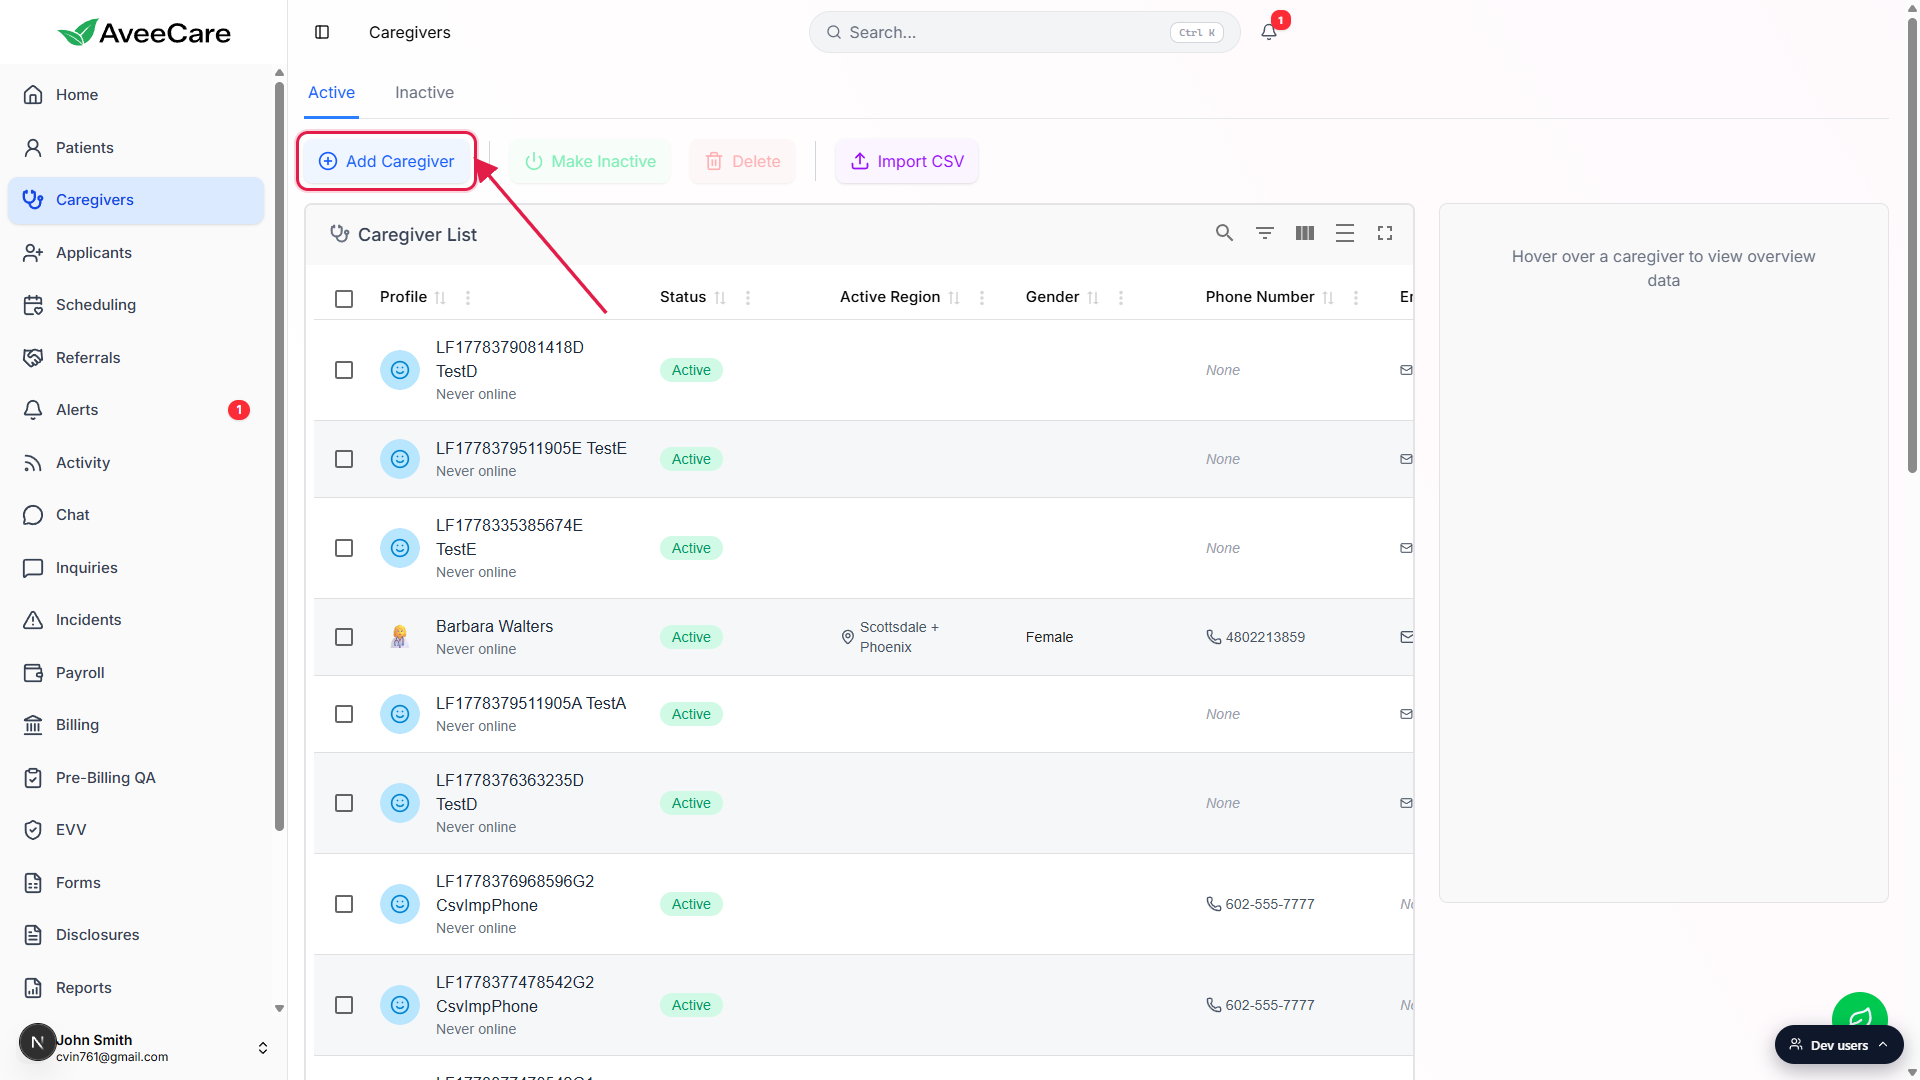
The New Caregiver full-screen modal opens.
The header reads New Caregiver with a smiley plus icon, and the close X is at the top-right. On a fresh tenant without a payment method on file, AveeCare prompts you to add a card before opening the form. See Billing defaults for setting up a payment method.
2. Fill Account Information
Set the photo or emoji, then fill the name fields and Goes By Name.
Click the avatar circle to upload a profile photo or pick an emoji. First Name and Last Name are required (red asterisk). Middle Name and Goes By Name are optional. Goes By Name is what other staff see at the top of the caregiver record, for example Barbara "Barb" Walters.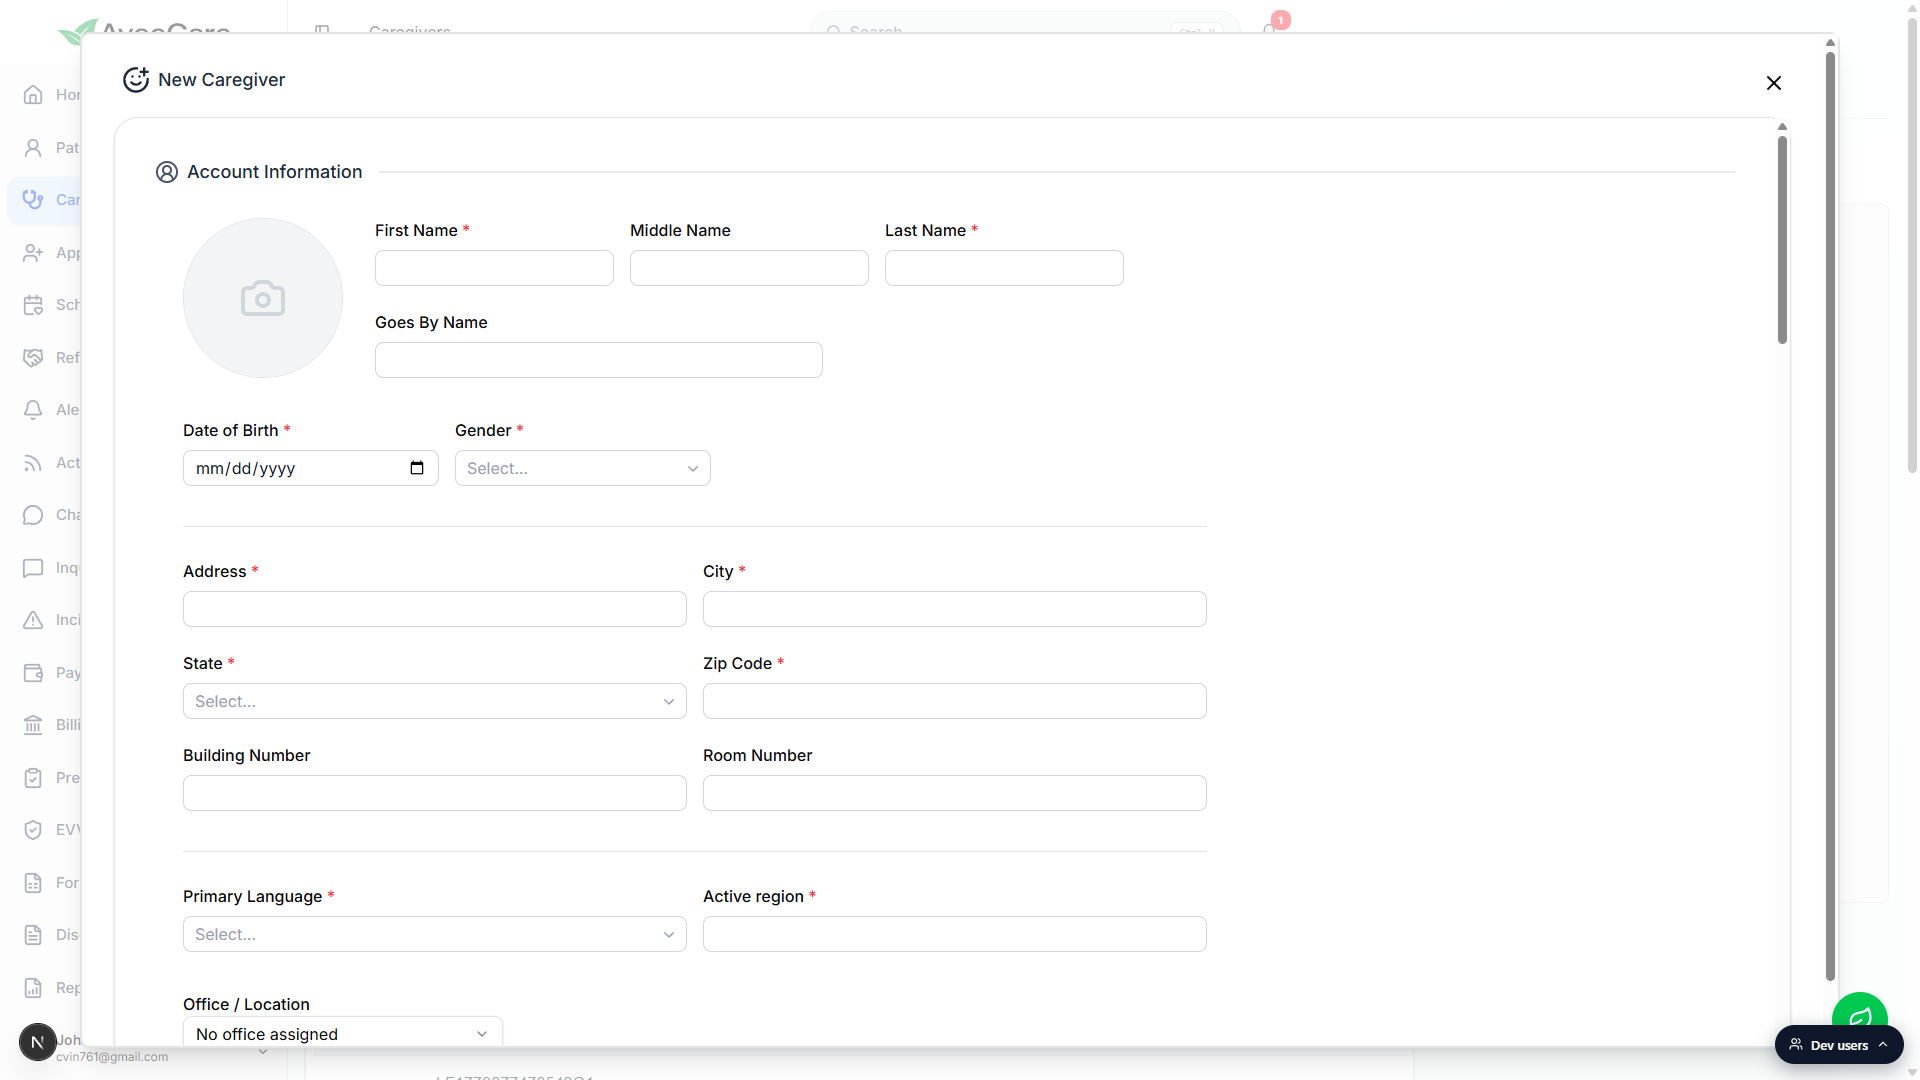
Set Date of Birth and Gender.
Both are required. Gender is a combobox with Male, Female, and Other. Date of Birth feeds the age display on the caregiver header and a few compliance reports, so check the year before you keep moving.Fill Address, City, State, Zip Code, Primary Language, Active region, and SSN.
Address, City, State, Zip Code, Primary Language, Active region, and Social Security Number are all required. Building Number and Room Number are optional. Office / Location is a dropdown that defaults to No office assigned; pick a specific office if your tenant has them set up.
3. Add Contact Information and Provider Credentials
On Contact Information, set Email and at least one Phone Number.
Email and the first phone number are required. Click Add Phone Number to stack additional numbers (Mobile, Home, Work) on the caregiver record.On Provider Credentials, capture NPI, Taxonomy Code, and state license details.
NPI is a 10-digit number used on insurance claims. Taxonomy Code is the provider specialty code (for example, 251E00000X for Home Health Aide Services). Both are optional in the form, but you need them to bill Medicaid or Medicare for this caregiver. Click Common Taxonomy Codes to expand a quick reference table with codes for Home Health Aide, RN, LPN, Physical Therapist, and others.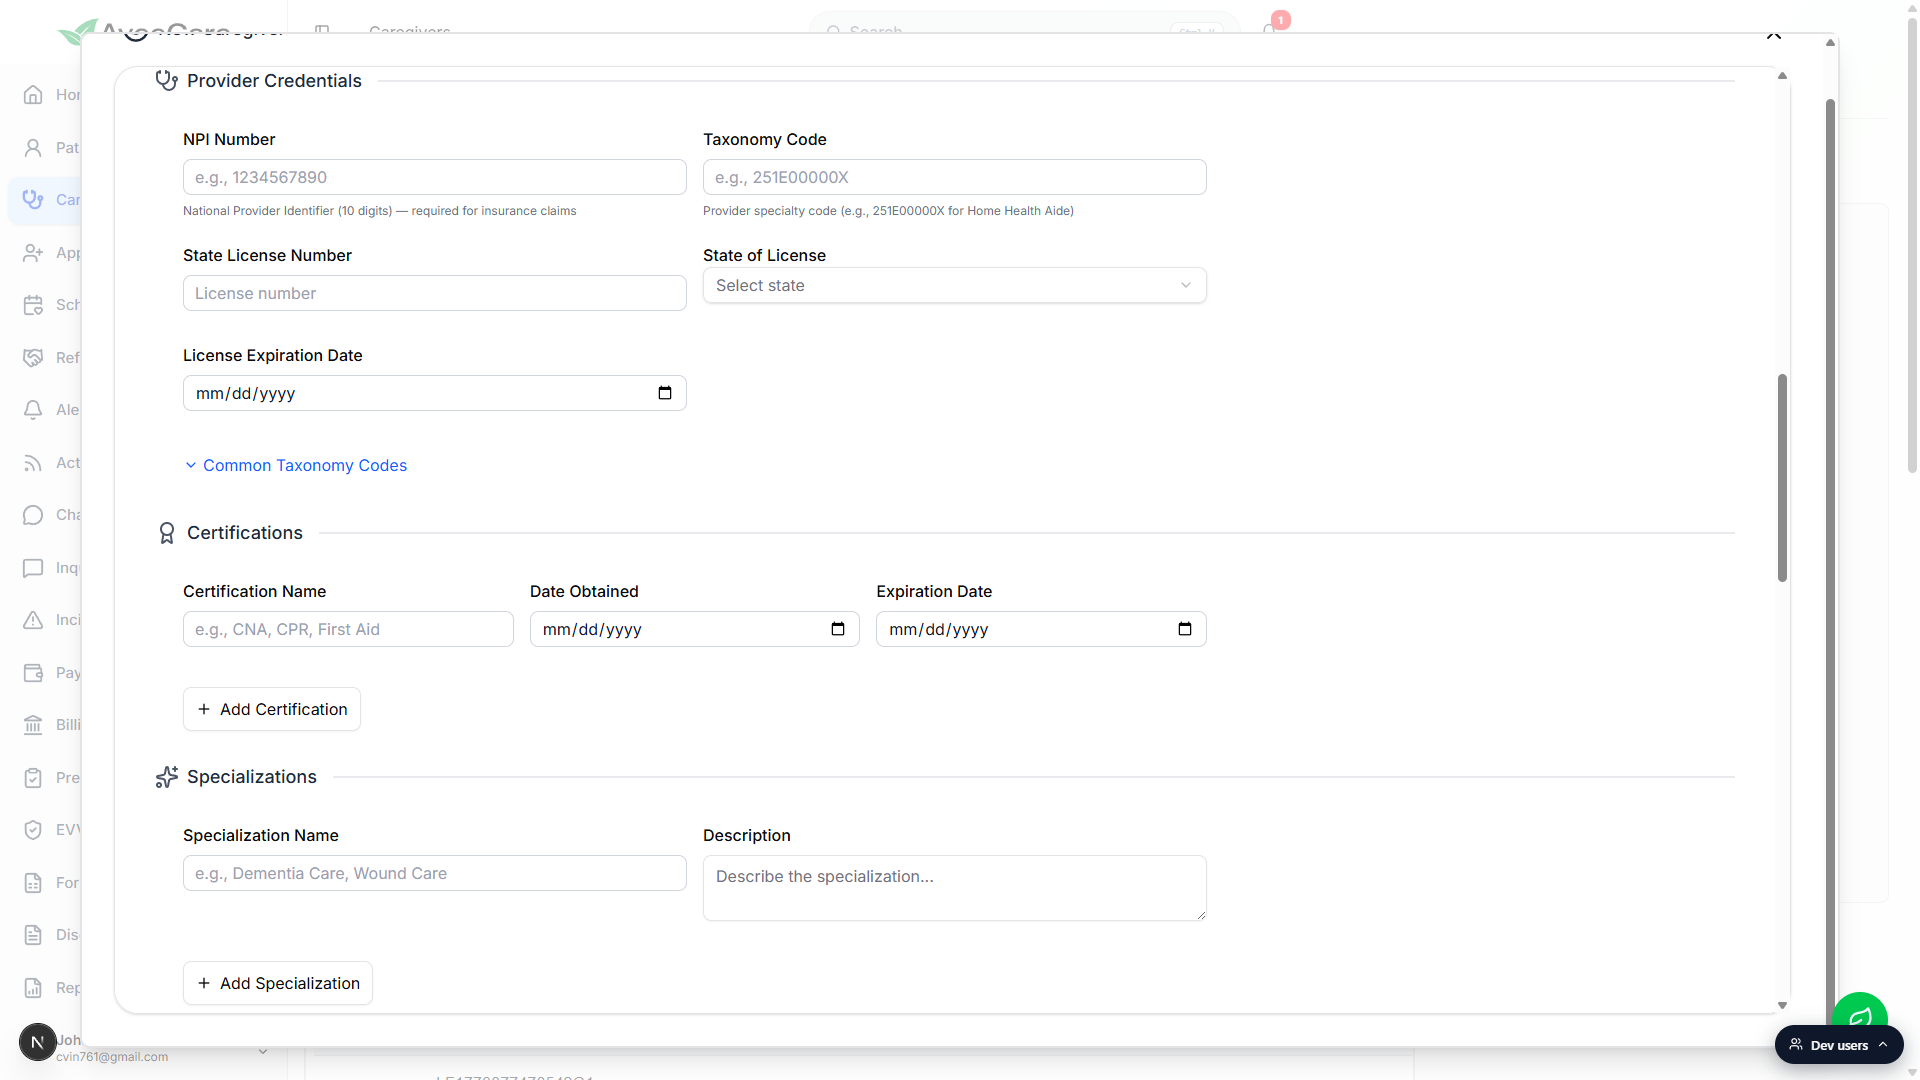
4. Capture Certifications, Specializations, Forms, and Notes
Add at least the core caregiver certifications (CPR, First Aid, CNA where relevant).
Each certification has a Name, Date Obtained, and Expiration Date. Click Add Certification to stack more rows. Expiring certs surface on the dashboard Credential Expirations panel, so accurate expiration dates pay off later.Add Specializations for any care areas this caregiver covers.
Specializations are free-text labels with a description, like Dementia Care or Wound Care. Click Add Specialization to add another. They show on the caregiver overview and in scheduling filters.Use Forms, Notes, Disclosures, and Files as the situation calls for.
Forms is for caregiver intake forms built from the form preset library. Notes is free text. Disclosures only shows up if your tenant has any (for example, a HIPAA Privacy Notice acknowledgment). Files is for ID scans, supporting certification PDFs, or other docs (50 MB max per file). All four sections are optional and can be added later from the caregiver record.
5. Set EVV Compliance and Other Information
Tick Live-In or On-Site flags if they apply.
EVV Compliance has three checkboxes: Live-In Caregiver, On-Site Caregiver (Facility), and Paper Timesheet Attestation On File. Live-in caregivers reside in the patient home and may have modified EVV verification. On-site caregivers work at a facility rather than a member home. The paper timesheet flag is for caregivers approved to use paper timesheets as a contingency.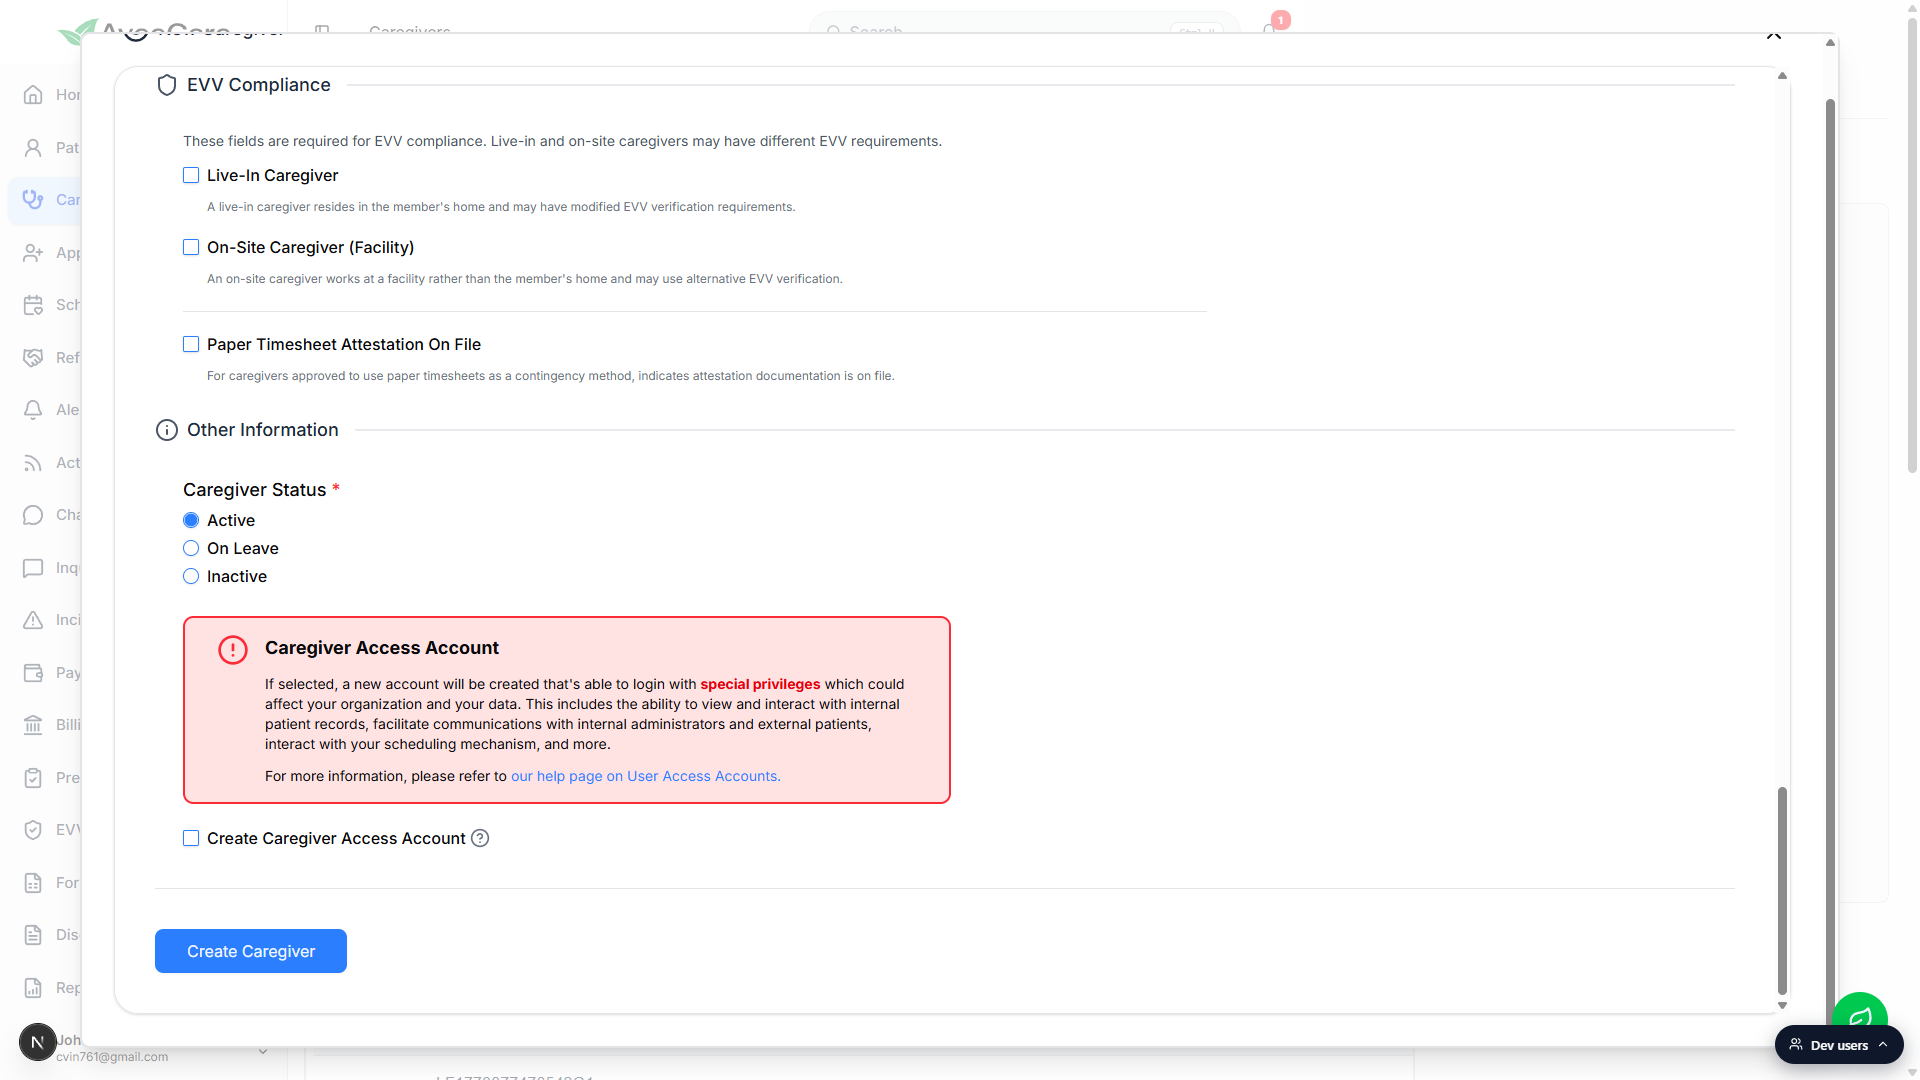
Pick a Caregiver Status (defaults to Active).
Status options are Active, On Leave, and Inactive. Most new caregivers go in as Active. On Leave keeps them on the roster but out of scheduling rotation. Inactive hides them from the default Caregivers list view.Decide whether to tick Create Caregiver Access Account.
The red warning panel above the checkbox calls out that an access account can sign in with privileges to view patient records, message administrators, and interact with scheduling. Leave it off if you only need a roster record. Tick it if this caregiver should have a login on day one.
6. Click Create Caregiver
Click Create Caregiver at the bottom of the form.
If any required field is empty, the form surfaces a toast and scrolls you to the missing field. If everything checks out, a loading overlay runs through the upload steps (profile picture, contact, certifications, forms, files, disclosures), then the modal closes and you land back on /caregivers with the new caregiver in the Active tab.Open the new caregiver to set pay rate and schedule the first visit.
Pay rate is not on the New Caregiver form. Open the caregiver row, switch to the Payroll tab to set the default rate, then go to Schedule to add a first visit.
Common pitfalls
- Skipping certifications. Without at least one certification on file with an accurate expiration date, the dashboard Credential Expirations panel cannot warn you when CPR or CNA renewals are coming up. Add the core certs at intake.
- Wrong NPI or Taxonomy Code. NPI is a 10-digit number; the form trims any non-digits and caps at 10. Taxonomy Code is a 10-character alphanumeric (for example, 251E00000X). Use the Common Taxonomy Codes reference inside the form if you are not sure which to pick.
- Empty Active region. Active region is required and is what office-filtered scheduling uses to decide which open shifts a caregiver can pick up. An empty value leaves the caregiver invisible to most scheduling filters.
- Ticking Create Caregiver Access Account too eagerly. The access account creates a real login with privileged data access. Read the red warning panel before you tick the box. Most agencies leave it off at intake and turn it on later from the caregiver record once the caregiver is ready to use the app.
- Missing pay rate. Pay rate lives on the Payroll tab of the caregiver record, not on the New Caregiver form. Visits assigned to a caregiver without a default pay rate fall through payroll calculations until you set one.
- Closing the modal mid-intake. The form does not auto-save. Closing the New Caregiver modal discards everything you have typed. If you need to step away, fill the required fields and Create, then add the rest later from the caregiver record.
Related
- Caregiver overview tab
- Caregiver certifications
- Caregiver list and filters
- Caregiver payroll and pay rate