The Caregivers page is the table view of every caregiver in your agency. It runs on Material React Table, so you get search, column filters, sortable headers, density, fullscreen, column visibility, and CSV export out of the box. The action bar above the table covers Add Caregiver, Make Inactive, Delete, and Import CSV.
Quick answer
Open Caregivers from the left sidebar. The page lands on the Active tab. Click any row to open that caregiver's Overview. Use the five icons in the top right of the Caregiver List card to search, filter, change density, hide columns, or go fullscreen.
1. Open Caregivers and pick Active or Inactive
Click Caregivers in the left sidebar.
The page opens on the Active tab. The Inactive tab sits next to it for off-roster caregivers. Inactive caregivers stay on file for credentialing, payroll history, and audit, but they don't show up in scheduling assignment, payroll runs, or the Active count.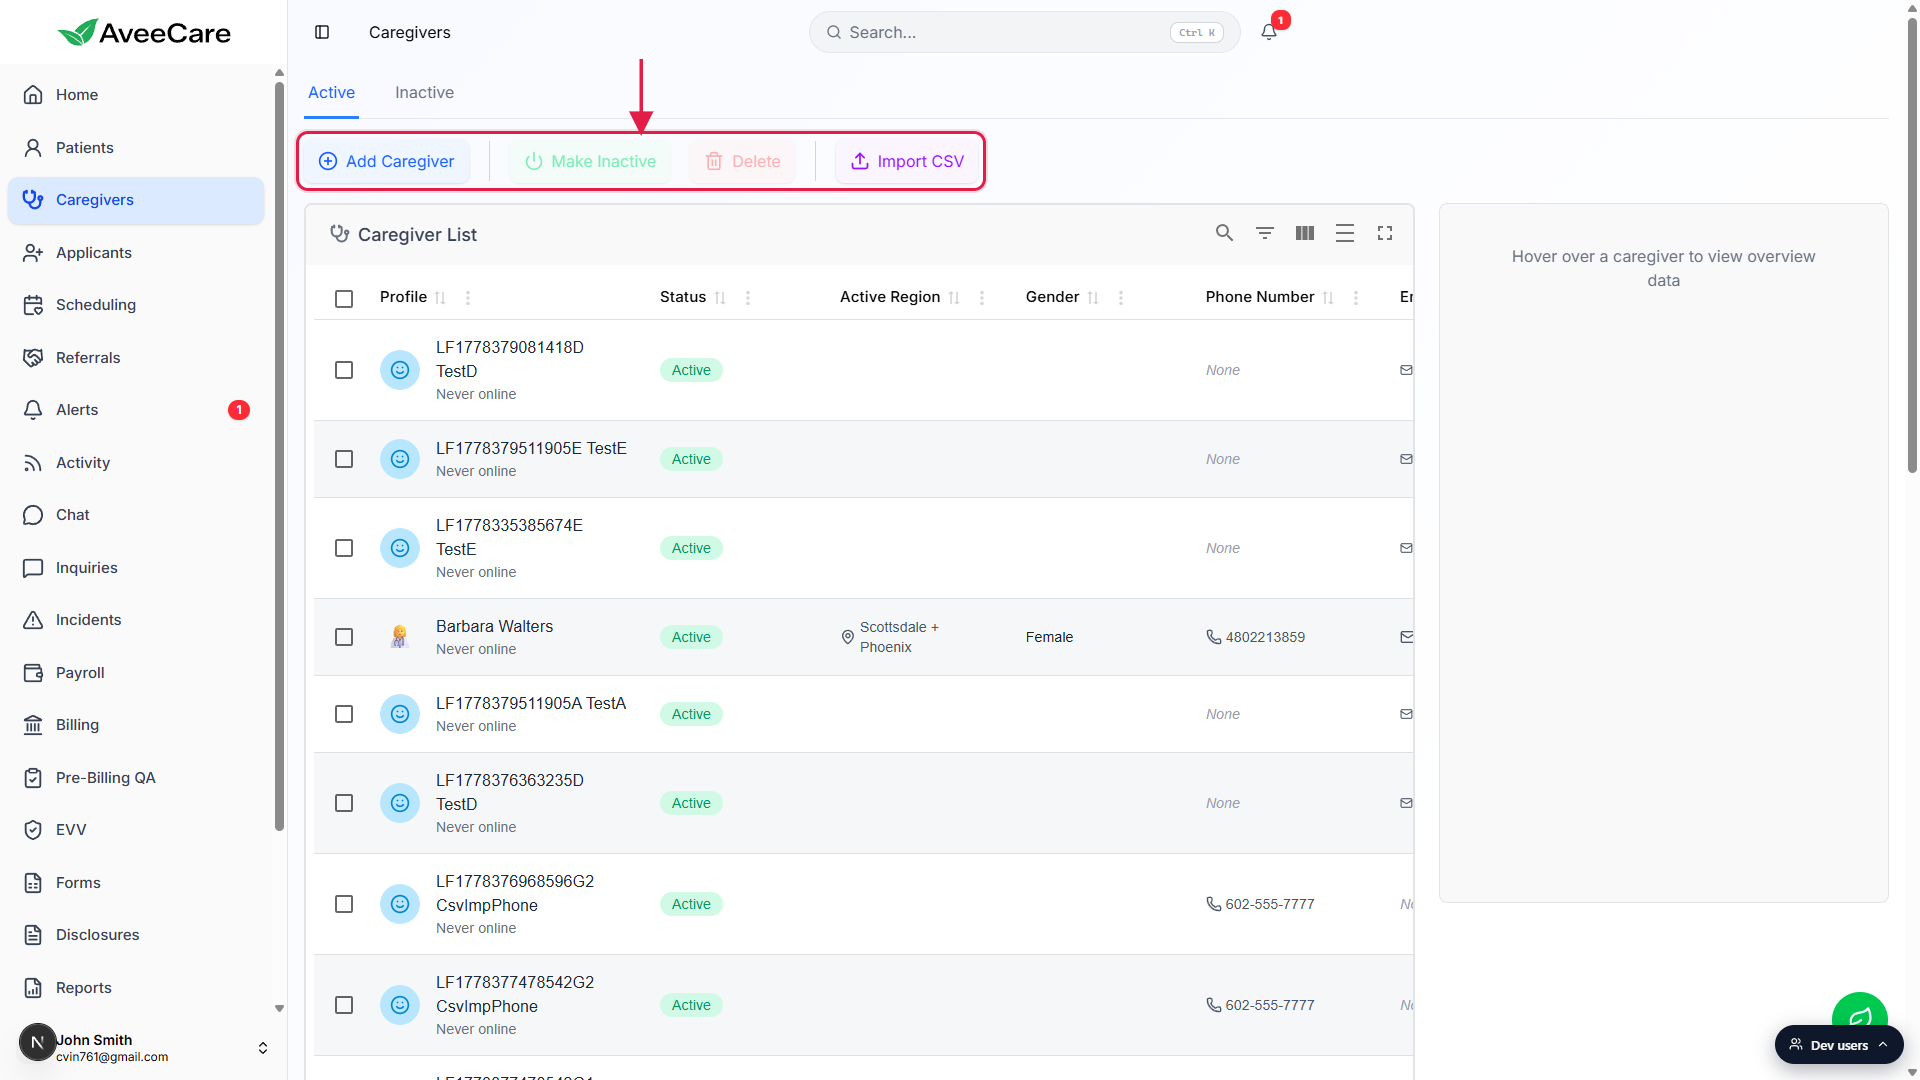
The action bar above the table has four buttons.
Add Caregiver opens the new-caregiver wizard. Make Inactive and Delete are bulk actions that turn on once you tick row checkboxes. Import CSV opens the bulk-import dialog for adding many caregivers at once.
2. Read the table columns
Default columns: Profile, Status, Active Region, Gender, Phone Number, Email, Last Visit, Next Visit.
Profile shows the caregiver's name, avatar, and an online presence indicator (caregivers who have never logged in show Never online). Active Region lists the offices they cover. Status is the Active or Inactive chip. Click any column header to sort by that column. The page loads with no sort applied, so the order you see is the agency's creation order.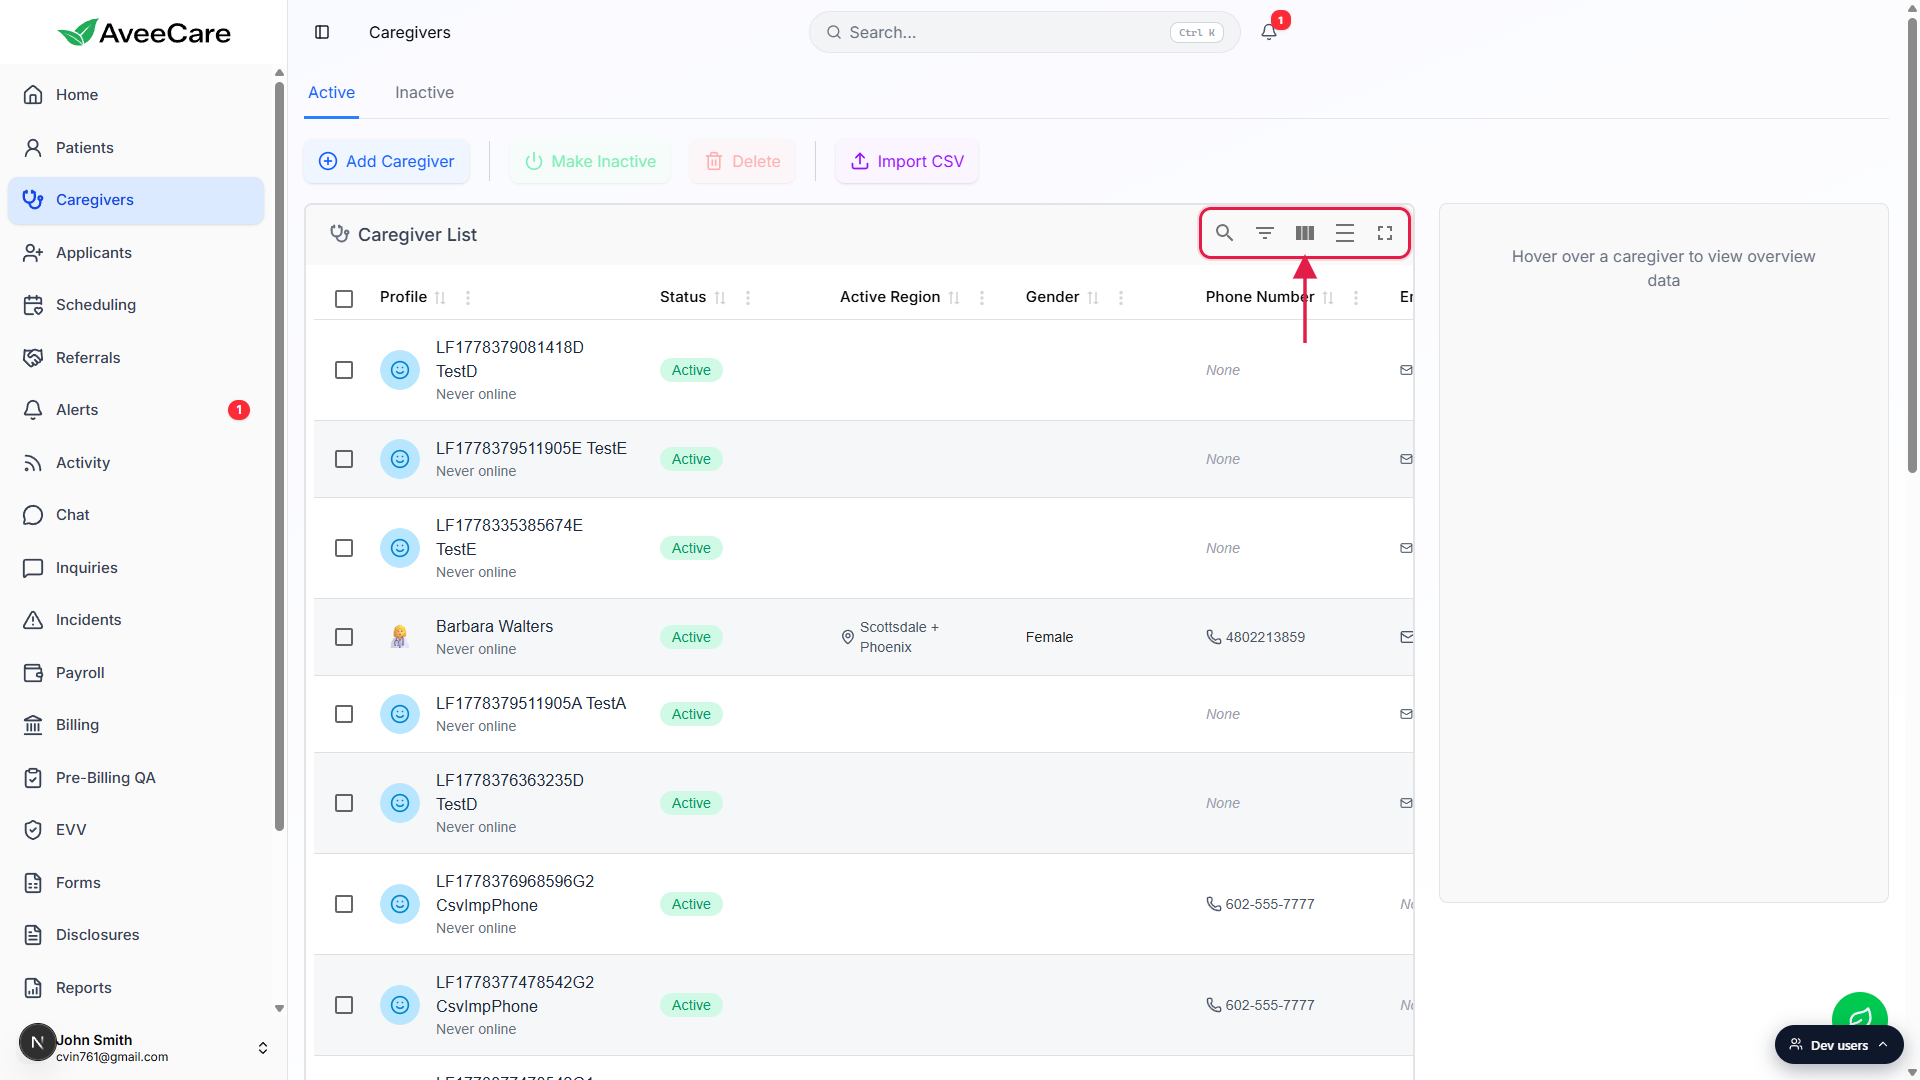
Pagination defaults to 20 rows.
The Rows per page dropdown sits in the bottom right of the table. Pick 20, 50, or 100. Use the chevrons next to it to page through.
3. Use the toolbar icons
Five icons in the top-right of the Caregiver List card.
Left to right: Search (magnifying glass) opens a text search across caregiver names. Filter (funnel) shows a per-column filter row with text, select, or date controls depending on the column. Column visibility (vertical bars) toggles which columns appear. Density (lines) cycles compact, comfortable, and spacious row heights. Fullscreen (corner brackets) expands the card to fill the browser.Search only matches names. For phone, email, or region, use the column filter.
Click the funnel, then type or pick a value in the input that appears under each column header. The table narrows live as you type.
4. Click a row to open the caregiver
Click anywhere on a caregiver row.
The app navigates to/caregivers/<name>/<id>/overview, which is the caregiver's Overview tab. From there you have tabs for Schedule, Payroll, Forms, Files, Disclosures, Activity, Certifications, Incidents, Notes, and Transfer History.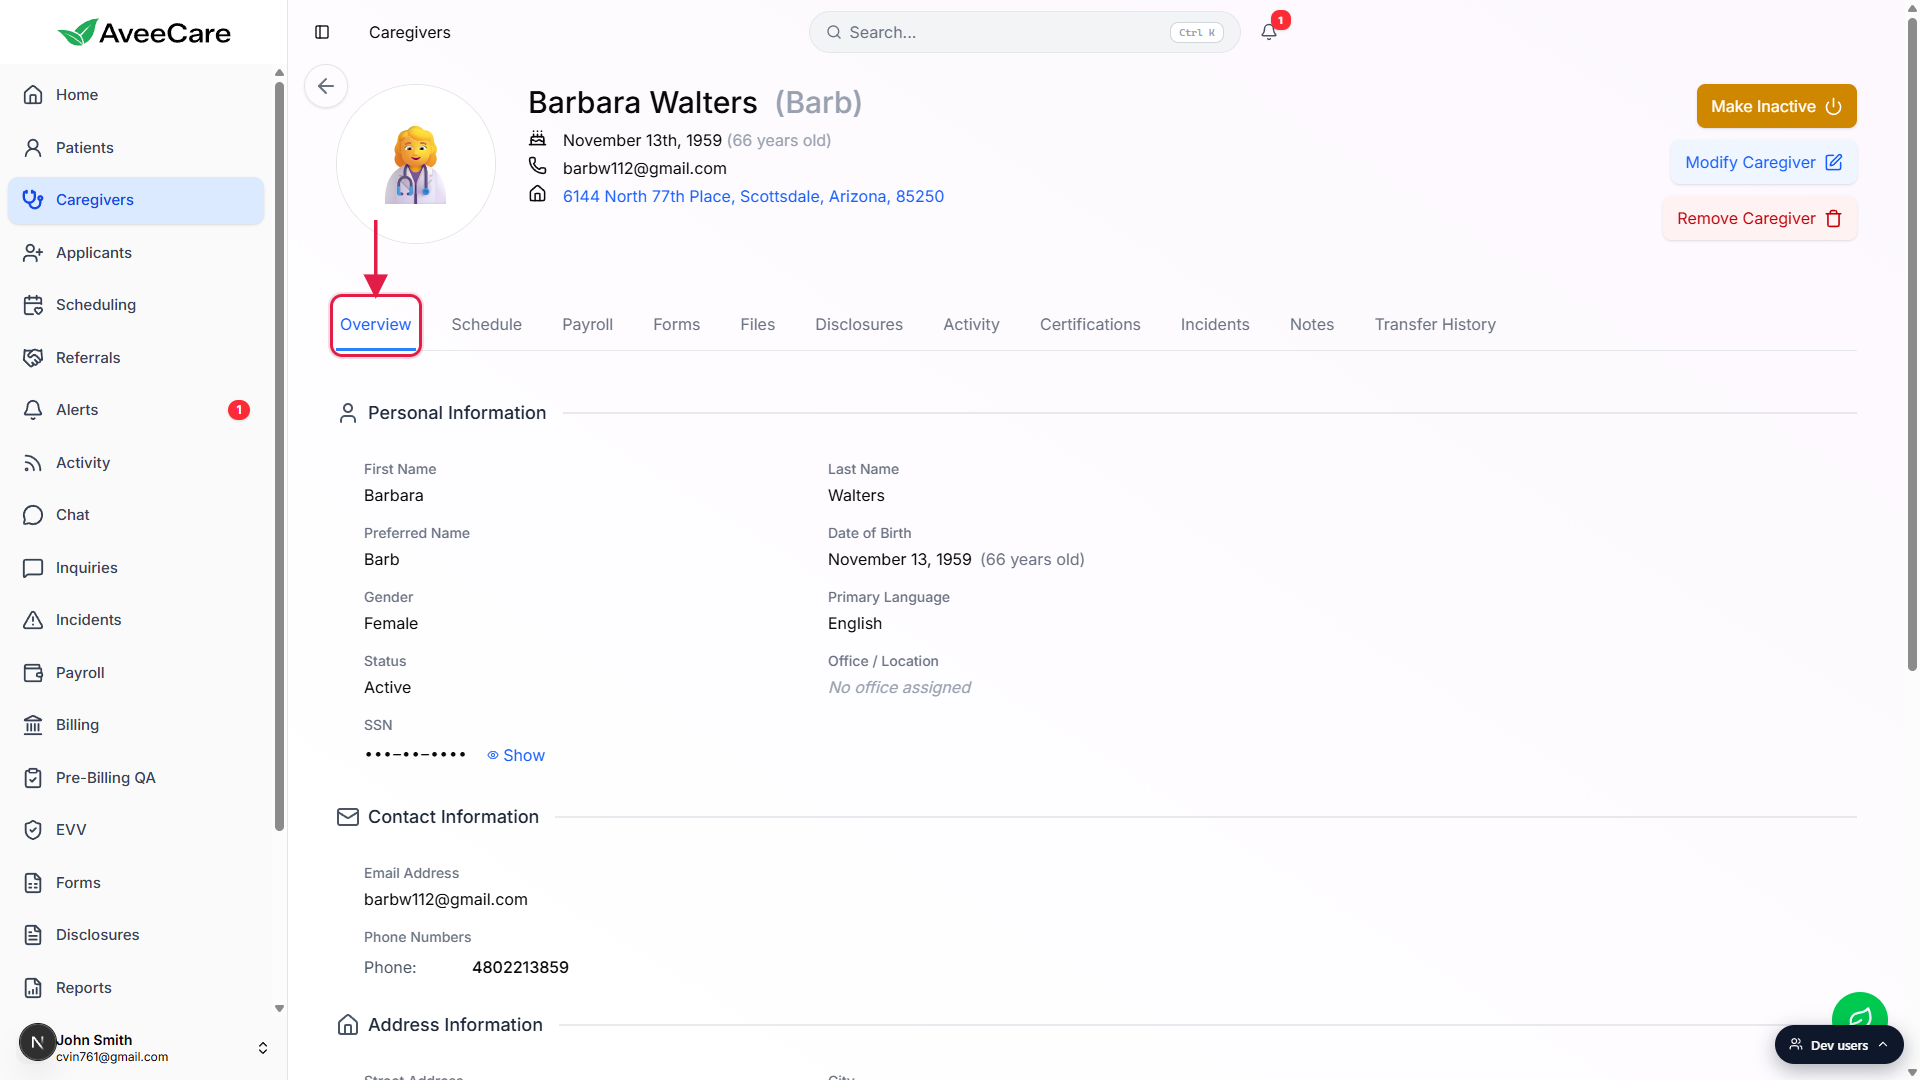
Use the right-side hover preview if you do not want to leave the list.
The empty card to the right of the table fills with that caregiver's overview data when you hover a row. The placeholder copy reads Hover over a caregiver to view overview data. Good for quick scanning when you are looking for someone without committing to opening the record.
5. Bulk-select to make inactive, delete, or import
Tick the checkbox at the start of each row you want to act on.
The header checkbox selects every visible row. Once at least one row is selected, the Make Inactive and Delete buttons in the action bar light up.Click Make Inactive to archive the selection, or Delete to remove it.
Make Inactive is the soft option, the caregiver still exists for credentialing, payroll history, and audit. Delete is permanent. Use Make Inactive whenever you might want the caregiver back later, or whenever payroll history still needs to point at them.Click Import CSV to add many caregivers at once.
The Import CSV dialog accepts a spreadsheet of new caregiver rows. Pair this with the Add Caregiver wizard article when you want one-at-a-time onboarding instead.
Common pitfalls
- Looking on the wrong tab. If a caregiver is missing from the Active list, click Inactive before assuming the record is gone. Inactive caregivers are hidden from Active, scheduling assignment, payroll filters, and counts but they still exist on file.
- Empty Active Region. Caregivers with no region can't be matched to office filters in scheduling. Open their record and add a region from the Modify Caregiver dialog if you want them to appear in office-scoped views.
- Search only matches names. The magnifying-glass search is name-only. To search by phone, email, region, or any other column, click the funnel icon and use the per-column filter instead.
- Make Inactive and Delete stay greyed out until you tick a row. They are bulk actions, so they need at least one selected row. New users sometimes click them with nothing selected and assume they are broken.
- Delete is permanent. There is no undo. If payroll history still references the caregiver, use Make Inactive instead so historical exports keep resolving.