Company Notifications is the company-wide rules tab inside Settings. From here a Root User or admin decides which categories of email and SMS the entire agency receives, plus a few alert-generation toggles like the Birthday Alerts switch. Categories disabled here are greyed out for every user on their My Notifications screen.
Quick answer
Open Settings, click the Company Notifications tab. Toggle the master categories under Email Notification Categories and the rows under SMS Notifications to Users. Click Save Company Settings at the bottom-right to apply the change agency-wide. Critical emails (account security, payment failures, card expiry) cannot be disabled.
What this tab controls vs. My Notifications
Company Notifications is agency-scoped. Anything disabled here overrides every user's personal preferences, so no one in the agency gets that category. The neighbouring My Notifications tab is the per-user version, and rows that the company has disabled show up greyed out there. For broader Settings tab layout, see Business settings.
1. Open Settings and click Company Notifications
Click Settings in the left sidebar, then the Company Notifications tab.
The tab strip lists Business Settings, My Notifications, Company Notifications, Subscription and Billing, Payment Integrations, Clearinghouse and Claims, Payroll, Locations, API Keys, and Account. Company Notifications is the third tab from the left.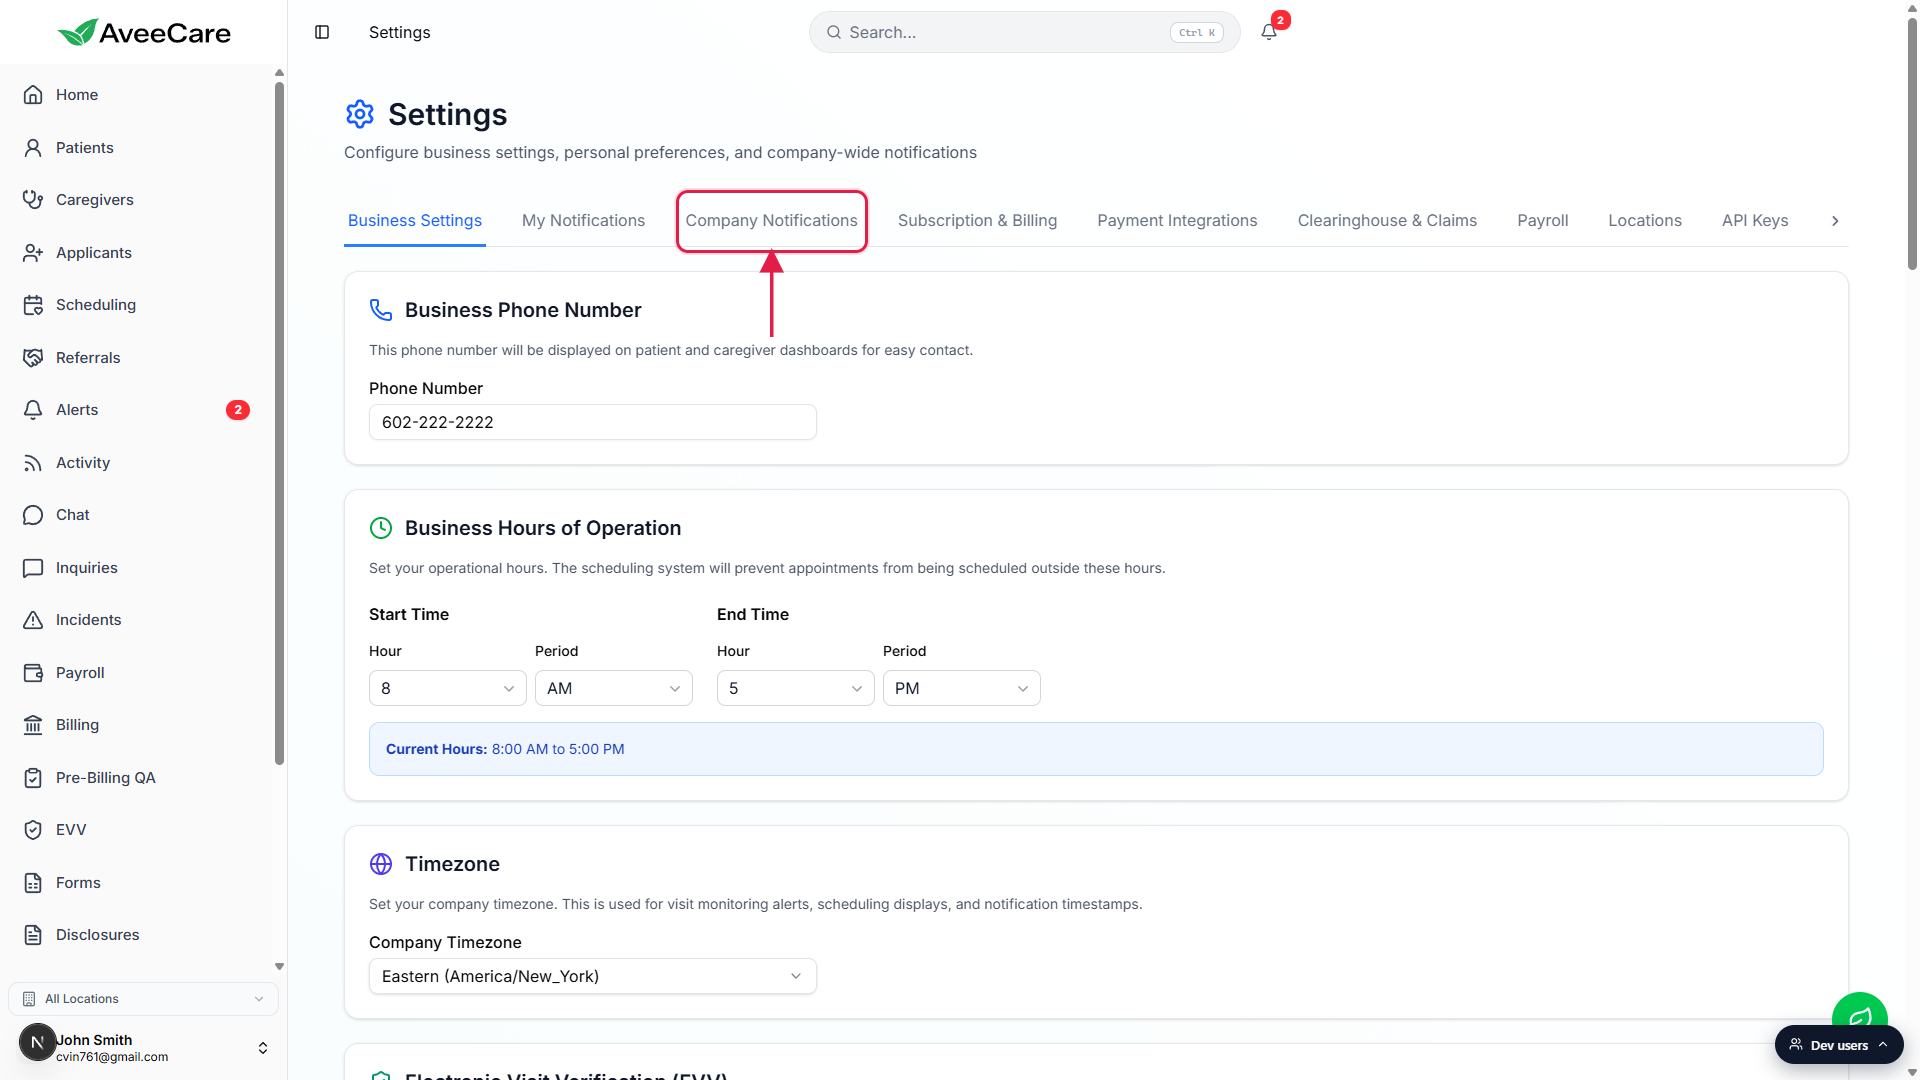
Confirm the page heading reads Company-Wide Notification Settings.
The page subheading explains the scope: “Control what notifications the company sends to caregivers and patients. These settings affect all users.” If you see a Your Personal Notifications card instead, you are on the My Notifications tab next door.
2. Toggle Email Notification Categories
Find the Email Notification Categories block.
It sits below an Email Notifications to Users sub-toggle group. The five master categories are Incident Report Emails, Billing Alert Emails, Visit Lifecycle Emails, Integration Event Emails, and Account Activity Emails. Each one is one toggle for the whole agency.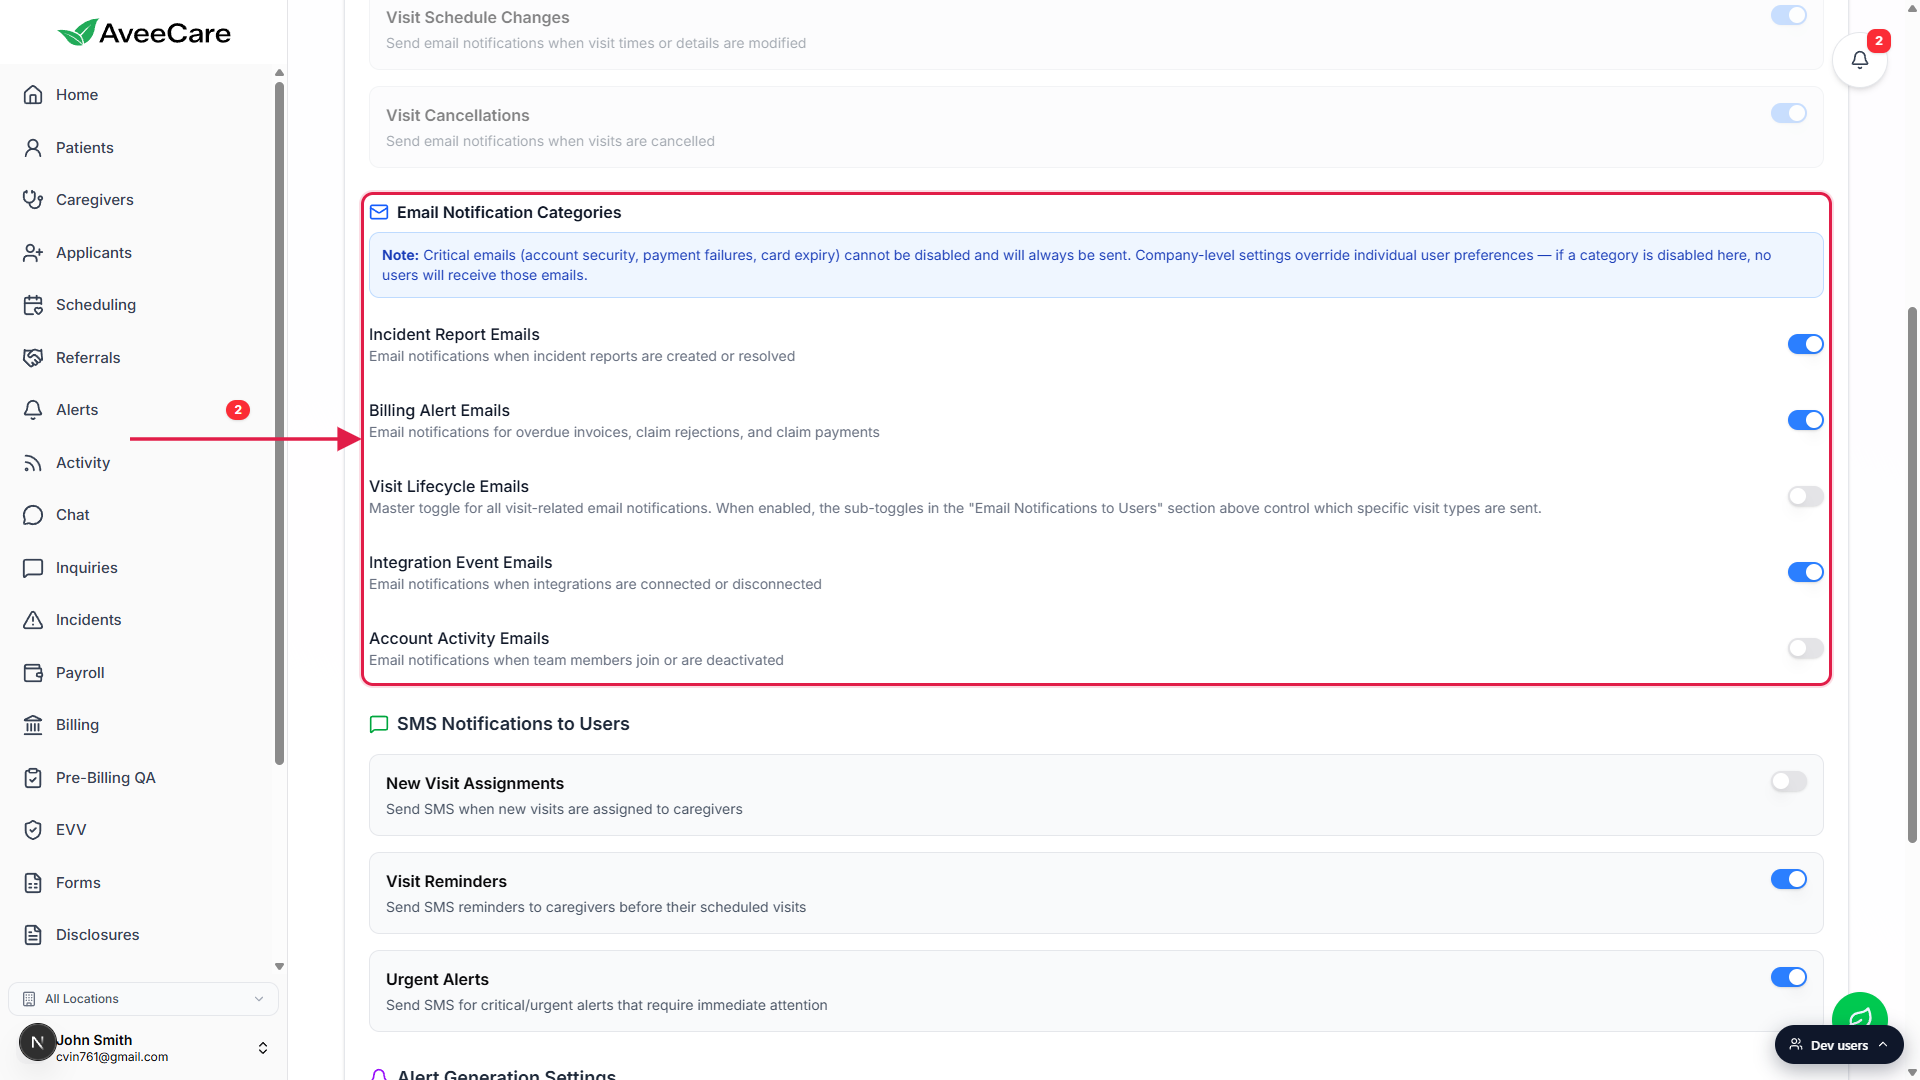
Understand the Visit Lifecycle Emails master toggle.
Visit Lifecycle Emails is the master switch for the Email Notifications to Users group above it. When it is off, the sub-toggles for New Visit Assignments, Visit Schedule Changes, and Visit Cancellations grey out and cannot send. Turn the master on first if you want per-event control over visit emails.Critical emails cannot be disabled.
The note at the top of the categories block calls this out. Account security alerts, payment failure notices, and card-expiry warnings always send regardless of toggle state. That is intentional: HIPAA and PCI obligations live there.
3. Toggle SMS Notifications to Users
Scroll past the email block to find SMS Notifications to Users.
Three rows: New Visit Assignments, Visit Reminders, and Urgent Alerts. New Visit Assignments sends a text when a visit is assigned to a caregiver. Visit Reminders texts the caregiver before each scheduled visit. Urgent Alerts covers critical messages that need immediate attention.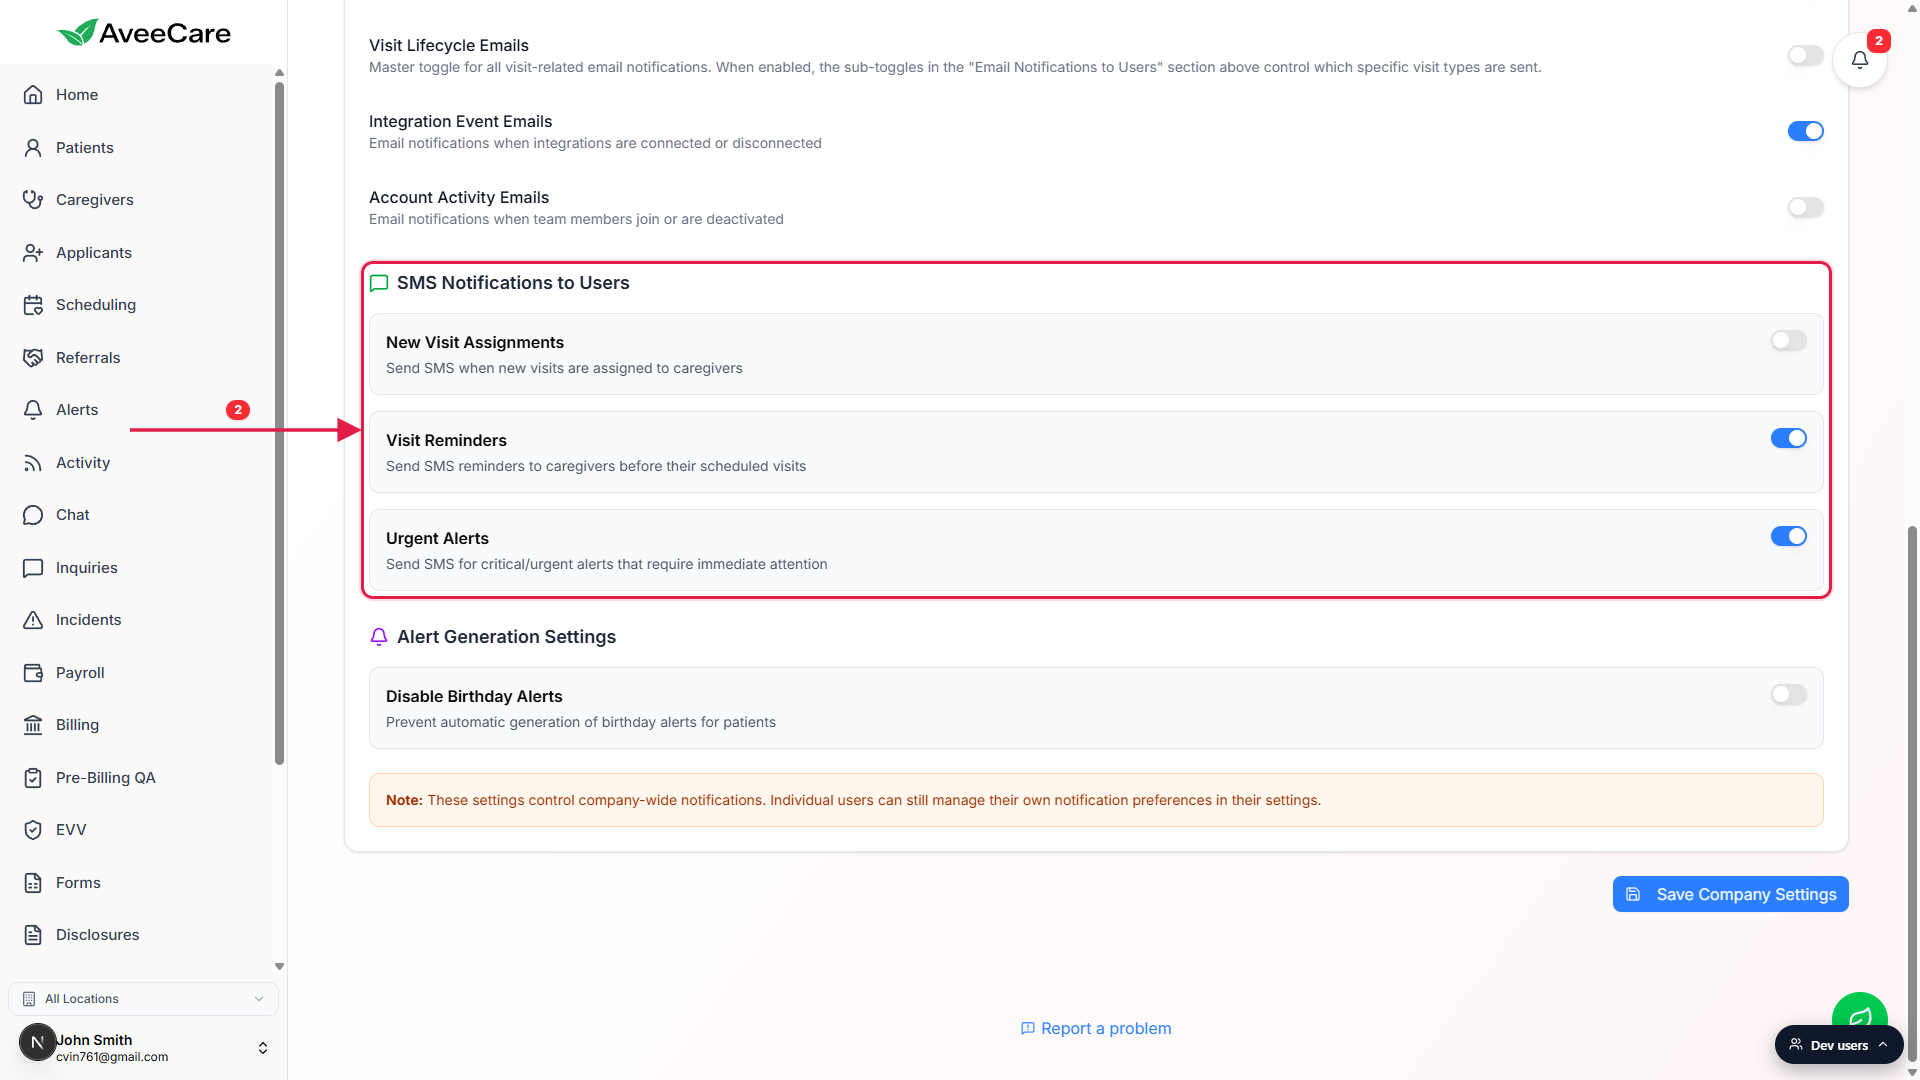
Disable Birthday Alerts lives in Alert Generation Settings below.
The Alert Generation Settings block sits under SMS and has a single Disable Birthday Alerts toggle that suppresses the daily birthday alert your agency would otherwise see in the Alerts tray for every patient on their birthday.
4. Save Company Settings
Click Save Company Settings at the bottom-right.
The button is blue and lives below the company-wide notification note. The change applies agency-wide immediately on save. There is no draft state and no per-row apply; the whole panel is one transaction.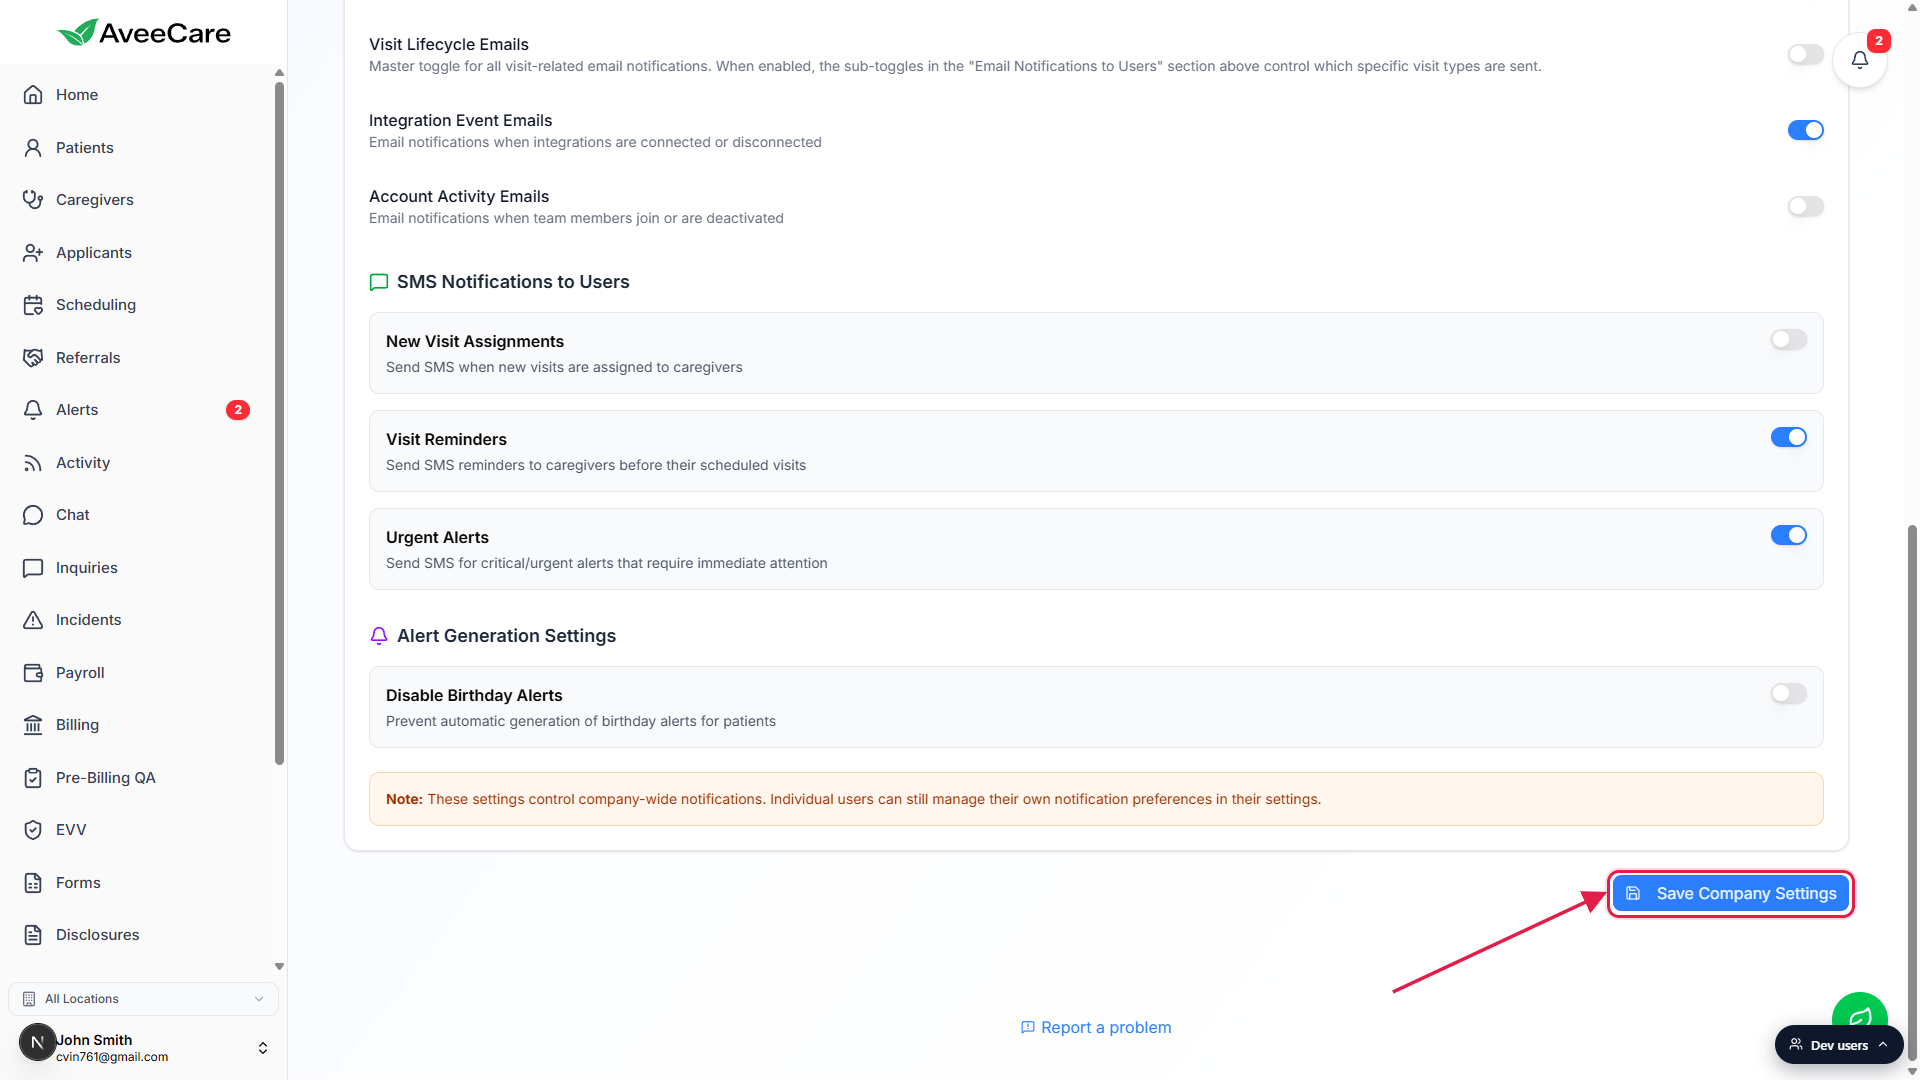
Verify the change on a user My Notifications screen if you disabled a category.
If you turned a category off, open the My Notifications tab as any user and confirm that the corresponding row is greyed out. That is how AveeCare shows company-level overrides to end users.
Common pitfalls
- Turning Visit Lifecycle Emails off and expecting the sub-toggles to still work. They cannot. The sub-toggles above (New Visit Assignments, Visit Schedule Changes, Visit Cancellations) read from the Visit Lifecycle master and grey out when it is off.
- Expecting critical security emails to honour these toggles. They do not. Account security, payment failure, and card-expiry emails are non-disable-able by design.
- Editing here when you only want to silence your own inbox. Company Notifications is the agency-wide rules tab. For your own preferences, switch to My Notifications (the tab to the left).
- Forgetting to click Save Company Settings. Toggle state is local to the page until you save. Navigate away first and the change is dropped.
- Looking for an SMS provider field on this tab. That lives in SMS provider settings, not under Company Notifications.