AveeCare protects tenant data with two complementary controls: optional two-factor authentication (a TOTP code from an authenticator app) and an optional, strictly personal Automatic Sign-Out that signs your own account out after a stretch of inactivity. Both are off by default. 2FA is turned on per user from the Two-Factor Authentication card in Settings, in the same section as Change Password; agencies that want to mandate it can flip Require two-factor authentication for staff on the Business Settings tab. Automatic Sign-Out is different: nobody — not even an agency owner — can turn it on for anyone else. AveeCare never signs anyone out for inactivity unless that person opted in from their own settings.
Quick answer
Open Settings and find the Two-Factor Authentication card next to Change Password. Scan the QR code with an authenticator app (or type the manual key), enter the 6-digit code it generates, and you are enrolled. To make 2FA mandatory for your whole office team, a RootUser can turn on Require two-factor authentication for staff on the Business Settings tab. Automatic Sign-Out is separate and personal: turn it on for your own account under Automatic Sign-Out on the My Notifications tab. It is off by default and there is no company-wide version — nobody is ever signed out for inactivity unless they opted in themselves.
What this covers and what it does not
AveeCare ships optional per-user 2FA, an agency-level 2FA requirement toggle for staff, and a per-user Automatic Sign-Out opt-in in the Settings UI. It does not ship a separate “Login Activity Log” panel for every sign-in. Recent caregiver and admin actions show up on the Activity page (visit starts, completions, incidents, inquiries), and the Accounts page is the place to disable a user account that is suspected of being compromised.
1. Enable 2FA from Settings
Click Settings in the left sidebar.
Settings sits near the bottom of the sidebar, under Help. The Two-Factor Authentication card lives in the same section as Change Password.Open the Two-Factor Authentication card and scan the QR code.
The card shows a QR code plus a manual setup key for devices that cannot scan. Point any TOTP authenticator app at the QR code, or copy the key into the app by hand.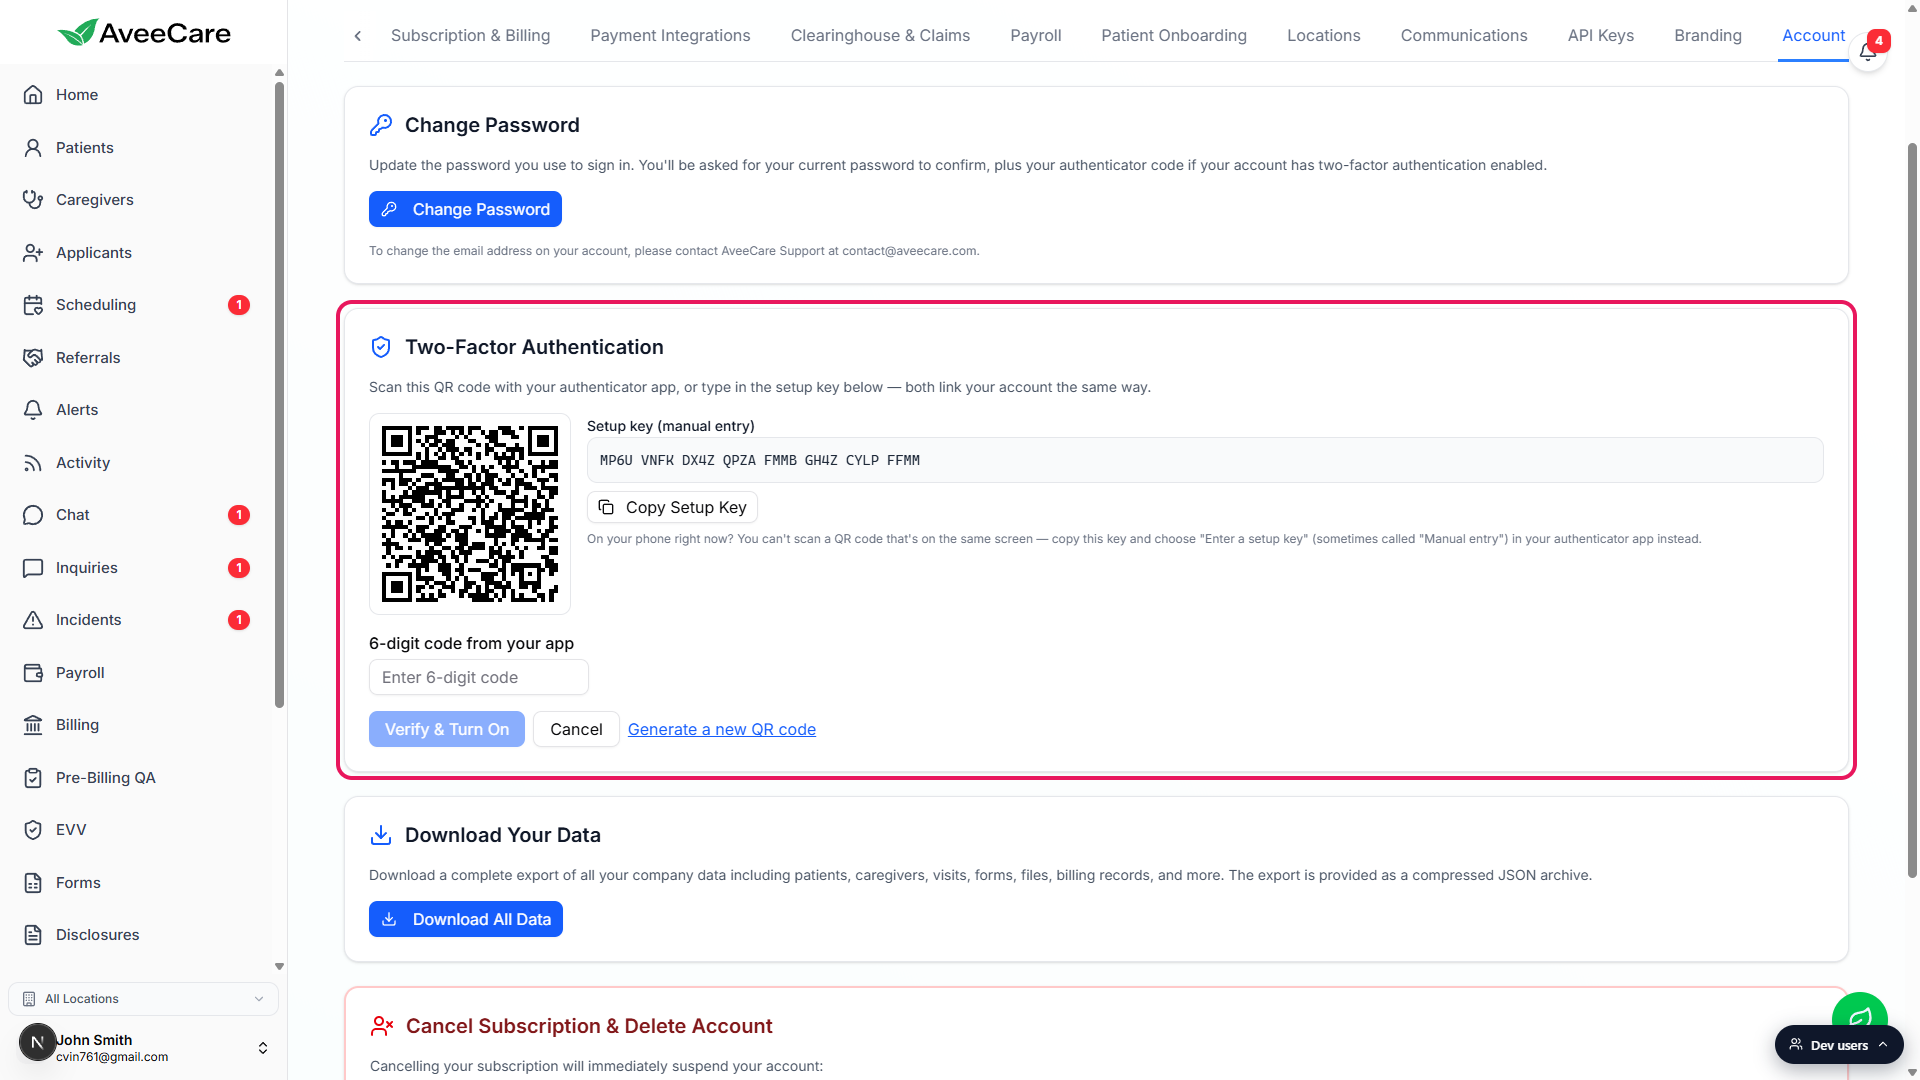
Type the 6-digit code from your app to confirm.
Entering a current code proves the pairing worked and switches 2FA on for your account. From then on, every sign-in asks for a fresh code after your password.
2. Require 2FA for all staff
Open the Business Settings tab.
The page opens on Business Settings by default. This tab holds tenant-wide policy, including the 2FA requirement for staff.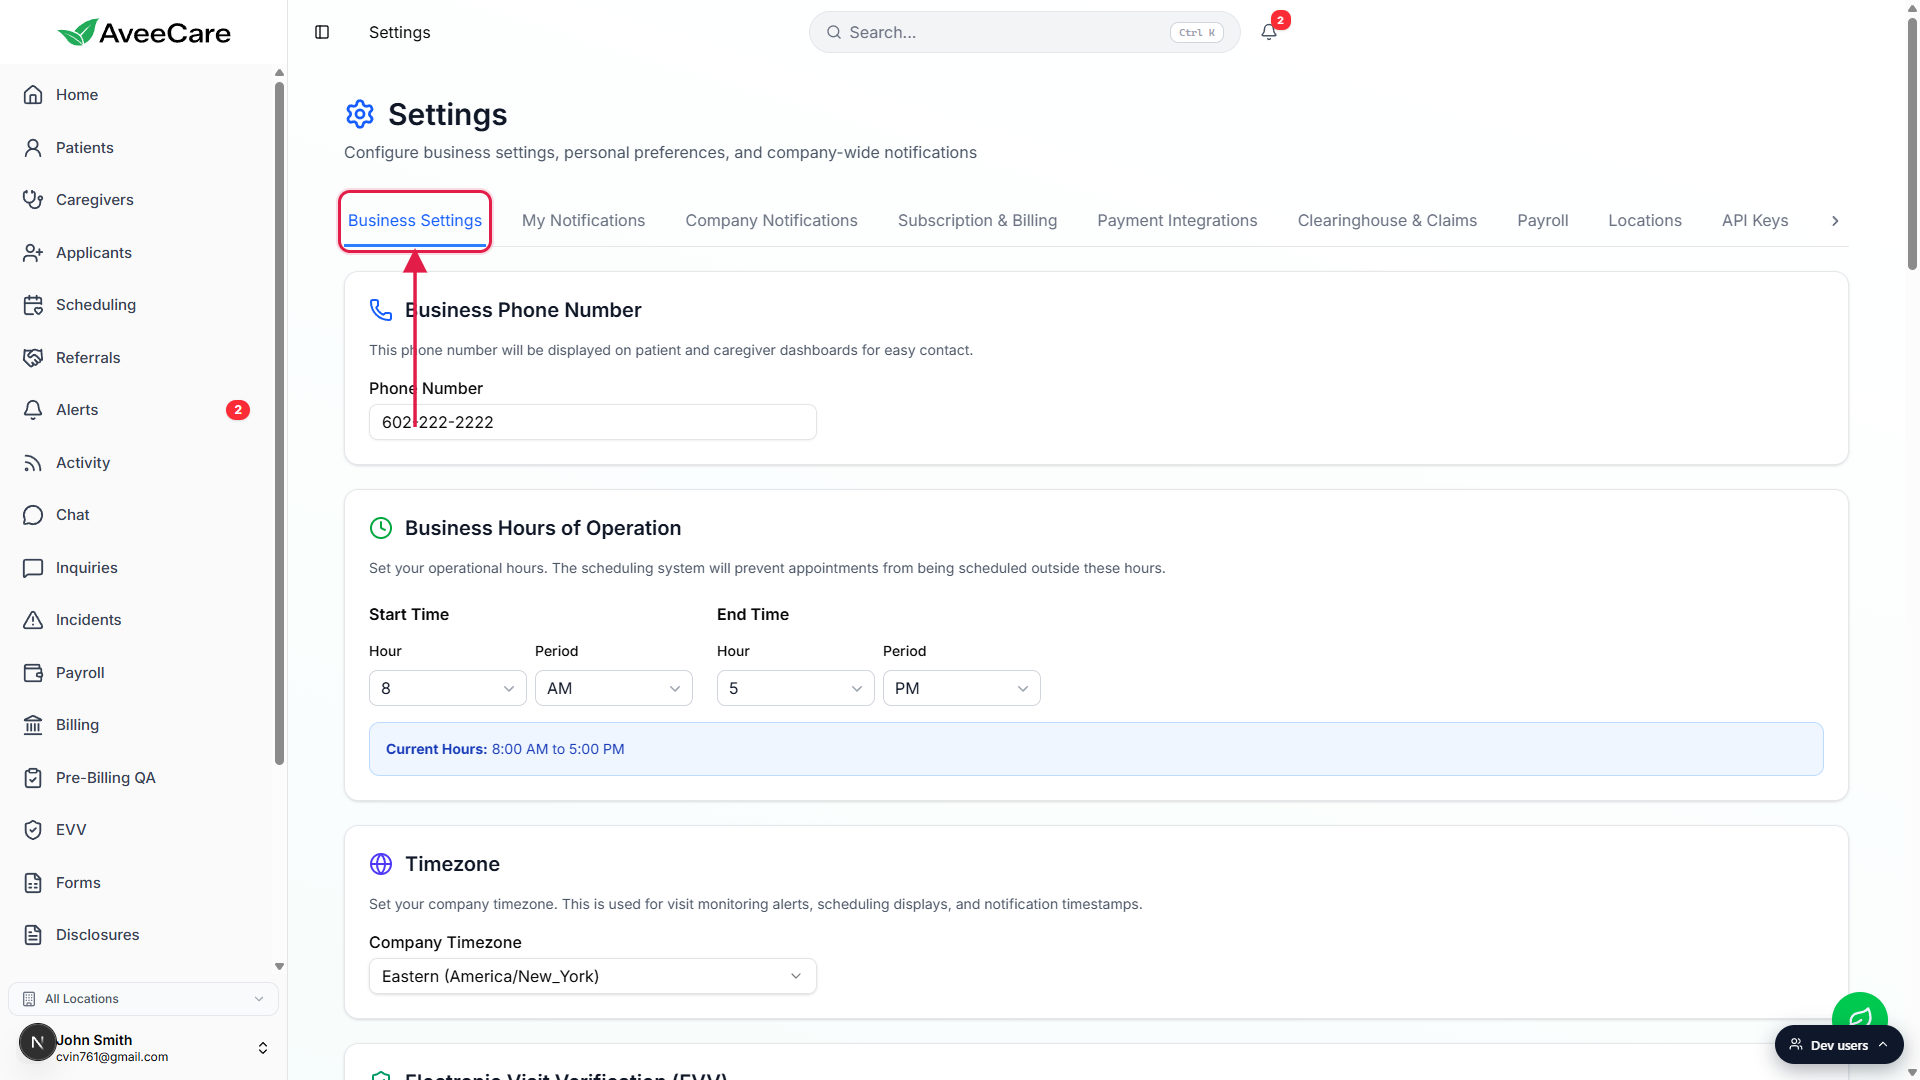
Turn on Require two-factor authentication for staff.
With the toggle on, owners, office staff, and caregivers who have not yet enrolled are walked through pairing an authenticator at their next sign-in, and 2FA cannot be skipped for staff accounts on your tenant. Patients are never asked. Click Save Business Settings to apply it.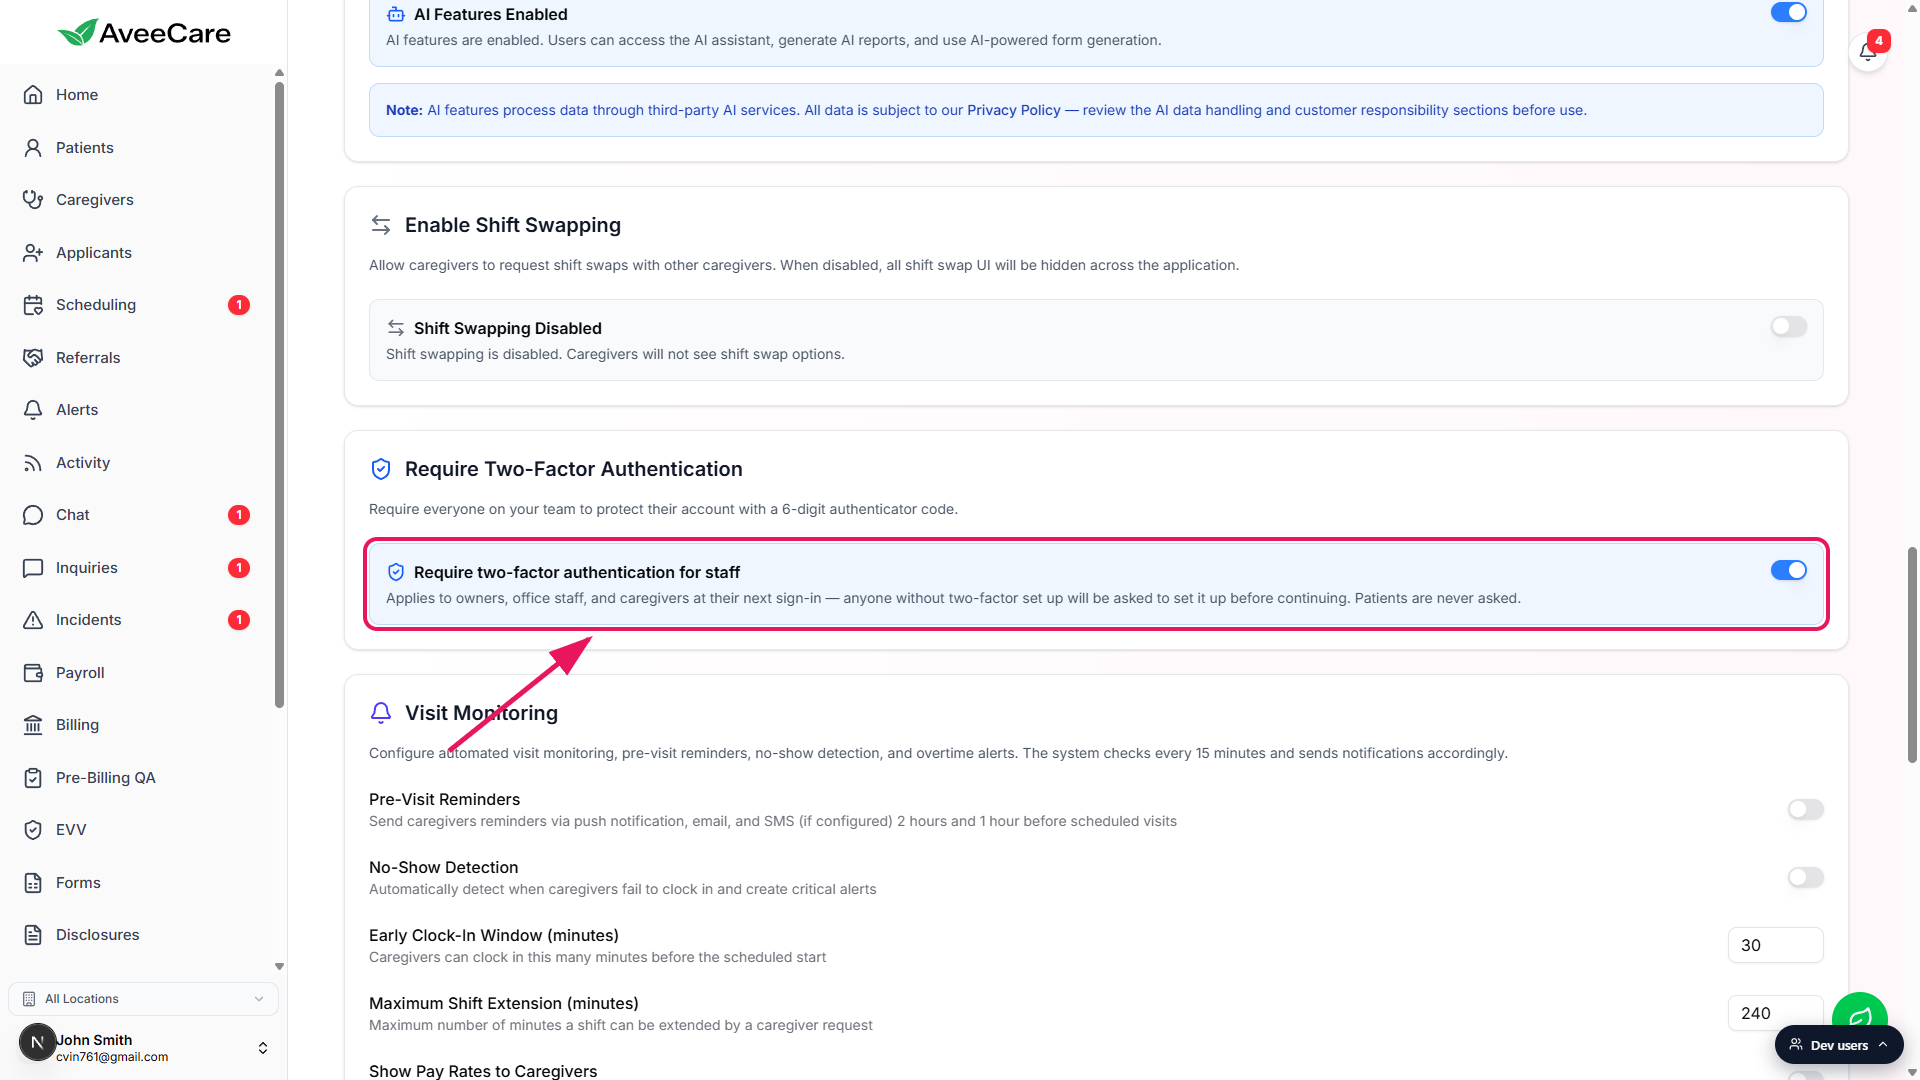
3. Sign in with your 6-digit code
Once 2FA is on for your account, sign-in always asks for a code.
After you enter your password, the sign-in screen prompts for the current 6-digit code from your authenticator app. There is no way for someone with only your password to get past that prompt.Use any TOTP authenticator app.
Google Authenticator, Microsoft Authenticator, 1Password, Authy, and Bitwarden all work. The link reading Need help with 2FA? on the sign-in screen opens a help dialog with the recommended apps and the full QR-code walkthrough.Lost your authenticator? Reset from the Accounts page.
A RootUser can open Accounts and use the per-user actions menu to disable the affected account, then re-invite it. The re-invite flow walks the user through pairing a new authenticator on their next sign-in.
4. Turn on Automatic Sign-Out for yourself (optional)
AveeCare never signs anyone out for being idle. If you want your own account to sign itself out after a stretch of inactivity — a common choice for a shared front-desk computer — you can opt in from your personal settings. This is per person: there is no company-wide setting, and nobody can enable it for another account. Patient and Caregiver accounts are never signed out for inactivity.
Click the My Notifications tab in Settings.
The Automatic Sign-Out card only shows up for accounts with the User or RootUser role, since those are the roles that work from shared office machines. Patient and Caregiver accounts do not have the card and are never auto-signed-out.Scroll to the Automatic Sign-Out card.
It sits below the granular notification toggles, with an orange clock icon. The description confirms the default: AveeCare never signs you out for being idle unless you turn this on.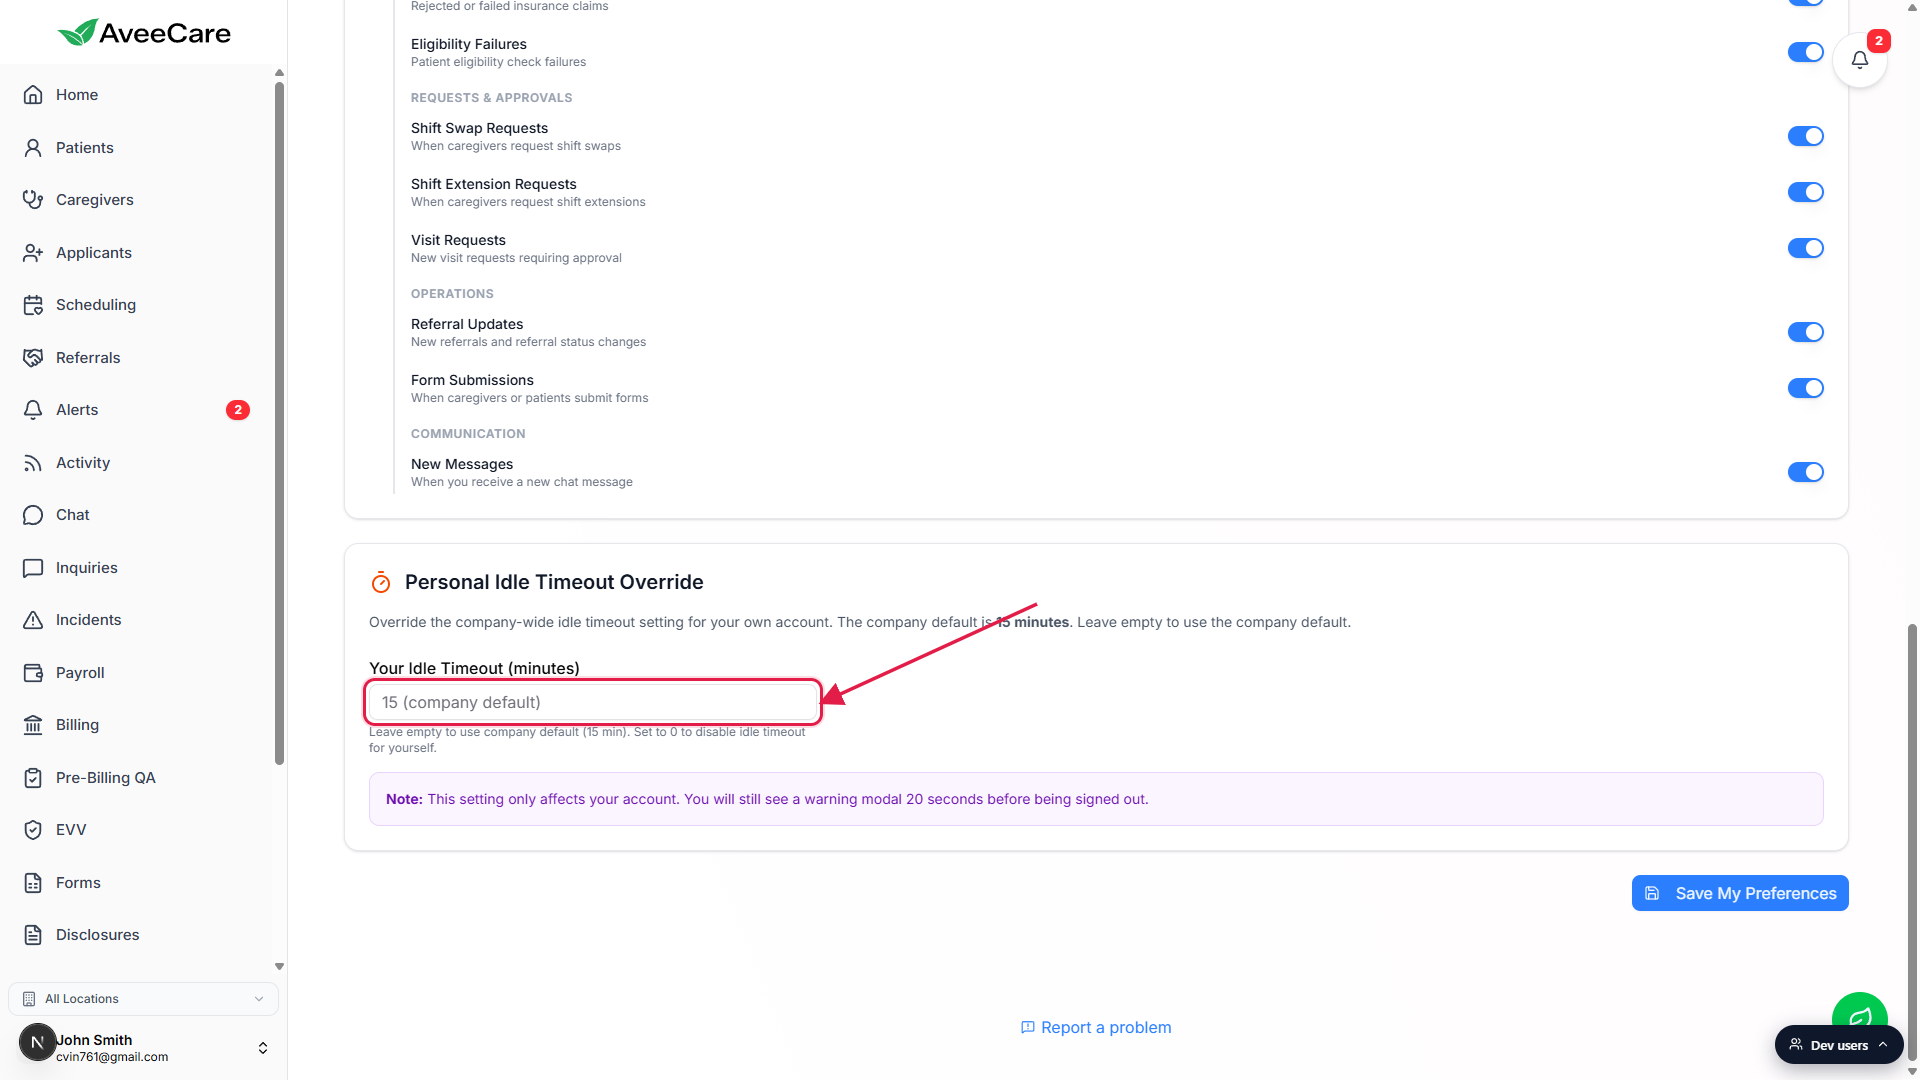
Type a number of minutes and click Save My Preferences.
Any positive number turns automatic sign-out on for your account only — after that many minutes of inactivity you get a 20-second warning, then AveeCare signs you out. Leaving the field blank (or 0) keeps it off, which is the default. Any activity — mouse movement, typing, or touch — resets the timer, and the countdown only runs while the tab is actually in front of you.
Common pitfalls
- Assuming 2FA is already on. 2FA is optional and off by default. A brand-new account signs in with just a password until the user enrolls from the Two-Factor Authentication card, or until the agency turns on the staff requirement in Business Settings.
- Looking for a company-wide idle timeout. There isn’t one. Automatic sign-out is strictly personal — each User or RootUser opts in (or stays out) from their own My Notifications tab, and nobody can set it for someone else. If your agency wants unattended shared machines protected, have each front-desk user opt in, or rely on the operating system’s lock screen.
- Automatic Sign-Out card is missing. The card only renders for User and RootUser roles. Patients and Caregivers do not see it, which is intentional — those accounts are never signed out for inactivity.
- Forgetting to click Save. Changing the staff 2FA requirement but not clicking Save Business Settings at the bottom right leaves the old value in place on the next page load. Same for Automatic Sign-Out and the Save My Preferences button.
- Lost authenticator with no RootUser available. A user who has lost their phone and is the only RootUser on the tenant cannot reset 2FA themselves. Contact AveeCare support before locking the last admin out.