Accounts is the one place every login in your tenant shows up. Office users, caregivers who can sign into the app, and patients or family members on the patient portal all sit in the same Account List, with role badges, status, and last-activity timestamps. This is where you add new logins, reset a password, lock someone out, or check who actually signed in this month.
Quick answer
Open Accounts from the left sidebar. The Account List table shows every login with Name, Role, Linked To, Email, Status, Creation Time, Last Activity, and a Controls column. Add new logins with the Create User, Link Caregiver, or Link Patient cards above the table. Use the row icons to delete, log out, reset password, or disable an account.
1. Open Accounts from the sidebar
Click Accounts in the left sidebar.
Accounts sits near the bottom of the sidebar, between Compliance and Help. The page loads with three entry cards at the top (Create User, Link Caregiver, Link Patient), the Account List table in the middle, and an Audit Logs panel below for 90-day-retention activity history.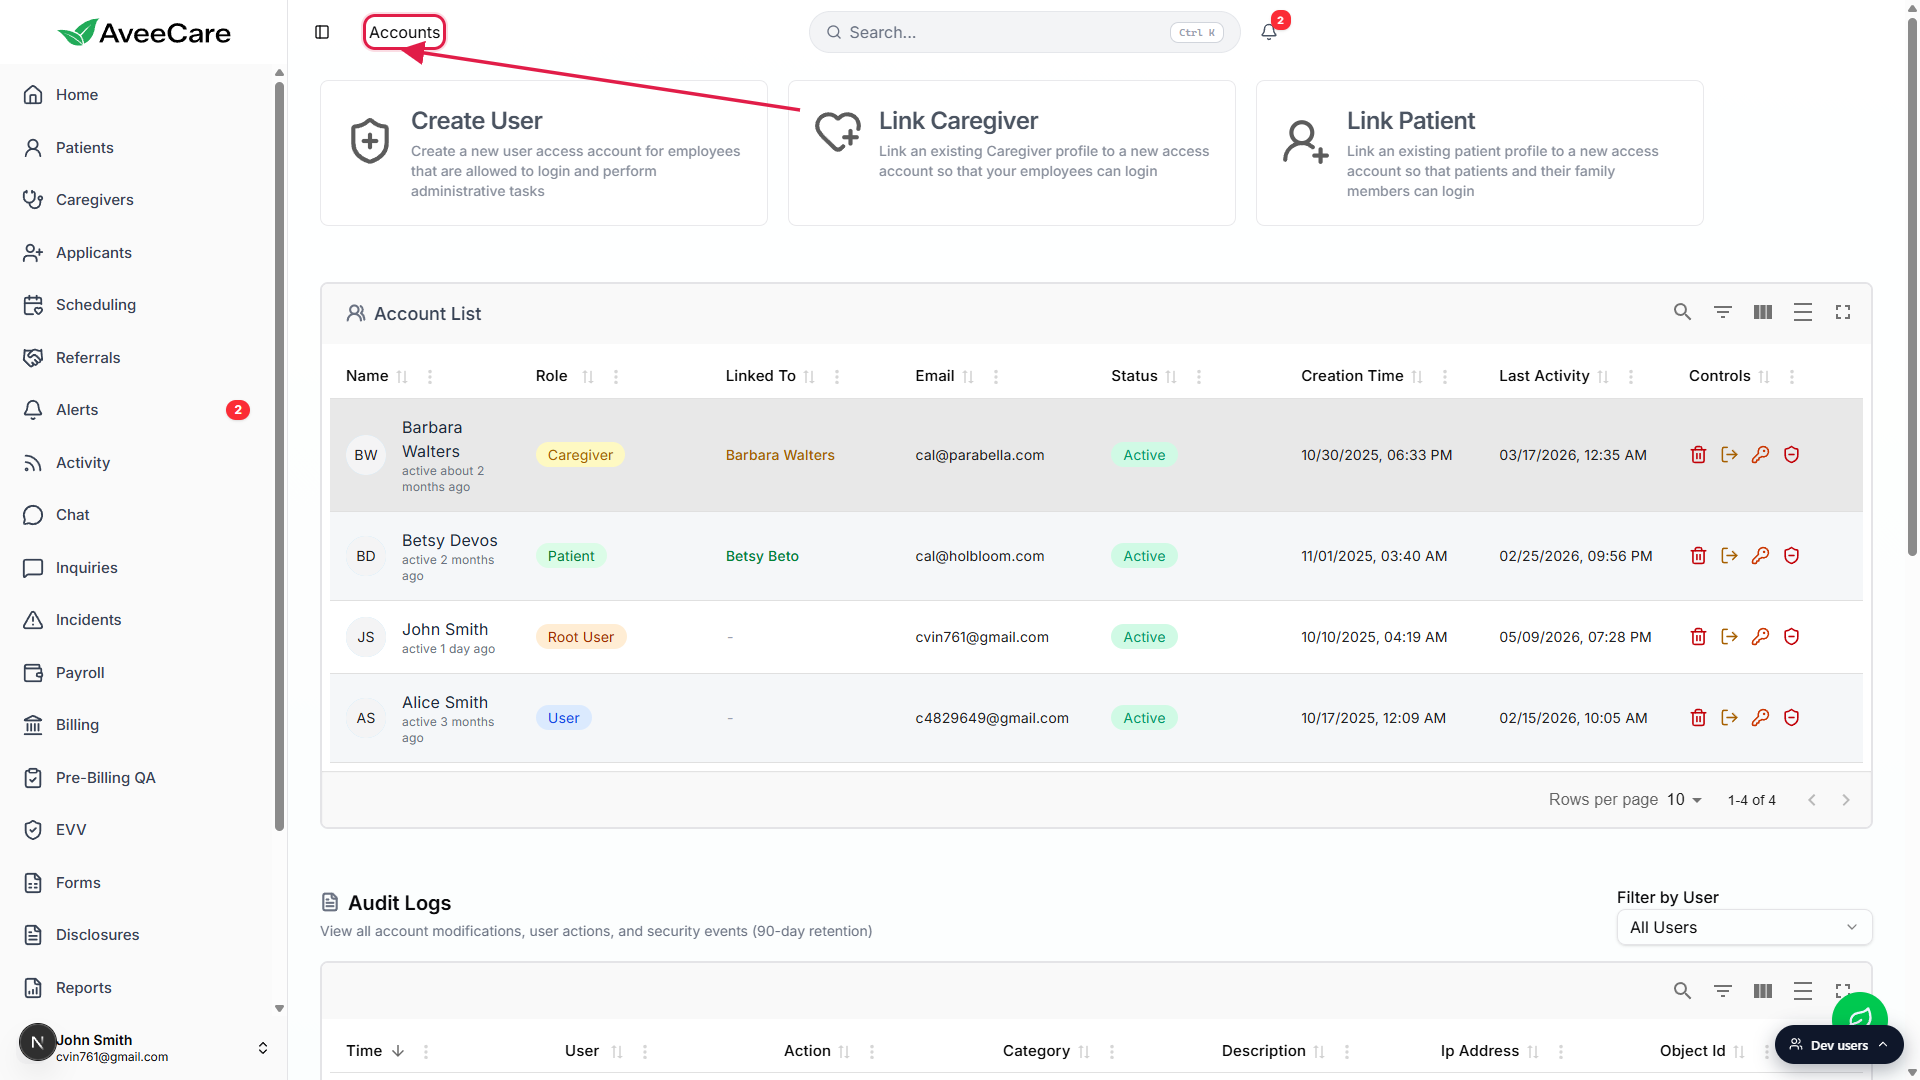
2. Read the Account List columns
Eight columns: Name, Role, Linked To, Email, Status, Creation Time, Last Activity, Controls.
Name shows the user's avatar, full name, and a short “active N days ago” line under the name. Role is a colored badge: Root User, User, Caregiver, or Patient. Linked To shows the caregiver or patient record this login is attached to, when applicable (Root User and User rows show a dash). Status is Active or Inactive. Creation Time is when the login was created. Last Activity is the most recent successful sign-in. Click any column header to sort, useful for finding dormant accounts by Last Activity.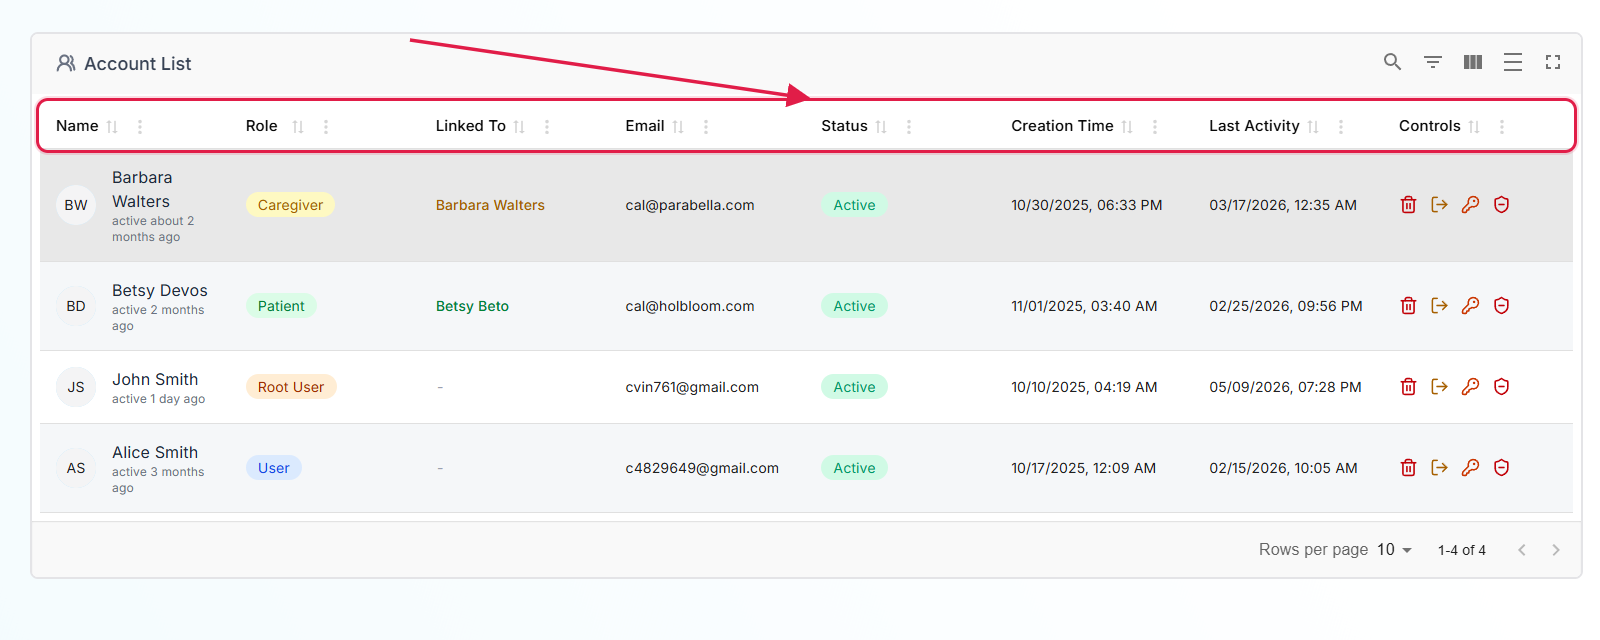
3. Use the per-row controls
Four icons sit in the Controls column on every row.
Hover any icon for a tooltip with the action name. The icons are always visible, you do not need to expand a menu first.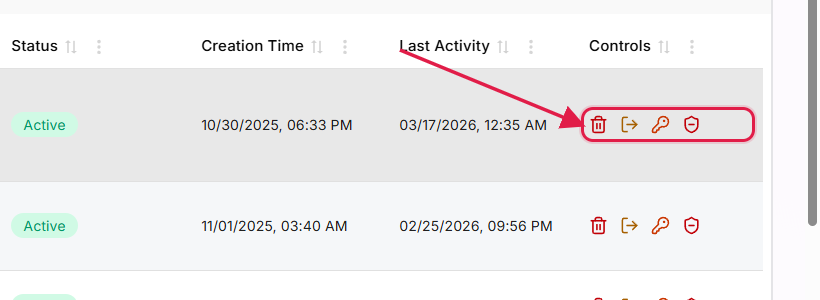
Trash icon: Delete User. The login is removed from Cognito permanently. If the user is linked to a Caregiver, the caregiver record is unlinked first so it can be re-linked to a different login later.
Log-out icon: Logout User. Ends every active session for that login. They will have to sign in again on every device.
Key icon: Change Password. Generates a one-time temporary password, displays it in the confirmation, and forces the user to set a new one on next sign-in. Copy the temp password from the dialog before clicking confirm.
Shield icon: Disable User (red minus shield on Active rows) or Enable User (blue plus shield on Inactive rows).
Disabling blocks sign-in without deleting any records. Re-enable later from the same icon. Disabling also revokes any active API keys for that user.
4. Add a new login from the entry cards
Click Create User to add an office login.
Use this for staff who need administrative access (scheduling, billing, payroll, patients, caregivers). The full-screen modal asks for first name, last name, email, and a confirmation email, then walks through five platform legal agreements (Privacy Policy, Terms of Service, Data Processing, Electronic Signature, AI Processing) before the Create User button enables.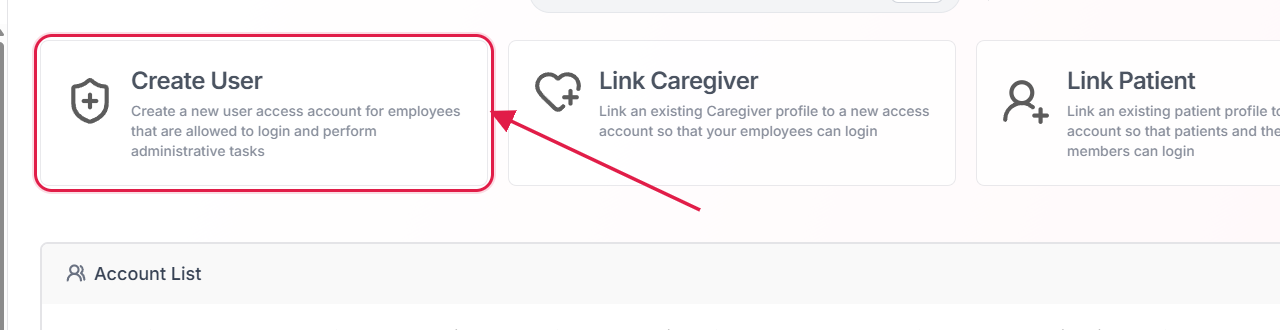
Click Link Caregiver to give an existing caregiver record a login.
The list only shows caregivers without a linked login. Pick one, confirm the email (auto-filled from the caregiver record, but you can change it), check the same five platform agreements, and the caregiver can sign in to the caregiver app.Click Link Patient to give a patient or family member a portal login.
Same flow as Link Caregiver but against the patient list. Useful when a family member wants to see schedule, notes, and disclosures through the patient portal.
Common pitfalls
- Caregiver shows up in Caregivers but not in Accounts. A caregiver record exists in Caregivers but they cannot sign in. The caregiver was created without an access account. Use Link Caregiver from this page to add the login.
- You see two rows for the same person. Most often a caregiver was created twice, or a User account was created for someone who already had a Caregiver login. Click into each row to confirm which is linked to the real Caregiver or Patient record, then delete the duplicate. Deleting a User unlinks any Caregiver record so the record itself survives.
- Reset Password but the user never sees the temp password. The temporary password is shown only in the confirmation dialog and is not emailed. Copy it before clicking confirm and share it with the user securely. They will be forced to change it on next sign-in.
- Disabled but they still seem logged in. Disable blocks new sign-ins but does not end the current session. After disabling, also click the log-out icon to kill active sessions immediately.
- Last Activity looks wrong. Last Activity is the most recent successful sign-in, not the most recent visit clock-in or chat message. A caregiver who works from a logged-in app for weeks may show a Last Activity timestamp from when they first signed in.