Patients and their family members can have their own login to the AveeCare patient portal so they can view visits, billing, and inquiries on the linked patient record. An admin creates the login from the Accounts page by picking a patient, confirming an email, acknowledging five required legal agreements, and submitting the form. Unlike the caregiver flow, a single patient record can have more than one Patient Access Account, so each family member gets their own credentials tied to the same patient.
Quick answer
Open Accounts, click the Link Patient card at the top of the page, pick a patient from the Available Patients table, confirm the email twice, check the five Platform Legal Agreements, then click Create Patient Access Account. AveeCare creates a Cognito login with the Patient role attached to that patient record. Run the same flow again with a different email to add a family member login on the same patient.
1. Open Accounts and click the Link Patient card
Click Accounts in the left sidebar.
The Accounts page loads with three entry cards at the top (Create User, Link Caregiver, Link Patient), an Account List in the middle, and Audit Logs at the bottom. Each card is the entry point for one of the three roles you can create from the UI.Click the Link Patient card on the right.
The card opens the Link Patient Access Account modal. Create User produces a User role login with full admin access, Link Caregiver produces a Caregiver role login, and Link Patient is the only one that wires a login to an existing patient record. Patient logins only see the linked patient's records, not the whole agency.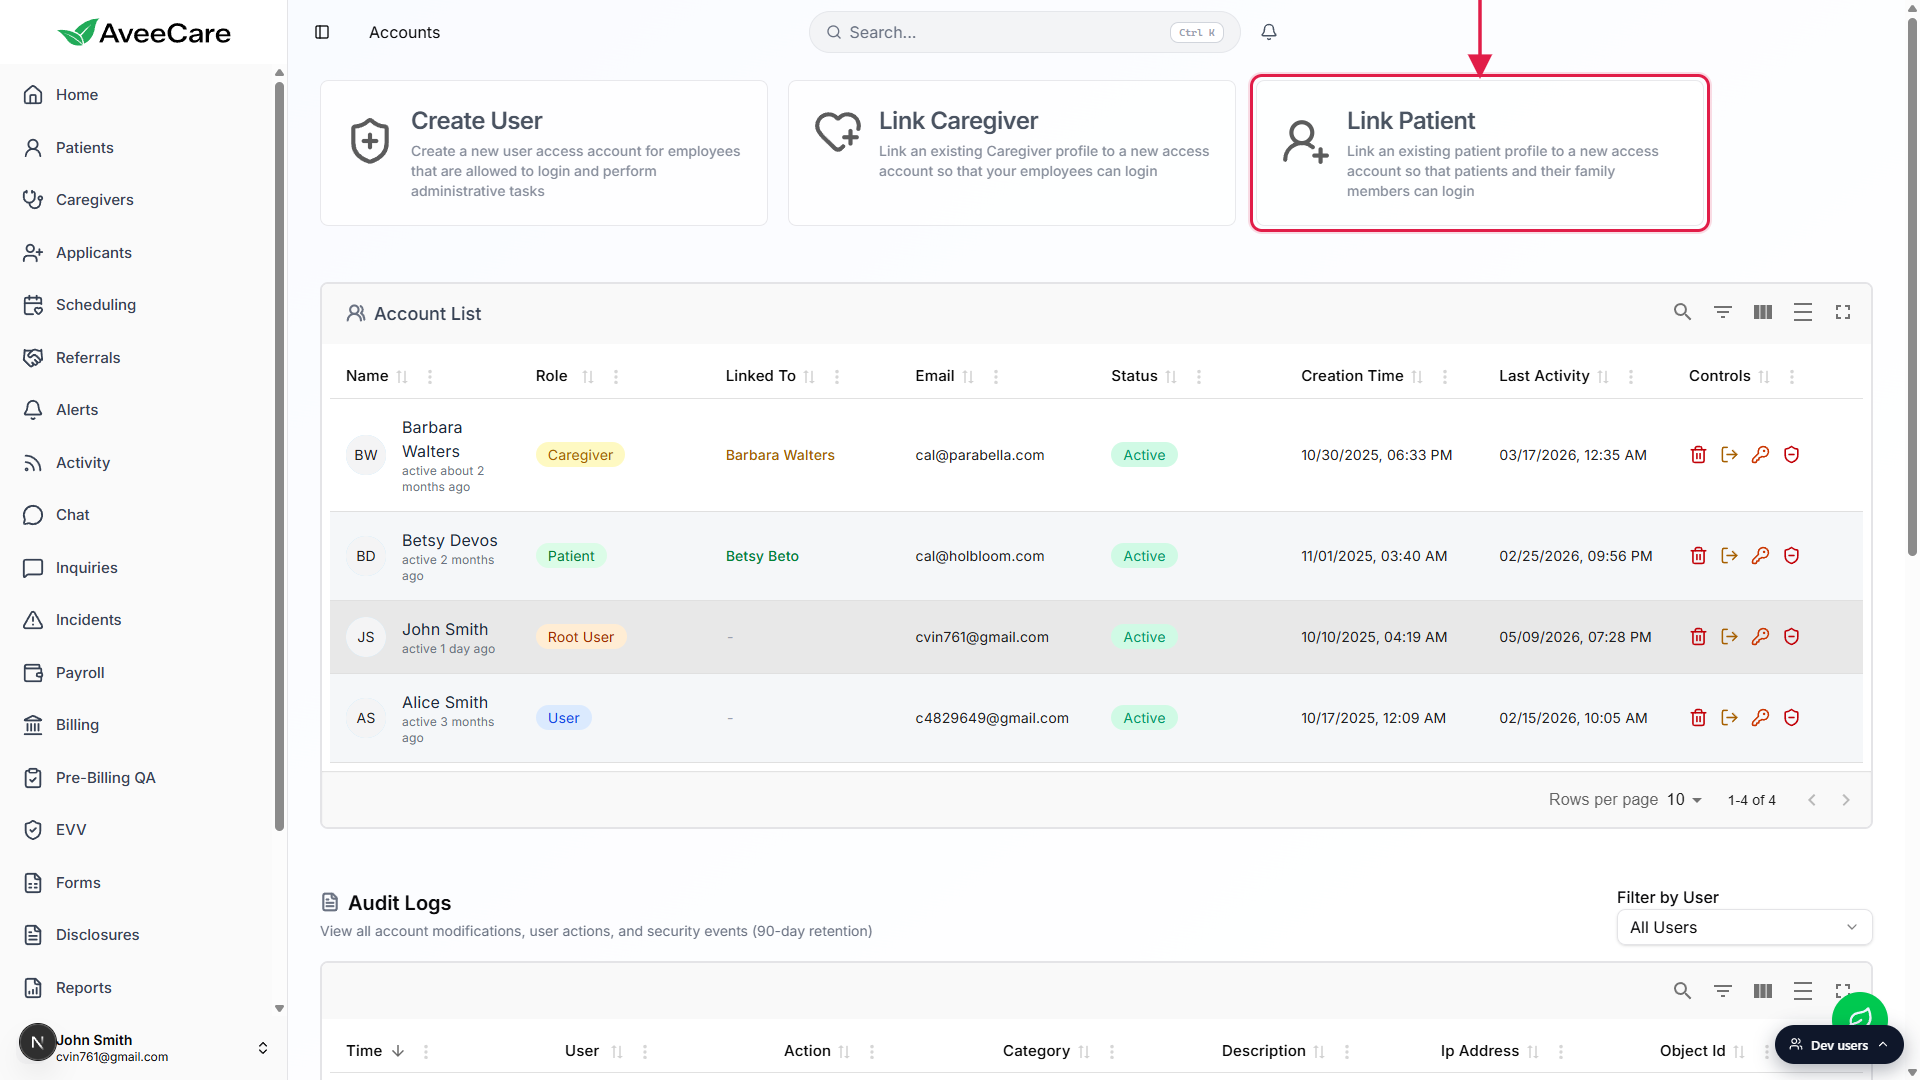
2. Pick the patient from the Available Patients list
Read the warning panel at the top of the modal.
A red You are creating a Patient Access Account panel spells out what the new login can do. It calls out that the account has limited access, can only view and interact with the linked patient's records, and that multiple access accounts can be created on the same patient (for family members). The panel links to the help page on User Access Accounts.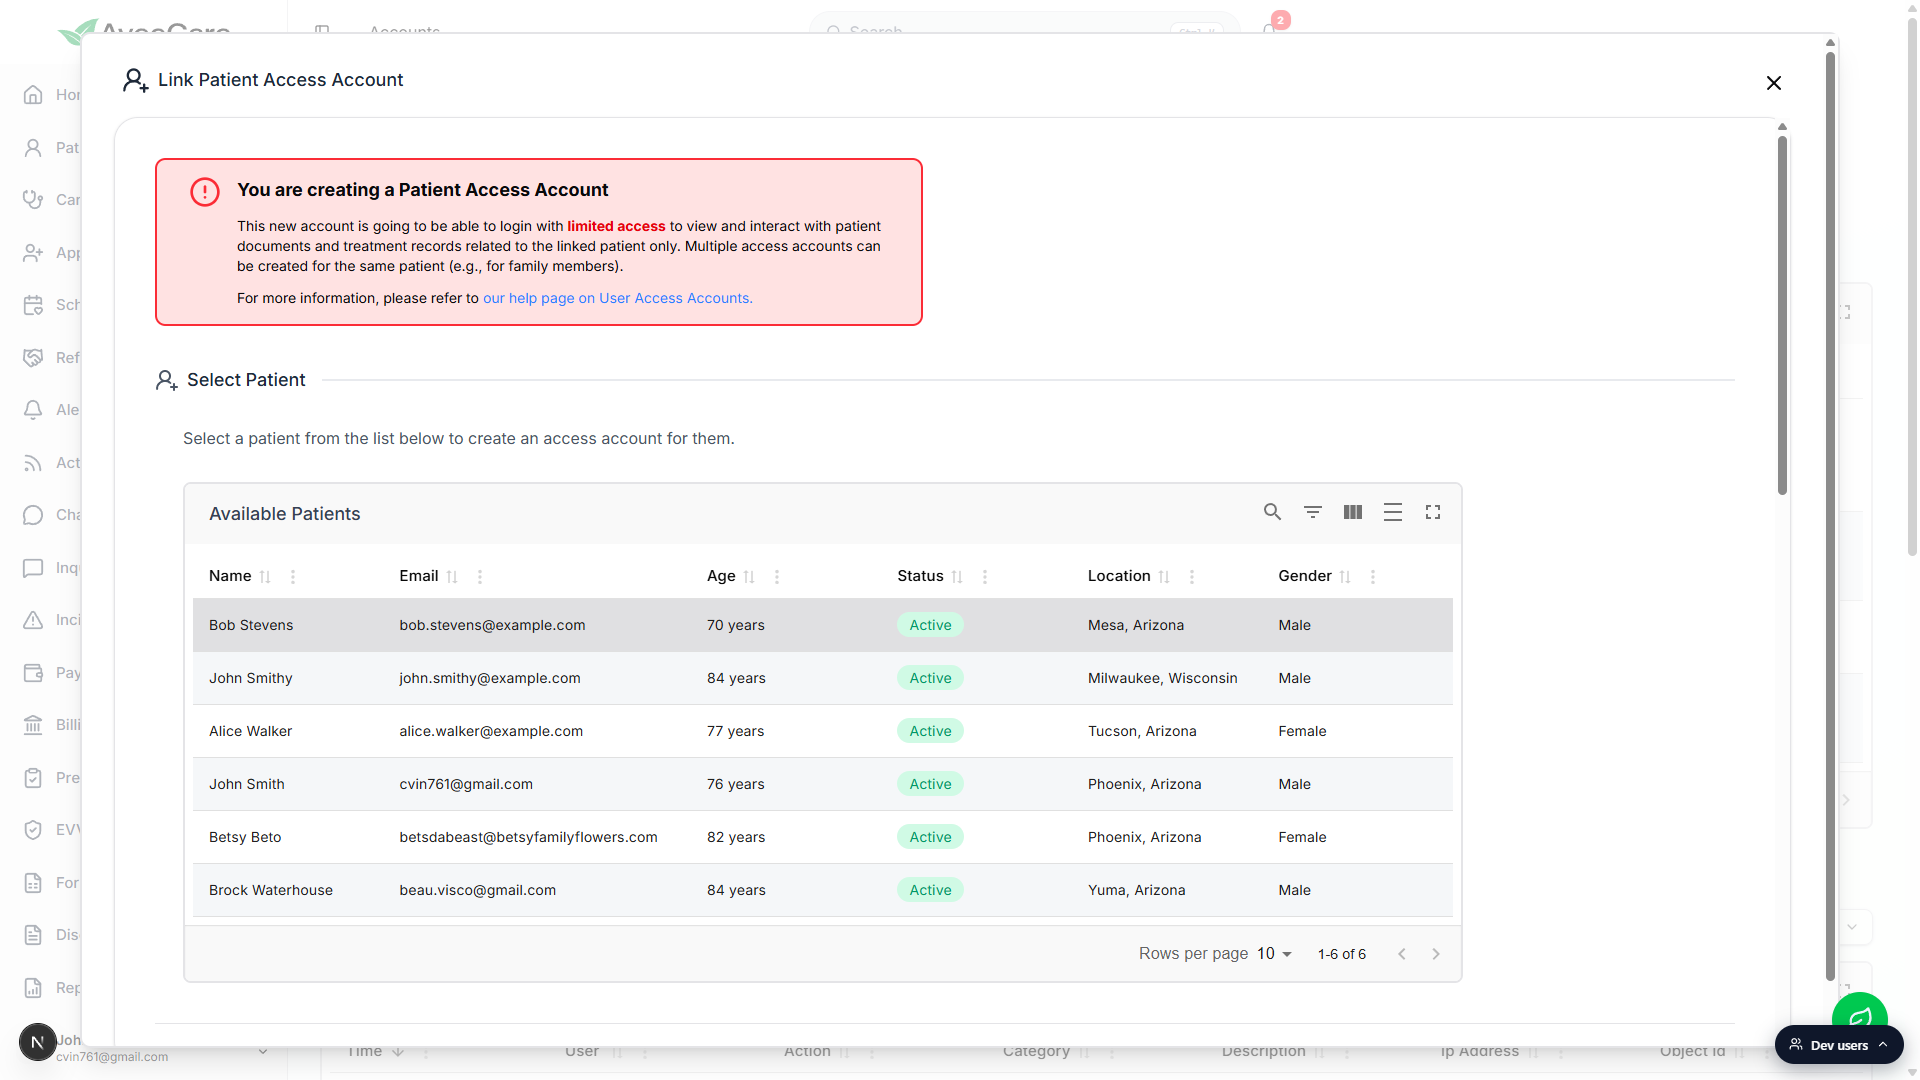
Click the row of the patient you want to give a login.
The Available Patients table shows Name, Email, Age, Status, Location, and Gender for every Active patient in the company. Use the search and filter controls in the top-right of the table to narrow the list. Inactive patients are filtered out, so if the patient you want is missing, check their Active toggle on the Patients page first.The selection drops into the Selected Patient panel below.
The label changes from No patient selected to the patient name with their age, gender, and city/state on a second line. Pick a different row to change the selection, the form will overwrite the previous choice.
3. Confirm the email the patient or family member will use
Check the Email field.
AveeCare pre-fills the Email field from the patient record on first selection. This is the address the new user will use as their Cognito login. For a family member login, overwrite the pre-filled value with the family member's own inbox so the temporary password lands on the right person.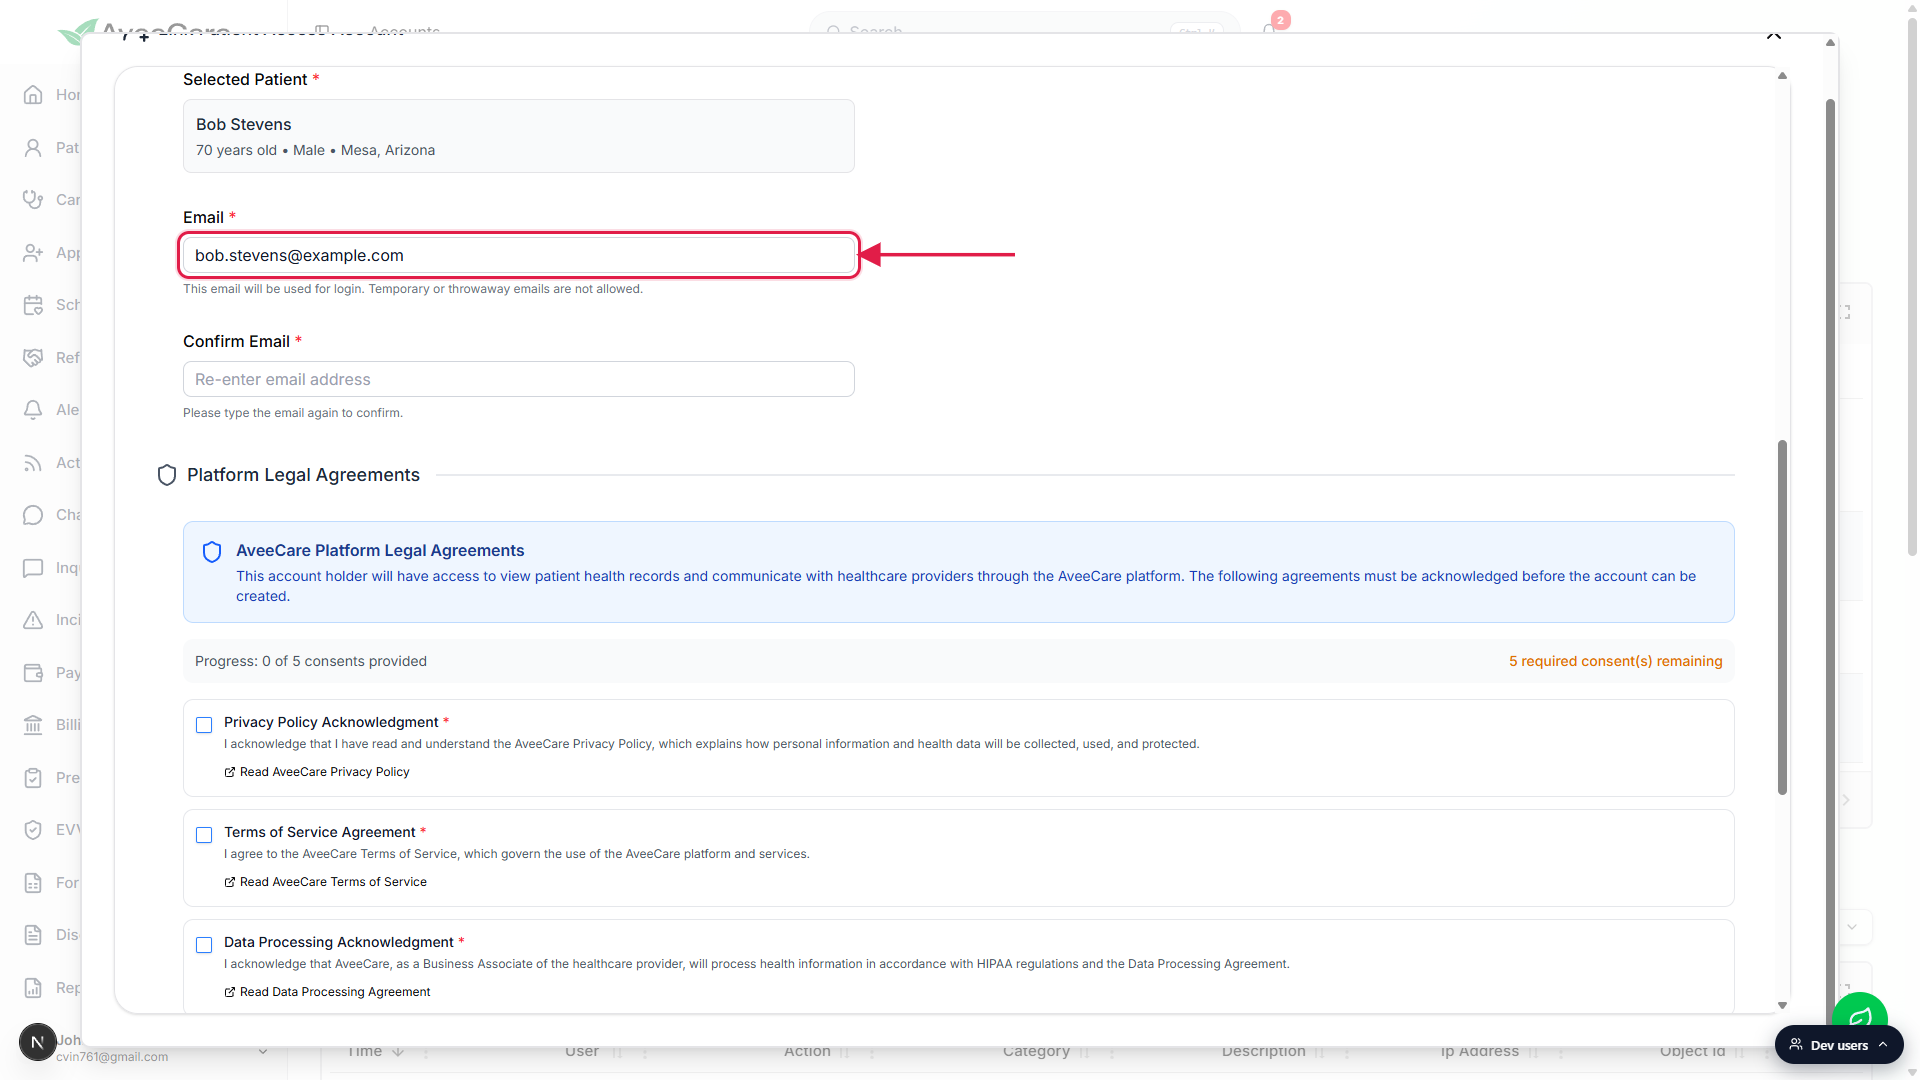
Type the same email into the Confirm Email field.
The Confirm Email field blocks paste, so it has to be typed by hand. Both addresses must match exactly. The help text under each field warns that temporary or throwaway email services are not allowed because Cognito uses the address for password recovery.For a family member, use that family member's own email.
Multiple Patient Access Accounts can be linked to the same patient record. Use a different email per family member so each one gets their own login and password. Reusing the same email across two family logins fails because Cognito treats one email as one account.
4. Acknowledge the five Platform Legal Agreements
Scroll to the Platform Legal Agreements panel.
The panel sits between the email fields and the submit button. A progress counter reads Progress: 0 of 5 consents provided and updates as boxes are checked. The submit button stays disabled until all five are checked.Check each of the five required boxes.
The five agreements are Privacy Policy Acknowledgment, Terms of Service Agreement, Data Processing Acknowledgment, Electronic Signature Consent, and AI Processing Consent. Each one has a Read link to the full document on aveecare.com. AveeCare records the consent with a timestamp for HIPAA, E-SIGN, and UETA compliance.Watch the progress counter hit 5 of 5.
When the last box is checked, the amber warning that No platform legal agreements must be acknowledged before creating an account disappears and the submit button becomes clickable.
5. Click Create Patient Access Account
Click the green Create Patient Access Account button at the bottom.
A confirmation dialog asks Are you sure you want to create a Patient access account for [Name]? Click Create Account. AveeCare creates a Cognito user with the Patient role and attaches it to the patient record. The modal closes and the new login appears in the Account List with role Patient, status Active, and the patient name in the Linked To column. Cognito emails the user a temporary password.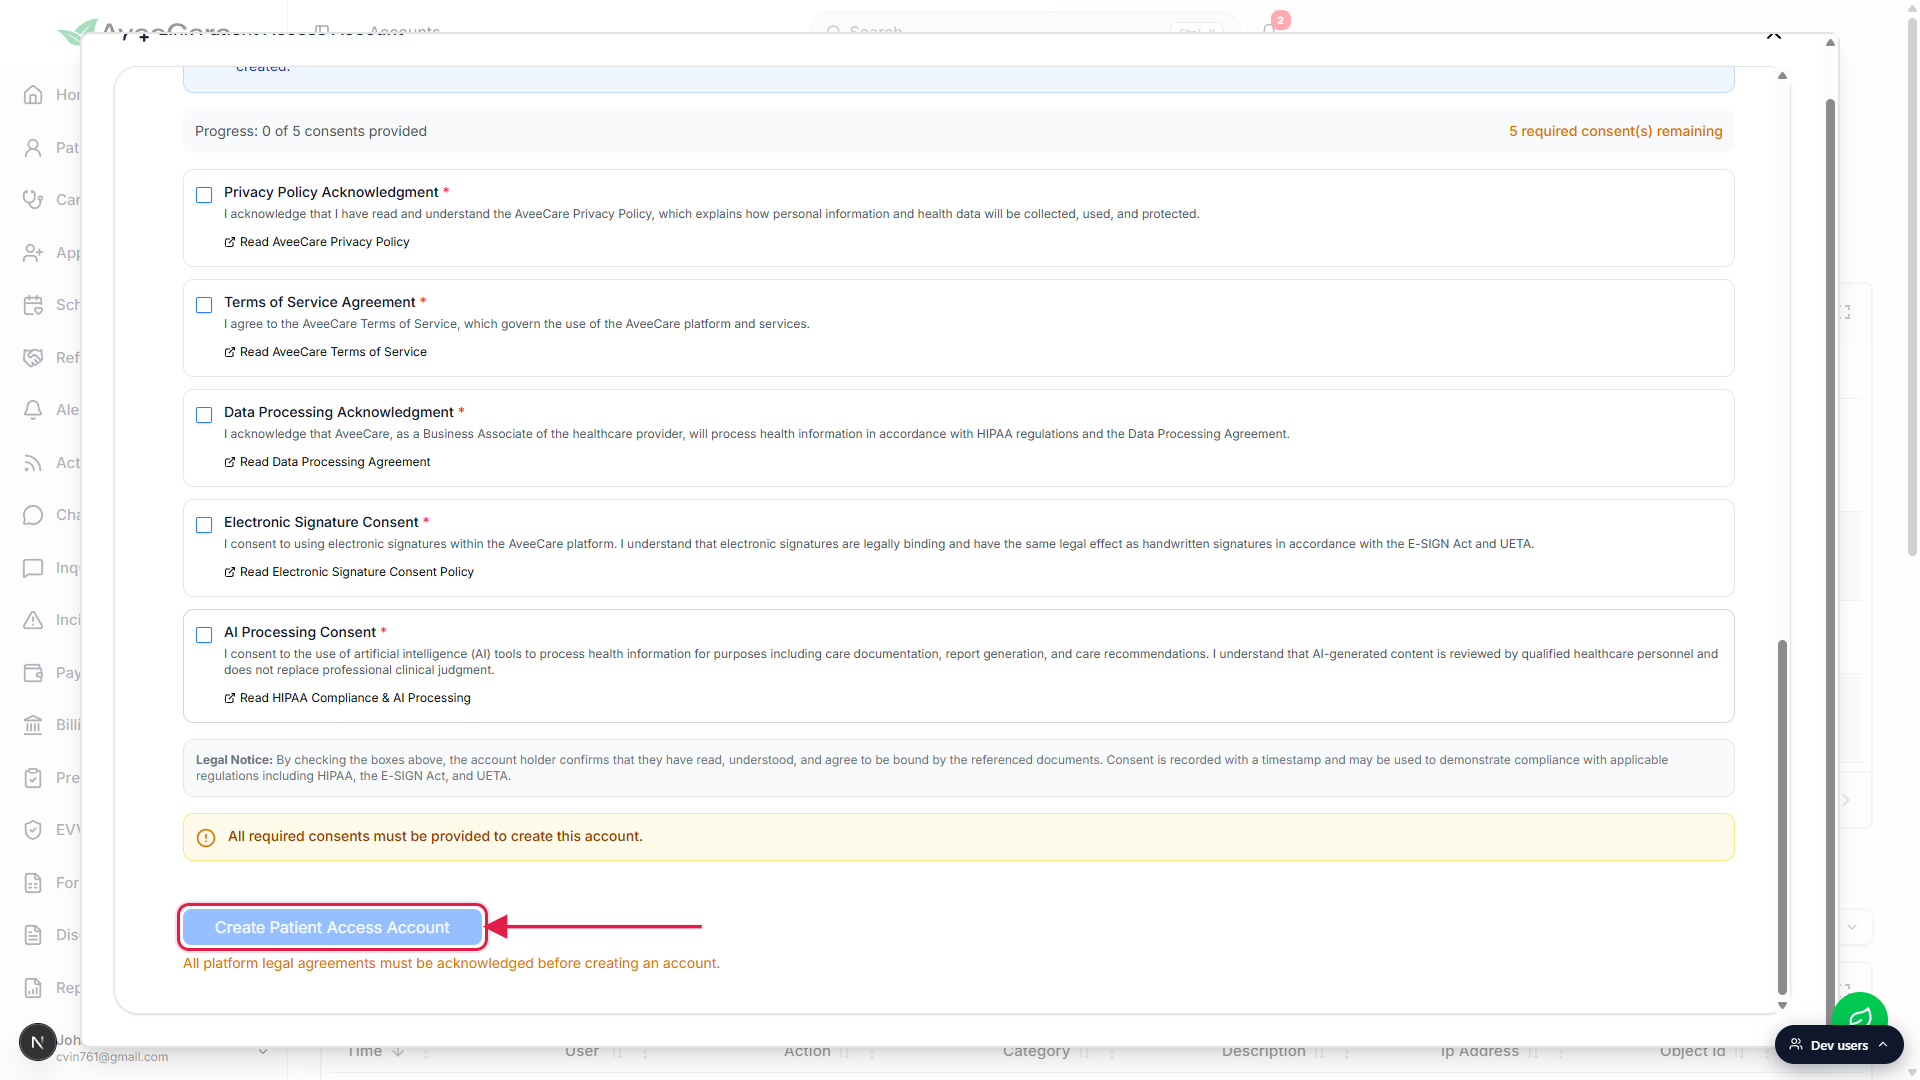
Look for the new row on the Account List below.
A successful link adds a row with the new user name on the left, a Patient pill in the Role column, the patient name in the Linked To column, the email you just confirmed, and Active in the Status column. The patient record itself now lists the linked login on the Patients page.Tell the patient or family member to check their inbox.
The first sign-in uses the temporary password Cognito sent. The user is forced to choose a new password on first sign-in. After that the login is good for the patient portal and the AveeCare web dashboard, limited to the linked patient's records.Repeat the flow for each family member who needs a login.
Open Link Patient again, pick the same patient, type the family member's email in both fields, acknowledge the consents, and submit. The Account List ends up with one row per linked login, all pointing to the same patient in the Linked To column.
Common pitfalls
- Wrong email pre-filled on the patient record. The Email field pre-fills from the patient profile. If that address is stale or wrong, the temporary password lands in the wrong inbox. Overwrite the email in the modal before submitting, or fix it on the patient profile so future links pre-fill correctly.
- Trying to paste into Confirm Email. The Confirm Email field blocks paste on purpose so the address gets typed manually. If paste fails silently, that is by design, type the email instead.
- Reusing one email across multiple family logins. Each email maps to one Cognito account across the whole company. Use a different inbox per family member. Two family members who genuinely share an inbox can share one login but cannot have two separate logins on that email.
- Inactive patient missing from the list.The Available Patients table only shows patients with the Active flag set. Reactivate the patient on the Patients page first if they need a login.
- Forgetting the five consent boxes. The submit button stays disabled until every Platform Legal Agreement checkbox is checked. The progress counter above the boxes shows how many are left.
- Expecting a SMS invite option. Patient access accounts are provisioned over email only. Cognito uses the confirmed email for the first temporary password and for any future password reset, so there is no SMS path.