Adding a new office staffer to AveeCare starts on the Accounts page. AveeCare does not have a separate “invite, then accept” flow with a token that can be resent or revoked. You create the User Access Account directly, Cognito emails the new user a temporary password, and they sign in and set their own password the first time.
Quick answer
Open Accounts from the sidebar. Click the Create User card at the top of the page. Enter first name, last name, email, and a confirmation email, then check all five platform legal agreements. Click Create User at the bottom of the form. The new login appears in the Account List and the person receives an email with a temporary password from AWS Cognito.
What Create User does, and what it does not
Create User makes a real Cognito account with the User role (administrative). It is not a deferred invitation. Once you click the final Create User button:
- The account is created immediately with Status Active.
- Cognito sends the user an email with a one-time temporary password.
- The user signs in with that temp password and is forced to set a new one.
- The row appears in the Account List right away, so you can sort, search, disable, or delete it before the user even signs in.
There is no Resend Invitation action, no Revoke Invitation action, and no pending-invite state. If the user does not receive the welcome email, use the Change Password row icon to mint a fresh temp password, or delete and re-create the account.
1. Open Accounts and click Create User
Click Accounts in the left sidebar.
The page loads with three entry cards at the top: Create User, Link Caregiver, and Link Patient. Use Create User for office staff who need administrative access. Use Link Caregiver or Link Patient when you want to give an existing caregiver or patient record a login.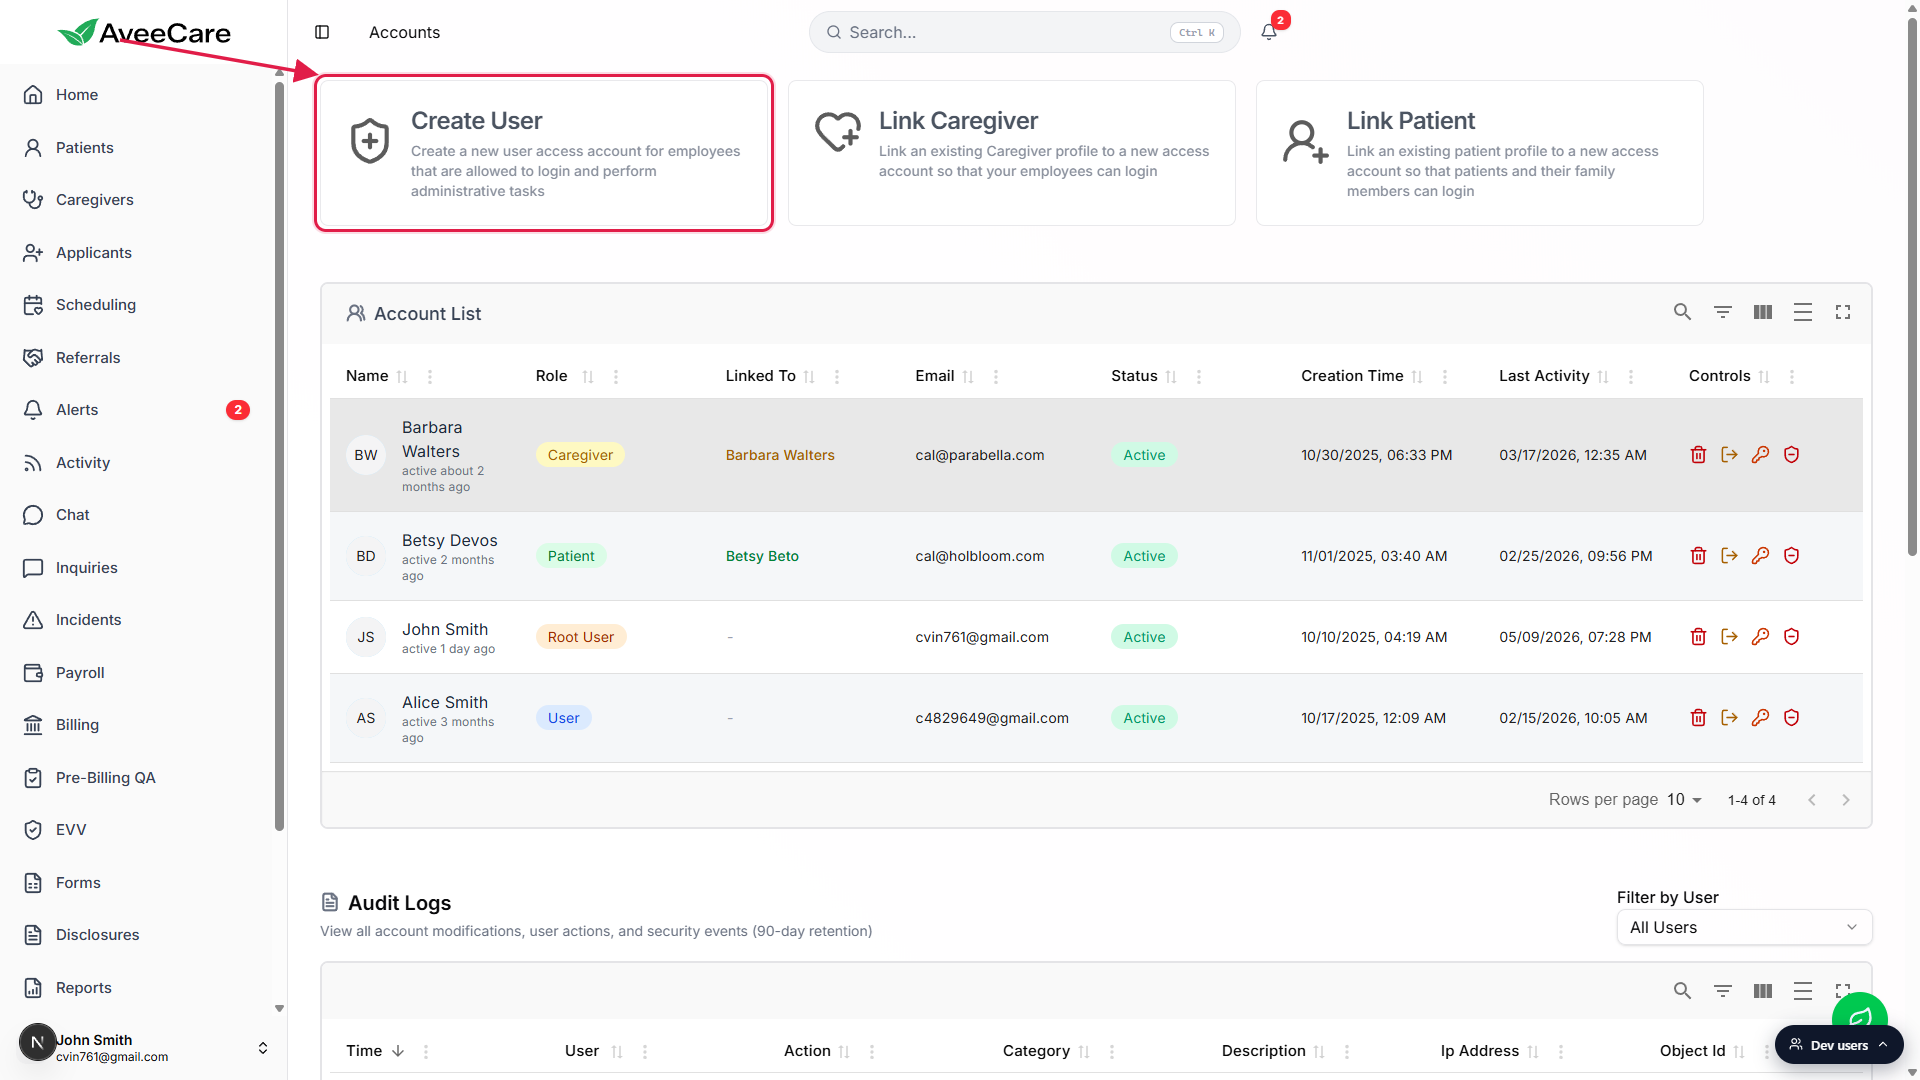
Click the Create User card.
A full-screen modal titled Create User Access Account opens. The modal has a red warning panel explaining that the new account will have administrative privileges (add and delete users, modify patients, modify caregivers, and more).
2. Fill out Account Information
Enter First Name, Last Name, Email, and Confirm Email.
Every field is required and marked with a red asterisk. The email becomes the user's sign-in username, so use the staffer's real work email. Temporary or throwaway emails are blocked by the form. The Confirm Email field intentionally does not allow paste, so you have to type the address twice; this catches typos before the account is created.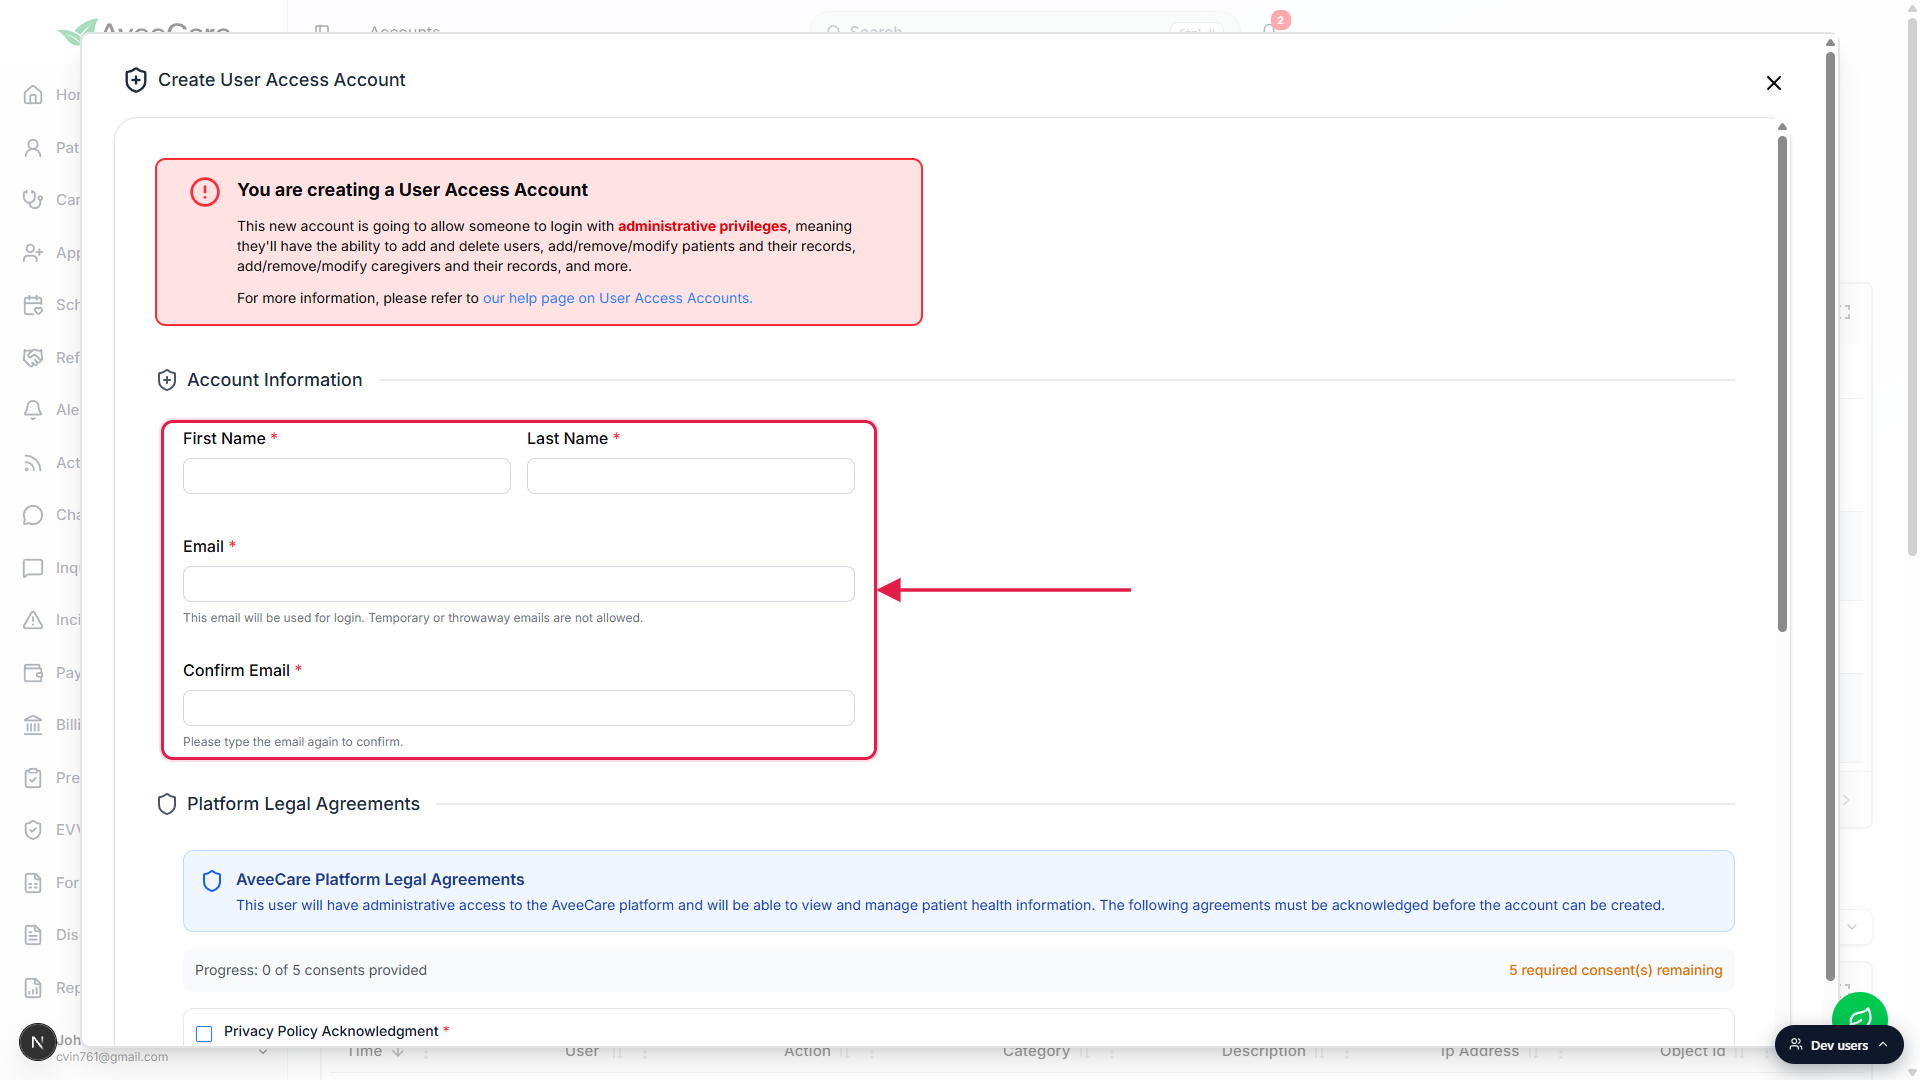
3. Acknowledge the five platform agreements
Scroll down to Platform Legal Agreements.
A progress bar at the top of the section tracks how many of the five agreements you have checked. The Create User button at the bottom stays disabled until all five are acknowledged.Check all five agreement boxes.
The required agreements are Privacy Policy Acknowledgment, Terms of Service Agreement, Data Processing Agreement, Electronic Signature Consent, and AI Processing Consent. You can expand each one to read the full text before checking the box.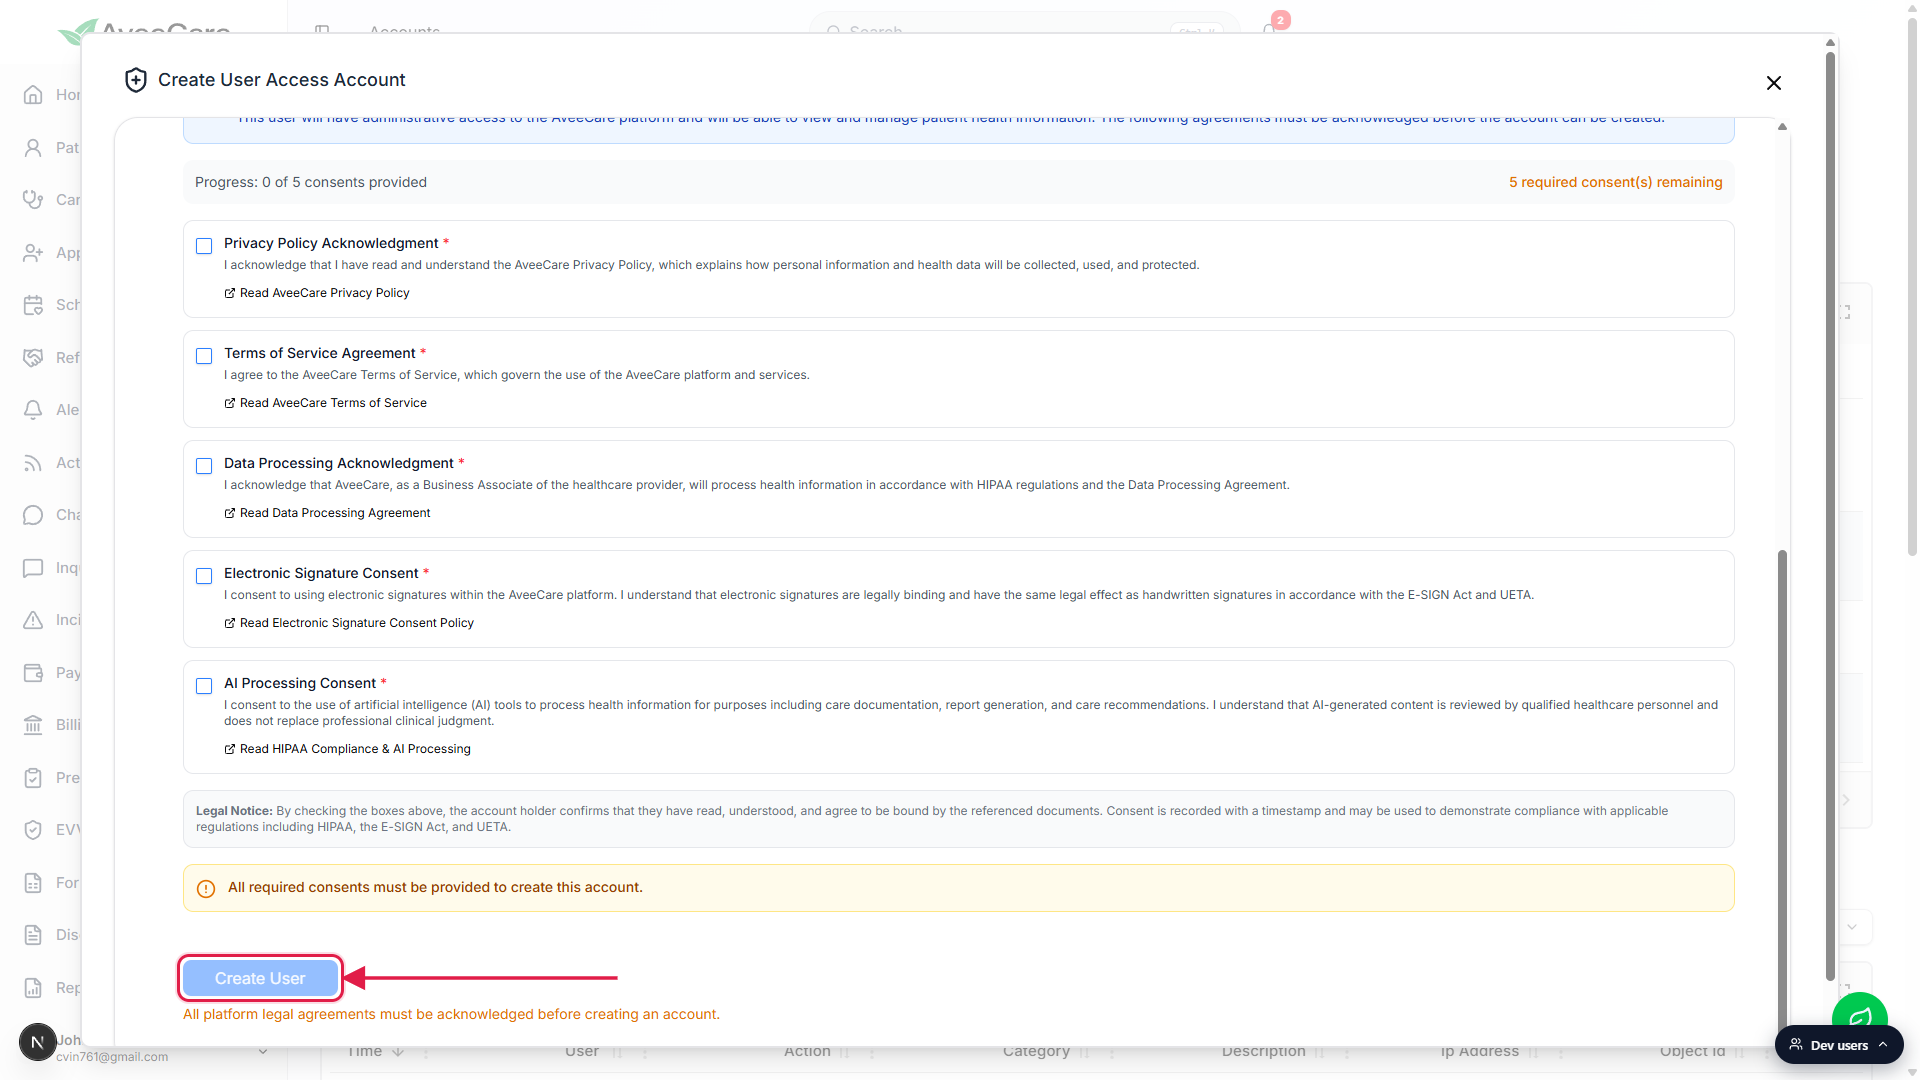
Click Create User at the bottom of the form.
A confirmation dialog asks you to confirm that you are creating a new administrative account. Click confirm to submit. A toast reads Successfully created user access account and the modal closes after the page reloads.
4. What happens after you click Create User
The new row appears in the Account List.
Status is Active, Role is User, Linked To is a dash (User accounts are not linked to a Caregiver or Patient record), Creation Time is the moment you clicked Create User, and Last Activity is empty until they sign in.Cognito sends the user a welcome email with a temporary password.
AWS Cognito generates the temp password and emails it to the address you entered. The email is sent automatically the instant the account is created. There is no separate “send invitation” step from inside AveeCare.The user signs in and is forced to pick a new password.
On first sign-in, Cognito requires them to replace the temp password with one of their own. After that, the password is managed from their own profile, not from the Accounts page.If the welcome email never arrives, use the Change Password row icon to issue a fresh temp password.
Click the key icon in the Controls column on the new row. The confirmation dialog displays a new one-time password that you can copy and share with the user securely. They will be forced to set a new one on next sign-in.
Common pitfalls
- Expecting a Resend Invitation action. There is no invitation token, so there is nothing to resend. Use Change Password from the Controls column to mint a fresh temp password if the original email was lost.
- Expecting a Revoke Invitation action. The account is created the moment you click Create User. To stop the user from signing in before they ever do, use Disable User (the red minus shield icon) or Delete User (the trash icon) from the row controls.
- Pasting into Confirm Email. The Confirm Email field is paste-blocked on purpose. Type the address out, do not copy from the Email field, or the form will not accept the value.
- Throwaway or temporary email addresses. The form blocks disposable-email providers. Use a real work email that the user will actually receive on.
- Forgetting to check all five agreements. The Create User submit button stays disabled until every box in Platform Legal Agreements is checked. A note in amber under the button explains why.
- Using Create User for a caregiver or family member. Create User grants administrative privileges. For a caregiver who needs to clock in or a family member who needs the patient portal, use Link Caregiver or Link Patient from the same Accounts page instead.
Related
- User and access account list
- Roles and permissions
- Link an existing caregiver account
- Link a patient account