Files is the per-patient document vault. Drop in ID scans, signed consent forms, photos, hospital discharge papers, anything you want attached to that one patient. Every upload sits behind the same HIPAA guardrails as the rest of the chart.
Quick answer
Open the patient, click Files on the tab strip. The page shows a yellow PHI banner, an Upload New Files card with a Select Files button, and a Patient Files table of everything already attached. Each row has View/Open, Download, Rename, and Delete on the right.
1. Open the patient and click the Files tab
Open Patients in the sidebar and click the row of the patient you want.
You land on the patient's Overview tab.Click Files on the patient tab strip.
Files sits between Forms and Disclosures, just to the right of the patient header. The URL becomes/patients/<name>/<uuid>/files.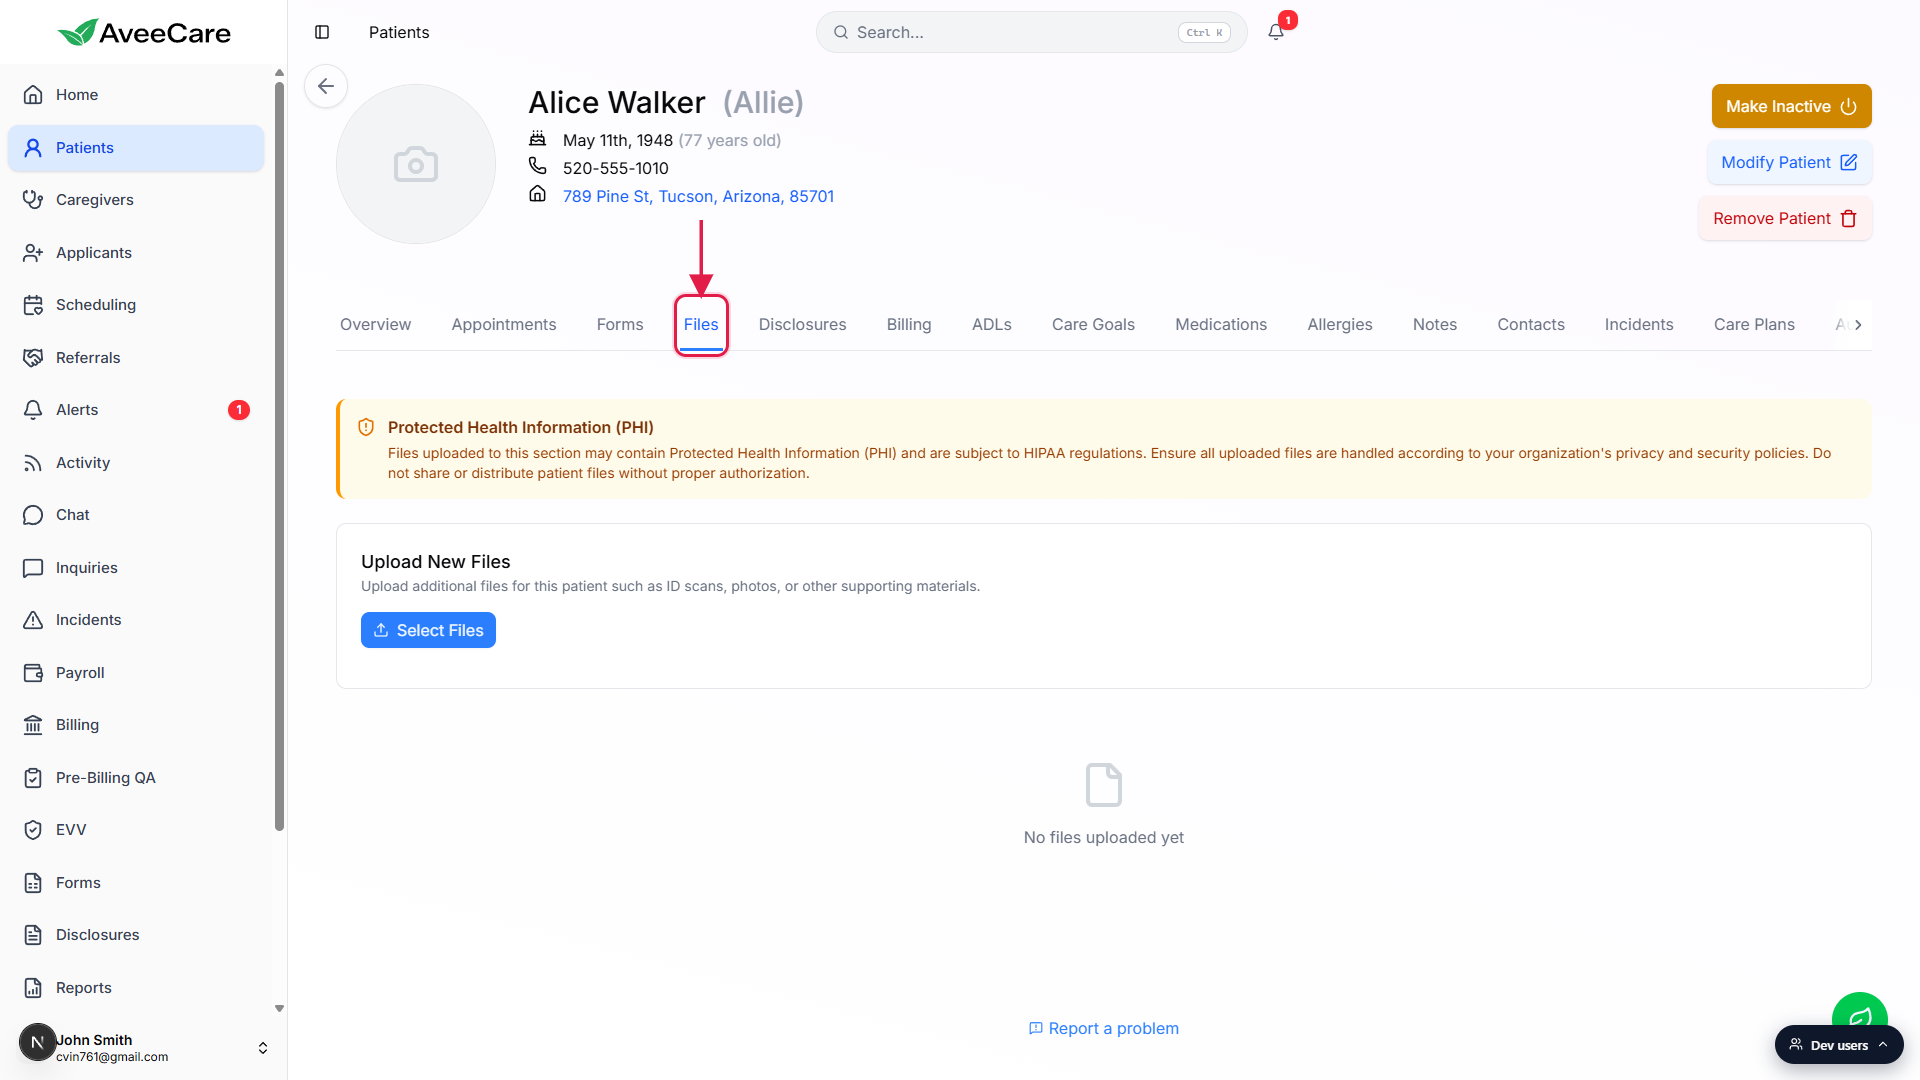
2. Read the PHI banner before uploading
The yellow banner at the top calls out Protected Health Information.
AveeCare reminds you that any file you drop here may carry PHI and falls under HIPAA. Treat every upload as PHI by default, only upload what you would want auditable, and never share files outside the people who already have access to the patient.
3. Click Select Files and pick documents
In the Upload New Files card, click Select Files.
Your browser's file picker opens. Pick one file or multi-select several. The picker accepts any file type. Each file is capped at 50 MB.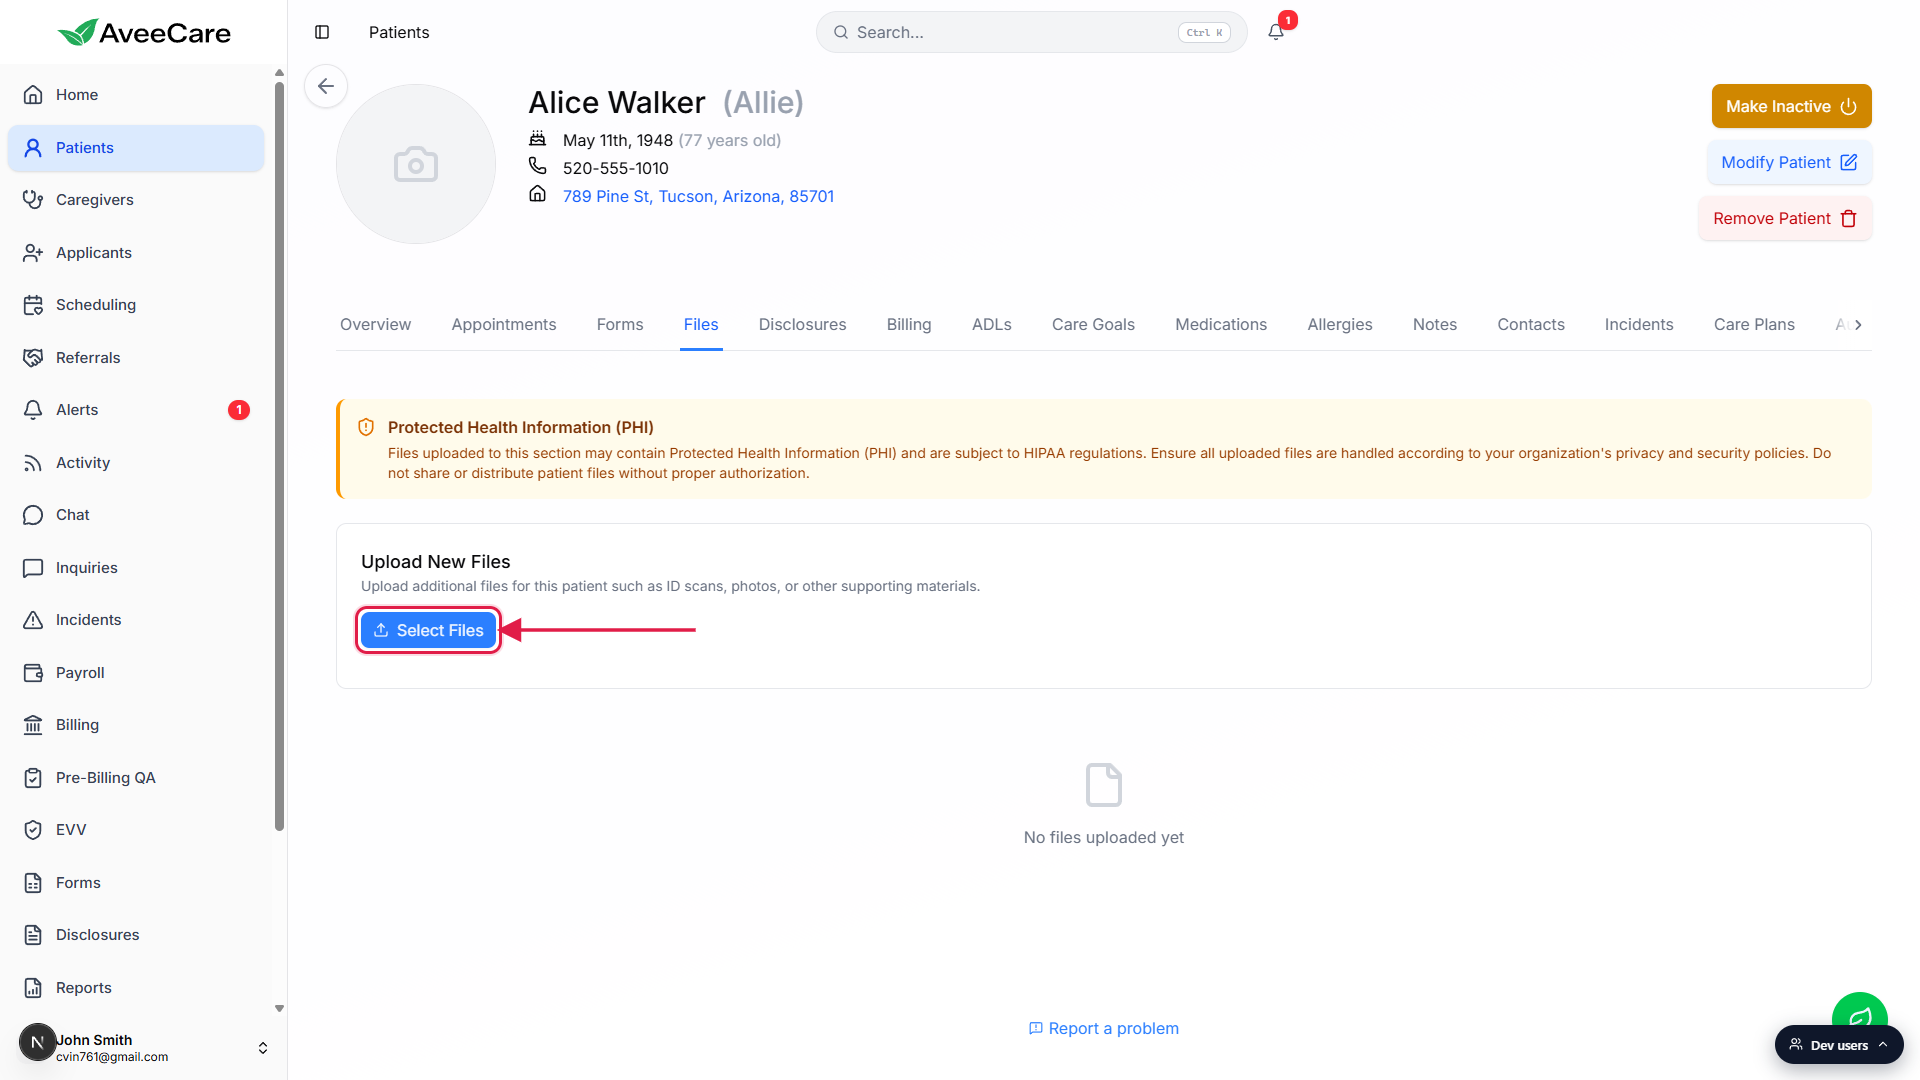
Confirm and upload.
After you pick files, the card shows an Upload N file(s) button. Click it to send them to AveeCare. You see a success toast for each batch and the new rows appear in the Patient Files table below. Every upload lands in the General category by default, rename or recategorize later if you want a tighter taxonomy.
4. View, download, rename, or delete a file
Each row in the Patient Files table carries four icon-buttons on the right.
View/Open opens images and PDFs inline. Non-viewable files just download. Download always pulls the original file. Rename opens a Rename File modal with the current name and a New File Name field. Delete opens a confirmation prompt and removes the file from the patient.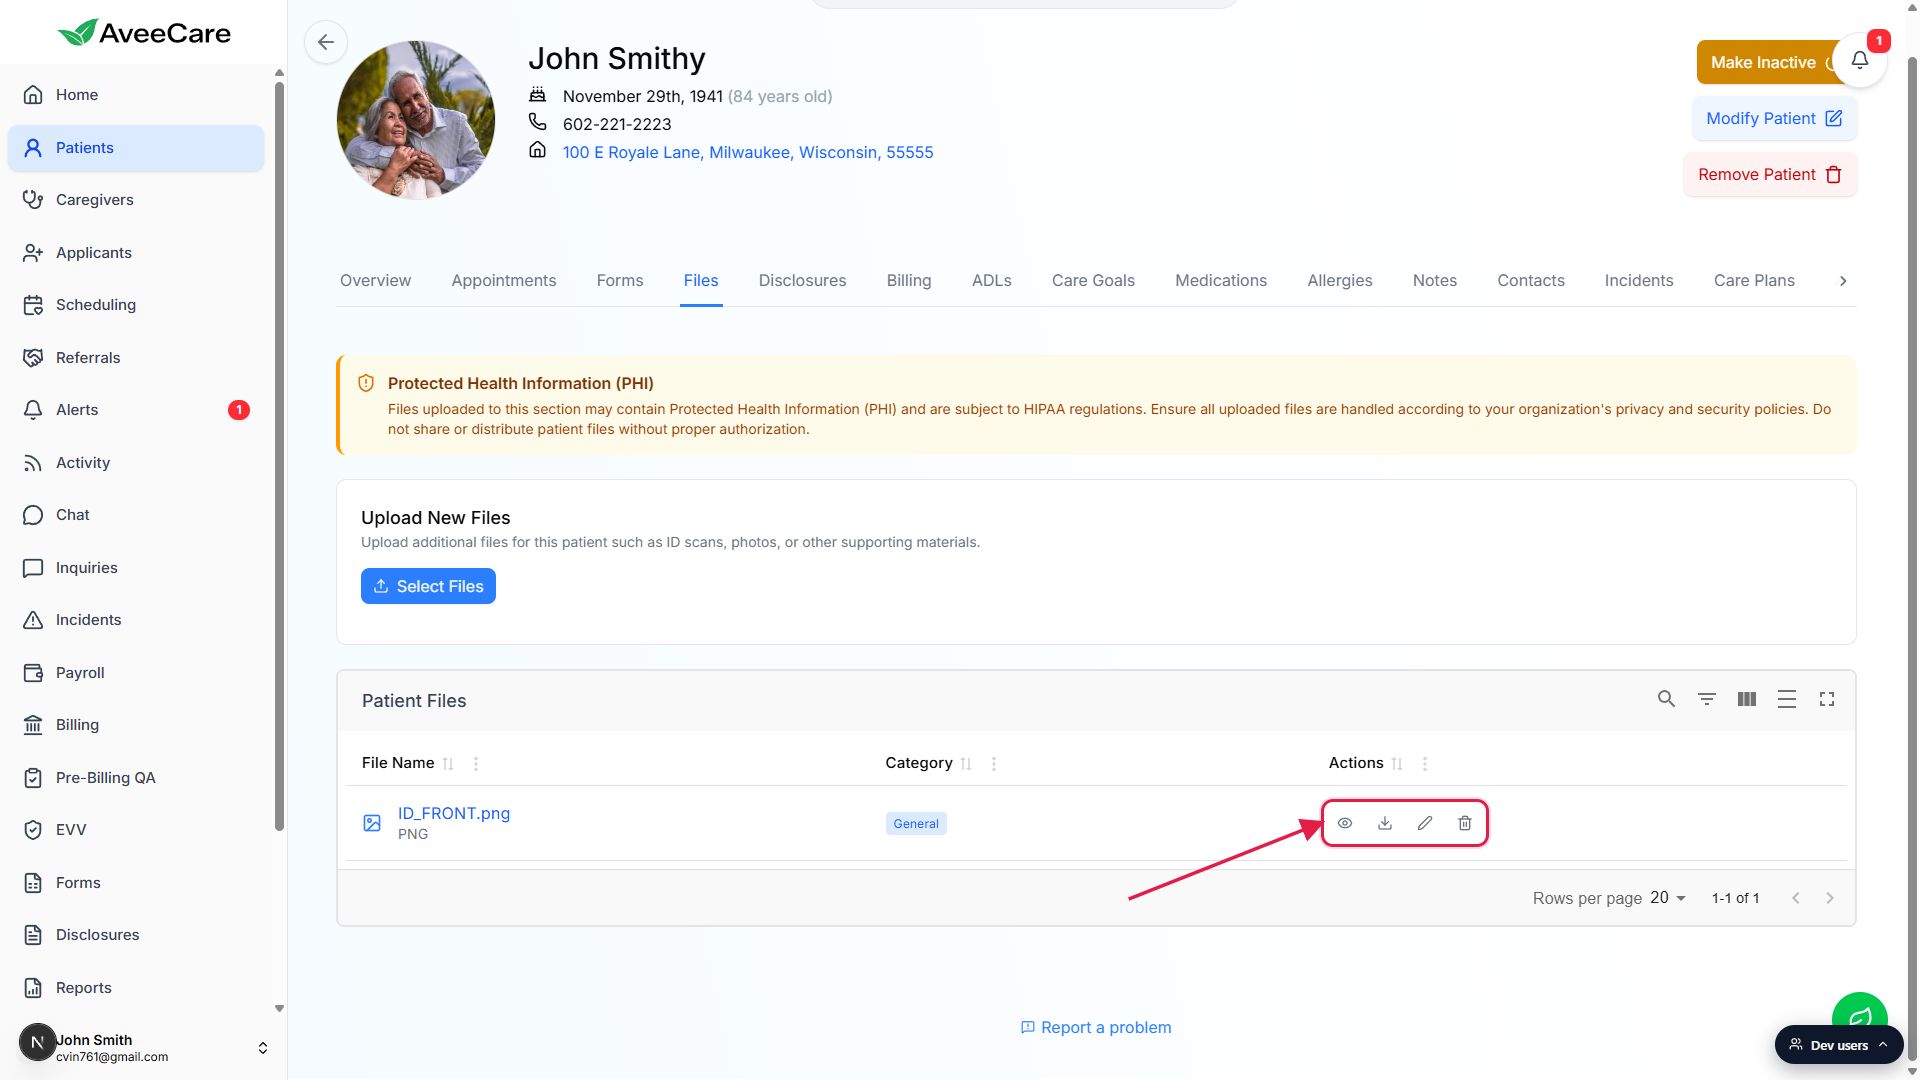
Use Rename to fix a confusing filename.
The Rename File modal shows the Current File Name as plain text and lets you type a New File Name. Click Rename to save. Renaming preserves the underlying file, only the display name changes.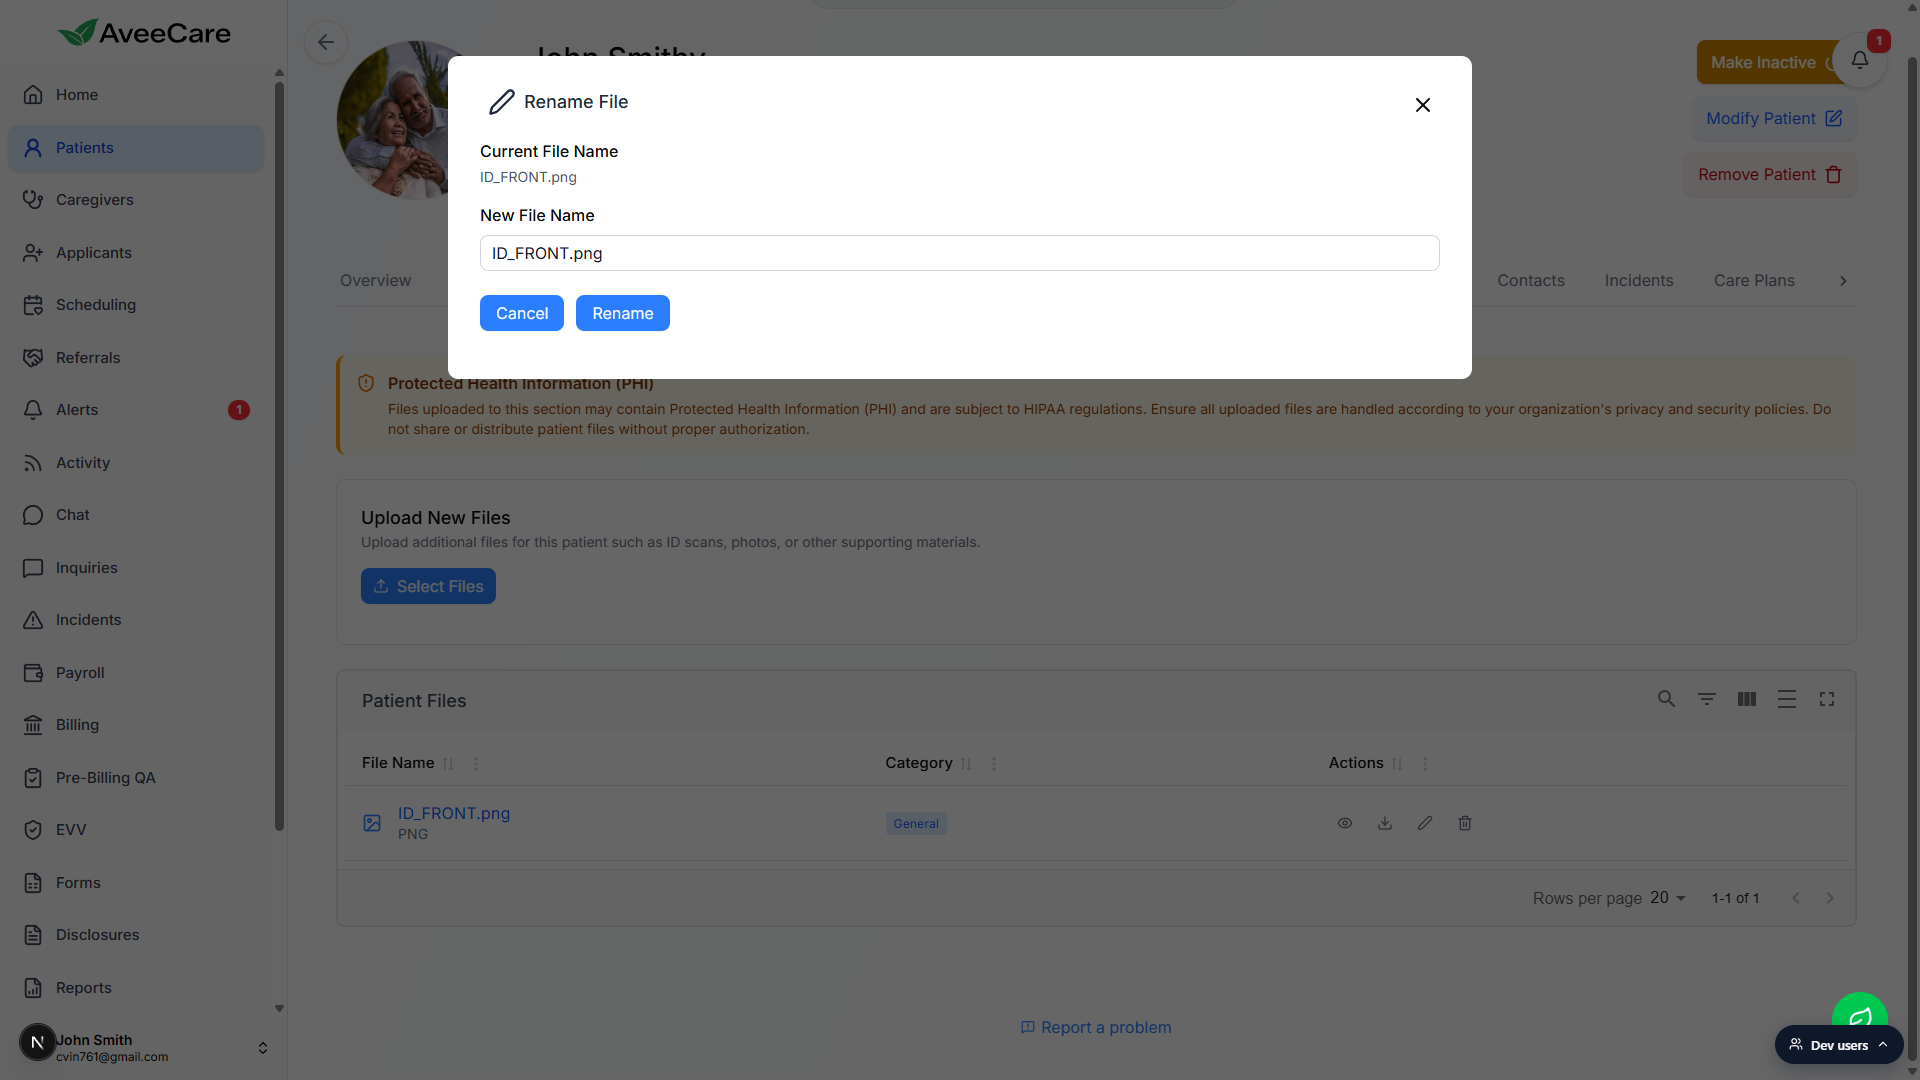
Click the file name itself to view or download in one tap.
The blue file name in the first column is also clickable. PDFs open in the AveeCare PDF viewer modal, everything else downloads through your browser. Same as clicking the eye icon.
Common pitfalls
- Uploading to the wrong patient. Always check the name in the patient header before clicking Select Files. It is easy to leave one patient open in another tab and upload there by accident.
- 50 MB per file ceiling. Big scans (like a multi-hundred page hospital packet) will fail. Compress PDFs first, or split a long packet into chapters.
- Everything lands in General. Files upload with the General category by default. Rename or sort by category if you want to find a specific document later.
- Notes vs Files. Free-text observations belong in Notes. Documents and scans belong here. Mixing them up makes both tabs harder to scan.
- Delete is permanent. The confirmation prompt warns that the action cannot be undone. Download a copy first if you might need the original later.