The Forms tab on a patient is where you assign per-patient forms like intake questionnaires, custom care sheets, and one-off data collection, then keep their completed responses on file. Each row in the Patient Forms table is one form attached to this patient, with its own status, field count, and View, Edit, and Delete actions.
Quick answer
Open Patients, click the patient, then click the Forms tab on the patient sub-nav. Click the New Form card to start one. Pick a preset from the Start from Preset dropdown or build fields from scratch in the form builder. Saved forms land in the Patient Forms table with a status of Completed or Incomplete.
Statuses you will see
The Status column on the Patient Forms table has two values:
- Completed. Every required field has a value. Shown in green with a check icon.
- Incomplete. One or more required fields are still blank. Shown in gray. Open the form, finish the fields, and save again to flip it to Completed.
1. Open the patient and click the Forms tab
Click the patient row from the Patients page.
The patient page opens on the Overview tab by default. The Forms tab sits on the patient sub-nav between Appointments and Files.Click Forms on the patient sub-nav.
The Forms tab loads the New Form card and the Patient Forms table for just this patient. Each row is one form previously attached to this person.
2. Start a new form from a preset or from scratch
Click the New Form card at the top of the Forms tab.
The card reads “Create a new form for this patient or use a preset” and opens the Create New Form modal.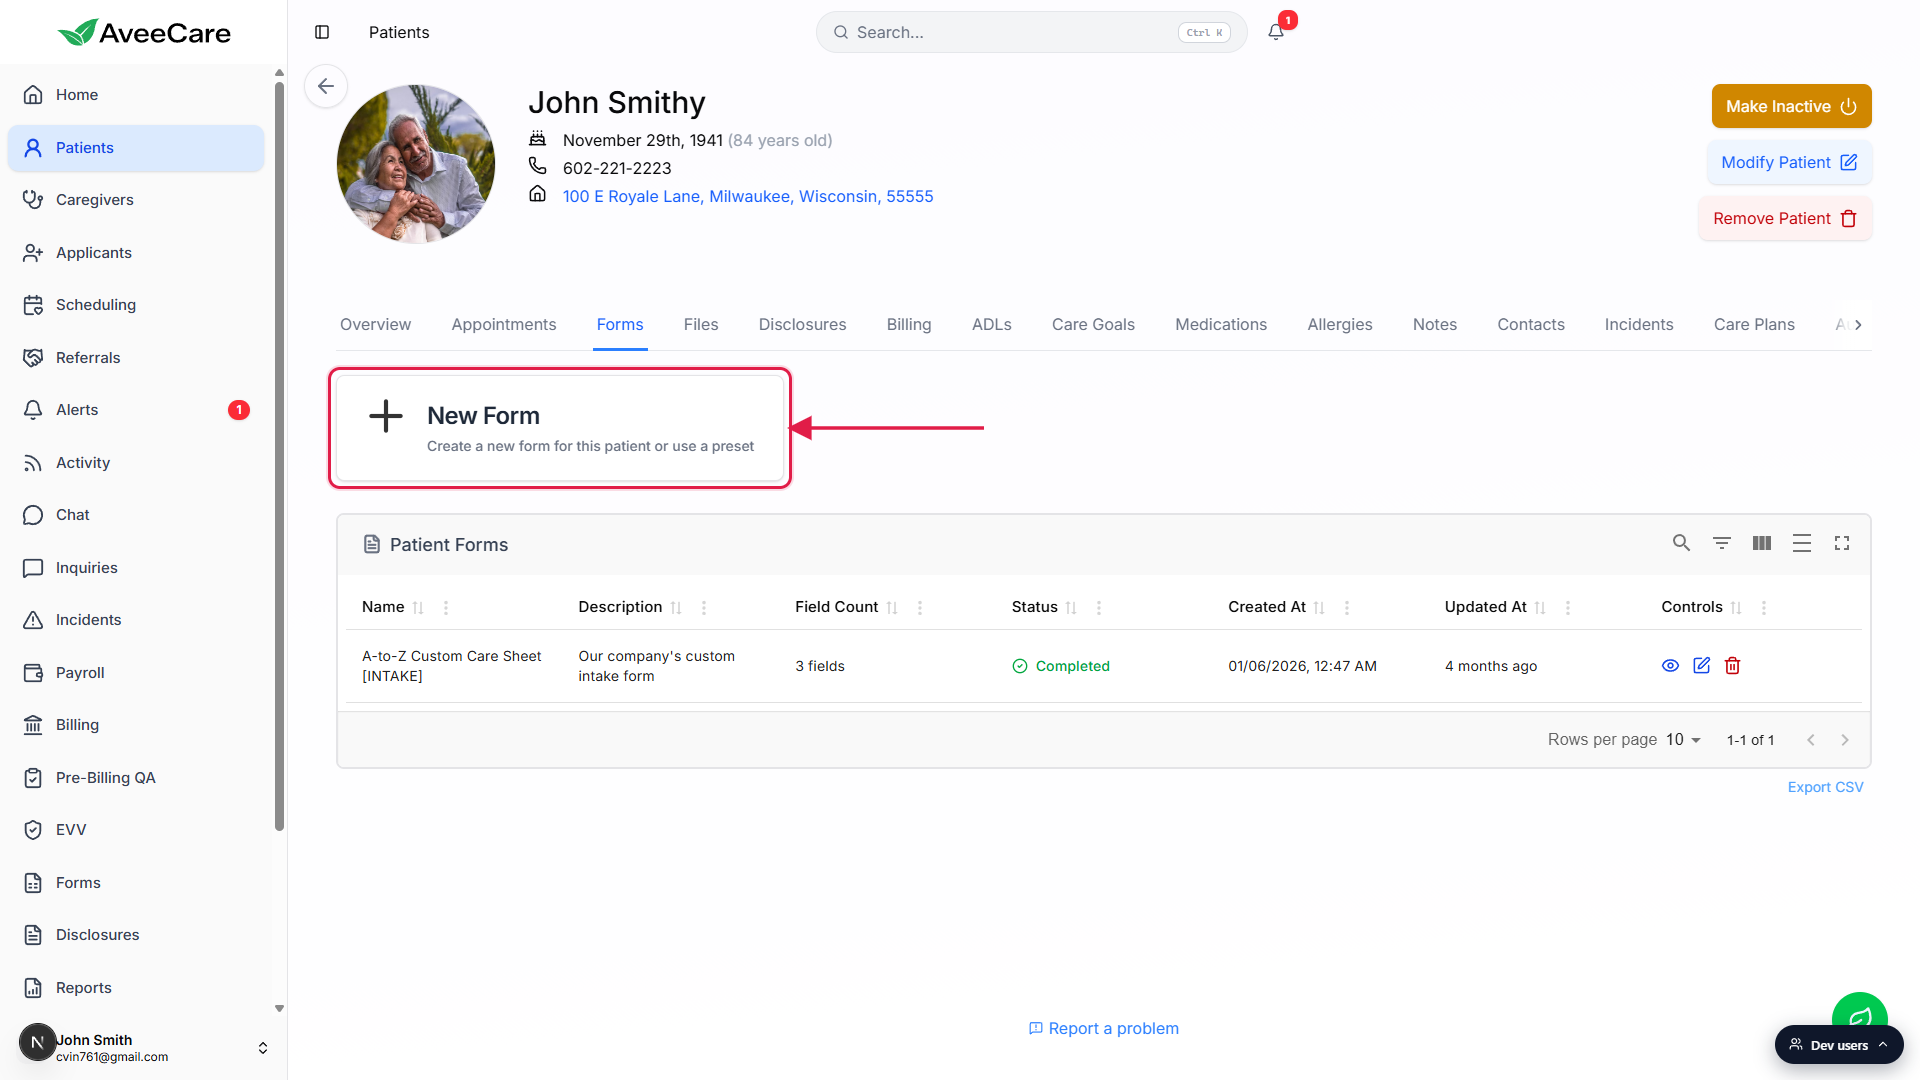
Pick a preset from Start from Preset, or leave it blank.
The dropdown lists every form template your agency has saved in the Form template gallery. Picking one fills the Form Name, Description, and field structure for you. To start blank, leave the dropdown alone and type a Form Name yourself.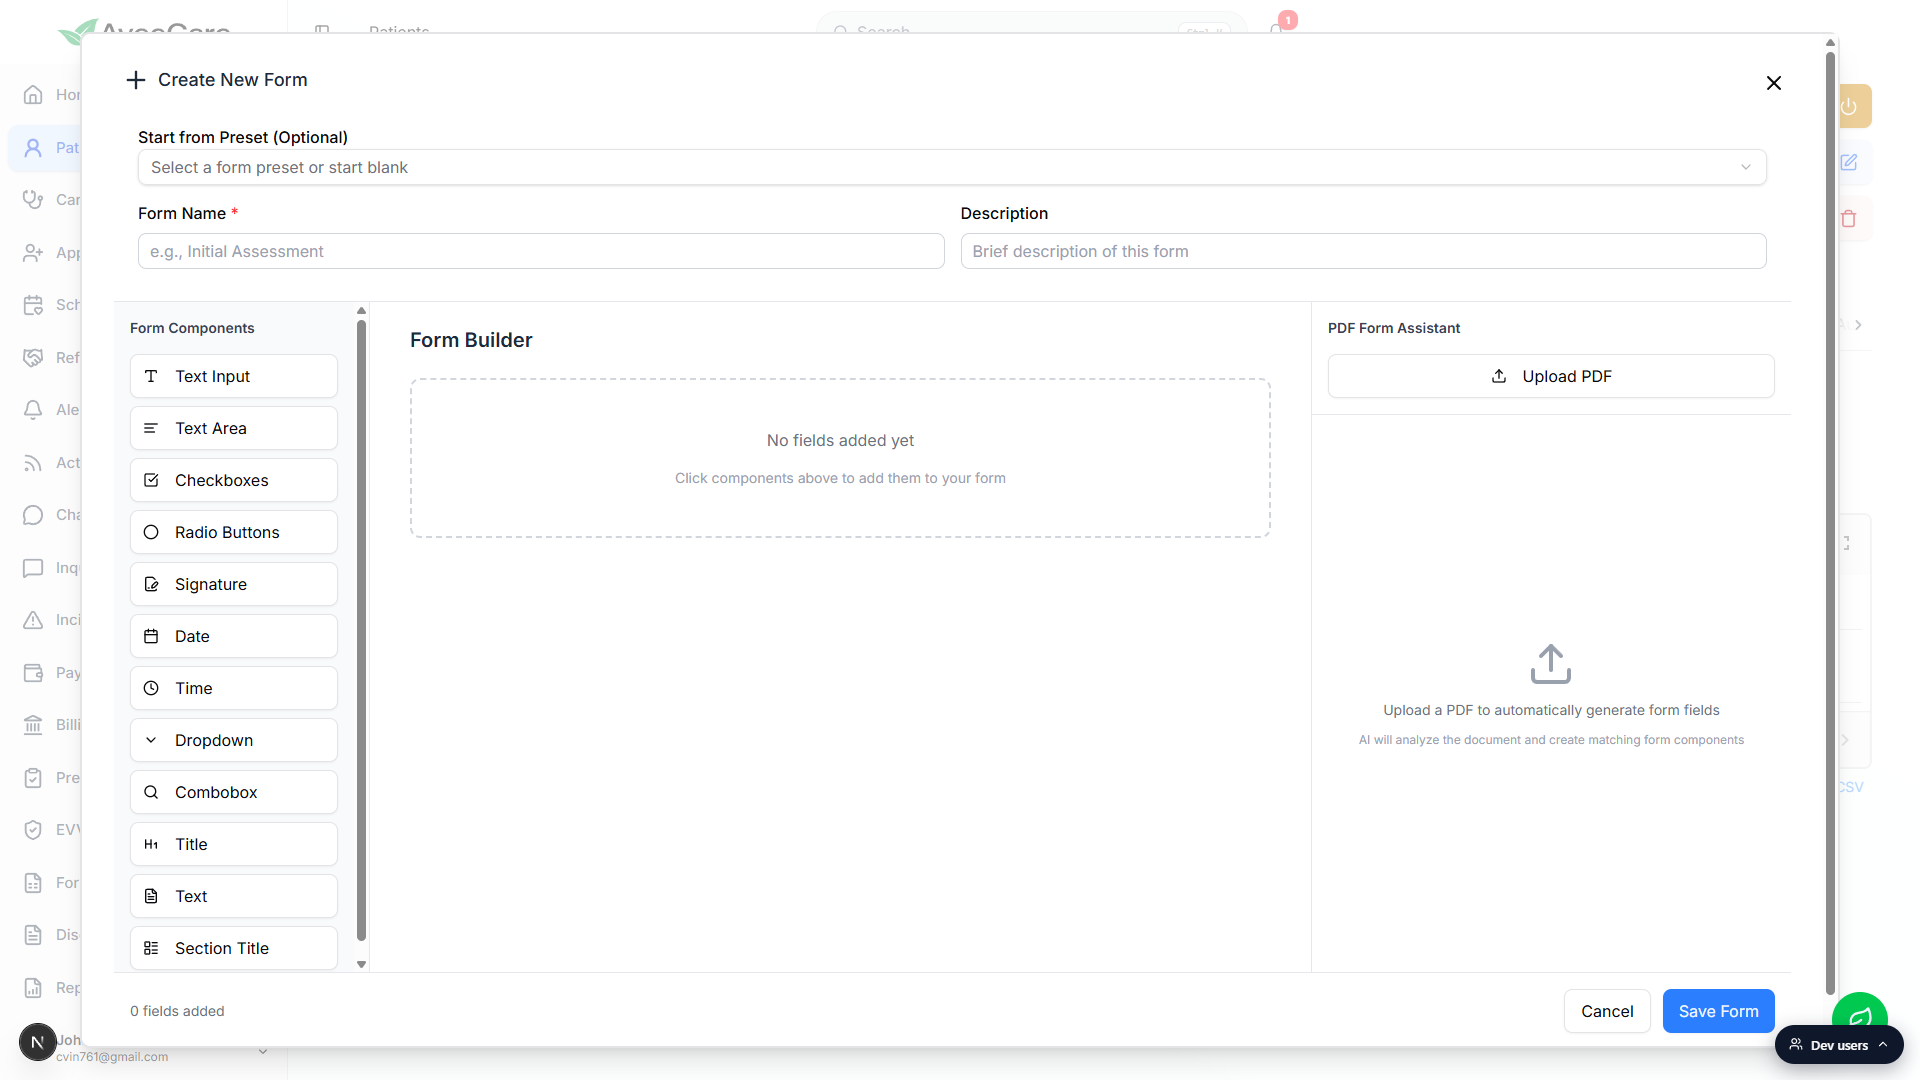
Add or edit fields in the Form Builder.
Click any item from the Form Components rail (Text Input, Text Area, Checkboxes, Radio Buttons, Signature, Date, Time, Dropdown, Combobox, Title, Text, Section Title) to add it to the form. Each field has a required toggle and label. The PDF Form Assistant on the right can also generate fields from an uploaded PDF.Click Save Form to attach it to the patient.
The new form lands as a row in the Patient Forms table. If you saved without filling required fields, the row shows Incomplete; otherwise it shows Completed.
3. Fill the fields and save the response
Click the eye icon on a row to open View/Fill Form.
The View/Fill Form modal shows the form name, description, current status, and every field with the patient's response. You can fill in or update any field here.
Click Save Form Data to record the response.
Status flips to Complete when every required field has a value. Saving updates the row's Updated At timestamp on the Patient Forms table.
4. Review, edit, or delete a saved form
Each row has three icon actions in the Controls column.
The blue eye is View/Fill Form (open and update responses). The blue pencil is Edit Form Structure (change the field layout, labels, and required toggles). The red trash icon deletes the form for this patient after a confirmation prompt.Use Export CSV at the bottom of the table to pull every form out.
The export pulls Name, Description, Field Count, Status, Created At, and Updated At for every form on this patient. It does not pull individual field responses. To capture responses, open each form and copy from the View/Fill Form modal.
Common pitfalls
- Forms versus Disclosures. The Forms tab is for general data collection (intake questionnaires, custom care sheets, one-off field sets). The Disclosures tab is for signed-and-dated policy disclosures from your disclosures library. Don't use Forms when you actually need a signed disclosure.
- Forms versus Files. Files is a per-patient document vault for uploads (PDFs, images, scanned packets). Forms collects structured field responses. If you have a signed PDF that already exists, attach it to Files instead of rebuilding it as a form.
- Editing a Completed form does not version it. Edits overwrite the response in place. The Updated At column shifts to reflect the change, but the previous response value is gone. Treat completed forms as the current record, not a versioned history.
- Deleting a form on the patient does not delete the preset. The trash icon removes only this patient's instance of the form. The underlying template in the Form template gallery stays available for future patients.
- Export CSV does not include field-level responses. The CSV is metadata only (form name, status, timestamps). For an individual response, open the form and copy from the View/Fill modal.
Related
- Form template gallery
- Assign a form to a patient or caregiver
- Patient disclosures tab
- Patient paperwork