Assigning a form in AveeCare means creating a per-person form record on a patient or caregiver. Office staff open the person, click New Form, pick a preset, and save. The form lands on that person's Forms tab and on the patient or caregiver portal, and the Status chip flips from Incomplete to Completed as soon as every required field has an answer.
Quick answer
Open the patient or caregiver record. Switch to the Forms tab. Click the New Form tile. Pick a template from Start from Preset, or build the form by hand. Click Save Form. The new row appears in the Patient Forms table with a Status of Incomplete until the required fields are filled.
Where the assign action lives
AveeCare does not have a top-level “Assign Form” button. The Forms sidebar page is where you manage Form Presets, your reusable templates. Assignment happens on the person. Open a patient (or a caregiver), switch to their Forms tab, and the New Form tile creates a new assignment on that one person seeded from any preset you pick. Caregiver forms work the same way under the caregiver record.
1. Open the patient or caregiver record
Click Patients in the left sidebar and pick a row.
To assign a caregiver-facing form, click Caregivers in the sidebar instead and pick a caregiver. The flow inside the detail page is identical, just with Caregiver Forms in place of Patient Forms.
2. Click New Form on the Forms tab
In the patient detail tab strip, switch to Forms.
The URL updates to/patients/<Name>/<id>/formsand the page shows a single New Form tile above the Patient Forms table. The tile is the assign action.Click the New Form tile.
A full-screen Create New Form modal opens. Cancel sits in the bottom toolbar if you opened it by mistake.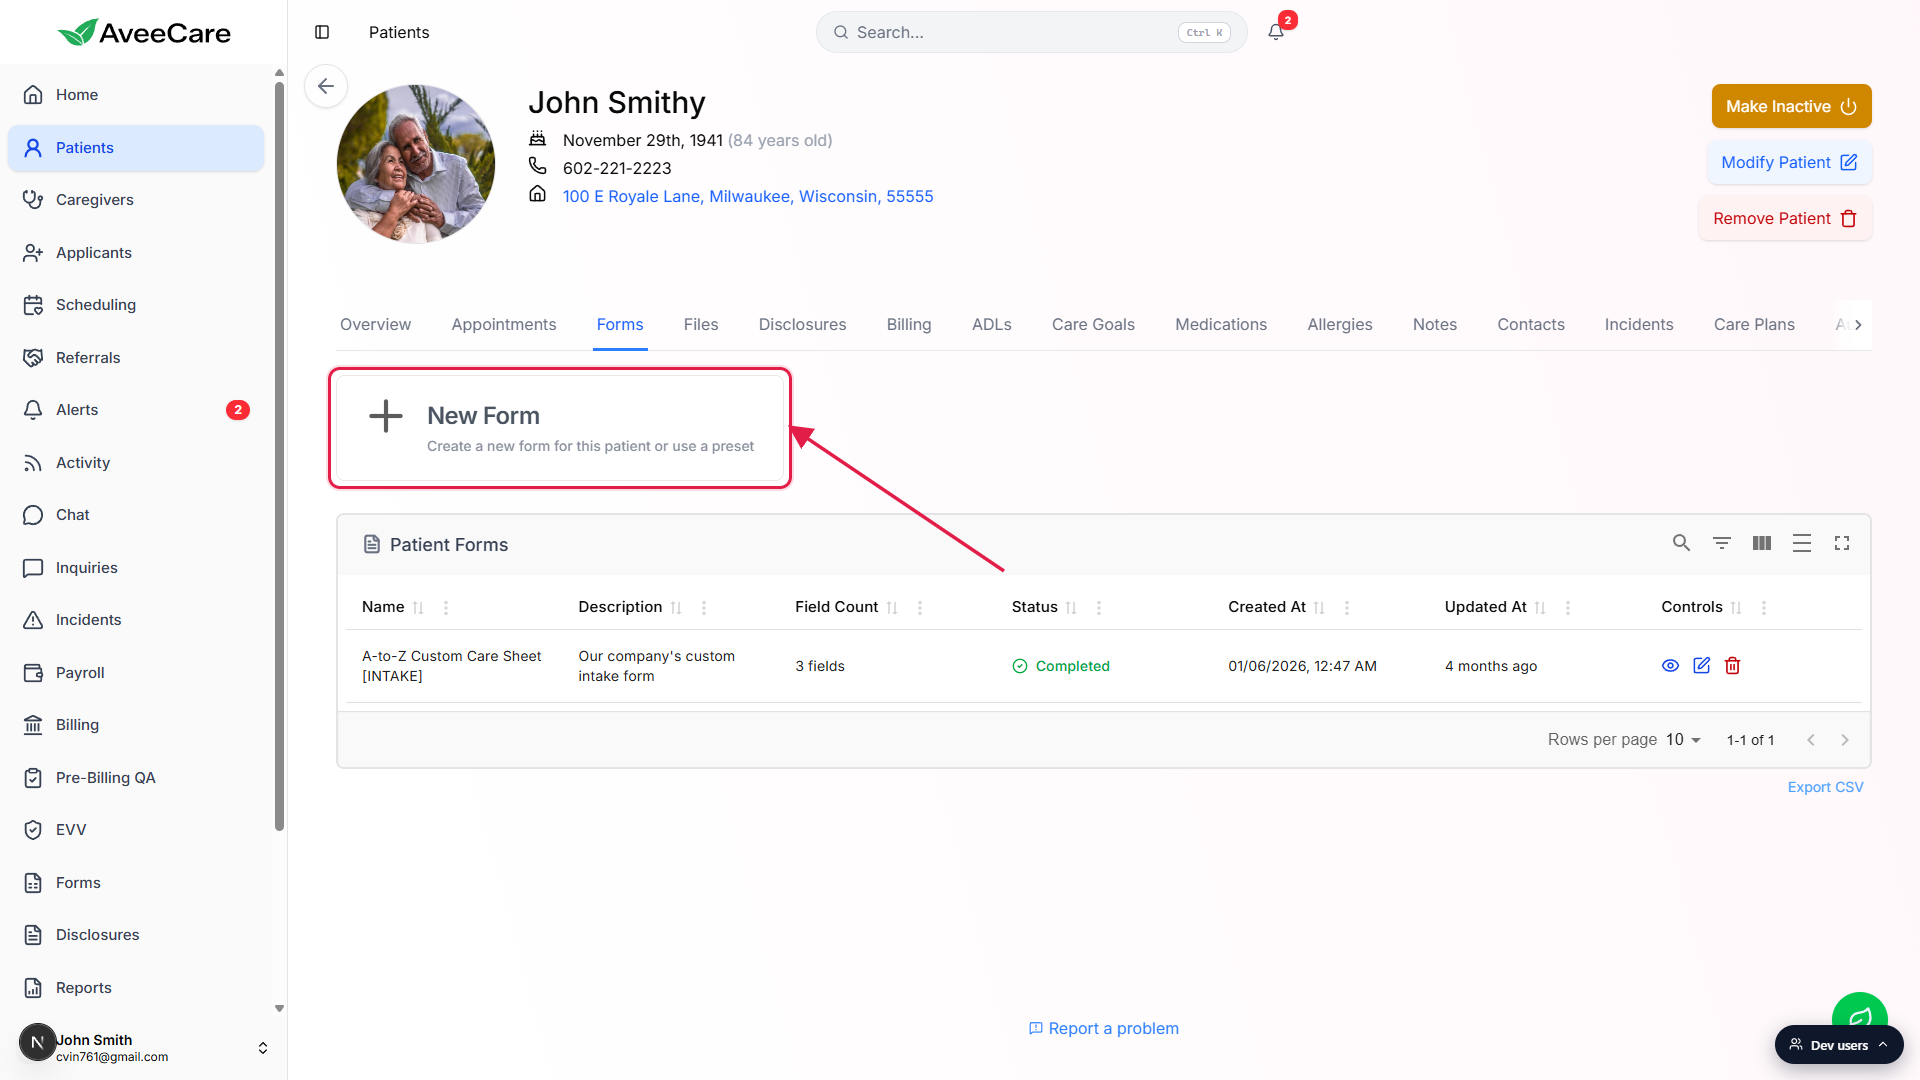
3. Pick a preset or start blank, then save
Open the Start from Preset dropdown.
The dropdown sits at the top of the Create New Form modal, above the Form Name field. The placeholder reads Select a form preset or start blank. Pick the preset you want to assign to this person.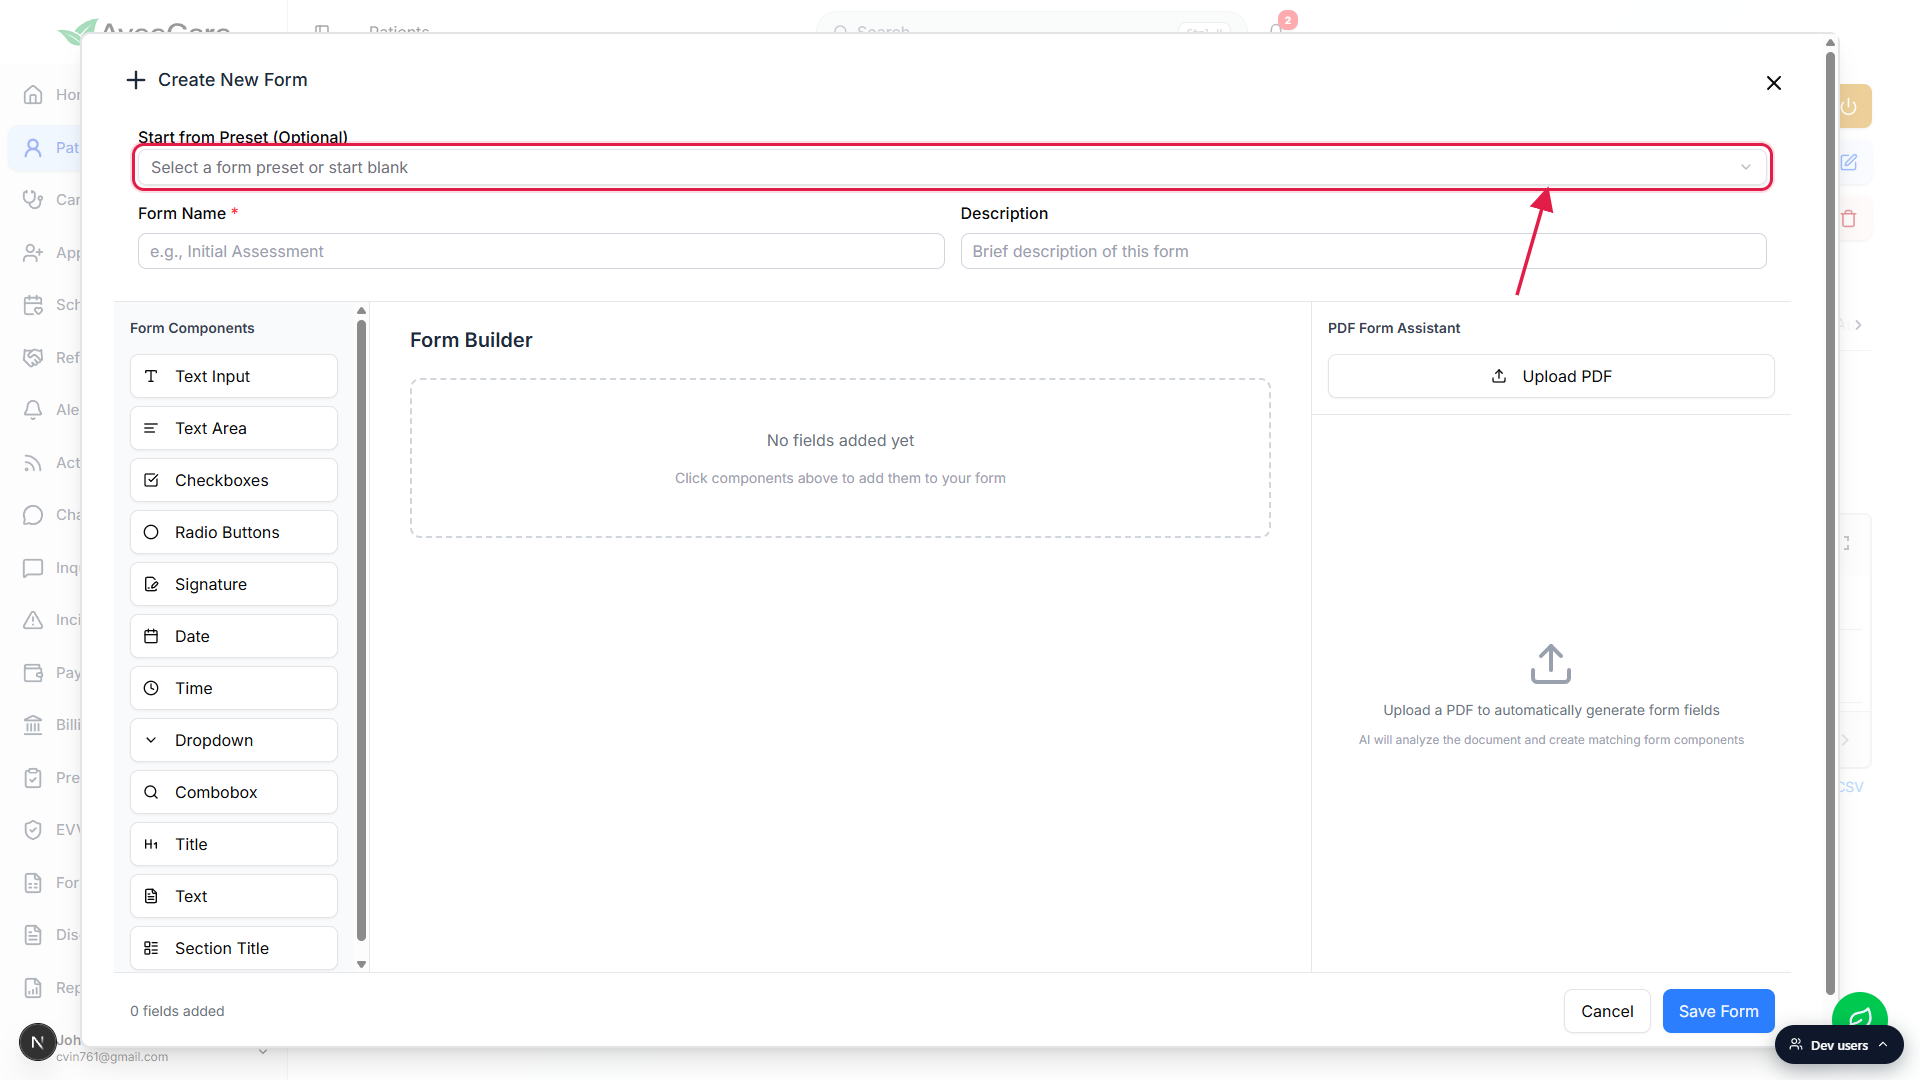
Pick a preset from the list, or click Blank Form to build it by hand.
The list is your tenant's Form Presets. Pick one and the Form Name, Description, and Form Builder fields prefill from the preset. Picking Blank Form clears them back to empty if you want to start from scratch.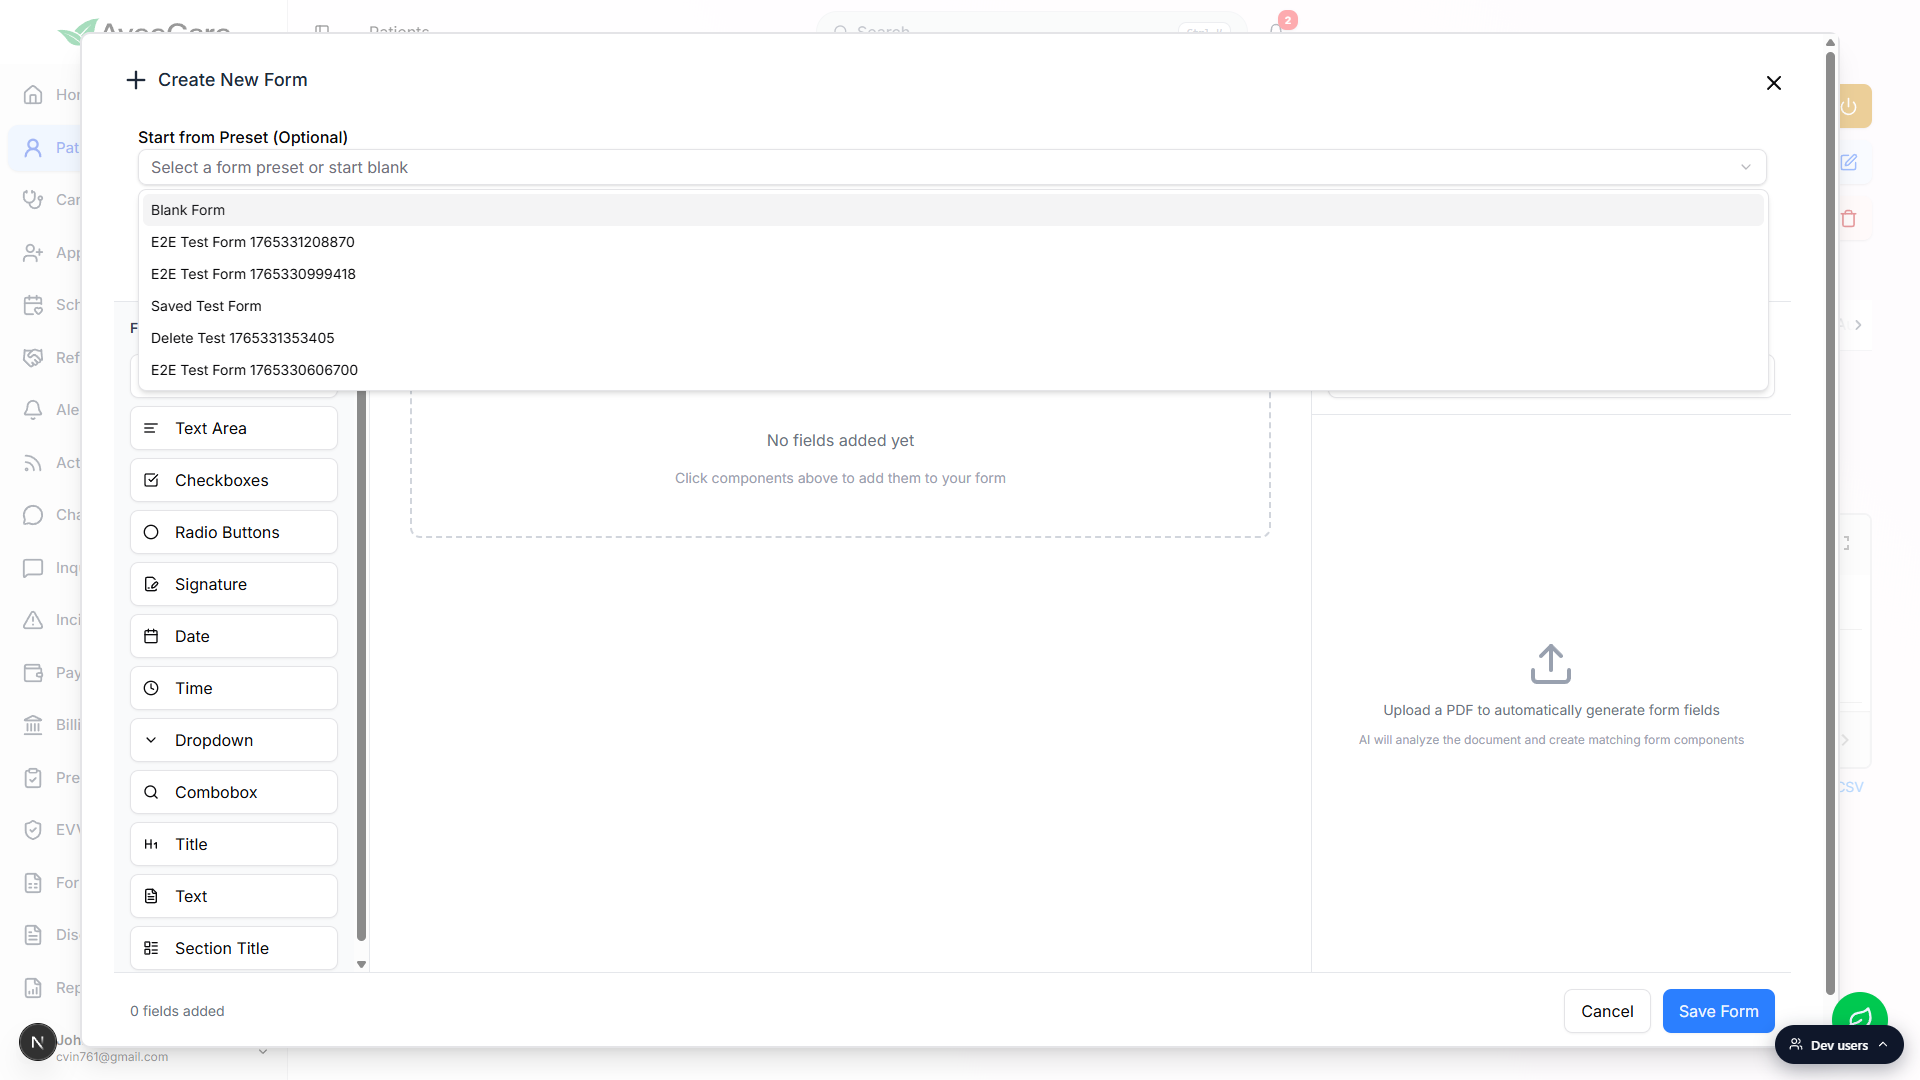
Edit the form name and description, then click Save Form.
Form Name is required (red asterisk). Description is optional. The Form Components rail on the left lets you add Text Input, Text Area, Checkboxes, Radio Buttons, Signature, Date, Time, Dropdown, Combobox, Title, Text, and Section Title fields. If you have a PDF intake you want translated, the PDF Form Assistant panel on the right reads an upload and creates matching components automatically. Click Save Form in the bottom right to push the form onto the patient.
4. Track completion in the Patient Forms table
Read the Status chip in the Patient Forms table.
Green Completed means every required field on the form has a value the last time it was saved. Gray Incomplete means at least one required field is still blank. The chip recomputes every time the form is saved, so as the patient or caregiver fills it on their end, the row updates here without any extra step.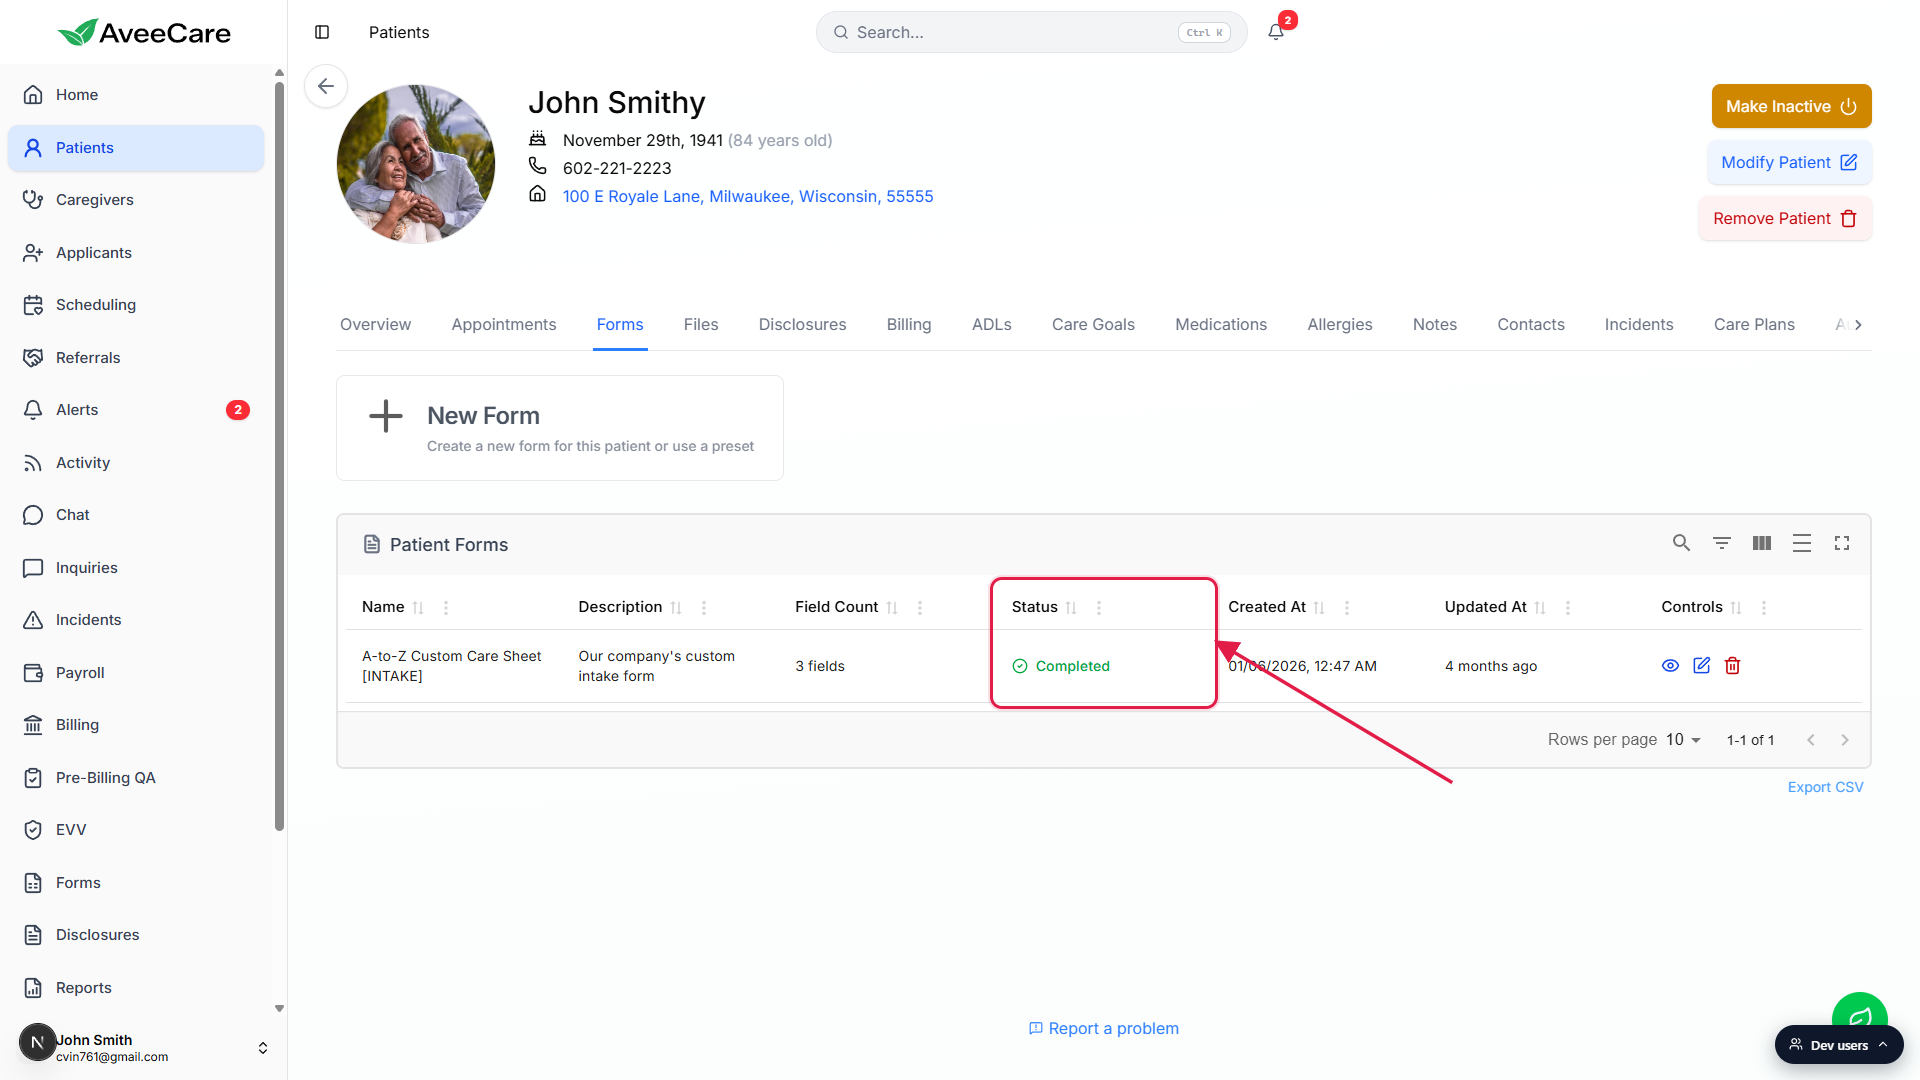
Open the row with the eye icon to read or finish answers.
The blue eye icon (View/Fill Form tooltip) opens a full-screen modal that renders every field with its saved answer. Required fields are marked with a red asterisk. Save Form Data at the bottom right flips the Status chip to green when every required field has a value.Use the red trash icon to unassign a form sent by mistake.
The trash icon (Delete Form tooltip) removes only that one person's copy of the form, not the underlying preset. A confirmation prompt asks you to type the form name before the delete fires.
Common pitfalls
- Looking for an Assign button on the Forms page. The Forms sidebar page shows Form Presets, your reusable templates. Assignment happens on the patient or caregiver, using the New Form tile on their Forms tab.
- Forgetting to scroll past the dropdown. The Start from Preset selector is optional. If you skip it without picking anything, Form Name stays empty and the Save Form button stays disabled. Either pick a preset or type a name and add at least one field by hand.
- Editing the preset after assigning. Going back to Forms and editing a Form Preset does not retroactively update patient or caregiver copies that were already assigned. Each assignment carries its own field set from the moment of save. To push a newer version, re-assign the preset to that person.
- Assuming the patient gets an email. Saving a New Form does not fire a notification on its own. It places the form on the patient or caregiver Forms tab, and they see it the next time they sign in to the app or portal. To prompt them right away, send a message in Chat or call them.
- Trashing the row to fix a typo. The red trash icon deletes the entire assignment. To fix the field structure, use the pencil icon (Edit Form Structure). To fix an answer, use the eye icon (View/Fill Form).