Electronic Visit Verification is a federal Medicaid requirement under the 21st Century Cures Act. Personal care and home health visits billed to Medicaid have to be verified at the point of care, then reported to a state-designated aggregator. AveeCare handles the clock-in capture, the verification, the storage, and the export, but only after you turn EVV on and tell it which state and aggregator you're billing under.
1. Decide if you actually need EVV
Quick gate before you spend time on config.
- Do you bill Medicaid for personal care or home health visits? If yes, you need EVV.
- Pure private pay only? You don't need EVV today. AveeCare still captures clock-in and clock-out timestamps (useful for payroll and accountability), but you don't have to wire up an aggregator.
- Medicare-only home health? EVV is a Medicaid requirement, not Medicare. Skip this if you don't touch Medicaid.
For the underlying federal mandate, the legislation that drives all this is the 21st Century Cures Act, which requires Medicaid-paid personal care and home health visits to be electronically verified at the point of care.
2. Flip EVV Requirements Enabled on the Business Settings tab
EVV is one tenant-level toggle, not a per-patient or per-caregiver setting. Once it's on, every Medicaid-billable visit has to be verified.
Open Settings. Stay on the Business Settings tab.
Scroll past Business Phone, Hours, and Timezone to the Electronic Visit Verification (EVV) card.Flip the EVV Requirements toggle on.
The label switches from EVV Requirements Disabled to EVV Requirements Enabled. While disabled, the EVV page is hidden from the sidebar. Once enabled, every section below (State Configuration, Telephony Backup, Provider Information) becomes live. Reference: EVV settings.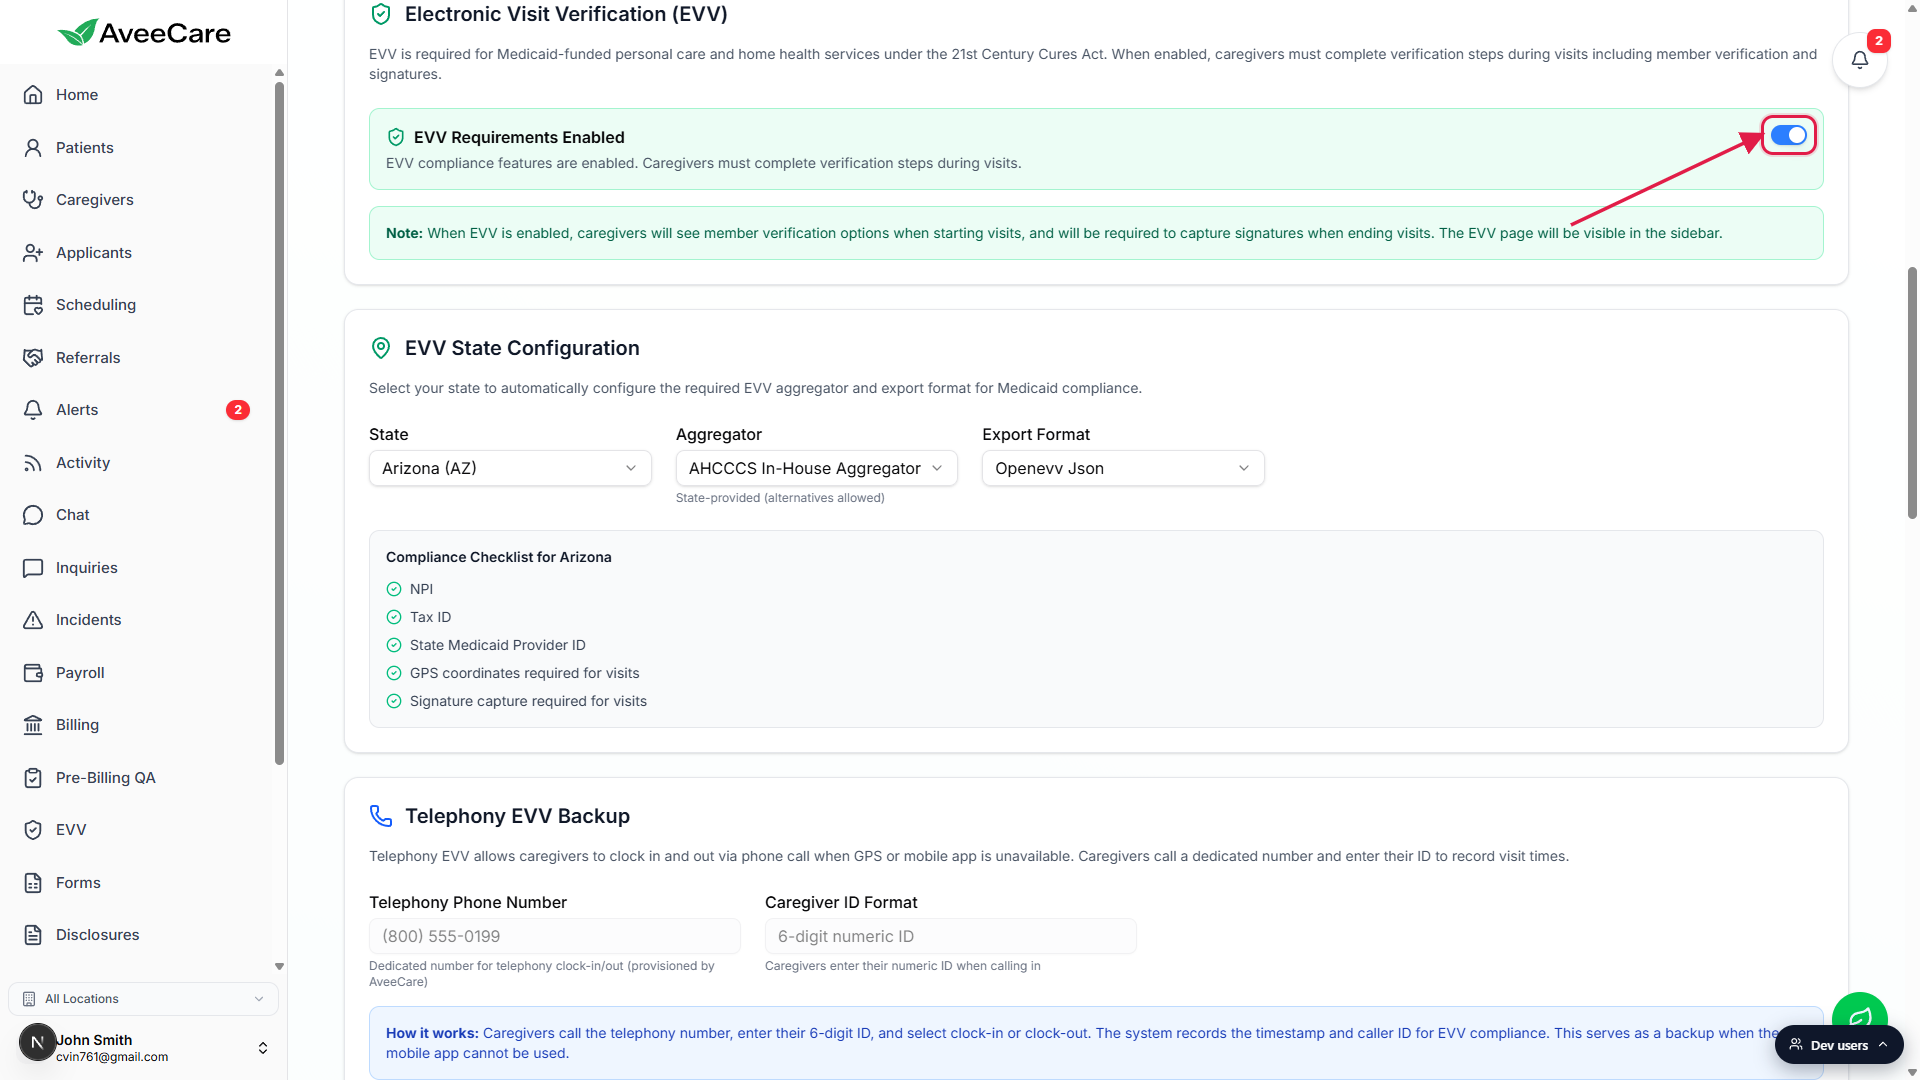
3. Pick your state and let aggregator and format auto-fill
AveeCare ships with the right aggregator and export format for all 50 states plus DC. You pick the state, and the other two dropdowns auto-fill correctly. Override only if your contract diverges.
Open the State dropdown in the EVV State Configuration card.
51 entries (50 states plus District of Columbia), alphabetical, labeled State Name (XX). Pick your primary billing state.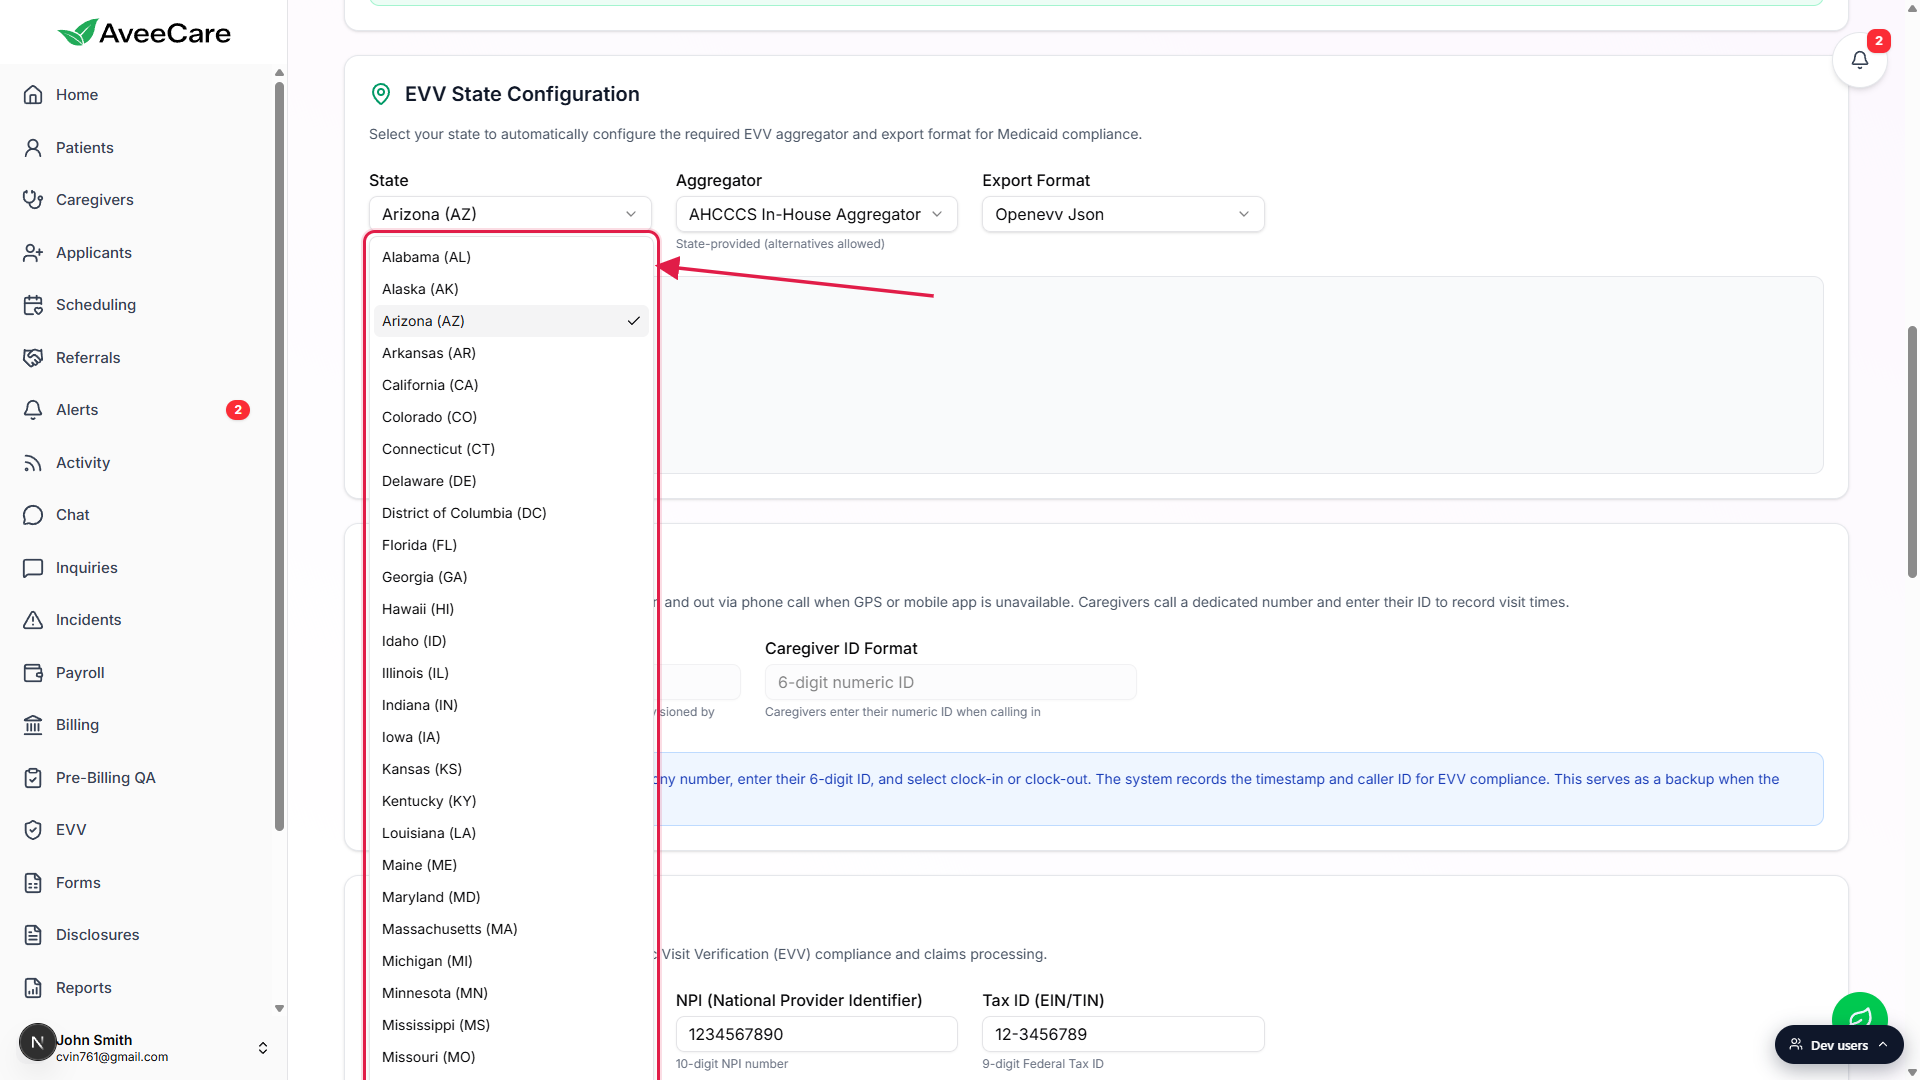
Aggregator and Export Format auto-fill from the state.
A small note under Aggregator tells you the model: State-mandated (no alternatives) for closed-model states, State-provided (alternatives allowed) for open-model states, Provider selects vendor for provider-choice states, and MCO-directed vendor selection for managed care states. Override Aggregator only when the model allows it and your paperwork points at a different vendor. Full reference: Per-state EVV configuration.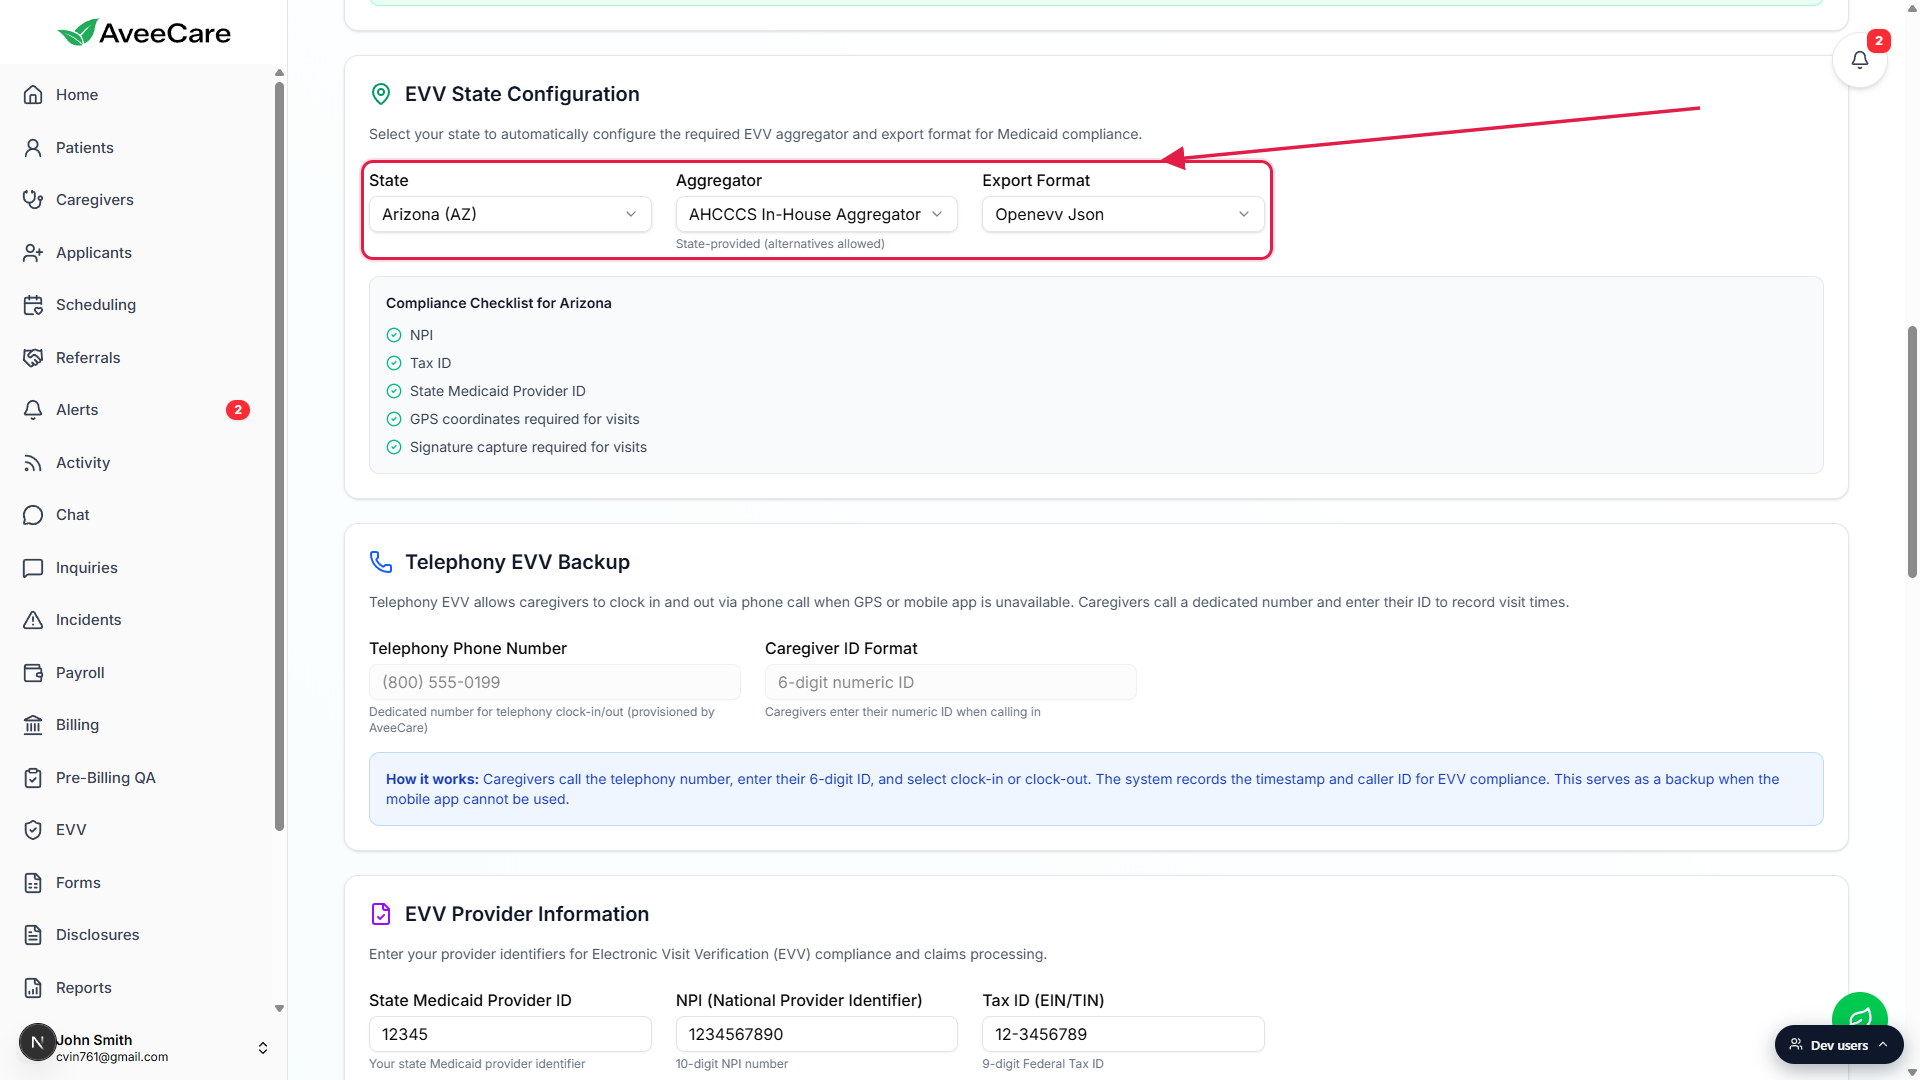
For multi-state agencies, set the default state here and override per export on /evv.
AveeCare keeps a single default state at the company level, not one row per state. If you operate in multiple states, change the State dropdown when you're about to export that state's batch, or use the State filter on the EVV Dashboard itself.
4. Clear every row on the Compliance Checklist
The Compliance Checklist for your state spells out every field the aggregator expects before exports work. It updates live as you fill fields.
Find the Compliance Checklist panel below the State Configuration dropdowns.
Every row has a green check (configured) or an amber warning (missing). The checklist always lists NPI, Tax ID, and State Medicaid Provider ID, then adds state-specific rows like GPS coordinates required for visits, Signature capture required, Caregiver SSN required by state, Service authorization number required, Reason codes required, and Telephony backup required, depending on what your state mandates.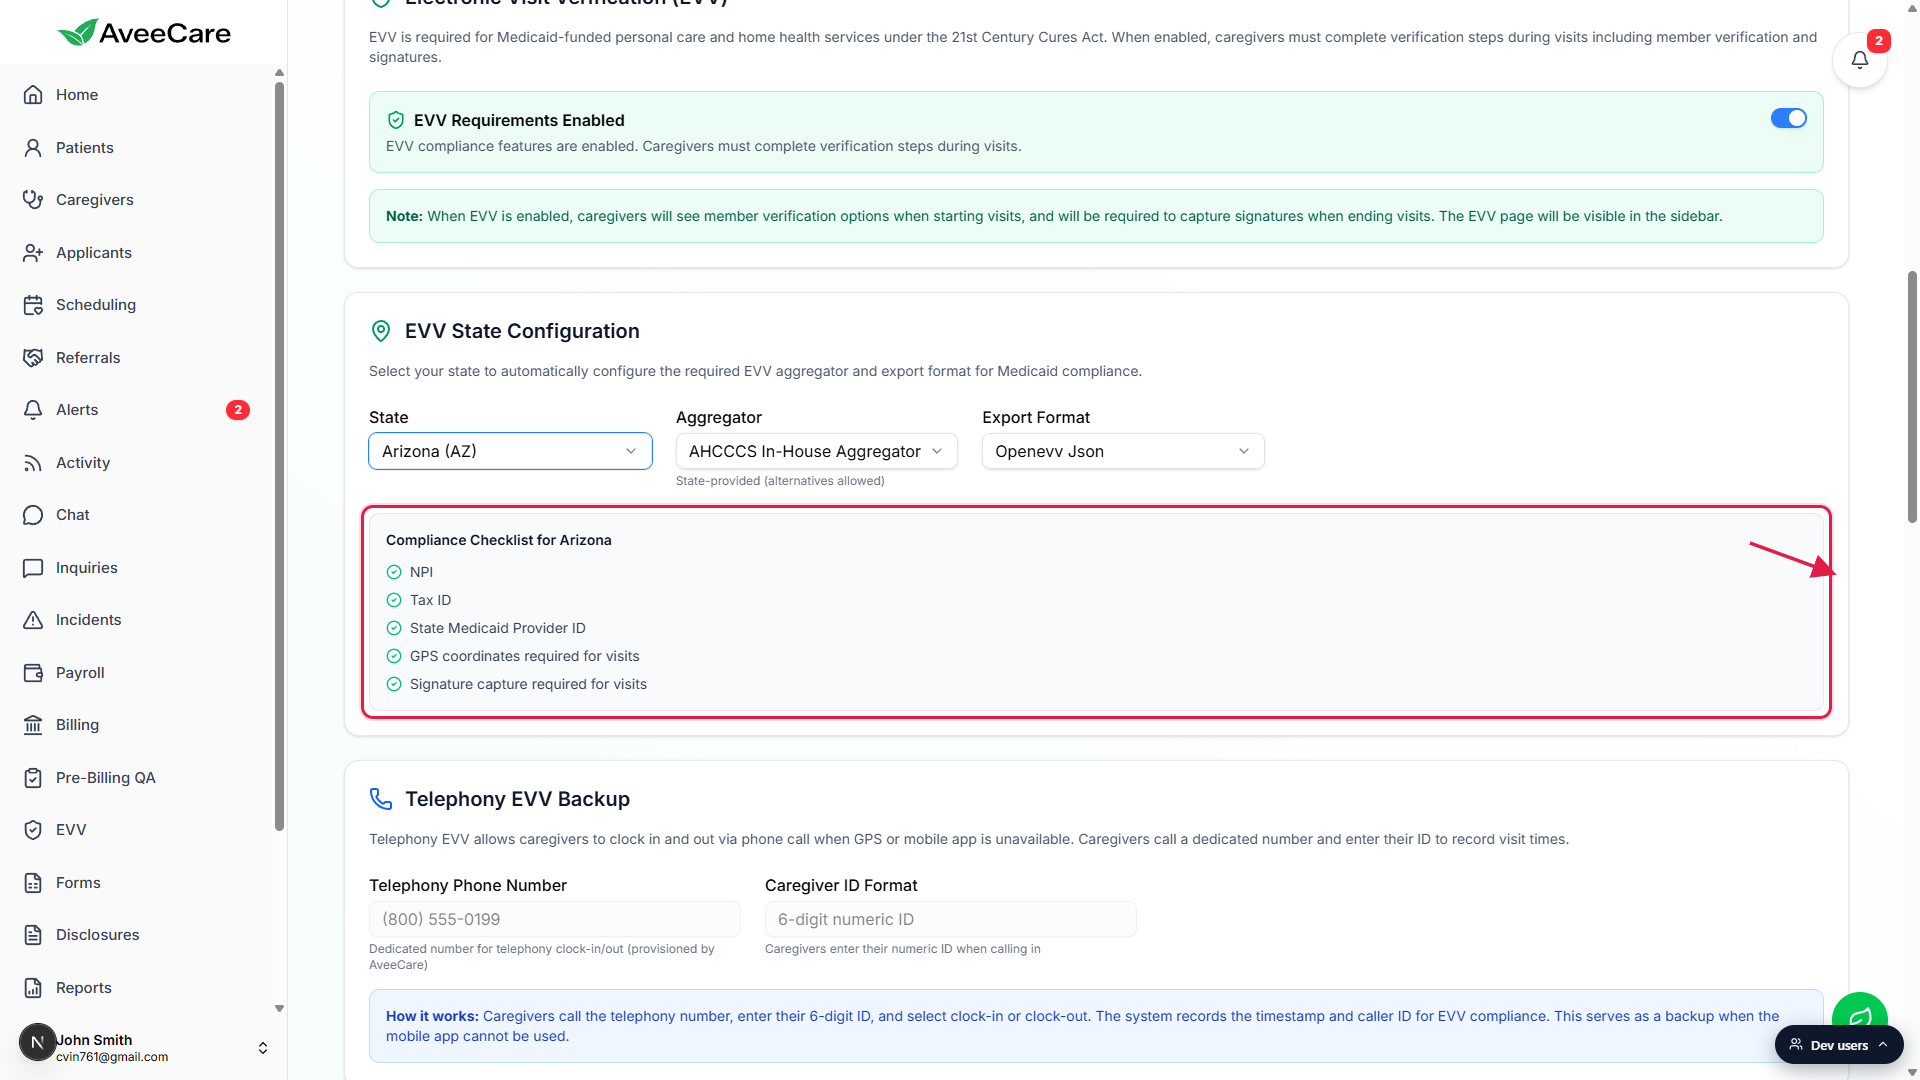
Click Fix Now on each missing row.
Each amber row has a Fix Now link that scrolls you straight to the matching field on the same page. For NPI, Tax ID, and State Medicaid Provider ID that's the EVV Provider Information card right below the checklist.Fill NPI, Tax ID, and State Medicaid Provider ID in the EVV Provider Information card.
State Medicaid Provider ID (max 20 chars), NPI (10 digits), Tax ID (9-digit EIN/TIN). All three are required for aggregator submission.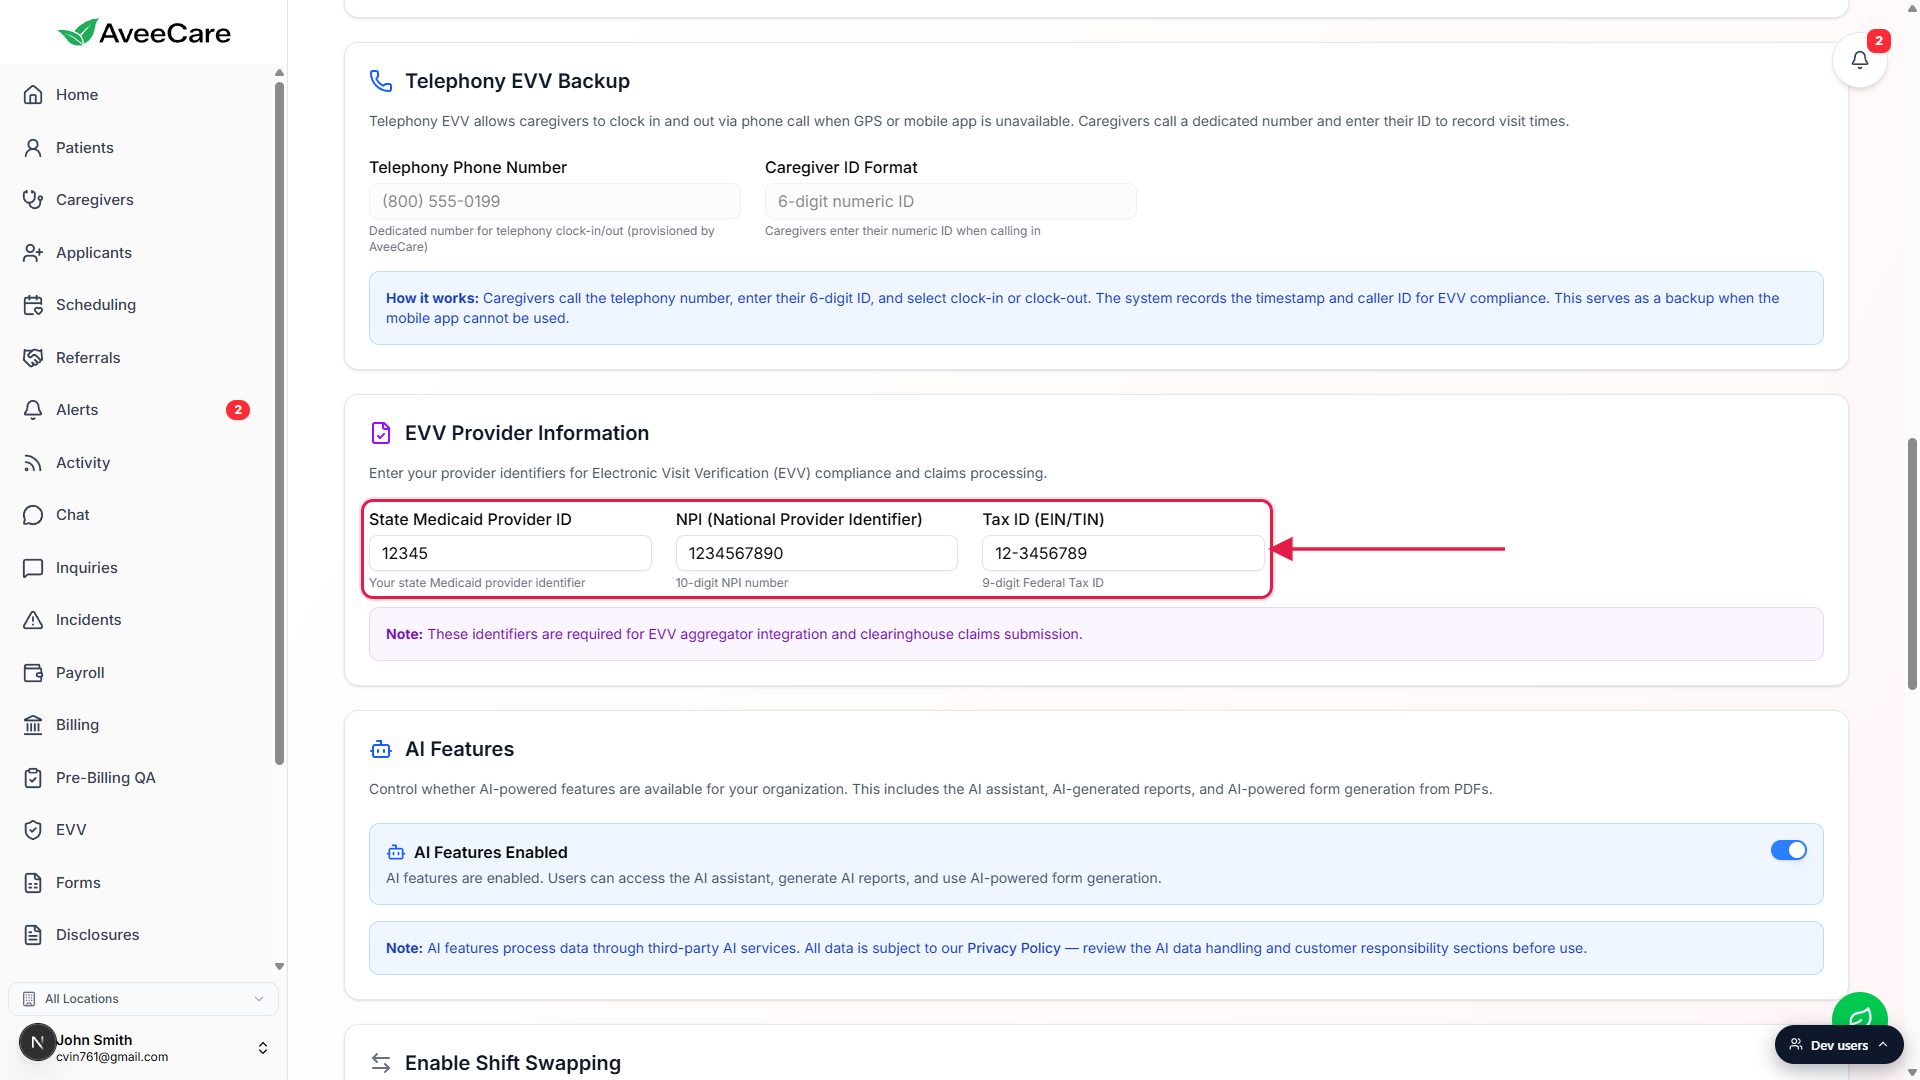
Click Save Business Settings at the bottom of the tab.
One Save button persists every change on the tab. After save, the Compliance Checklist refreshes and any rows you populated flip from amber to green.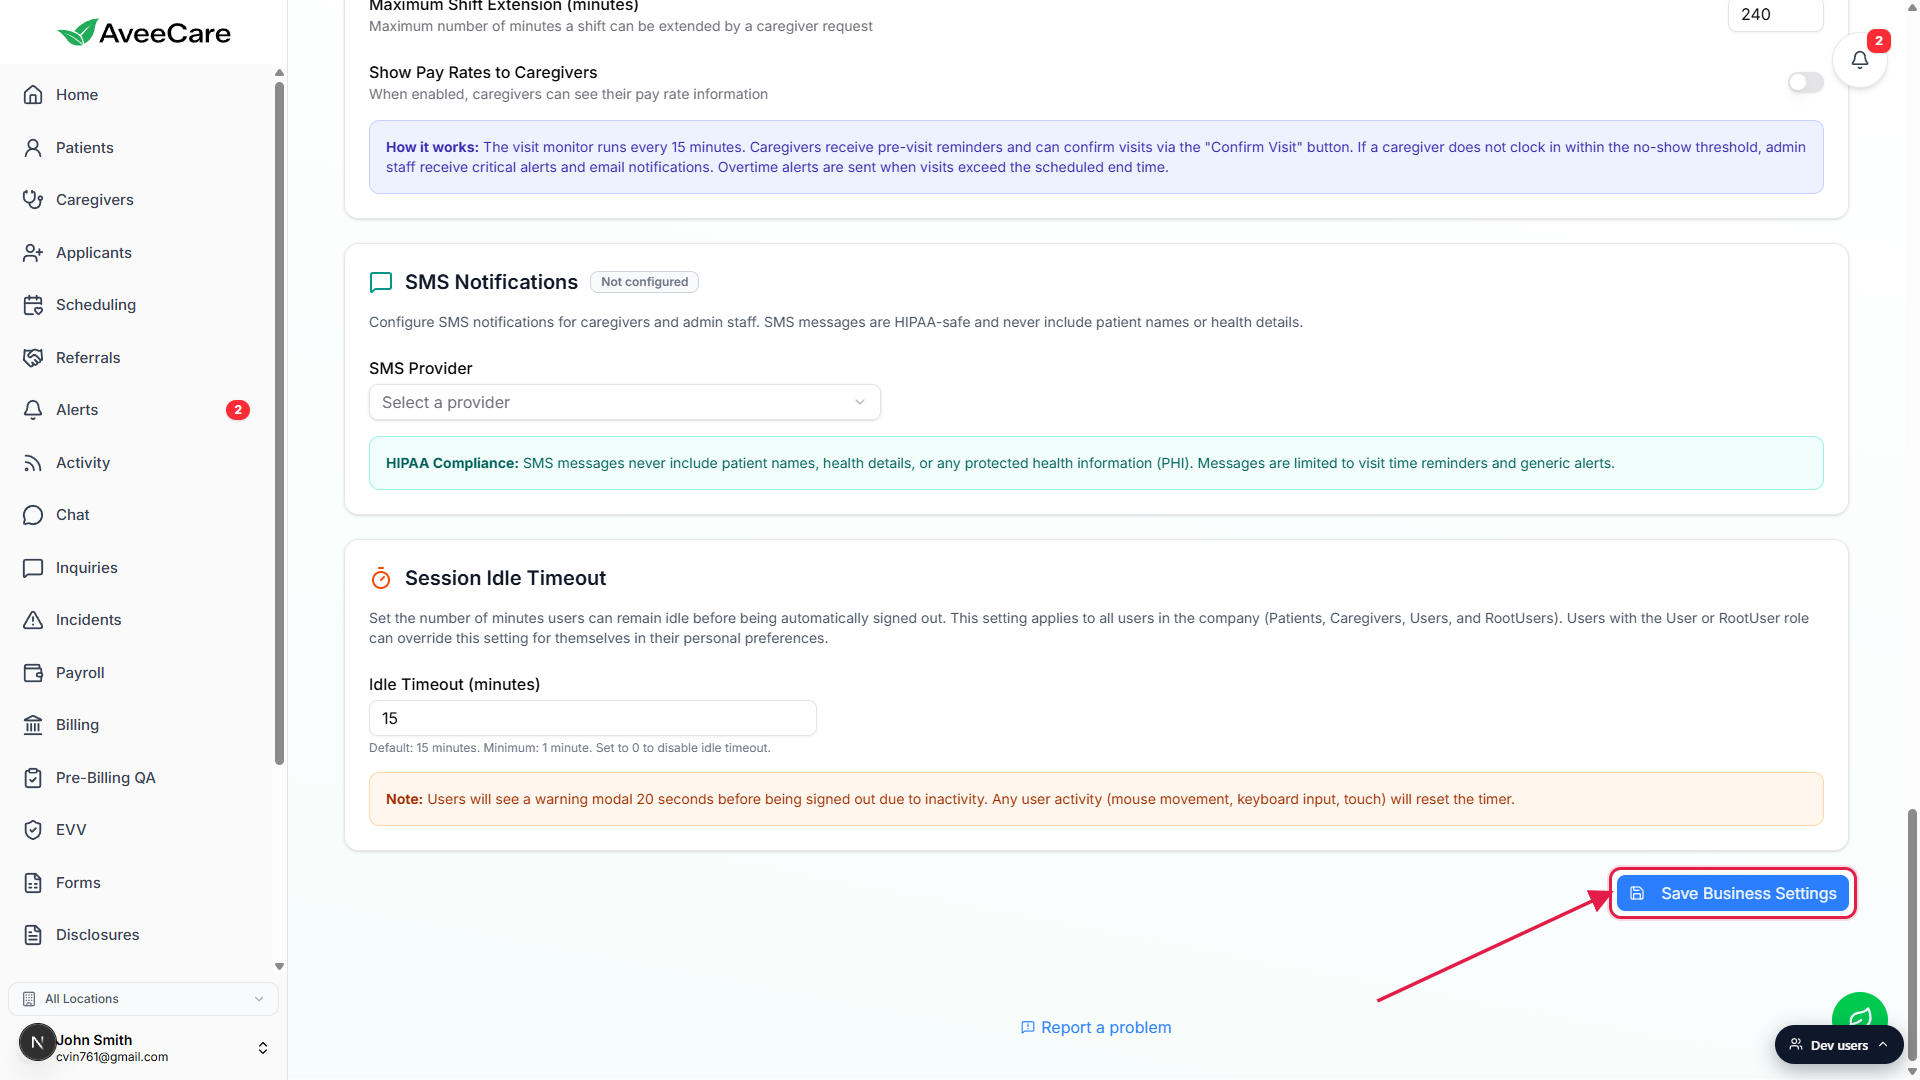
5. Run a test visit and export to your aggregator
Configuration is half the work. The other half is proving the end-to-end loop works before you bet a real Medicaid claim on it.
Schedule a test visit with a caregiver who has the AveeCare app installed.
Use a test patient or a willing real one. Make sure the caregiver is logged into the mobile app on a device with location services on. The EVV clock-in / clock-out reference covers the field-side capture.Have the caregiver clock in, complete the visit, and clock out.
Clock-in captures location and timestamp. Clock-out captures location, timestamp, signatures (caregiver and patient or their EVV PIN), and any state-required reason codes.Open /evv in the sidebar and confirm the visit appears.
The EVV Dashboard loads with date range, state, and export format filters at the top, a row of Status chips that double as live counts (Pending, Validated, Flagged), and the EVV Records table. Reference: EVV dashboard.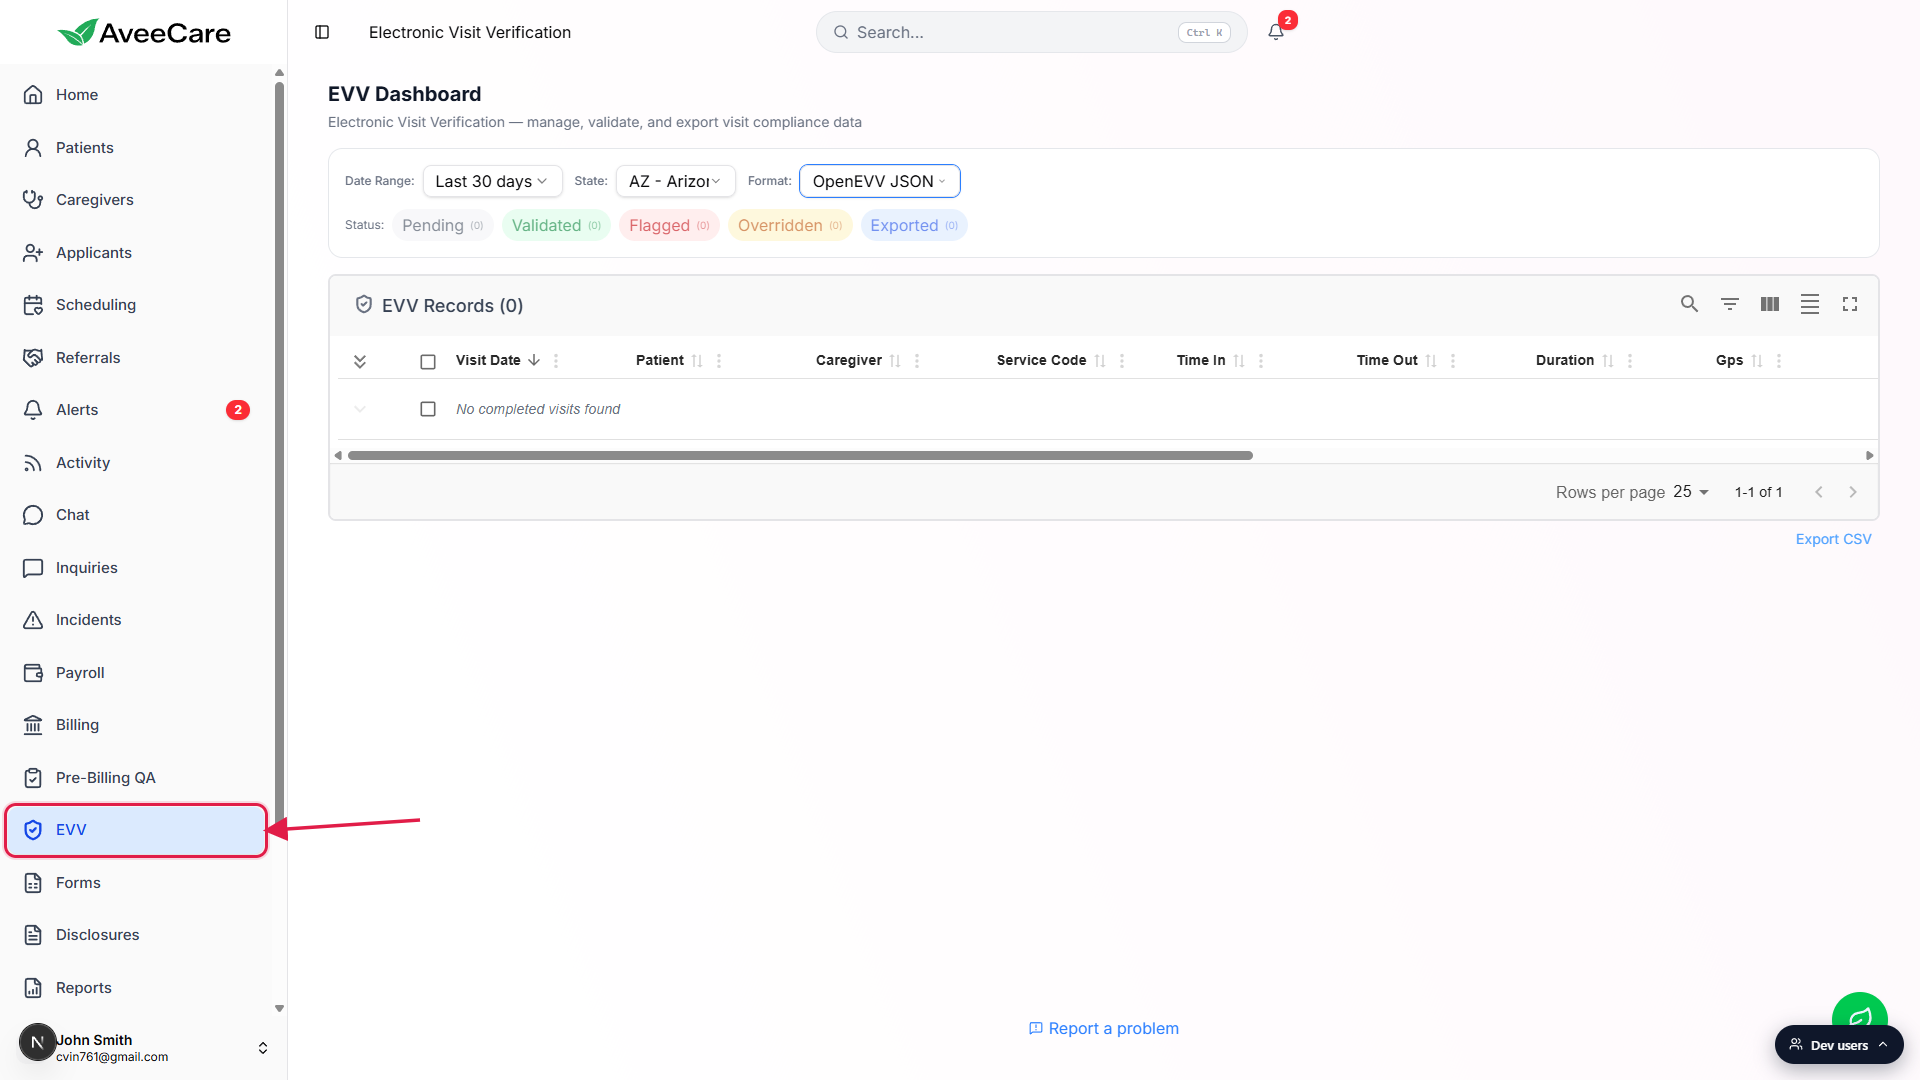
Validate the row and export to your aggregator.
Per-row View / Validate / Override actions let you check the capture and flag the row Validated. Use the bulk action bar and the Export Format selector at the top to push a batch. If any row is Flagged, AveeCare shows a warning before export. Reference: EVV data table and exports.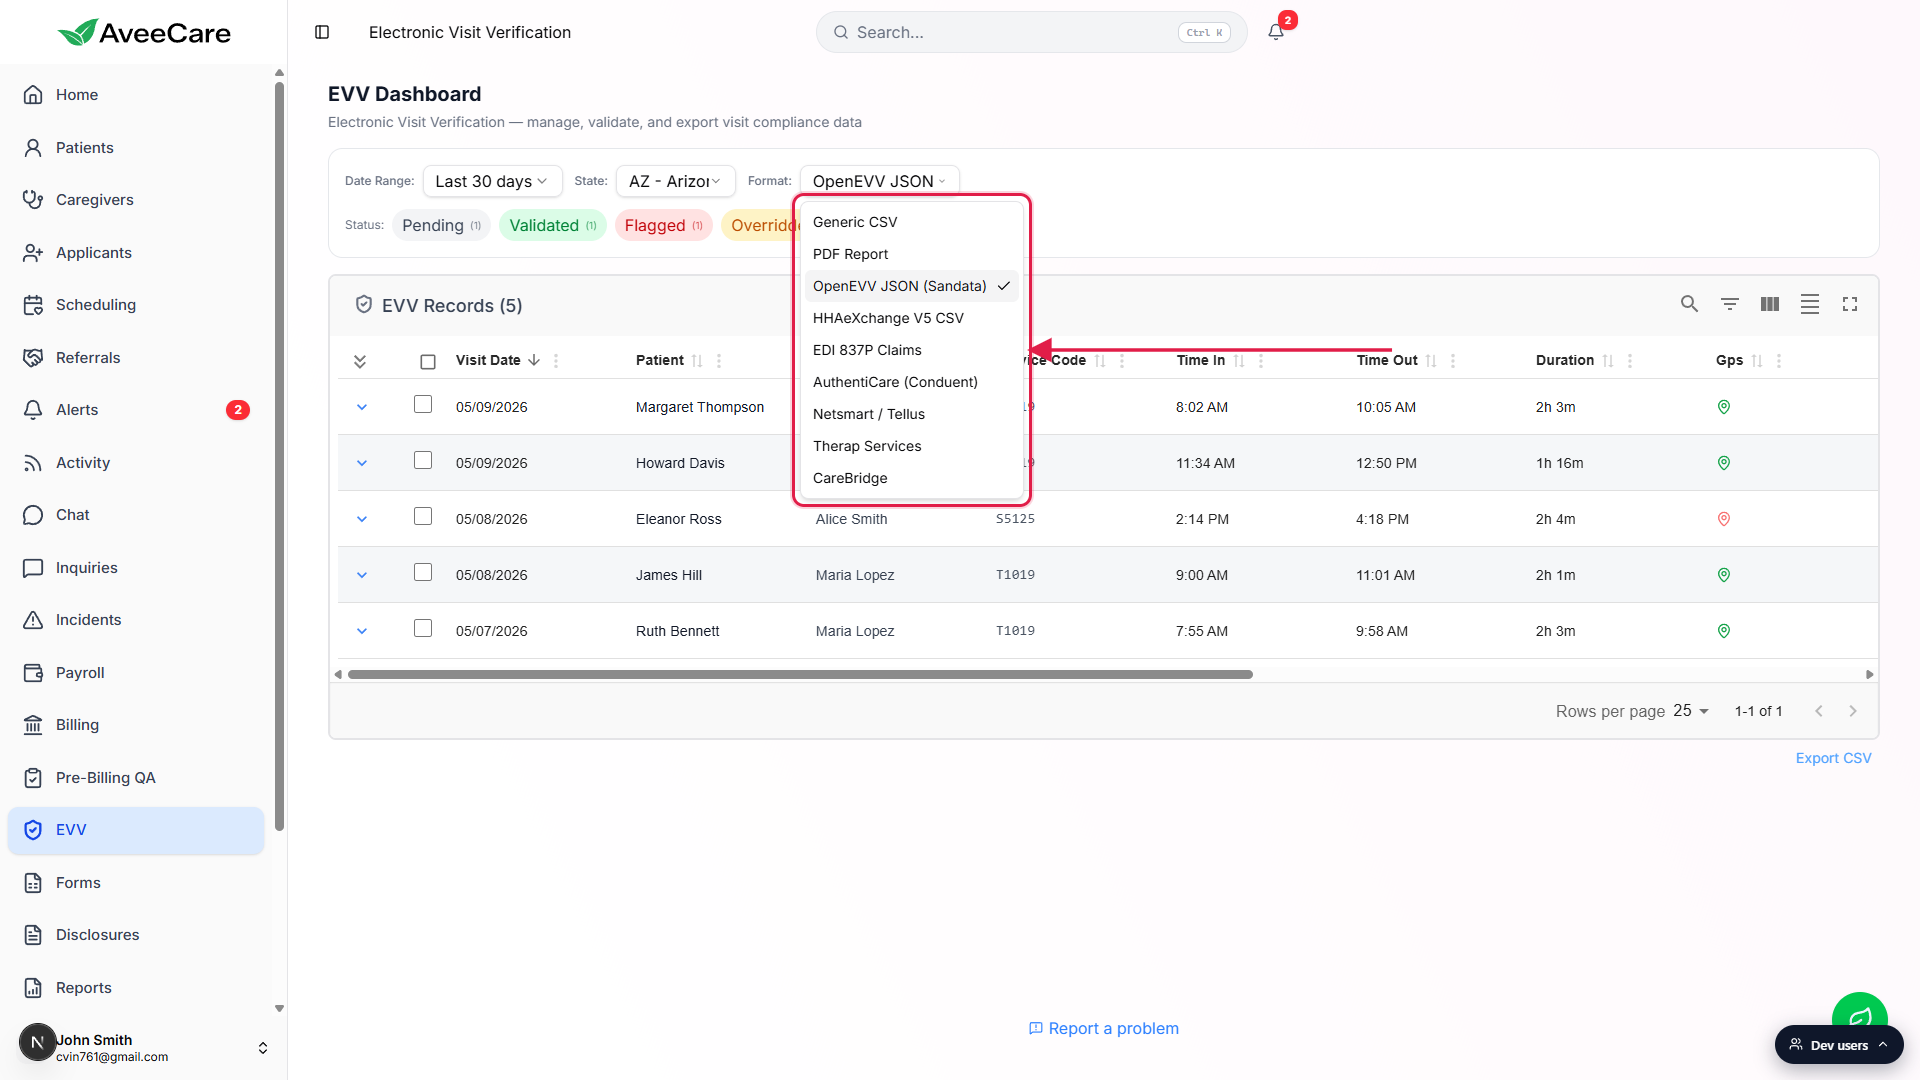
Related
- EVV settings
- Per-state EVV configuration
- EVV dashboard
- EVV data table and exports
- EVV clock-in / clock-out