Almost no agency runs on a single login. Coordinators schedule, billers invoice, HR onboards caregivers, and the field staff need their own accounts so they can clock in. Everything happens from one page: Accounts. This guide walks you through getting every person on your team a login with the right level of access, in the right order.
1. Pick the right role for each teammate
AveeCare has four built-in roles, and the role decides which entry card you click on the Accounts page. There is no role dropdown anywhere, so get this right before you start clicking.
Look at the three entry cards at the top of Accounts.
The cards map one-to-one to the three roles you can hand out: Create User for office staff, Link Caregiver for field staff, and Link Patient for patients or family portal access. RootUser is the founder account from signup and cannot be reassigned.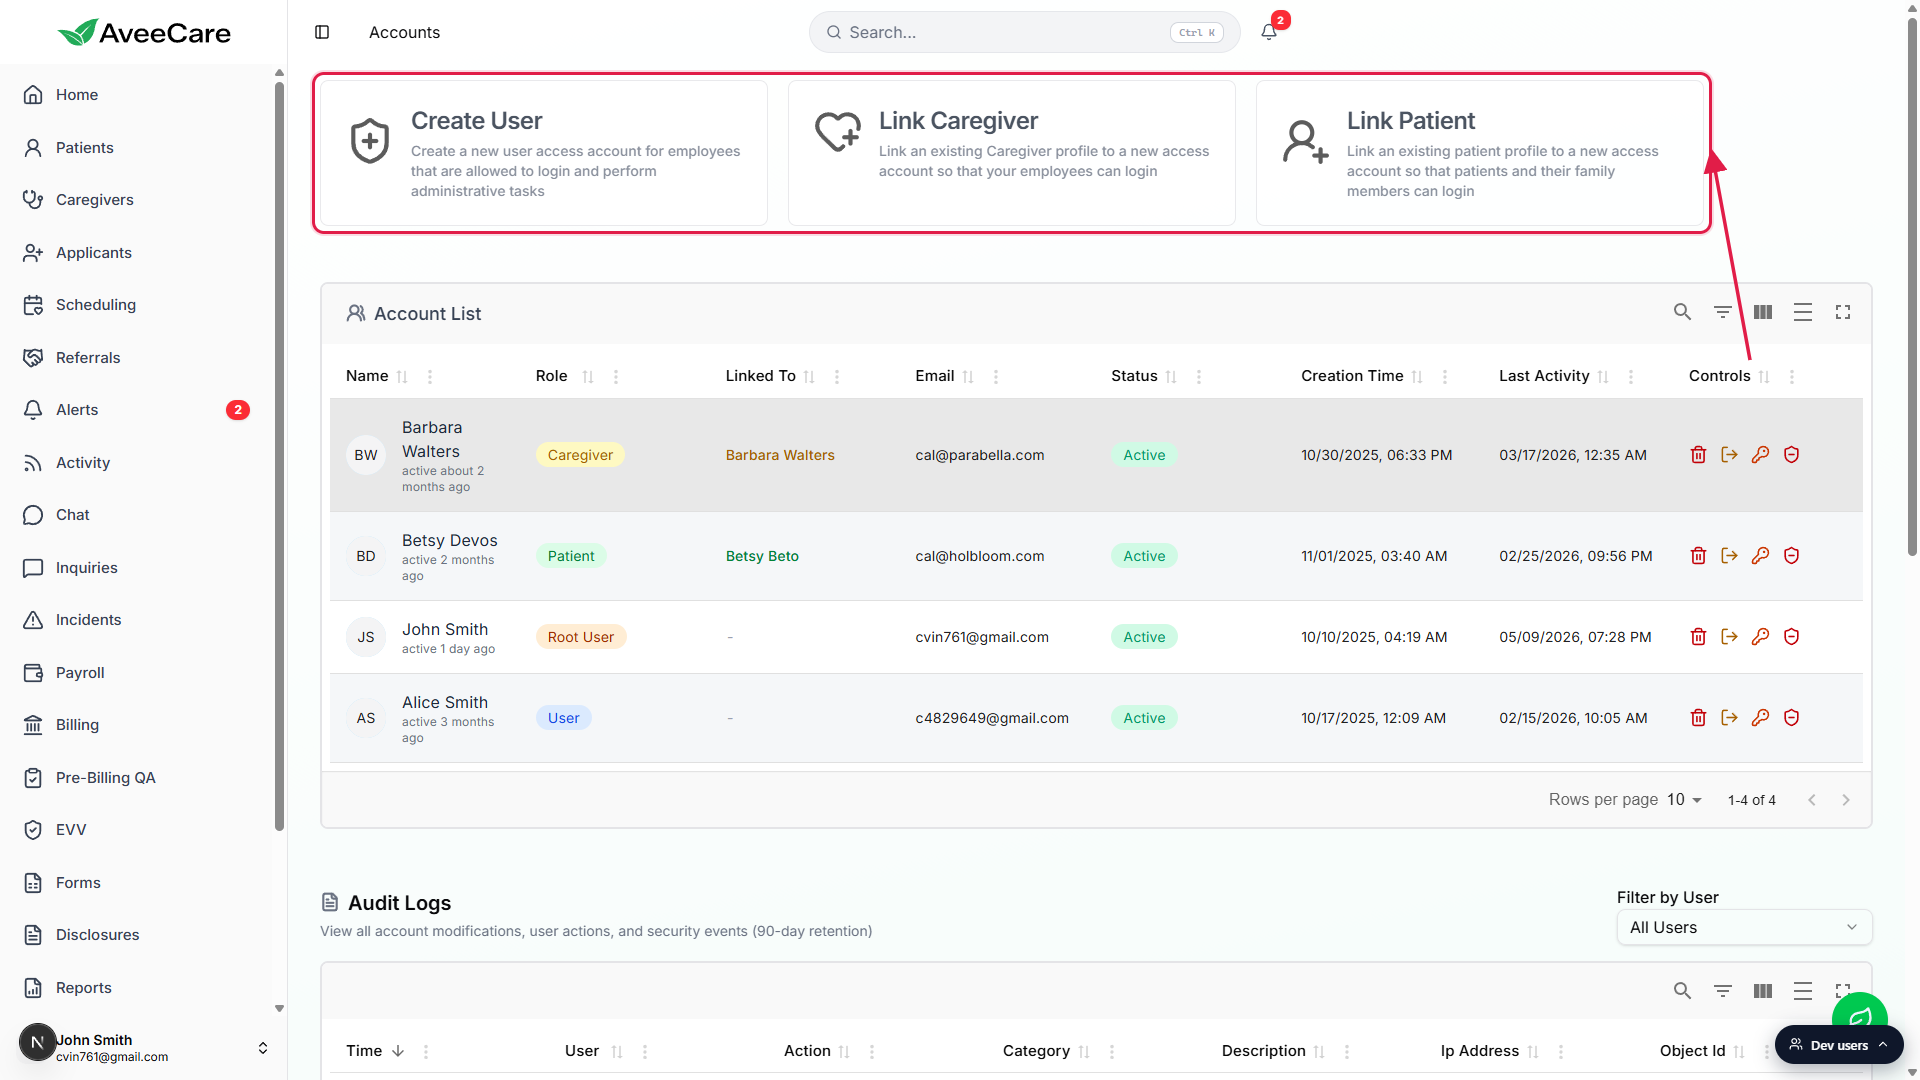
Match each teammate to a role before you start.
User is the office-staff admin role: schedule, bill, payroll, run reports, manage patients and caregivers. Coordinators, billers, HR, and ops people are Users. Caregiver is the field-staff role: see only their own assigned visits, clock in and out, write notes. Patient is the portal role: see only their own visits and invoices. Read the Roles and permissions reference for the full breakdown.
2. Add your office staff (Create User)
Create User makes a full administrative account with the User role. Use it for every coordinator, biller, HR person, or office manager who needs to actually run the agency.
On Accounts, click the Create User card.
A red warning panel inside the modal spells out what the new account can do: add and delete users, modify patients, modify caregivers, and more. Read it once so you understand what you're handing out.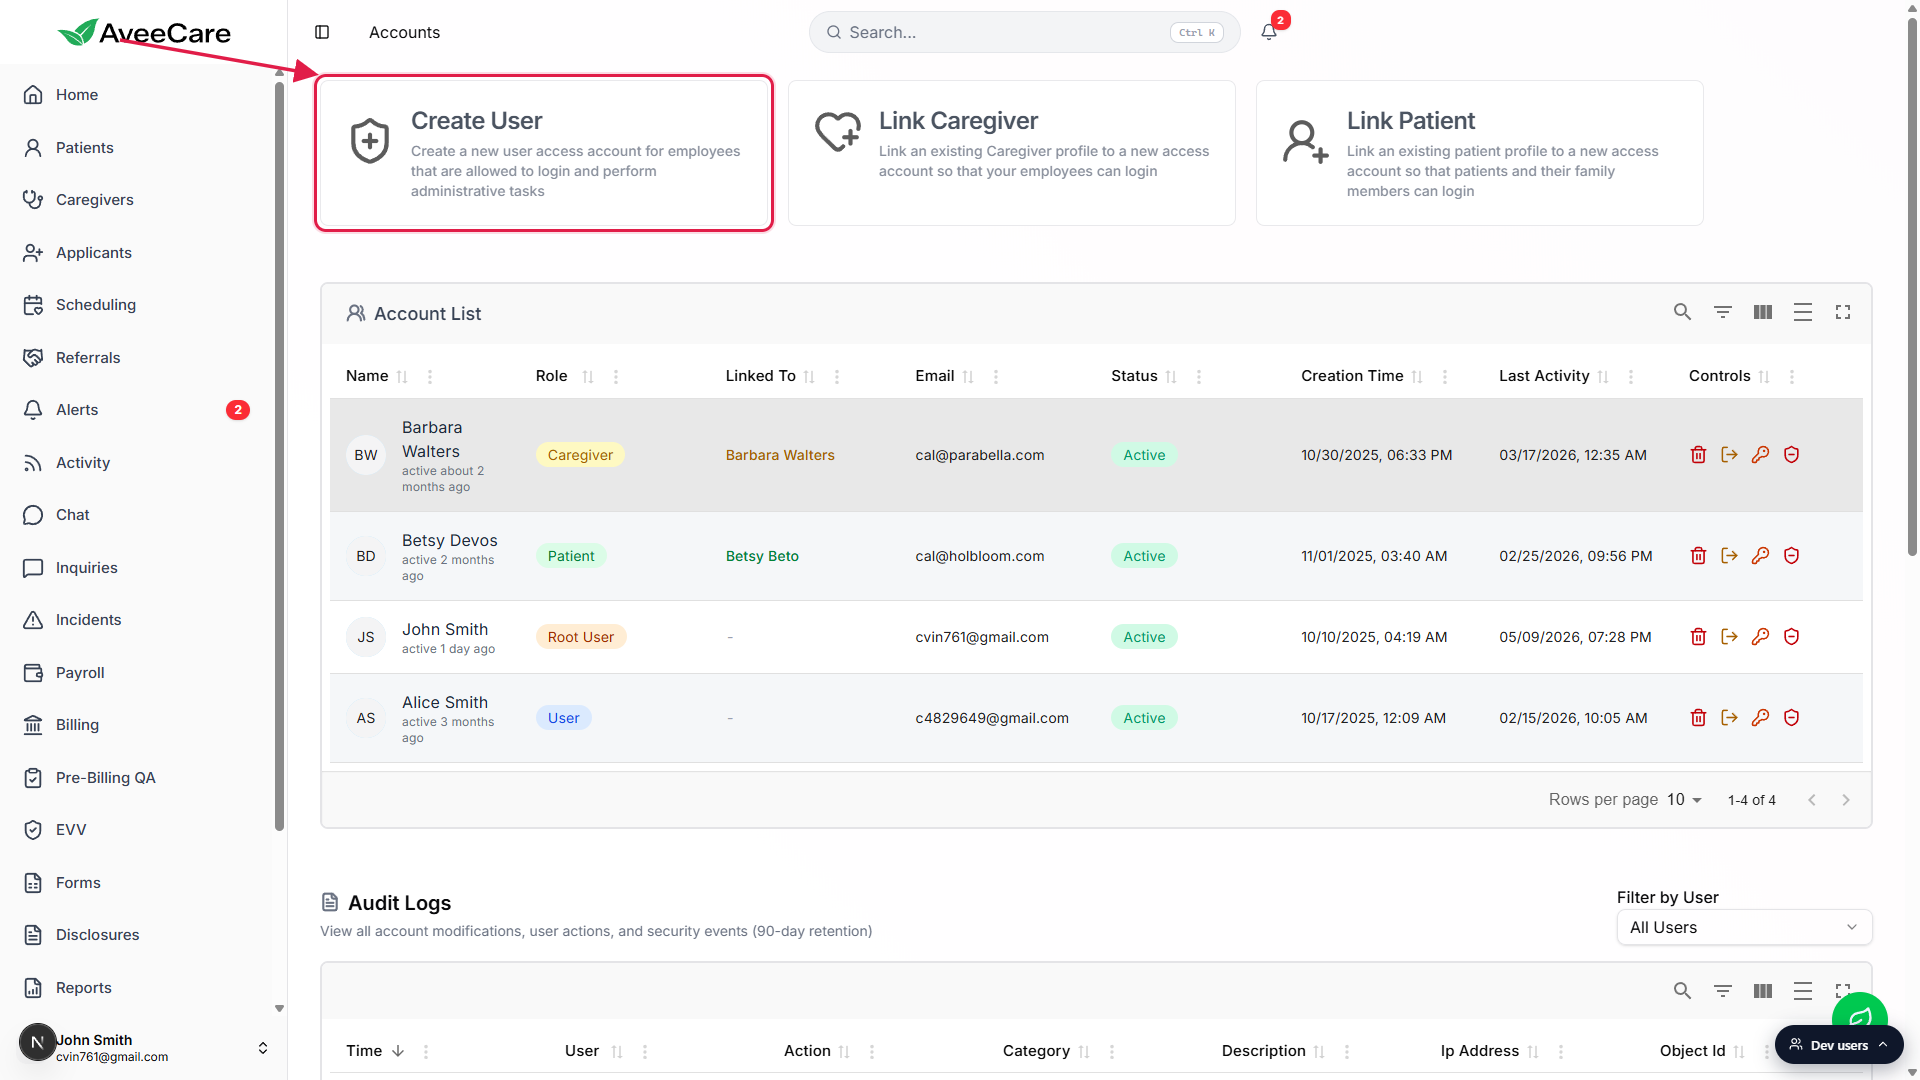
Fill out First Name, Last Name, Email, and Confirm Email.
The Confirm Email field intentionally blocks paste so you have to type the address twice. That catches typos before the account is created, because a wrong email means the user never receives their welcome password.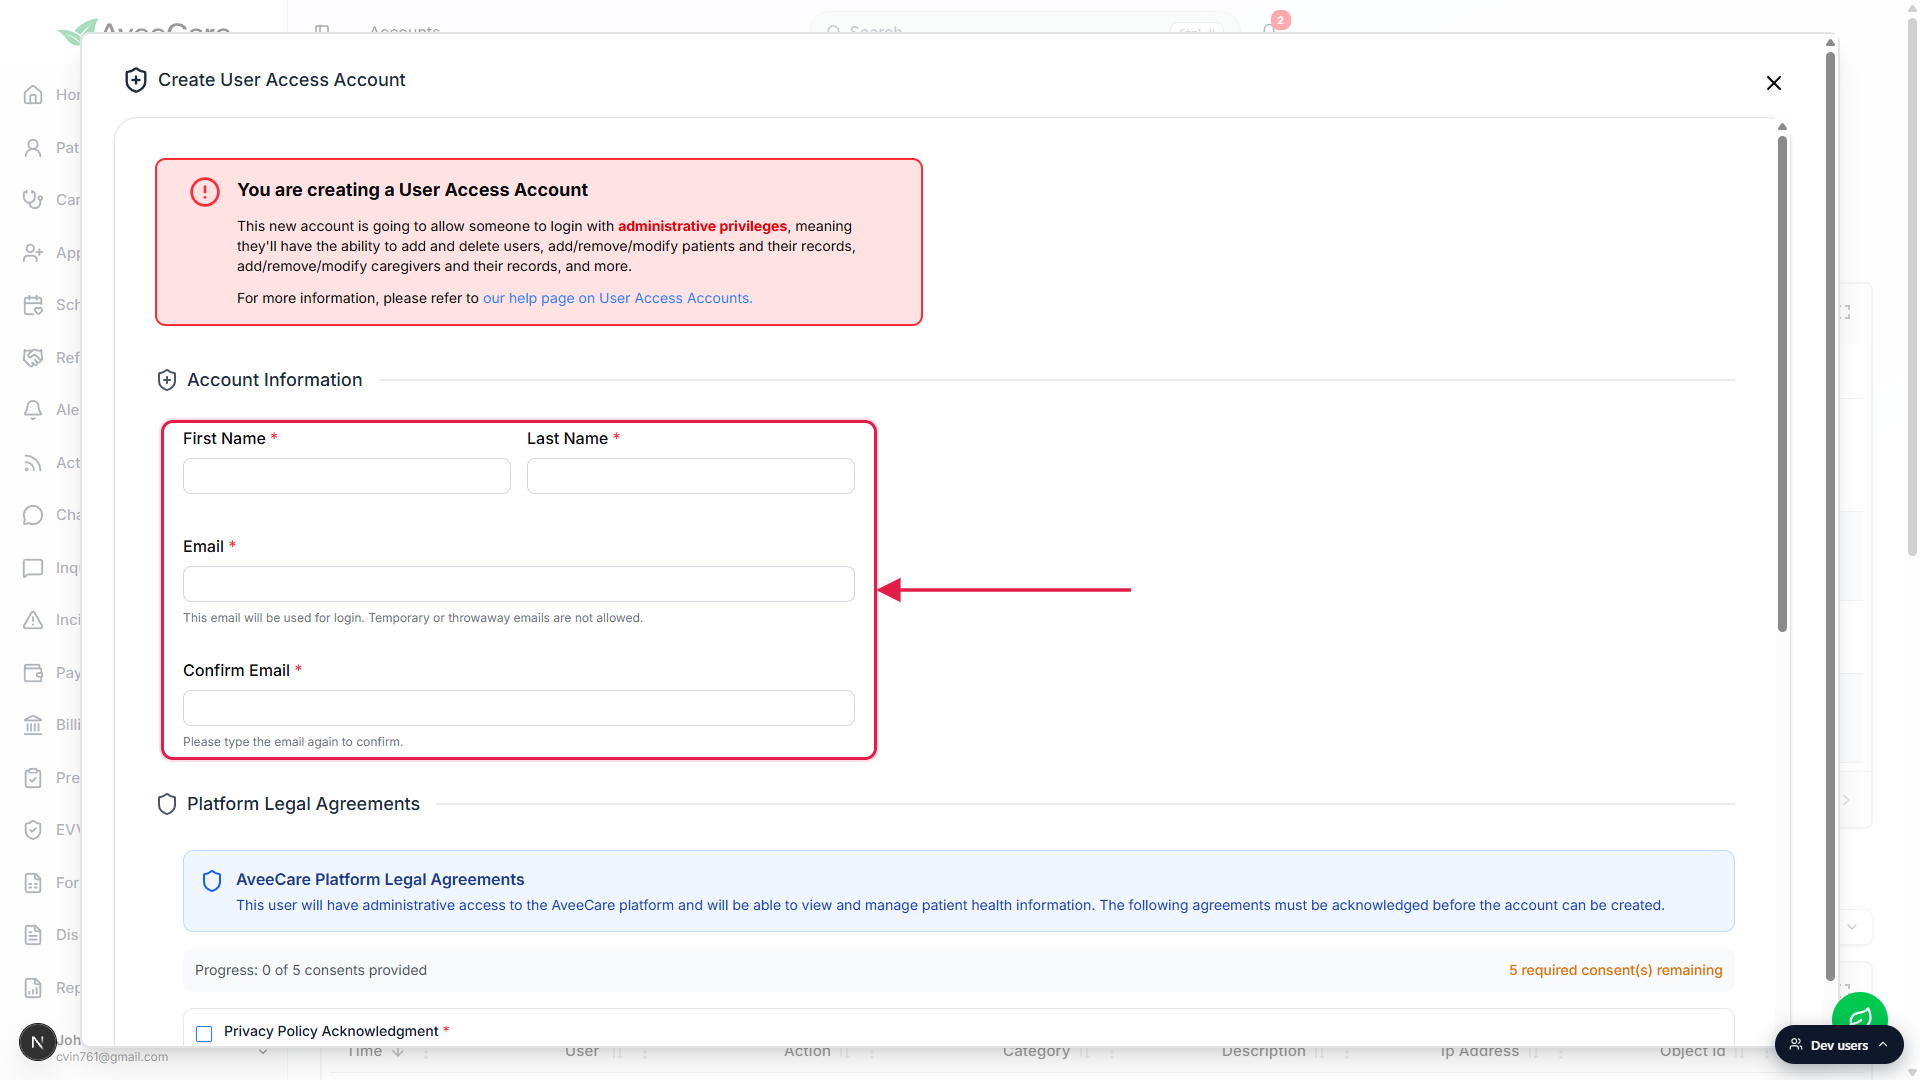
Scroll down and check all five Platform Legal Agreements.
Privacy Policy, Terms of Service, Data Processing Agreement, Electronic Signature Consent, AI Processing Consent. The Create User submit button stays disabled until every box is checked. That's a HIPAA requirement, not a glitch.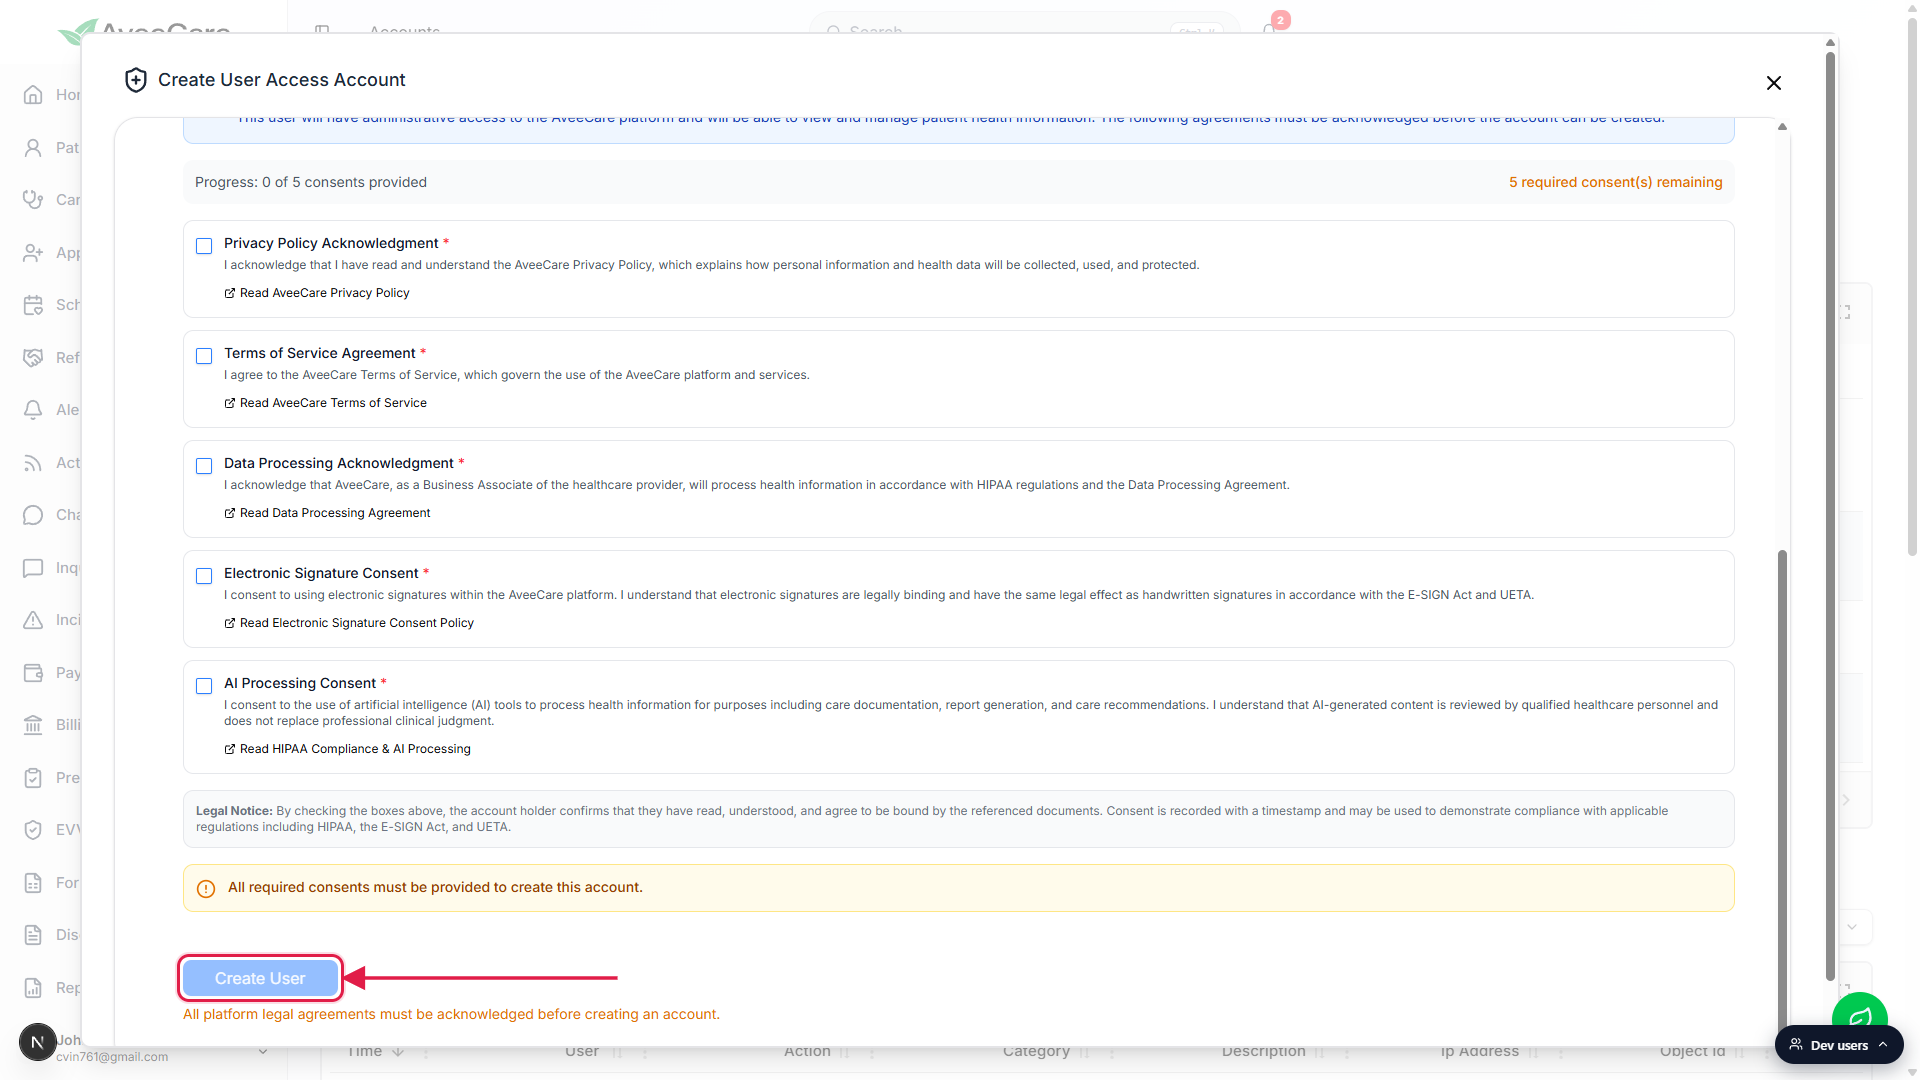
Click Create User. Cognito emails them a temporary password.
The new row lands in the Account List with Status Active. AWS Cognito sends the user a welcome email with a one-time password. They sign in, set their own password, and they're live. There is no “Resend Invitation” action because the account is already real, see the Invite a user reference for the why.
3. Give caregivers a login (Link Caregiver)
Caregivers in your agency already have a Caregiver record after you add them. What they don't have until you do this step is a login they can sign into the caregiver app with. Use Link Caregiver to attach a Cognito account to an existing caregiver record.
On Accounts, click the Link Caregiver entry card.
The list only shows caregivers without a linked login yet, so you won't accidentally create a duplicate. Pick the one you want to attach a login to.Confirm the email and check the five agreements.
The email is auto-filled from the caregiver record but you can change it if needed. Same five Platform Legal Agreements as Create User, because the same HIPAA requirements apply.Submit. The caregiver is emailed a temp password and can sign in.
Once they sign in for the first time, they land on the caregiver app shell with only their own visits, their own schedule, and their own profile. They cannot see other caregivers, other patients, or any company financial pages.
4. Give patients or family portal access (Link Patient)
The patient portal is opt-in per patient. Use it when a family member wants to see schedule, notes, or invoices for the person you're caring for, or when the patient is independent enough to manage their own account.
On Accounts, click the Link Patient entry card.
Same shape as Link Caregiver. The list shows patients without a portal login yet. Pick the patient and the form pre-fills the email from the patient record.Confirm the email, check the agreements, and submit.
Cognito emails them a temp password. After sign-in they land on the patient portal: their own visits, their own care plan, their own invoices, and the Pay Now button for outstanding balances. They cannot see other patients or any company-wide data.For a family member instead of the patient, use the family member’s email.
The portal doesn't verify identity, so the email you enter is the person who can sign in. A daughter handling her father's schedule and bills enters her own email here.
5. Watch sign-ins and clean up dormant accounts
Once your team is in, the Account List is also where you keep things clean: kill stale logins, force someone off all their devices, reset a forgotten password, or temporarily disable an account for a leave of absence.
Read the Account List columns to see who’s using AveeCare.
Eight columns: Name, Role, Linked To, Email, Status, Creation Time, Last Activity, Controls. Click the Last Activity header to sort and find dormant logins to clean up.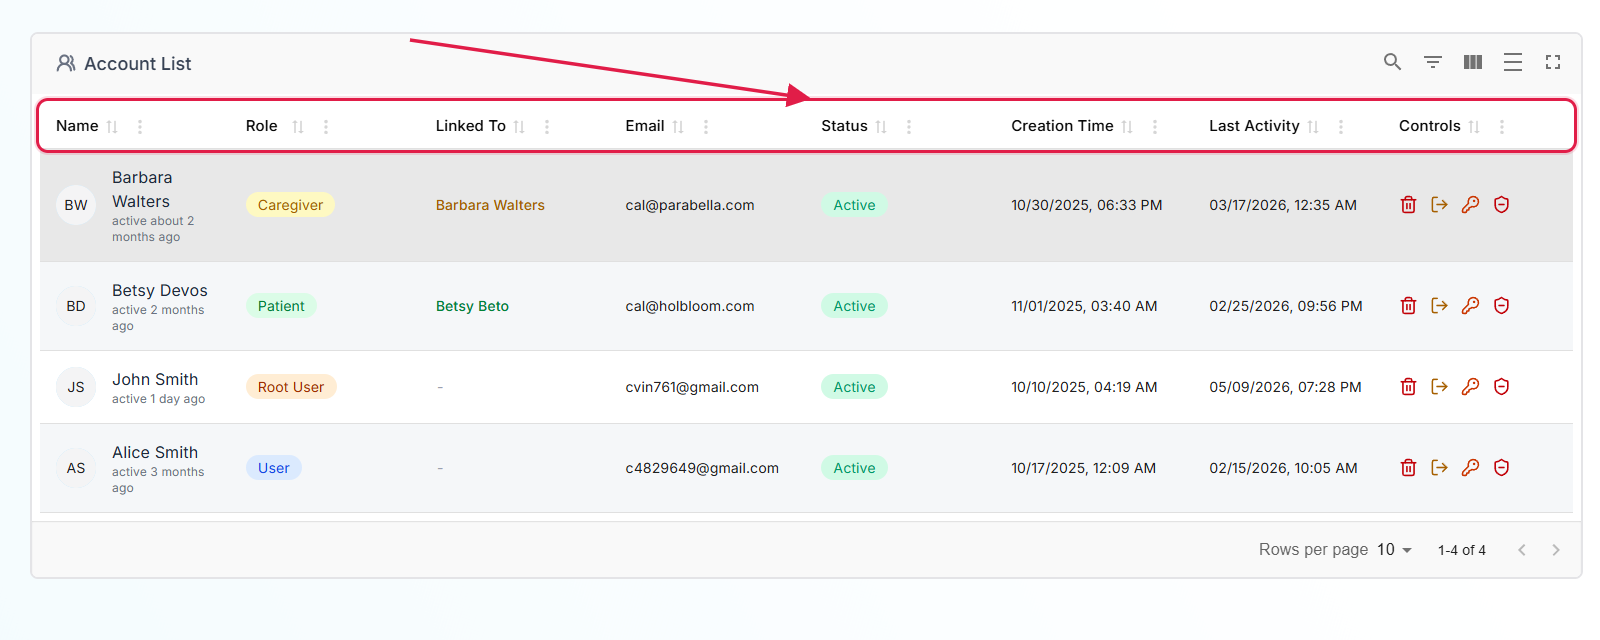
Use the per-row icons for the four common admin actions.
Trash deletes the login. Log-out icon ends every active session for that user. Key icon resets the password (the new temp password is shown in the confirmation dialog only, so copy it before clicking confirm). Shield icon disables (or re-enables) a login without losing the record. The full reference is in User and access account list.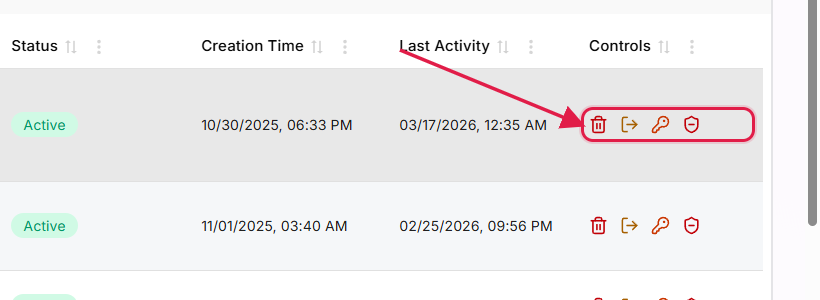
Related
- Roles and permissions
- Invite a user (Create User flow in depth)
- Accounts table (every column and row action)
- Your first week with AveeCare