API Keys is the tab on Settings where you mint bearer tokens that let outside AI assistants and integrations call AveeCare on your behalf through the MCP protocol. Each key inherits your role and permissions, carries a 90-day expiry, and can be revoked from the row at any time.
Quick answer
Open Settings and click the API Keys tab. Click Generate New API Key, accept the security notice, give the key a label, then copy the value from the reveal dialog before closing it. The key value is shown once. Use Revoke in the row to invalidate a key.
What an API key can do
An AveeCare API key is a bearer token for the MCP endpoint at https://app.aveecare.com/api/mcp. While it is valid:
- Same permissions as the issuing user. A Root User key can do anything in the app. A regular User key is scoped to that user's role.
- No MFA prompt per request. The token replaces the interactive sign-in for AI clients, so treat it like a password.
- Logged. Every action the key takes is attributed to your account on the Activity feed.
- Expires after 90 days. Generate a new key and rotate before the old one expires.
Root Users see every key in the company on this tab. Regular Users only see their own keys. Anyone can revoke a key they have visibility into.
1. Open Settings and switch to the API Keys tab
Click Settings in the left sidebar.
Settings opens on the Business Settings tab by default. The tab strip across the top runs Business Settings, My Notifications, Company Notifications, Subscription & Billing, Payment Integrations, Clearinghouse & Claims, Payroll, Locations, API Keys, Account.Click API Keys near the right end of the tab strip.
You land on a list of existing keys plus a teal Generate New API Key button in the top-right. The list shows Label, Key ID (first 8 characters), User, Created, Last Used, Expires, Status, and Actions.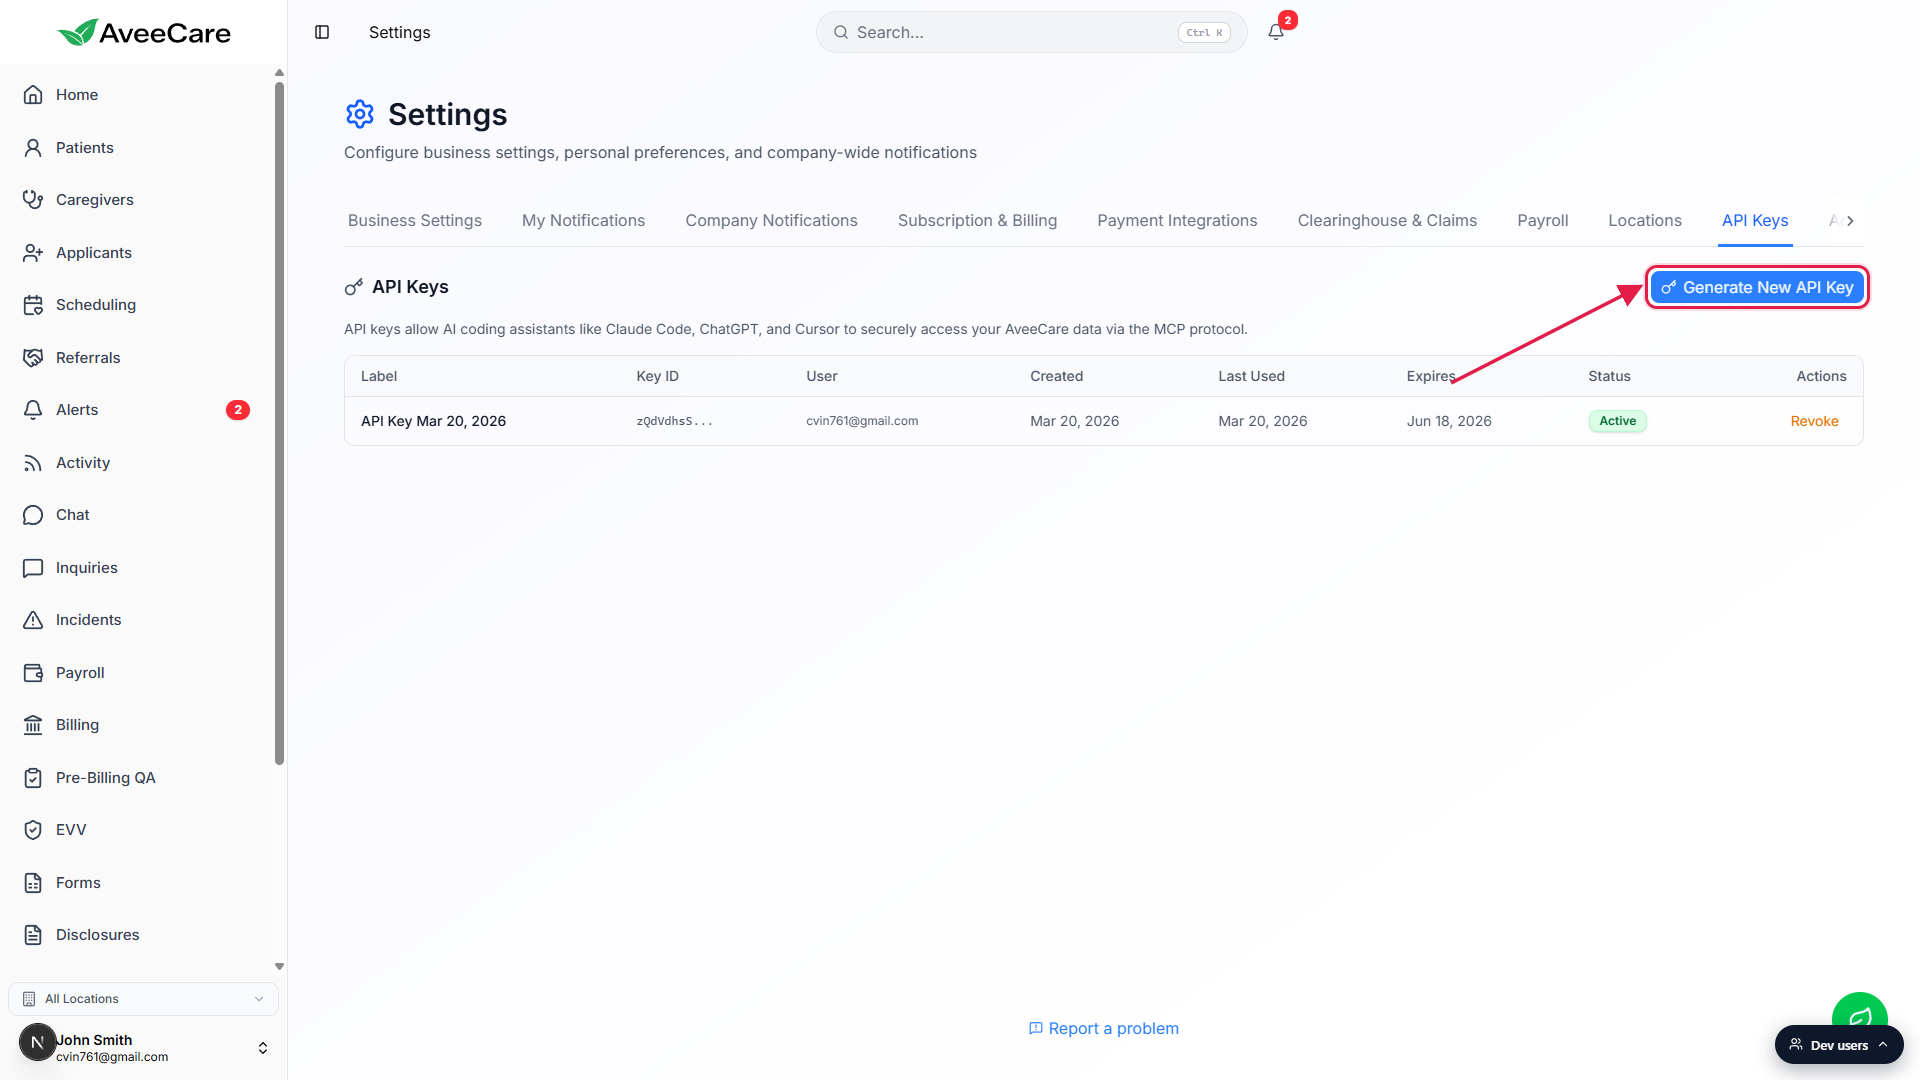
2. Click Generate New API Key and read the notice
Click Generate New API Key.
A Security & Compliance Notice modal opens. It is six bullet points reminding you that the key has session-level access without per-request MFA, inherits your role, must be treated like a password, logs every action against your account, can be revoked from this page, and expires in 90 days.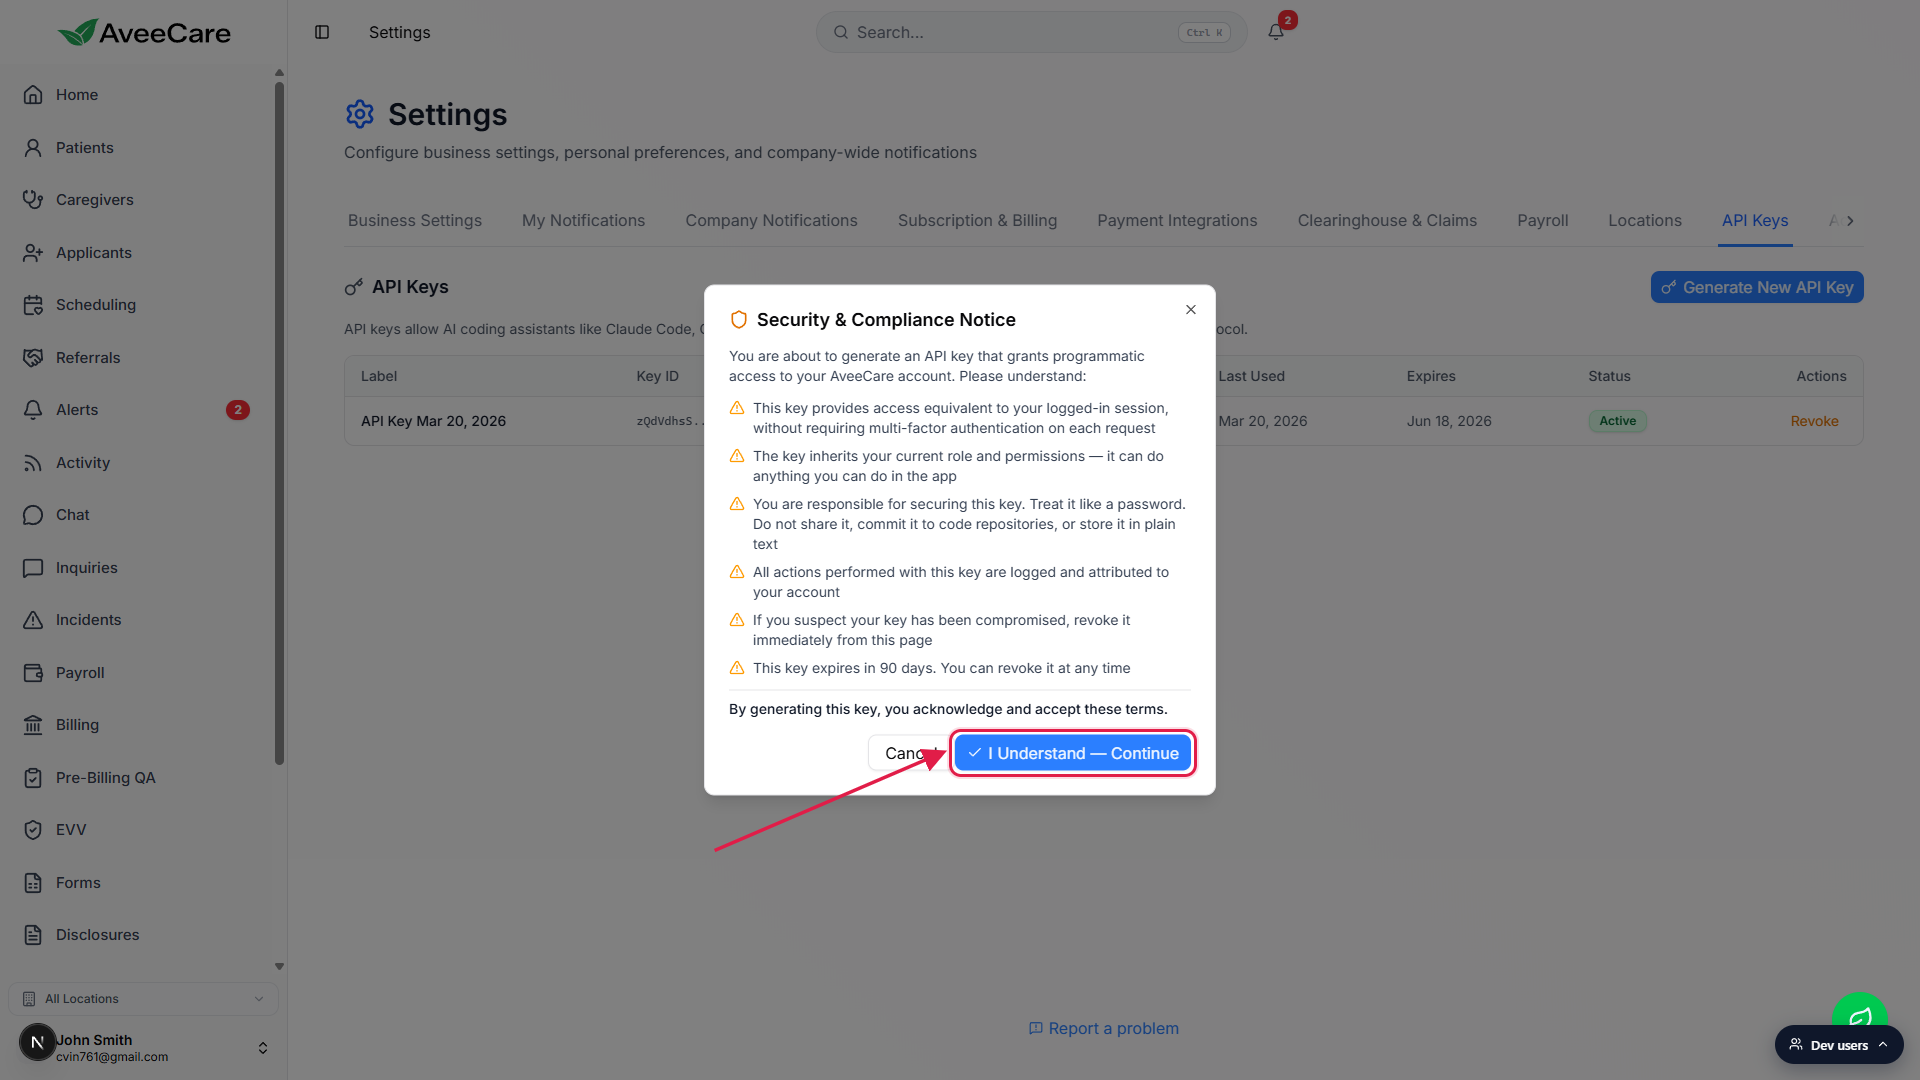
Read the bullets, then click I Understand - Continue.
The Cancel button on the left backs out without generating anything. The blue Continue button on the right acknowledges the terms and moves to the label step.
3. Name the key and generate it
Type a label that describes where the key will live.
The Name Your API Key dialog pre-fills a default likeAPI Key May 10, 2026. Replace it with something you will recognize later, for exampleClaude Code - Work LaptoporCursor - Home iMac. Labels are the only way to tell two keys apart on the list.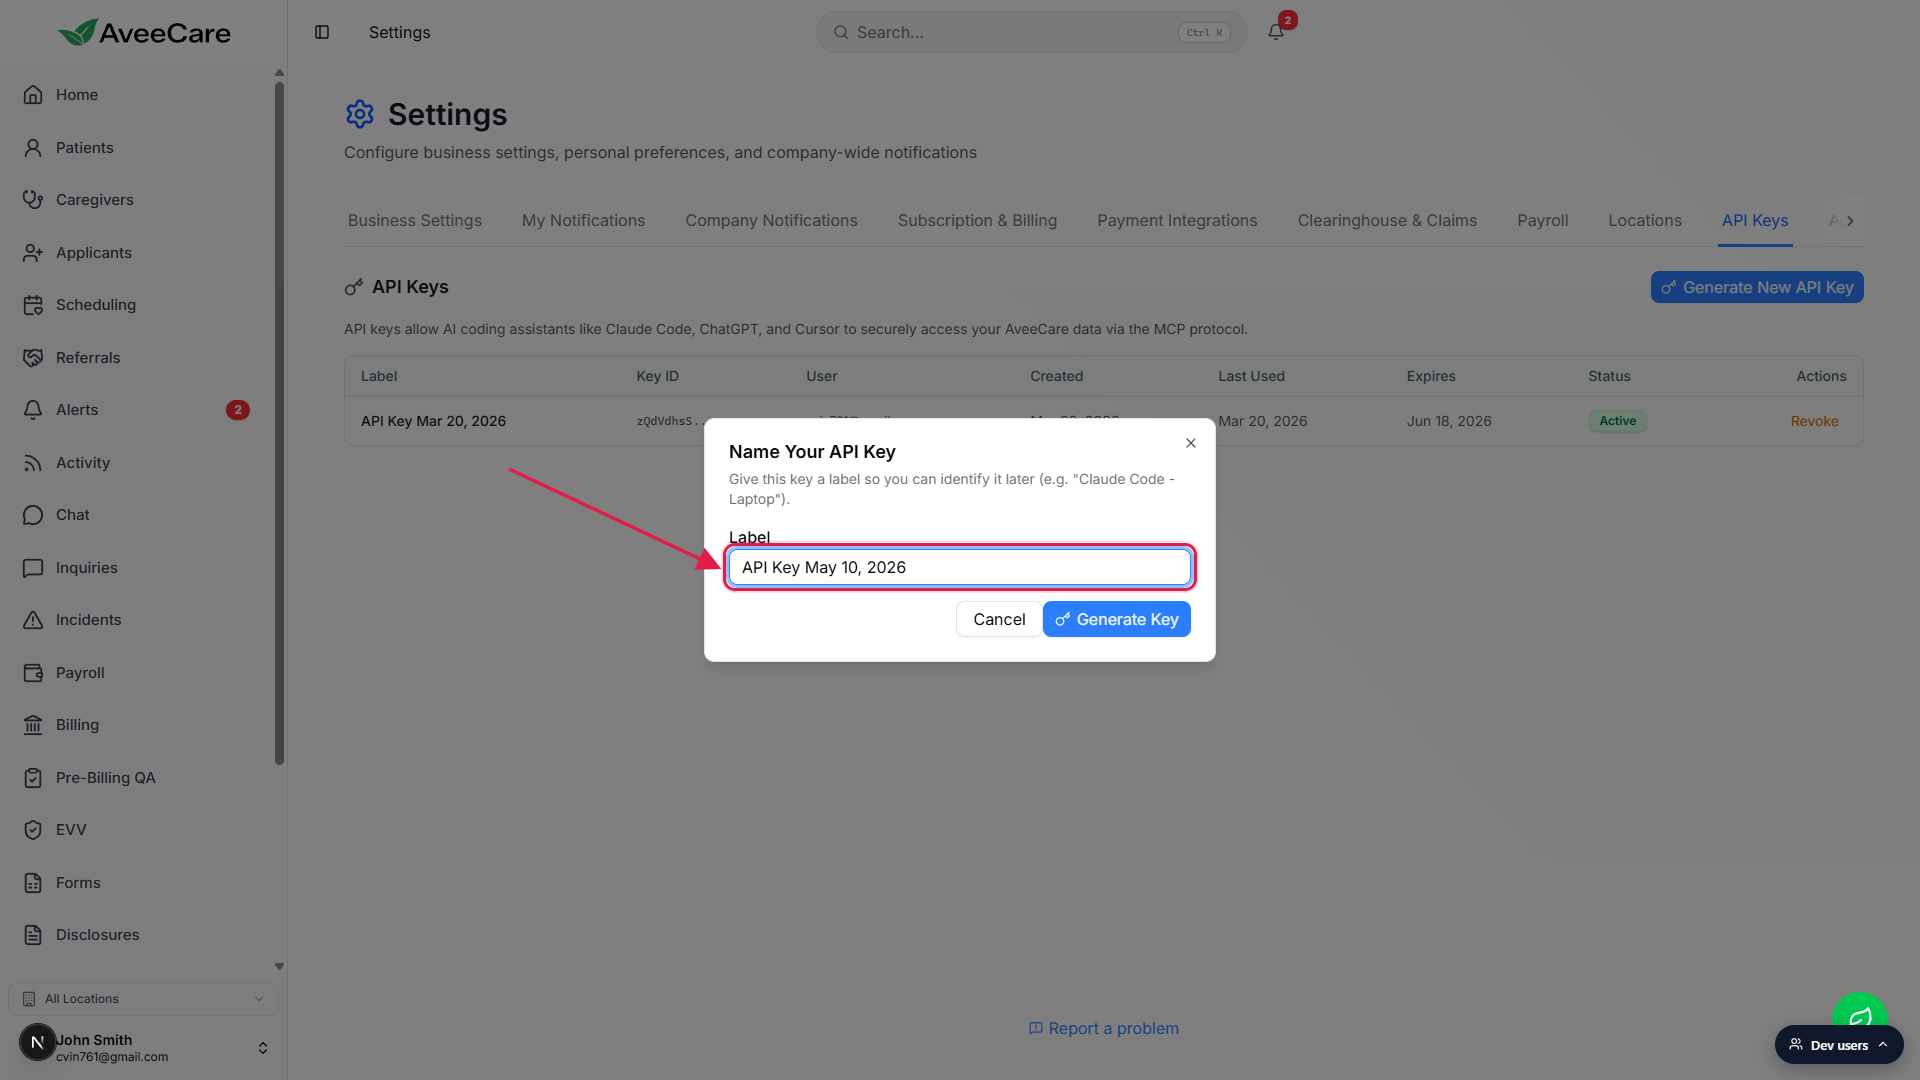
Click Generate Key.
The button shows a spinner while the server hashes the new secret and stores the public part. The full token never lives on the server in plain text, which is why the next dialog is the only place you will ever see it.
4. Copy the key once from the reveal dialog
Click Copy on the dark code block to grab the full token.
The Your API Key dialog displays the full bearer token in a green monospace strip, with a Copy button to its right. An amber warning under the token reminds you that this is the only time the key will be displayed.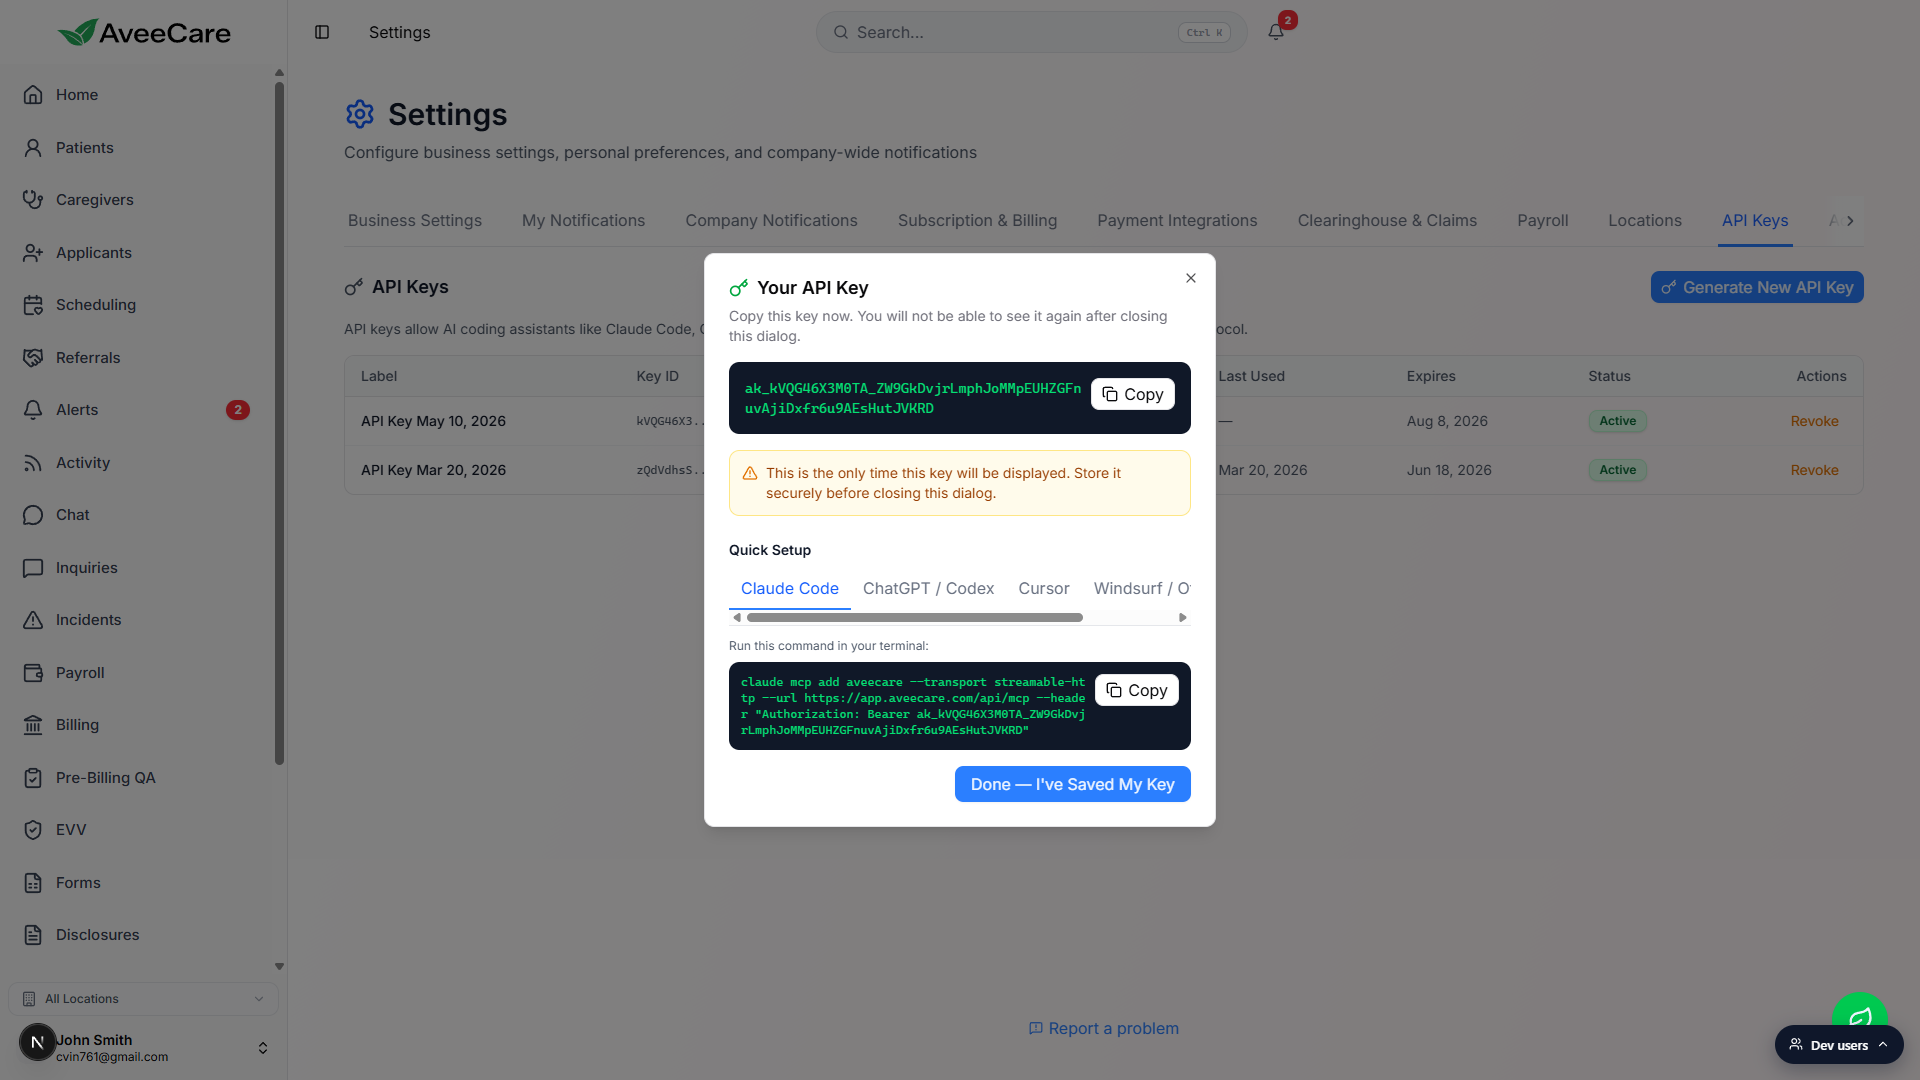
Use the Quick Setup tabs to copy a client-specific snippet.
Five tabs are provided: Claude Code (a singleclaude mcp addcommand), ChatGPT / Codex (steps plus a Bearer header), Cursor (a JSON block for.cursor/mcp.json), Windsurf / Other (the same JSON in a generic MCP config shape), and Generic (a label-value grid of URL, Transport, Auth Method, and Key). Each tab has its own Copy button.Click Done - I have Saved My Key to close.
Closing the dialog clears the token from memory. If you missed copying it, you have to revoke the key and generate a new one. The new key shows up at the top of the list on the API Keys tab with status Active.
5. Revoke a key when you no longer need it
Find the row on the API Keys tab and click Revoke.
Revoke shows in the Actions column for any Active key. Use the label and Last Used columns to confirm you are picking the right key. A Revoke API Key confirmation dialog appears with a short warning that the action is immediate and cannot be undone.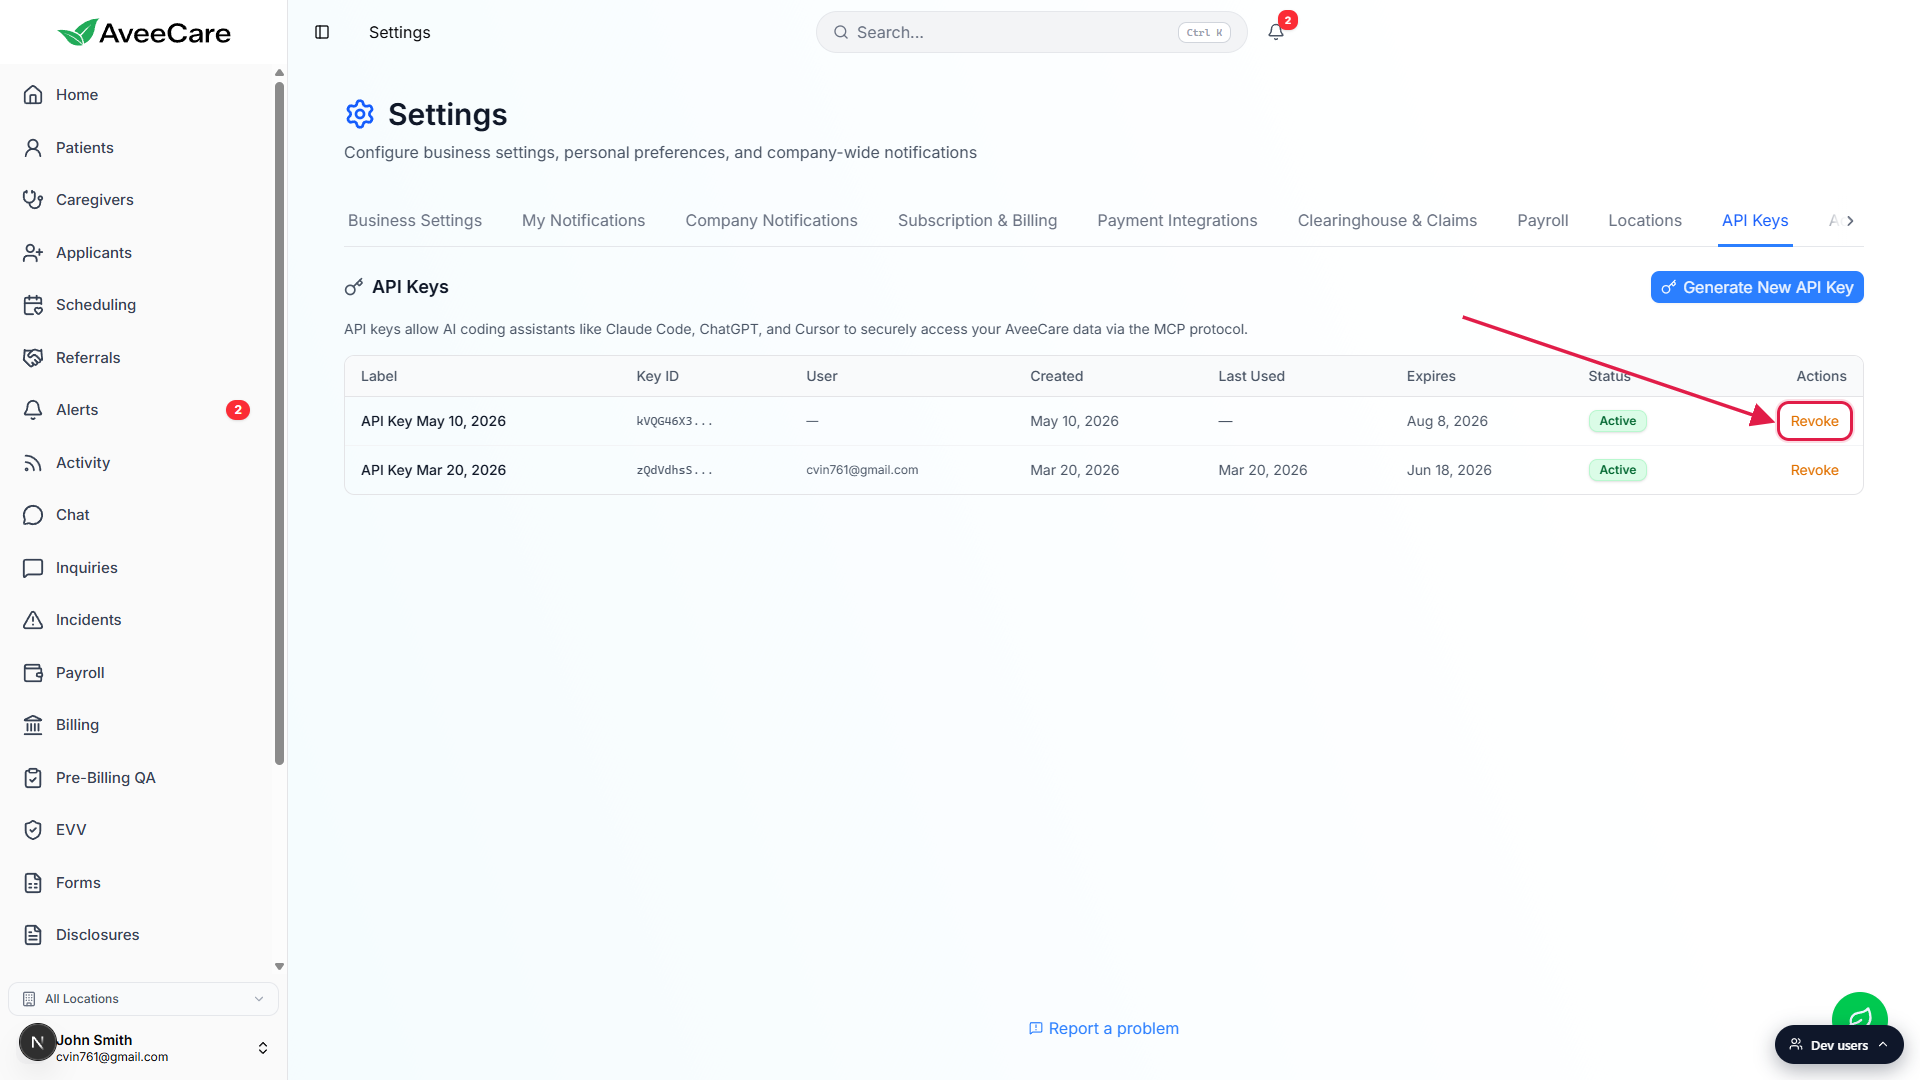
Click Revoke Key to confirm.
The row updates to status Revoked. Any client still using the bearer token starts getting 401 responses on its next request. A trash-can icon replaces Revoke in the Actions column so a Root User can fully delete the record when they want to.
Common pitfalls
- Closing the reveal dialog before copying. The token is shown once. If you click Done before copying, the only path forward is to revoke and generate a new one. Always paste the value into your client (or a password manager) before closing.
- Sharing one key across multiple devices. Labels exist so you can tell devices apart. Generate a separate key for each laptop, desktop, or shared workstation. If one device is lost or stolen, you can revoke just that key without disrupting the others.
- Forgetting that the key carries your role. A Root User key can do everything a Root User can do, including changing other users, billing, and EVV. Generate keys from the lowest- privilege user that still has the access your client needs.
- Ignoring the 90-day expiry. Keys silently flip to Expired after 90 days and stop working. The Expires column shows the date. Rotate before the deadline rather than after a client starts failing.
- Confusing this with AI settings. Turning off AI Features on Business Settings hides the in-app AI assistant but does not revoke any API keys. A remote agent that already has a token keeps working until you revoke the key itself.