You do not have to retype a roster to leave your old software. The Import page takes the export file your current system gives you and brings the whole list across in one pass, including systems AveeCare has never seen before.
Quick answer
- Import / Export in the sidebar
- Pick Clients (Patients)
- Drop in the Excel, CSV or JSON file from your old system
- Check the columns, click Ask AI to map the rest for anything unmatched
- Preview → Import
Exports from HomeTrak, AxisCare, Generations, CareSmartz360, WellSky Personal Care (ClearCare) and The Rosemark System are recognised automatically. Anything else still works, it just takes one extra click.
1. Open Import / Export
Click Import / Export near the bottom of the sidebar.
It is an office-staff page, so caregivers and patients never see it. Importing and exporting both live here, so leaving is as easy as arriving.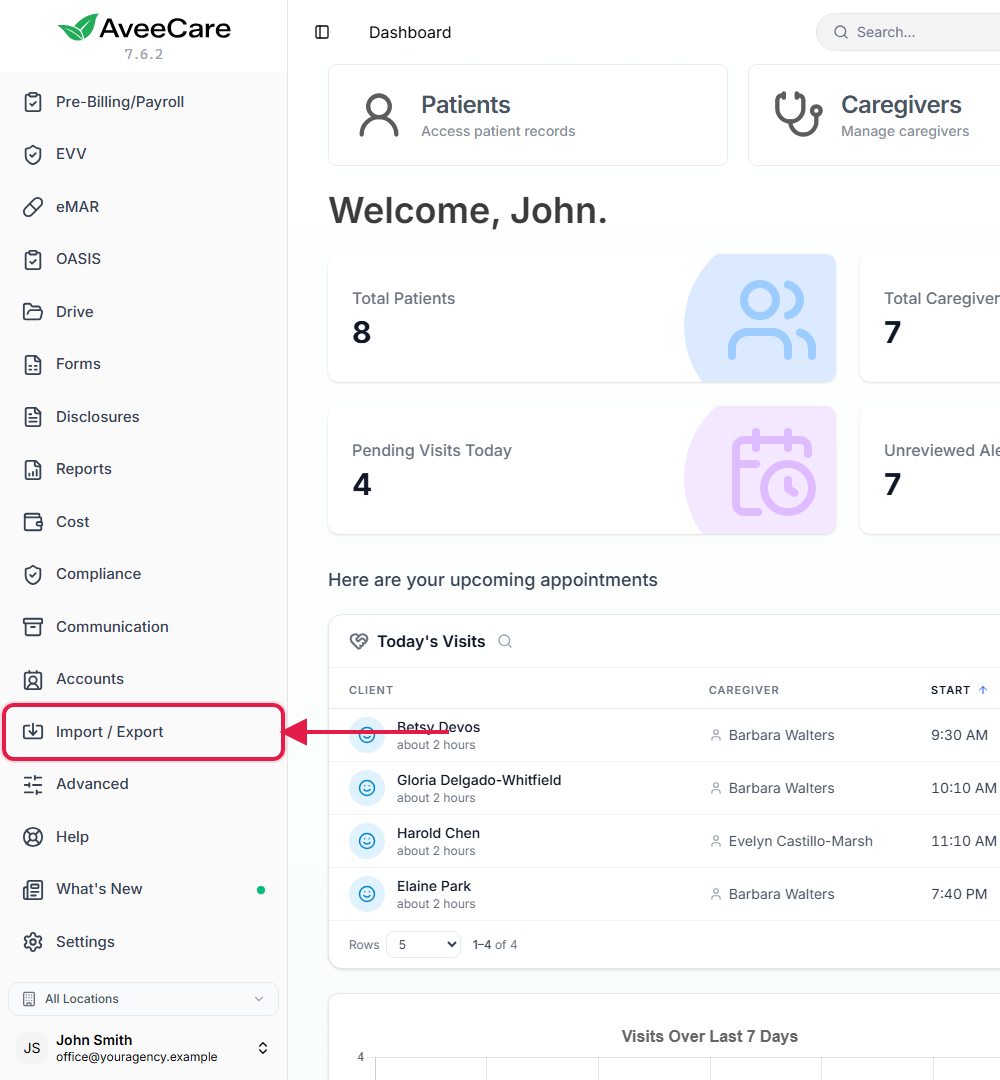
2. Choose Clients (Patients)
Click the Clients (Patients) card.
There are seven things you can bring over. Start with clients: visits, authorizations and care plans are all matched back to clients by name, so the roster has to exist first.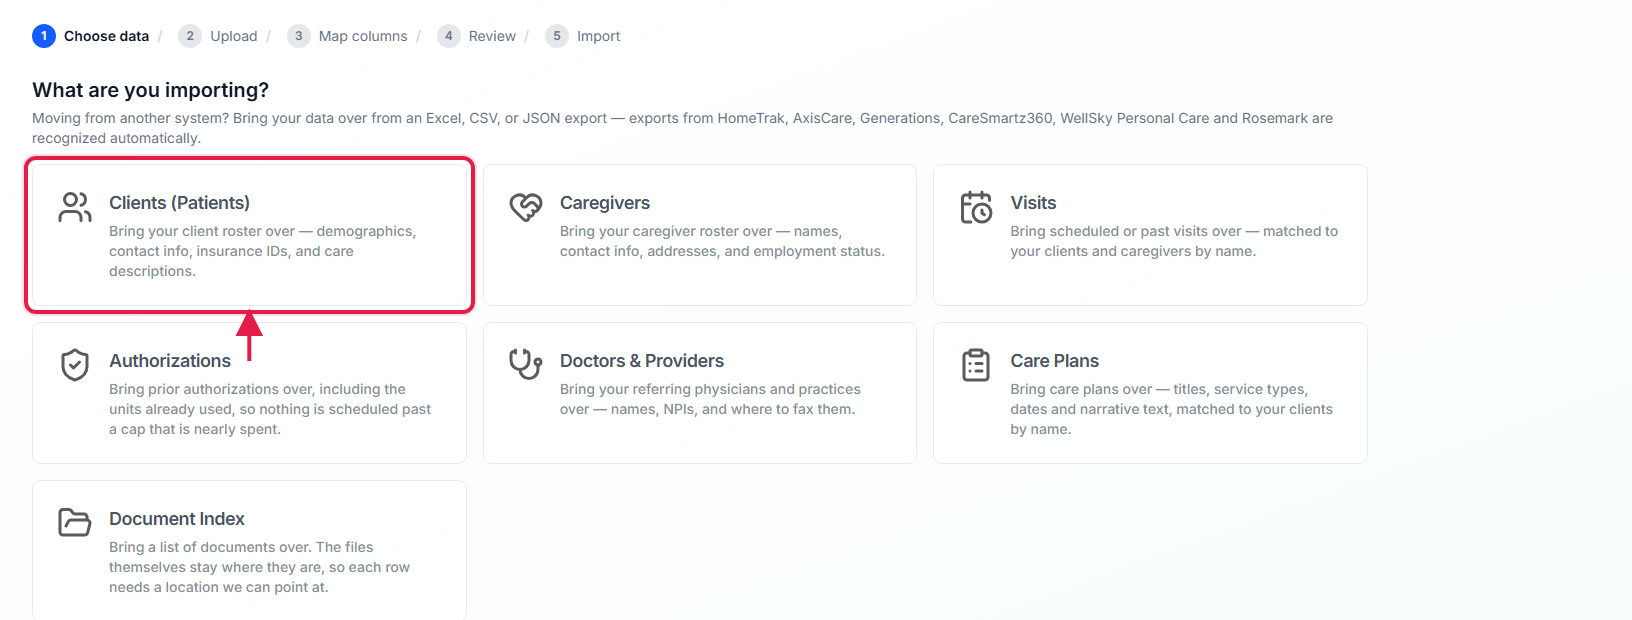
Six systems are recognised without you doing anything.
HomeTrak, AxisCare, Generations, CareSmartz360, WellSky Personal Care and Rosemark. If your export comes from one of those, the column matching is done for you.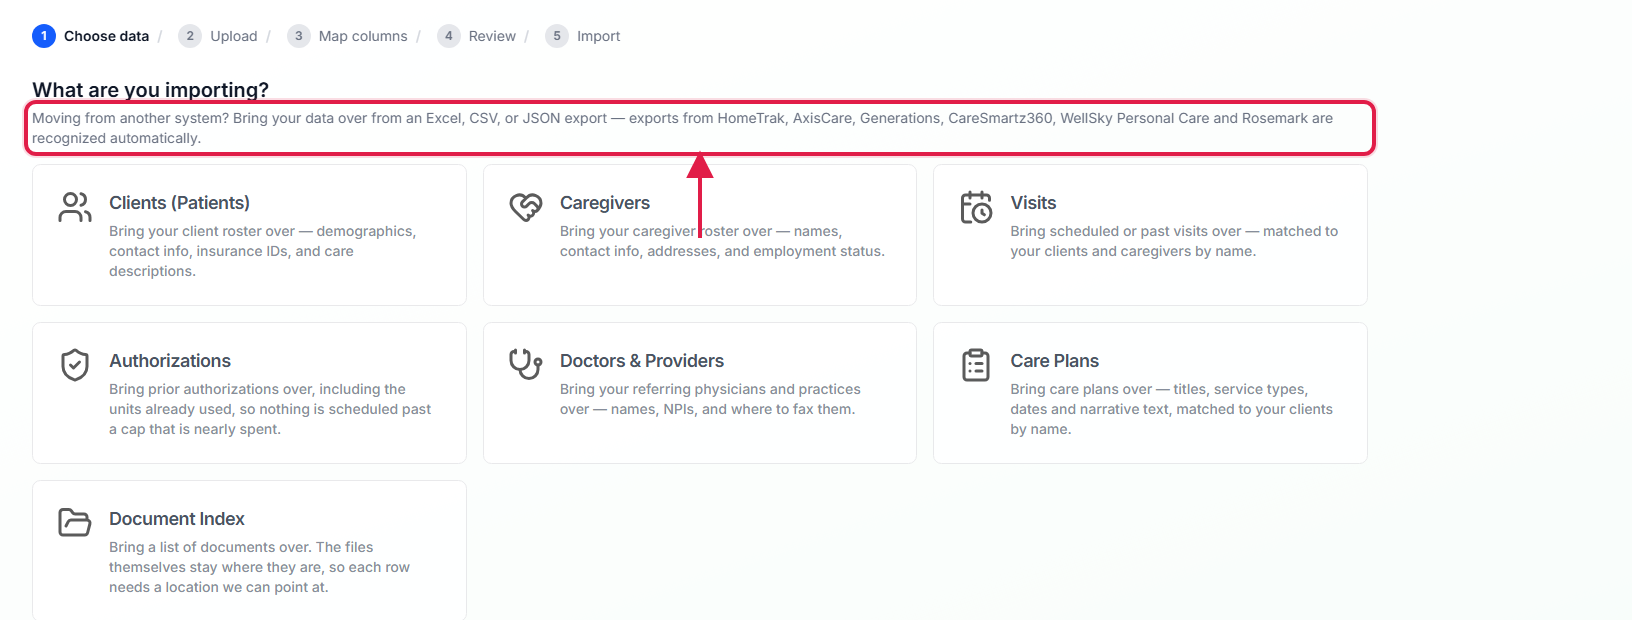
3. Drop in your old export file
Drag the file onto the box, or click to browse.
Excel (.xlsx,.xls),.csv,.tsvand.jsonall work. Quoted fields, tabs and semicolons are handled for you. There is a paste box underneath if it is easier to copy rows straight out of a spreadsheet.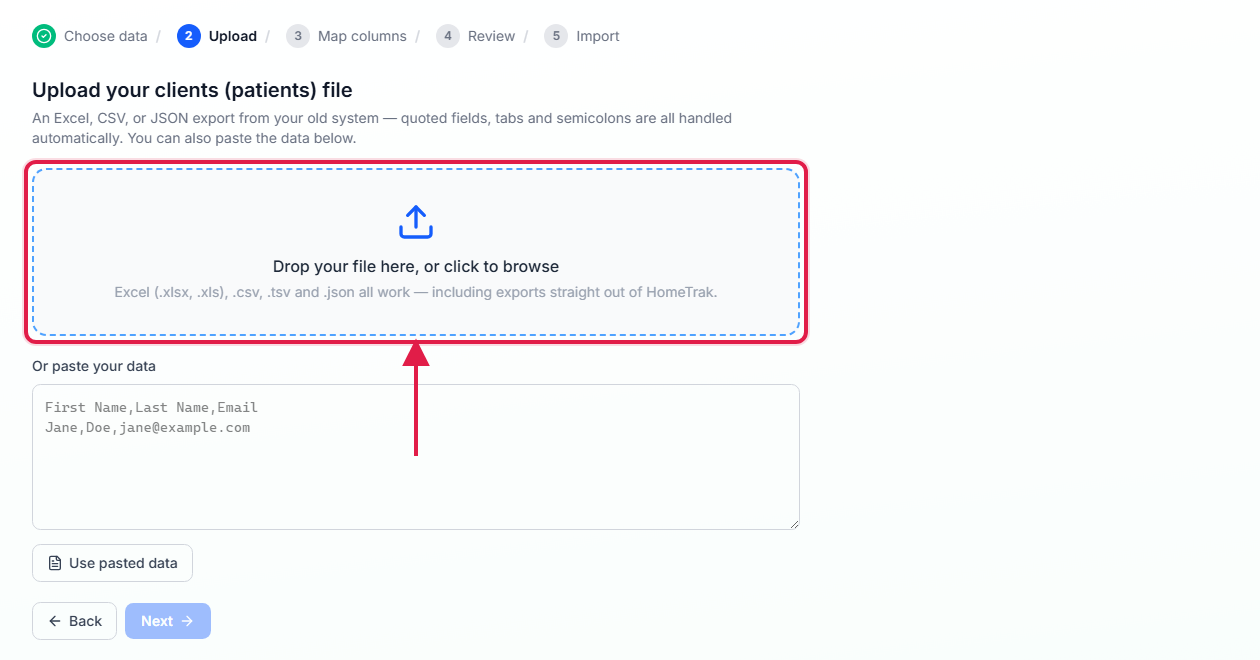
Check the row count, then click Next.
The box shows the file name and how many rows were read. If that number looks wrong, the file has a header problem and it is worth fixing before you go on.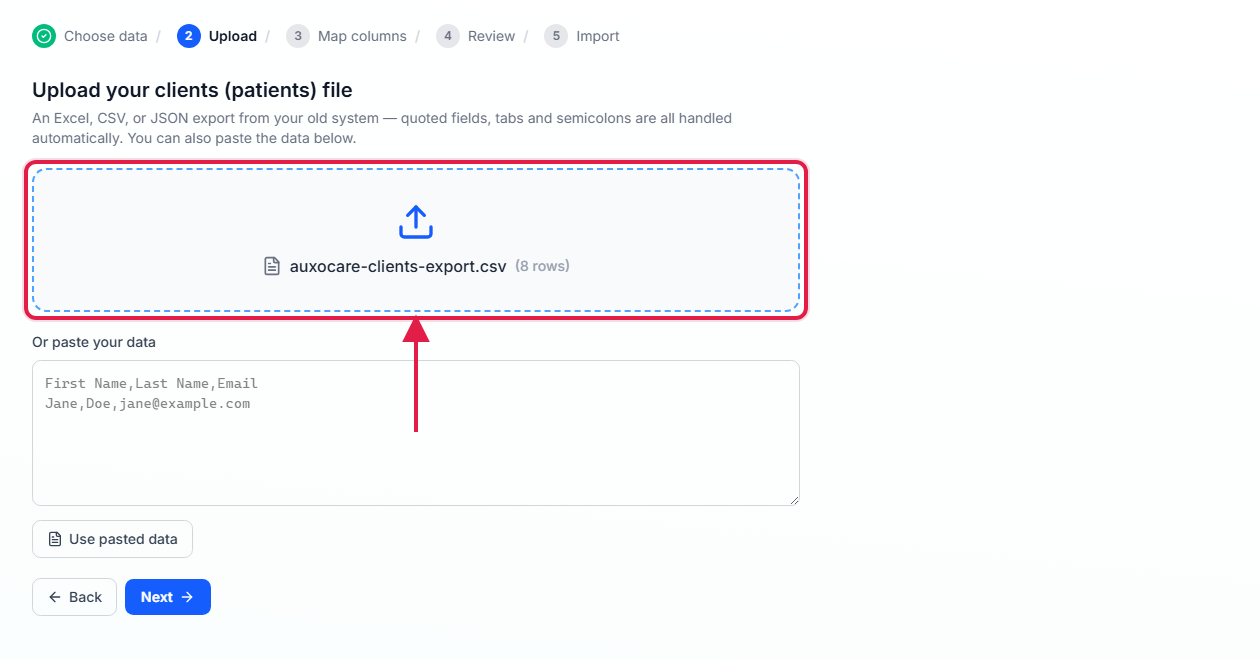
4. Check what AveeCare matched
Read down the list: your column on the left, the AveeCare field on the right.
Two sample values from your own file sit in the middle so you can tell at a glance whether a match is right. Anything AveeCare did not recognise is set to Don't import rather than guessed at. If your export came from one of the six systems above, pick it in Source system and the whole mapping fills in at once.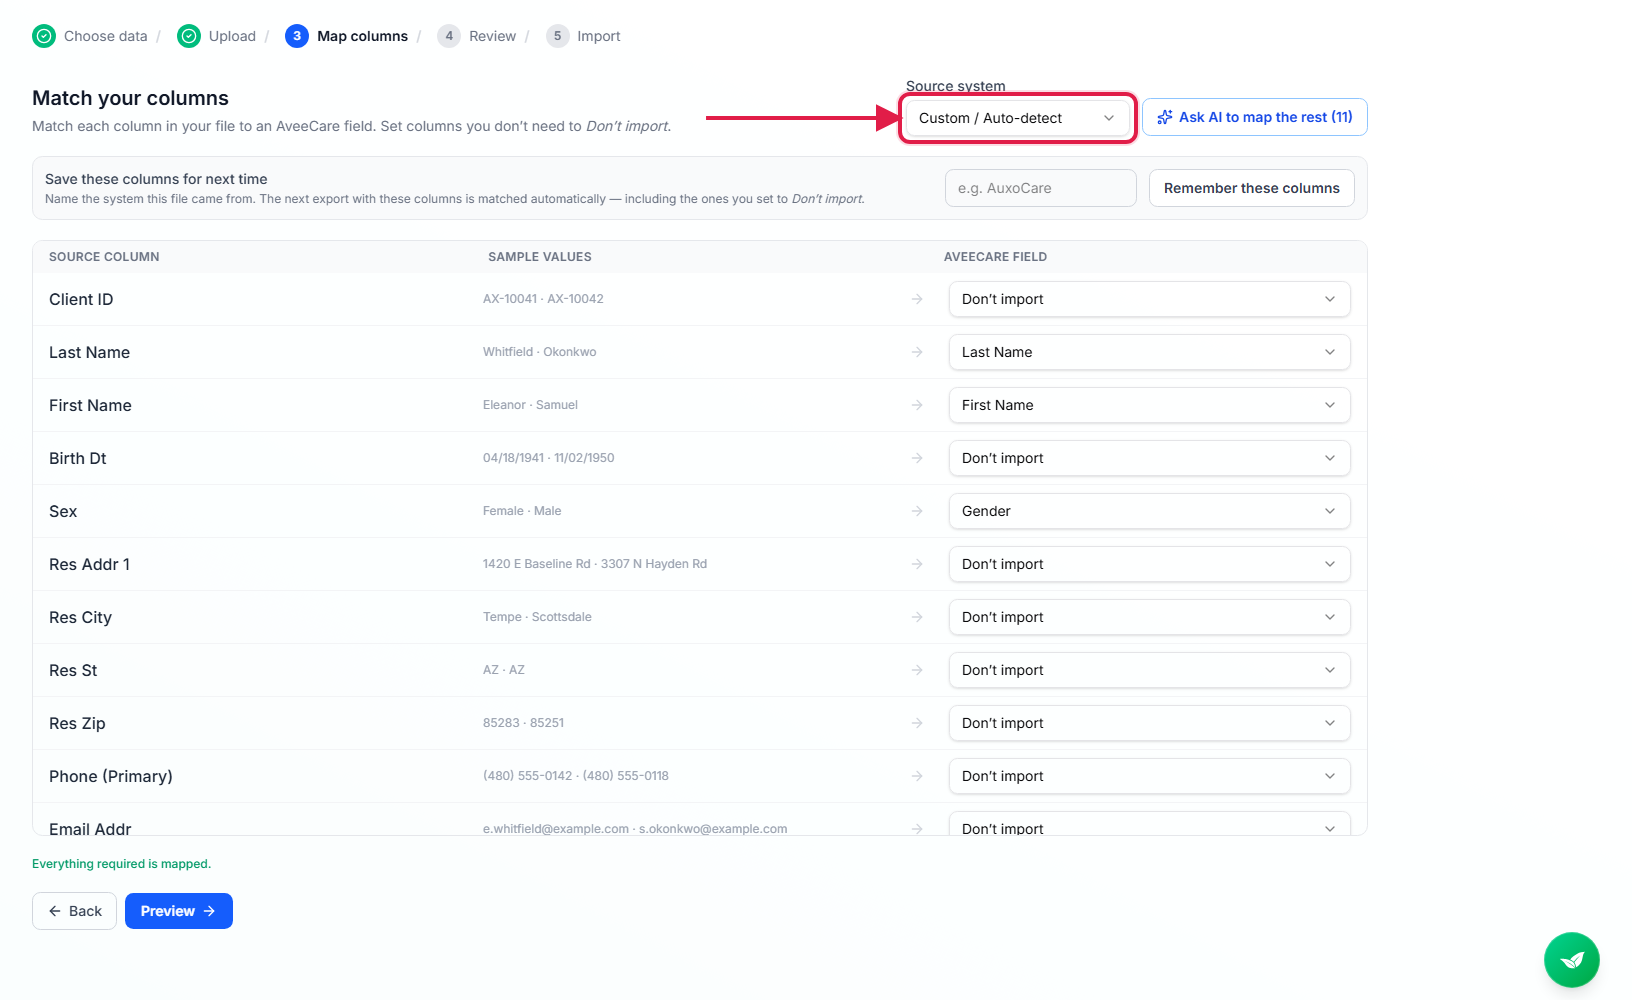
5. Ask AI to map the rest
This is the step that matters when your software is not one of the six. The example below uses a sample client export, named for AuxoCare, so you can see how a system AveeCare has never met behaves. Its columns (Birth Dt, Res Addr 1, Svc Program) match nothing AveeCare knows.
- Four of the fifteen columns matched on their own.
- One click mapped ten of the remaining eleven.
- The last one is an internal client number with no AveeCare equivalent, so it stays on Don't import.
Click Ask AI to map the rest.
The button counts the columns still unmatched, so you always know how much is left. It only touches those columns and never overwrites a match you already made.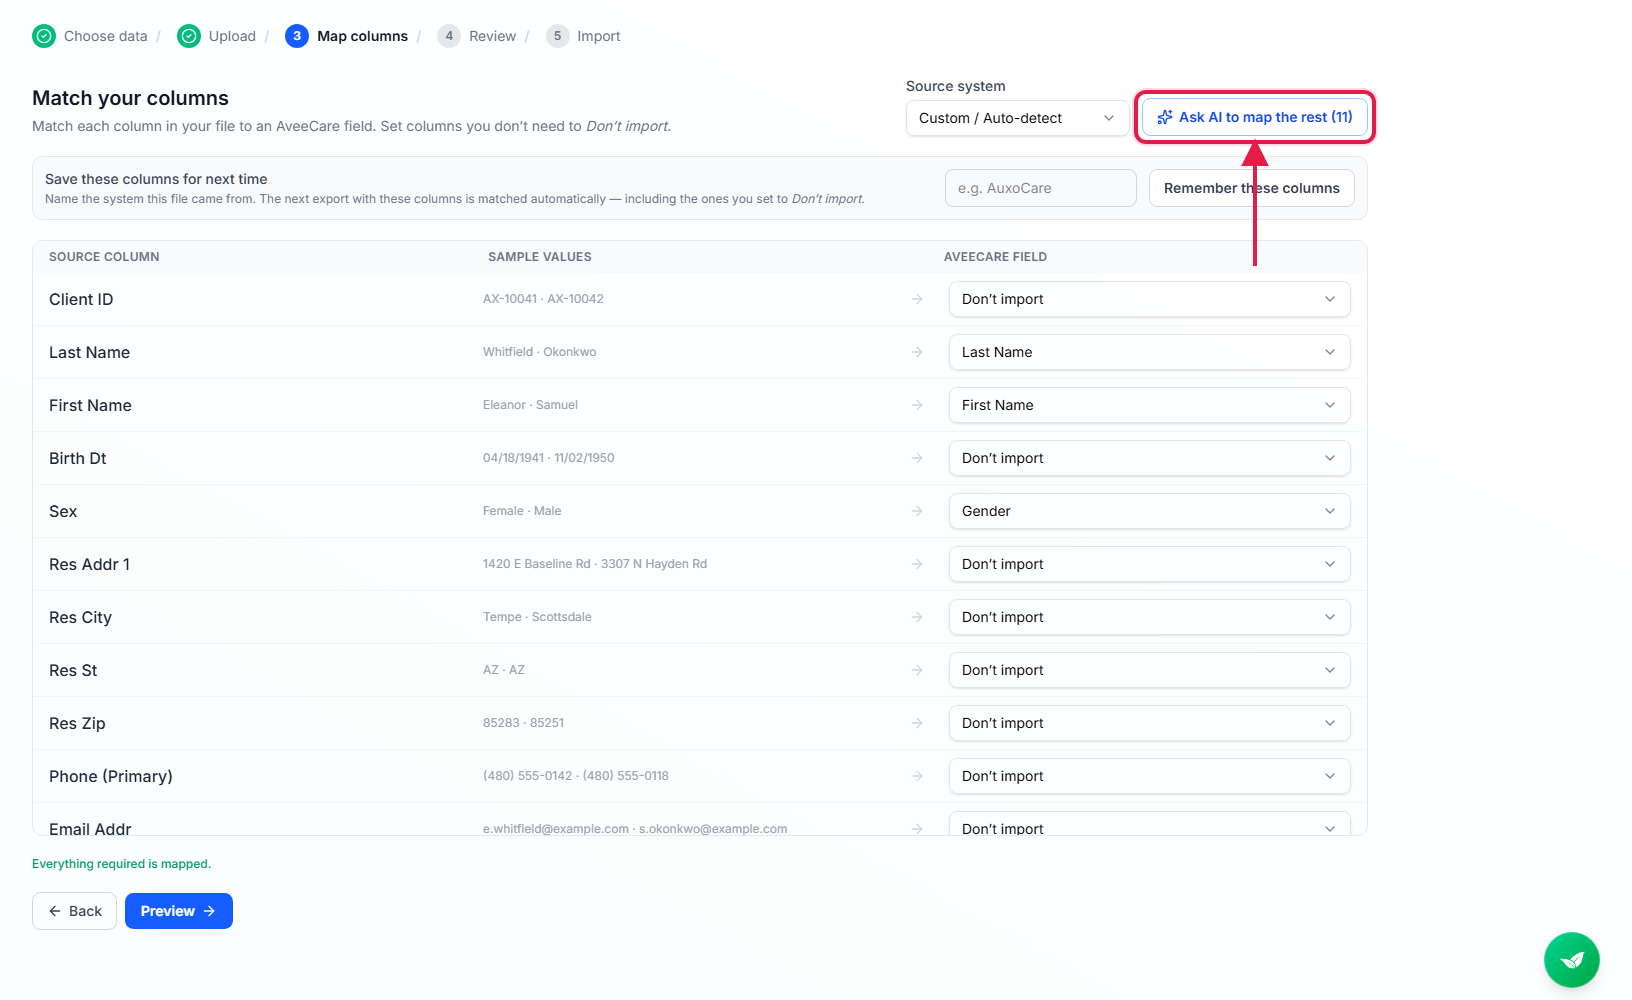
Read the summary line and check its work.
AveeCare names every column it changed in a message at the top of the screen. Nothing happens quietly. Scan that list and fix anything that looks wrong before you move on.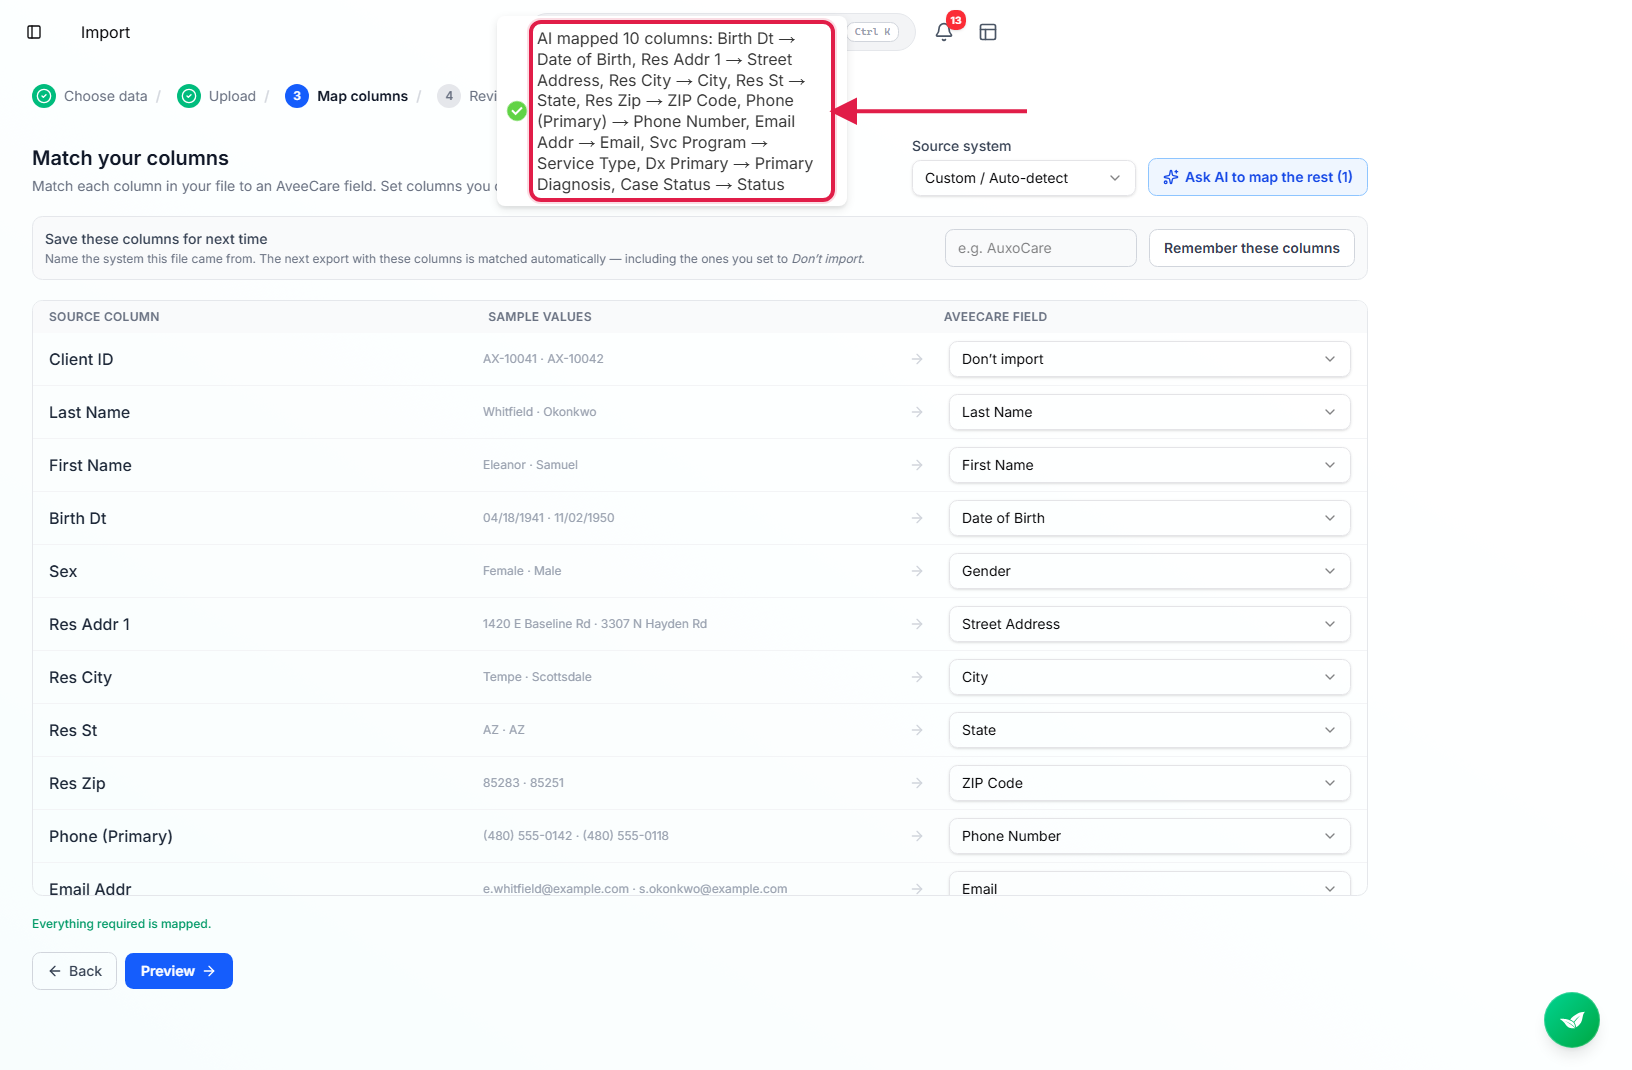
6. Fix a column and save the mapping
Change any row with the dropdown on the right.
Every AveeCare field for this record type is in the list, plus Don't import for columns you do not want. If your file has one Name column instead of two, choose Full Name (one column) and AveeCare splits it, including “Boyd, Jackie”.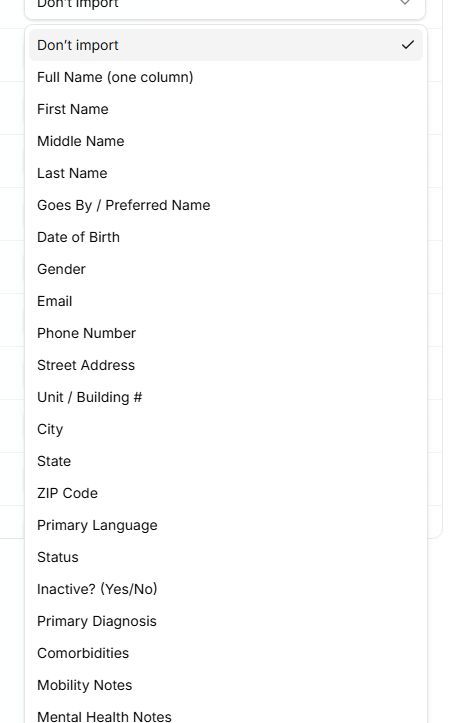
Type the name of your old system, then click Remember these columns.
The next export with the same columns is matched automatically, including the ones you set to Don't import. Worth doing even once: most migrations run in several passes, and the second file is then free.
Your saved mapping now sits in the Source system list, marked (yours).
The six built-in systems are above it. From here on, a file from that system is one click rather than a mapping exercise.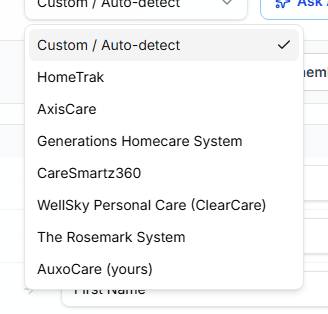
7. Review the rows, then import
Check the counts at the top of the review table.
Ready is what will be created. With problems and Duplicates appear only when there are any, and those rows arrive unticked. Duplicates are matched against your existing roster by email.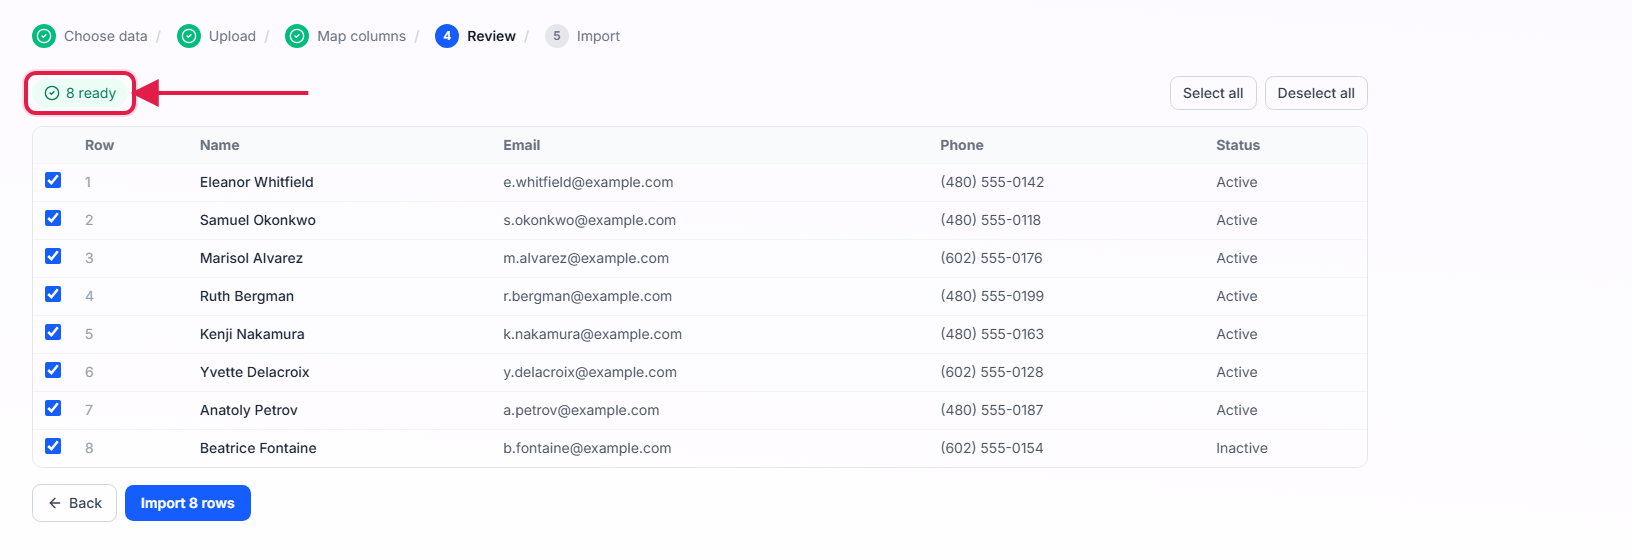
Untick anything you do not want, then click Import.
The button names the number so there are no surprises. Select all and Deselect all are there for a long file, and a problem report downloads as a CSV if any row could not be read.
Check that the numbers reconcile.
AveeCare compares what was in your file against what is now in AveeCare and tells you whether it adds up. Download the validation report if you want the paper trail, which includes anything that could not be checked as well as the counts that match.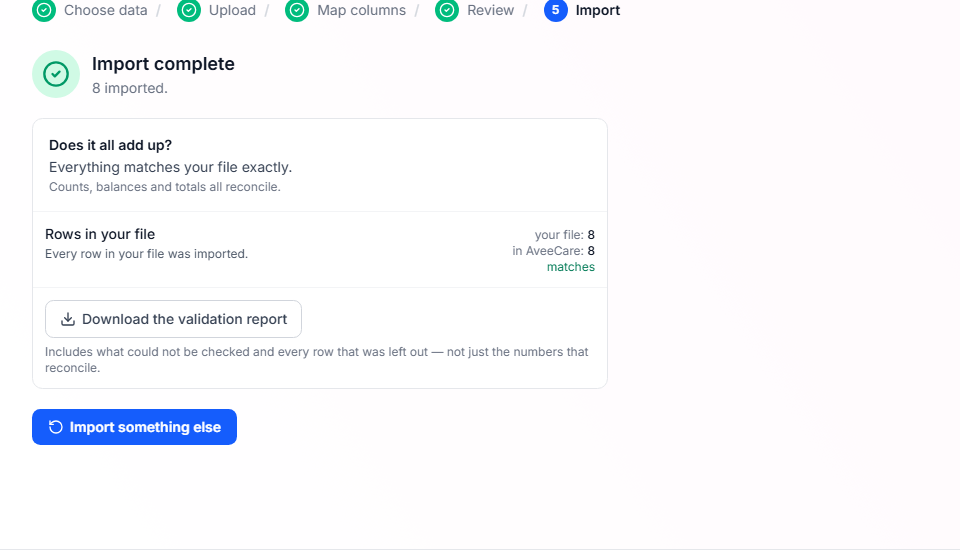
8. Find the patients on Patients
Imported patients are on the Active tab, ready to schedule.
Anything marked inactive in your file lands on the Inactive tab instead. Language, city, phone and service type come across with them, so the list is useful immediately rather than after a clean-up pass.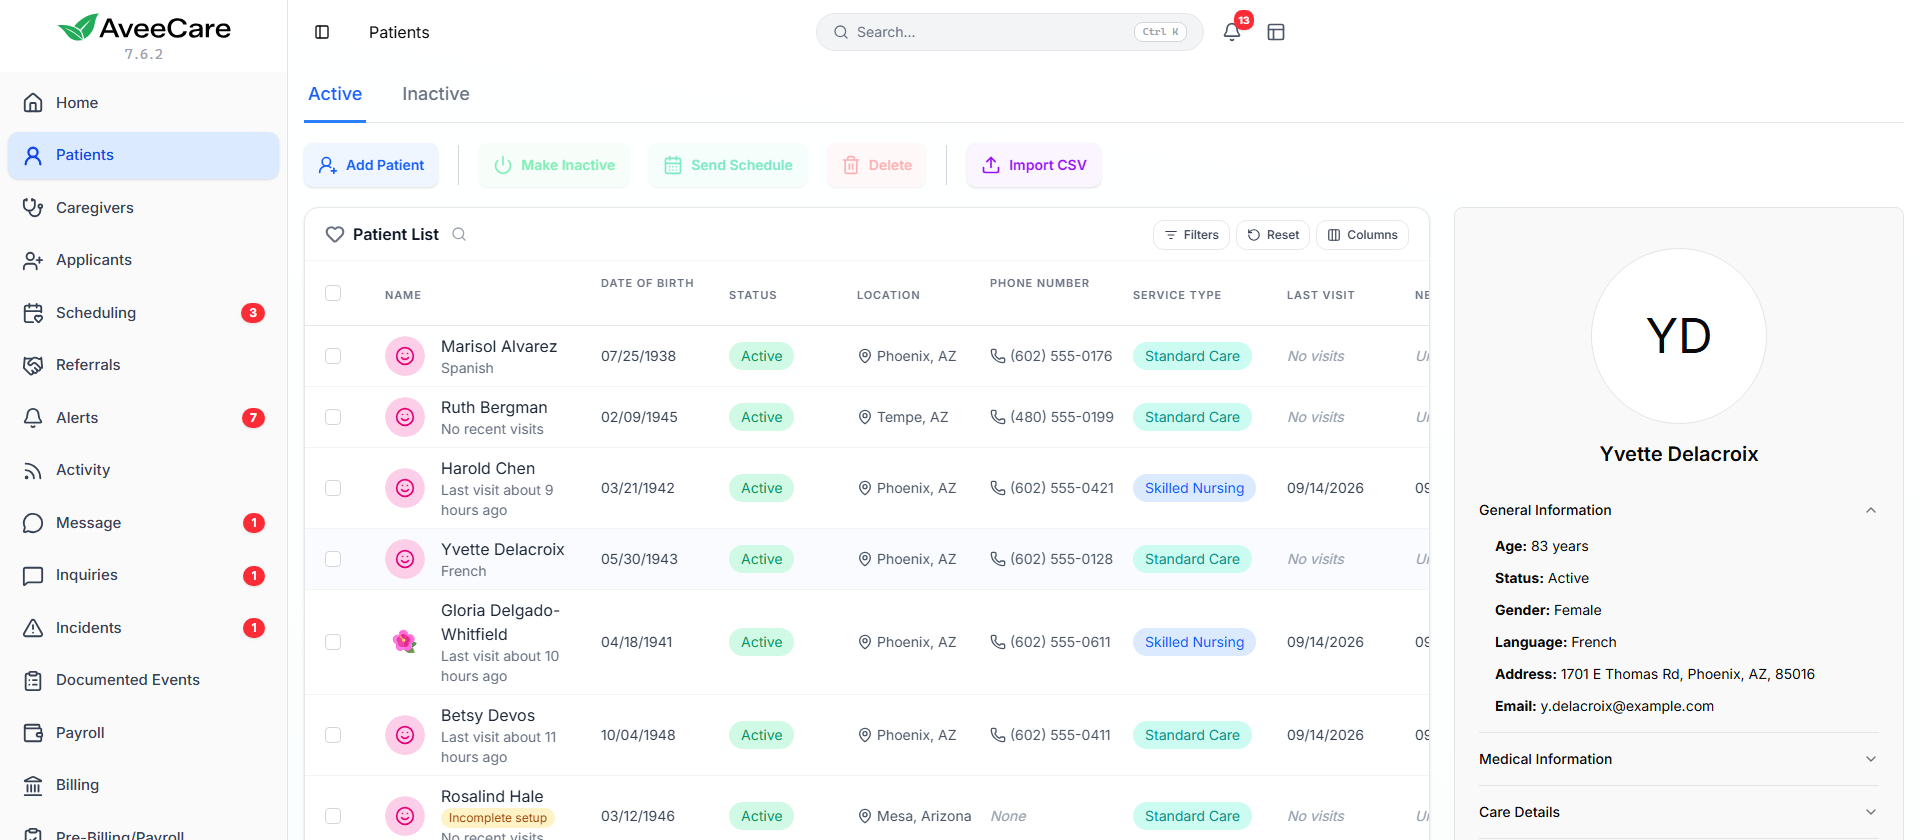
What else you can bring across
Same wizard, different starting card. Import clients and caregivers first, because everything below is matched back to them by name.
- Caregivers. Names, contact details, addresses, employment status.
- Visits. Scheduled or past visits, matched to clients and caregivers by name. There is a tick box for “these are past visits from my old system”, which keeps them out of EVV files and new claims while still showing them on the patient record.
- Authorizations. Including the units already used, so nothing gets scheduled past a cap that is nearly spent.
- Doctors & Providers. Referring physicians and practices, with NPIs and fax numbers.
- Care Plans. Titles, service types, dates and narrative text.
- Document Index. A list of documents and where they live. The files themselves stay where they are, so each row needs a location AveeCare can point at.
Taking your data back out
The same page exports everything, in the same shape AveeCare imports. That is deliberate: a file we hand you on the way out is a file we accept on the way back in.
- Clients, caregivers, visits, authorizations, doctors, care plans, document index, document requests, shared links and communication index, each as a CSV.
- Your schedule as a calendar file that keeps repeating visits repeating.
- Everything, in one archive as a single ZIP, including document history, versions, notes and the text read from your scans.
Every export on this page is a single click.
Scanned files are downloaded separately, and AveeCare does not charge you for them. There is a tick box if you need caregiver Social Security numbers included.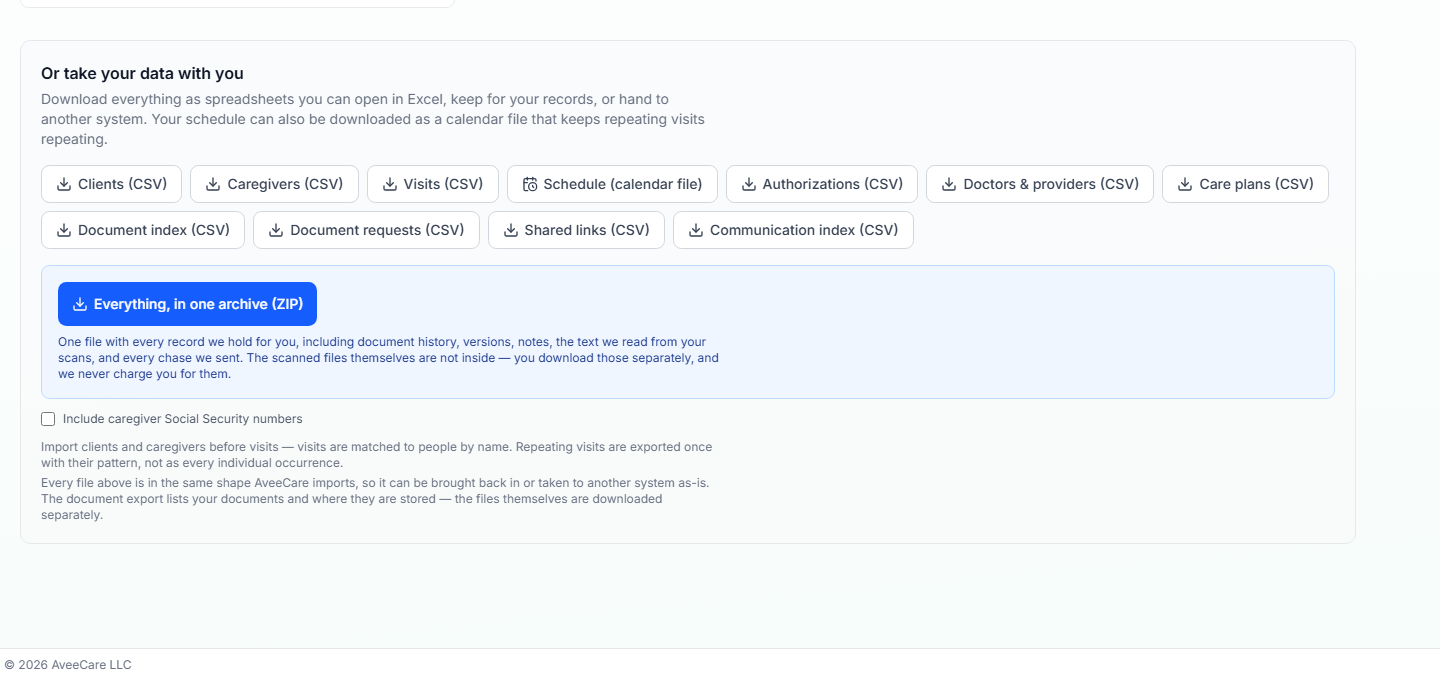
Common pitfalls
- Importing visits before people. Visits are matched to clients and caregivers by name. Import both rosters first or every row fails with “no client called X”.
- Trusting the AI mapping without reading it. It tells you every column it touched for a reason. Thirty seconds of scanning beats finding a diagnosis in the notes field a month later.
- Running the same file twice. Clients and caregivers are de-duplicated by email, so rows without an email address can come in twice. Check the duplicate count on the review step.
- Expecting document files to arrive. The document index brings the record that a document exists and where it lives. It cannot bring the file itself out of your old system.
- Skipping the units already used on authorizations. An authorization imported without them looks brand new, and AveeCare will happily schedule past a cap that is nearly spent.
Related
- Add a Patient (Manual Add) for a single intake you want to type yourself.
- Bulk Patient Import (CSV) is the smaller importer built into the Patients page.
- Remote Onboarding sends a secure link so a family fills in their own details.
- Patient list and filters for searching and sorting the roster once it is in.
Frequently asked questions
.xlsx and .xls), .csv, .tsv and .json. Quoted fields, tab separators and semicolon separators are all handled. You can also paste rows straight into the box on the upload step.