The green Go to Billing (N Clean) button is the eligibility-gated handoff in the Pre-Billing QA header. It only renders when at least one visit qualifies, so the number on the button is a live readiness signal, not just a link. Click it and you get a confirm dialog with the count, then a jump to the Billing page so you can invoice or generate claims.
Quick answer
Open Pre-Billing QA. Resolve issues until at least one row qualifies (fully clean if Block critical is on, no-critical-issues if it is off). A green Go to Billing (N Clean) or Go to Billing (N Eligible) button appears in the header. Click it, confirm the count in the dialog, and you land on Billing.
Two Go to Billing controls, not one
The Pre-Billing QA header carries two separate Go to Billing controls, which trips a lot of new users:
- Green count button (this article). Go to Billing (N Clean) or (N Eligible). Renders only when N is at least 1. Opens a confirm dialog first, then navigates. The count reflects your Block critical setting.
- Outlined unconditional button. Go to Billing with a right-arrow icon. Always visible, no confirm dialog, no count. Use this when you want to leave QA without asserting anything about readiness.
1. Find the green count button in the QA header
Open Pre-Billing QA from the left nav.
The page header shows three controls on the right side: a Block critical switch with a shield icon, a Refresh button, and an outlined Go to Billing button. When at least one visit is eligible, a green Go to Billing (N Clean) button slots in between Block critical and Refresh.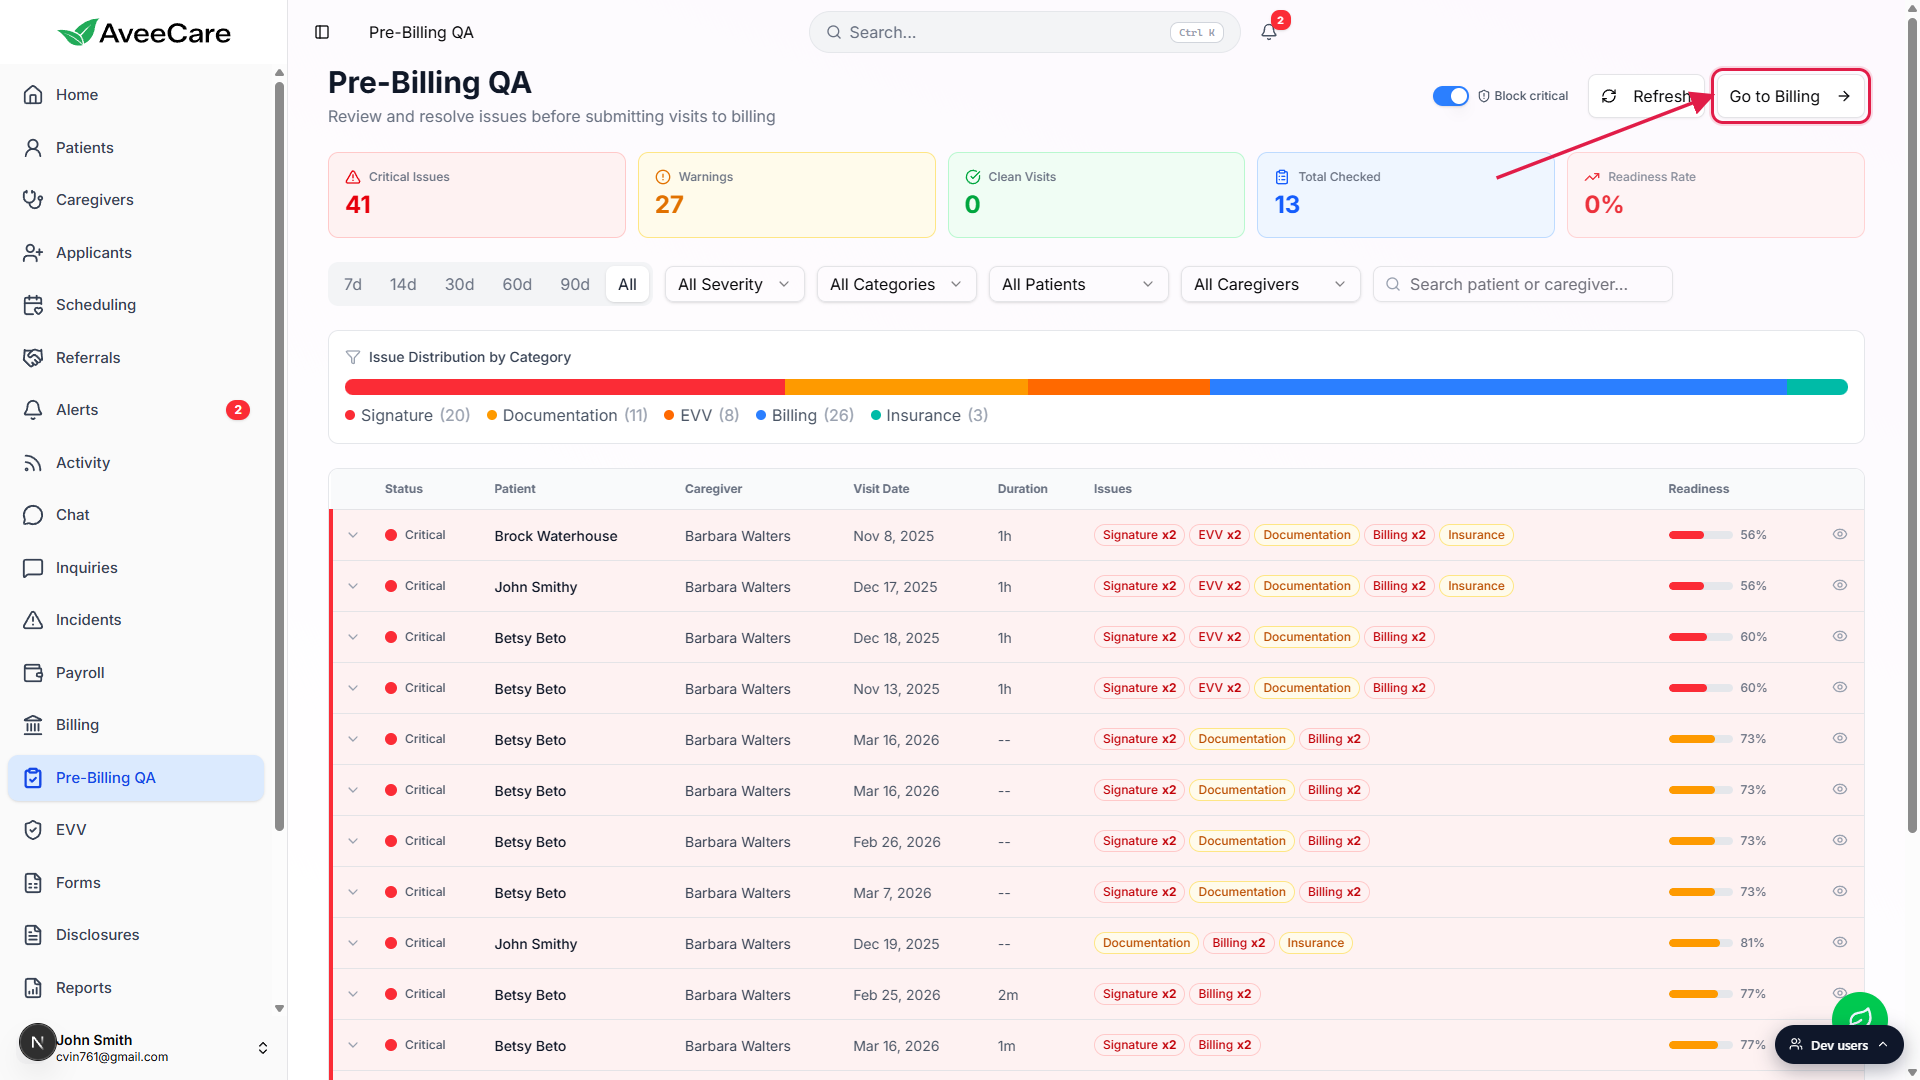
If the green count button is missing, resolve issues until at least one row qualifies.
See the Pre-billing QA checklist for the resolution workflow. Inline Save fixes Missing Clock-In Time, Missing Clock-Out Time, and Missing Service Code. Open Visit jumps you to the visit detail page for signatures and notes. Insurance and authorization fixes live on the patient record.
2. Flip Block critical to change what the count means
Find the Block critical Switch in the top-right.
It sits to the left of the Refresh button, labeled Block critical with a small shield icon. The state is stored per-company in your browser, so each staffer in your tenant can keep their own preference.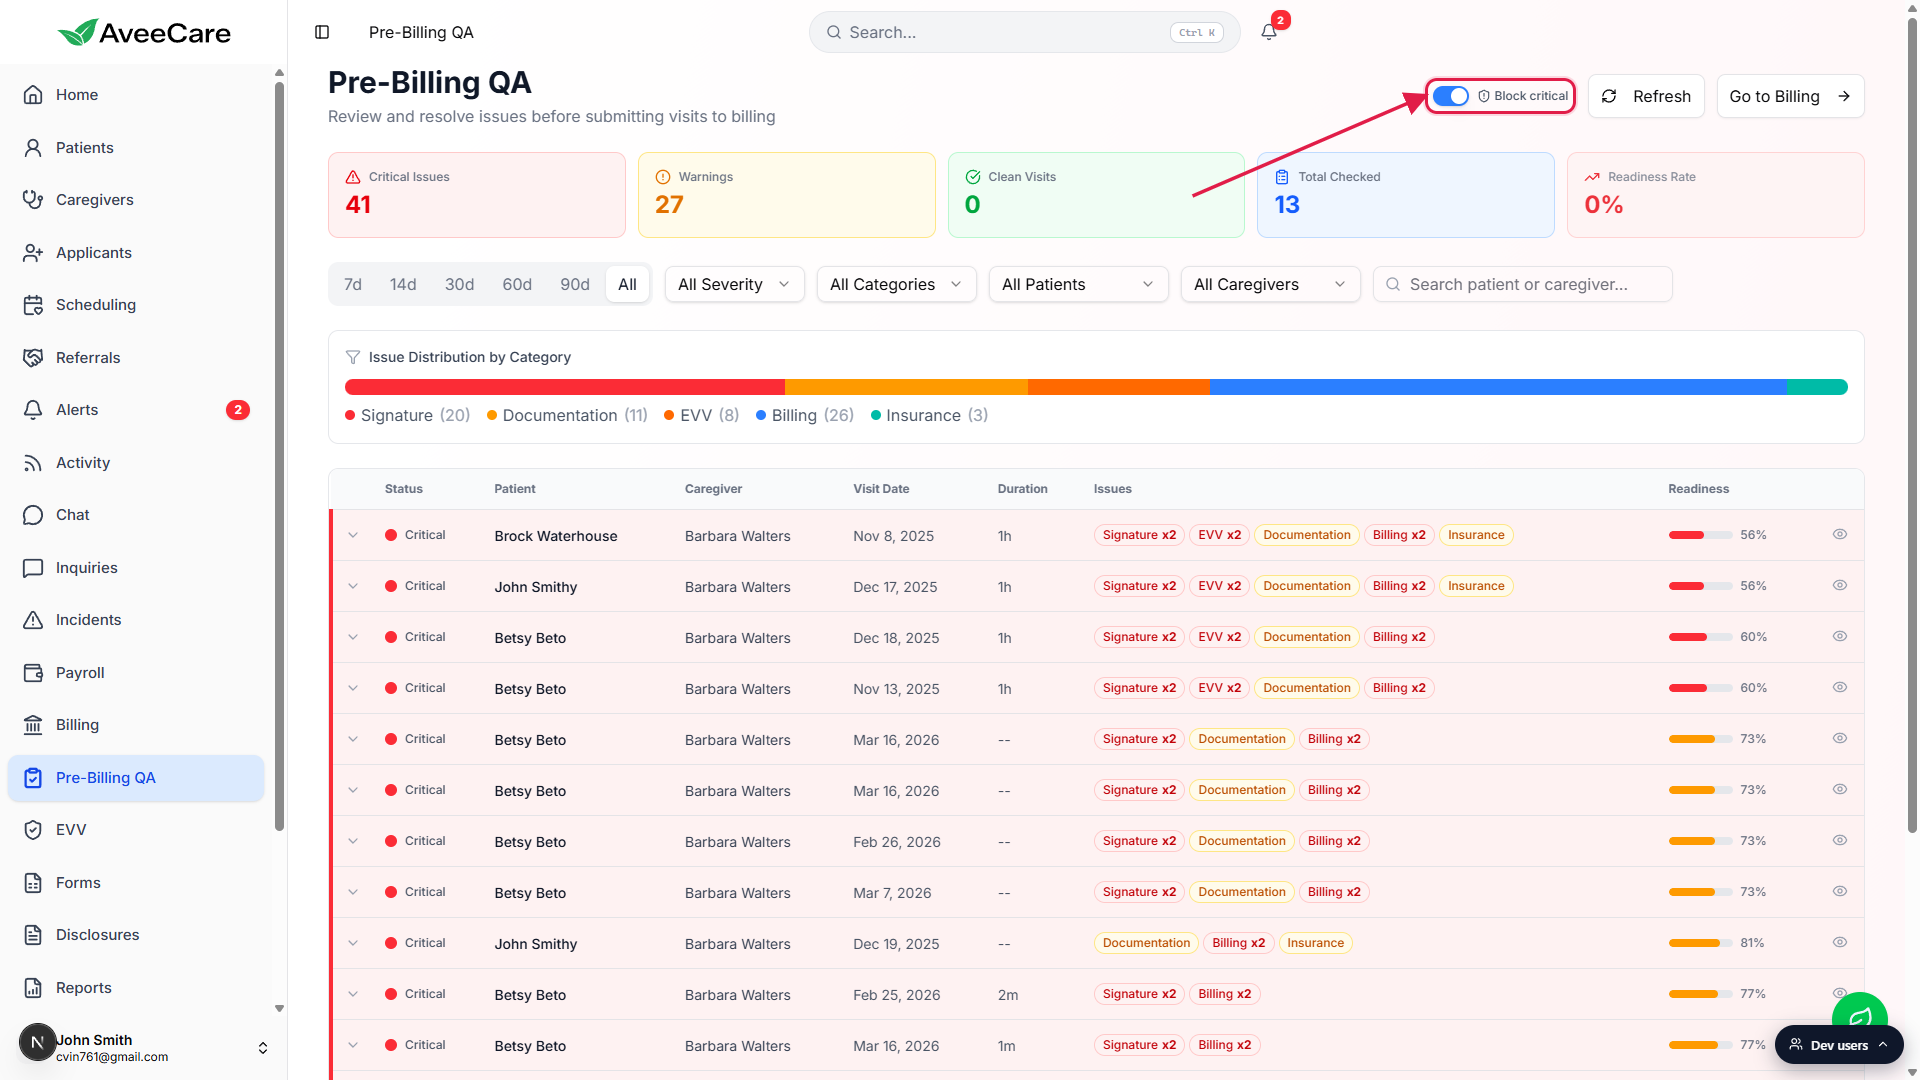
On (default): only fully clean visits count.
The button label reads Go to Billing (N Clean). A row is counted only when every check passes: signatures present, clock-in and clock-out captured, visit notes written, ADLs charted, service code set, billing rate configured, insurance on file.Off: visits without critical issues count too.
The label flips to Go to Billing (N Eligible). Now rows with warnings or info-level problems (no visit notes, missing ADLs, zero billable amount) are included, as long as they have no critical-severity issues. Critical visits are excluded either way.
3. Click the button and confirm the navigation
Click Go to Billing (N Clean) or (N Eligible).
A small confirm dialog titled Navigate to Billing opens. It restates the count: N visits are ready for billing. When Block critical is off, an amber note also appears: visits with warnings or info-level issues are included since the critical gate is off.Click Go to Billing in the dialog to confirm.
A toast confirms N visits are ready for billing and the app routes you to Billing. Click Cancel in the dialog if you noticed the count is wrong and want to keep auditing first.
4. Land on Billing and pick up where you left off
You land on the Billing page.
The clean-count handoff does not push a filter onto the Billing page. You arrive at the regular Visit Billing table, which shows every unbilled visit by default. Use the Date Range chips, Billing status dropdown, Patient filter, or search to narrow to the rows you just audited.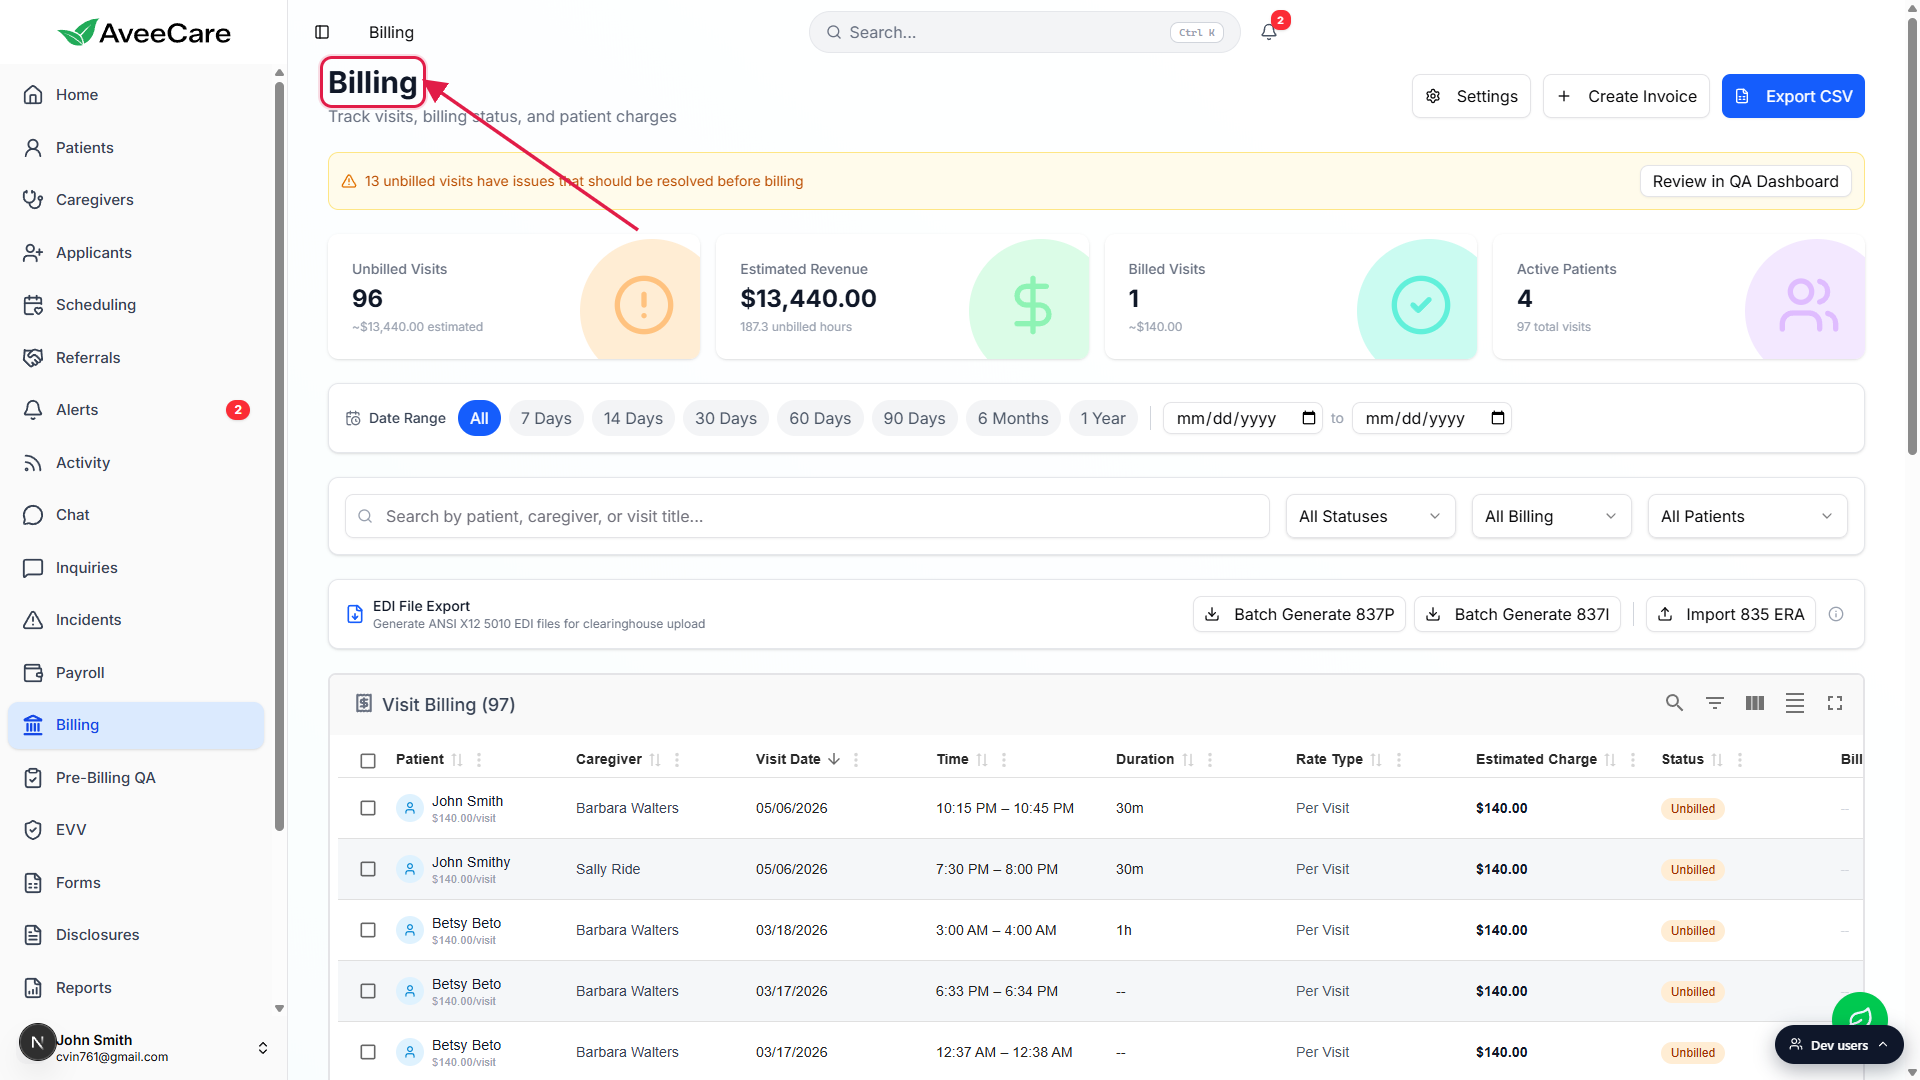
Create invoices or generate insurance claims from the Billing table.
Use Create Invoice for private-pay or long-term-care invoices. Use the per-row Generate insurance claim shield button for Medicare or Medicaid CMS-1500 claims. Use the EDI File Export card to batch 837P or 837I files for your clearinghouse. See the Invoices tab article for the full Billing-page reference.
Common pitfalls
- The green button is not visible. That means submittable count is 0. No row is fully clean with Block critical on, or no row is critical-free with Block critical off. Keep resolving issues. The outlined Go to Billing button is still there if you want to leave the page anyway.
- Expecting a pre-filter on Billing. The handoff does not push the clean-visit set into the Billing table as a filter. Billing reads its own data and shows every unbilled visit. You may have to re-filter once you land.
- Counting Critical Issues from the tiles. The big Critical Issues tile counts issues, not visits. A single visit can show six critical issues. The button count stays in visits: how many rows you can actually move.
- Confusing Block critical with the Severity filter. The Severity filter only changes what you see in the table. Block critical changes what gets included in the green button count. They are independent. You can hide critical rows from view and still get blocked from submitting them.
- Toggling Block critical does not retroactively re-audit. The count updates instantly because it filters the already-loaded QA results. To re-run the checks against fresh data (after another staffer saved fixes, for instance), click Refresh.