Create Invoice in AveeCare opens a single modal where you build a patient-pay invoice line by line. It is not a date-range visit picker. Each invoice has a patient, one or more manual line items with quantity and unit price, a billing provider, a due date, and optional notes. The Total recalculates as you type.
Quick answer
Open Billing, click Create Invoice in the top-right header. Search and pick a patient (optional), fill in line items, choose a Billing Provider, set the Due Date, and click Send Now or Save as Draft. The Total at the bottom of the Line Items section updates live.
What this wizard creates
The modal produces a single patient-pay invoice record. It does NOT:
- Submit a Medicare or Medicaid claim. Use the CMS-1500 wizard or EDI 837 export for those.
- Auto-pull billable visits from a date range. Line items are entered manually here.
- Bulk-create one invoice per patient. The modal is one invoice at a time.
For visit-driven billing across many patients, use the Visit Billing table on the main Billing page with Mark Billed and Stripe charge actions instead.
1. Open Billing and click Create Invoice
Click Billing in the left nav.
The page loads the Visit Billing table and the action row in the top-right header: Settings, Create Invoice, and Export CSV.Click Create Invoice in the top-right.
The button sits to the left of Export CSV. It opens a full-screen modal titled Create Invoice.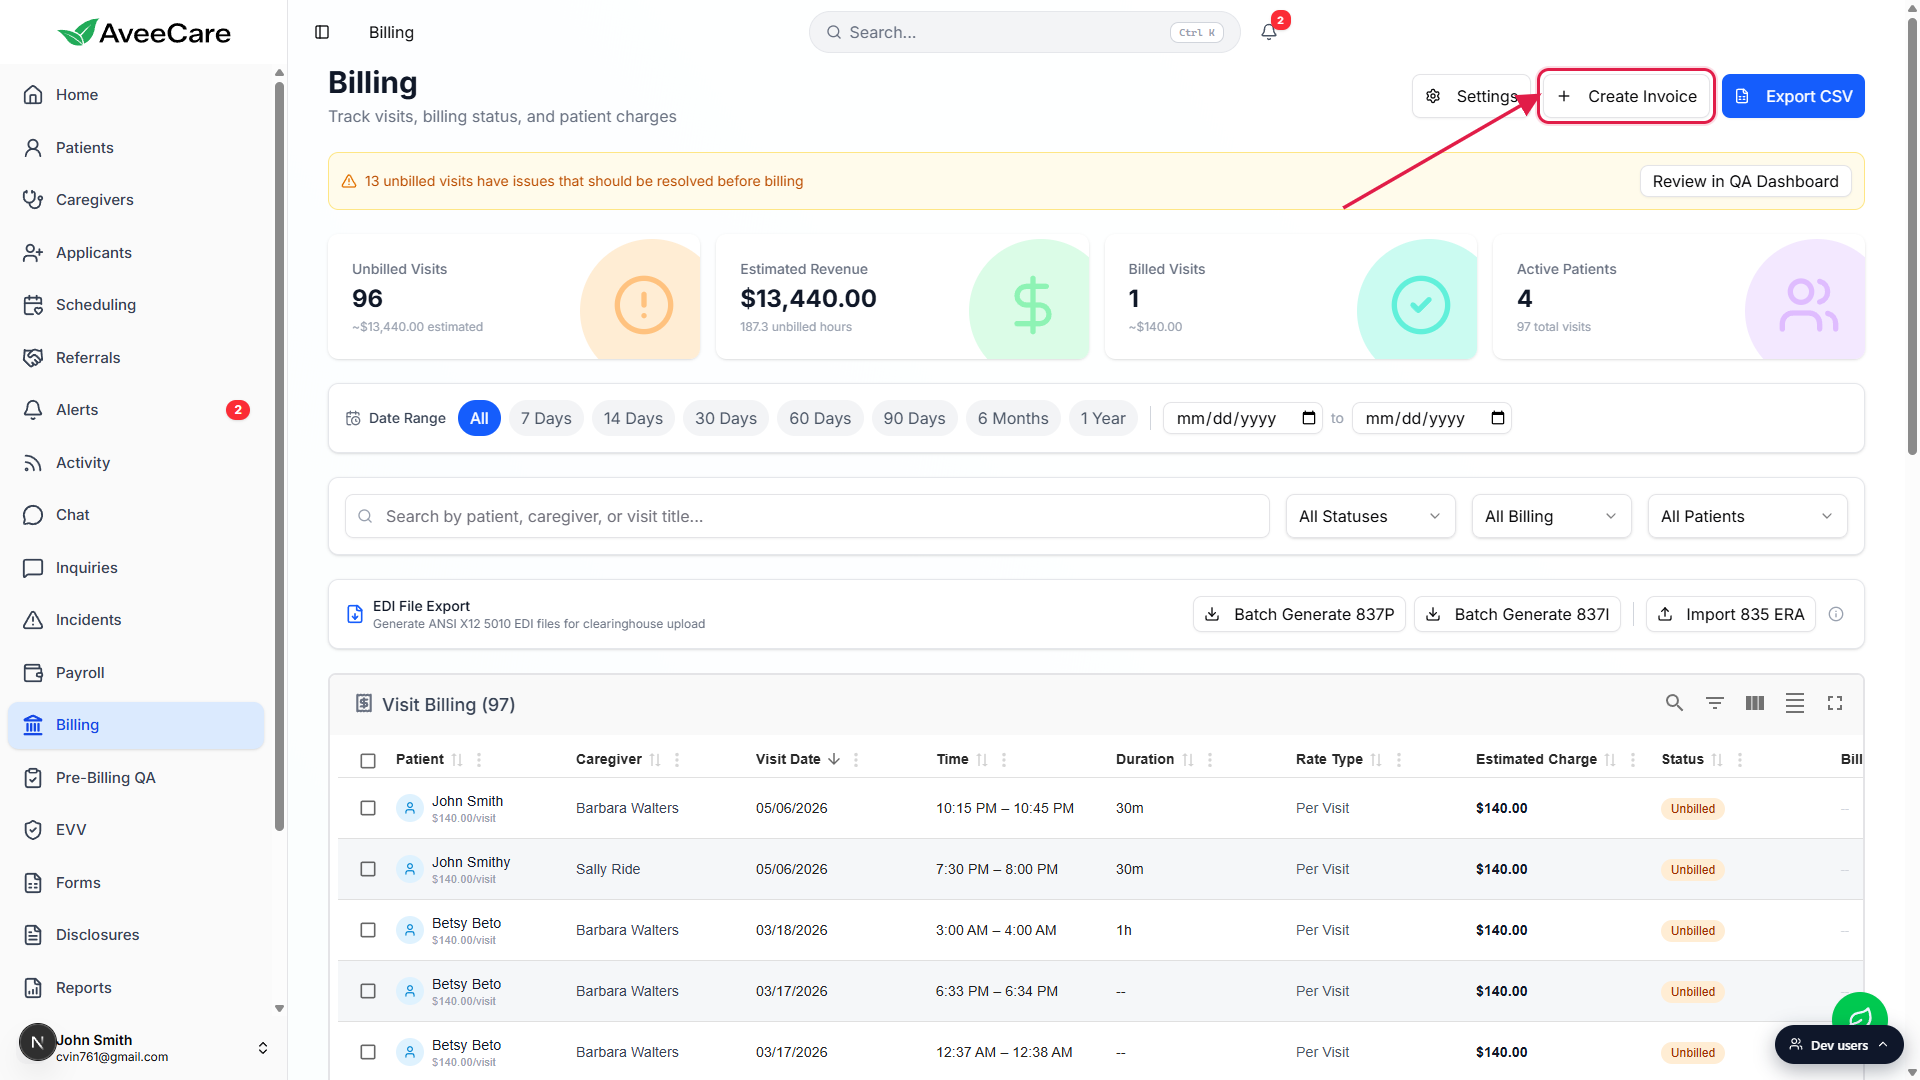
2. Pick a patient (optional)
Type a name in the Patient (Optional) search box.
The search debounces a few hundred milliseconds, then a small dropdown shows up to five matching patients. Click the patient you want. A green Selected: First Last confirmation line appears below the search box.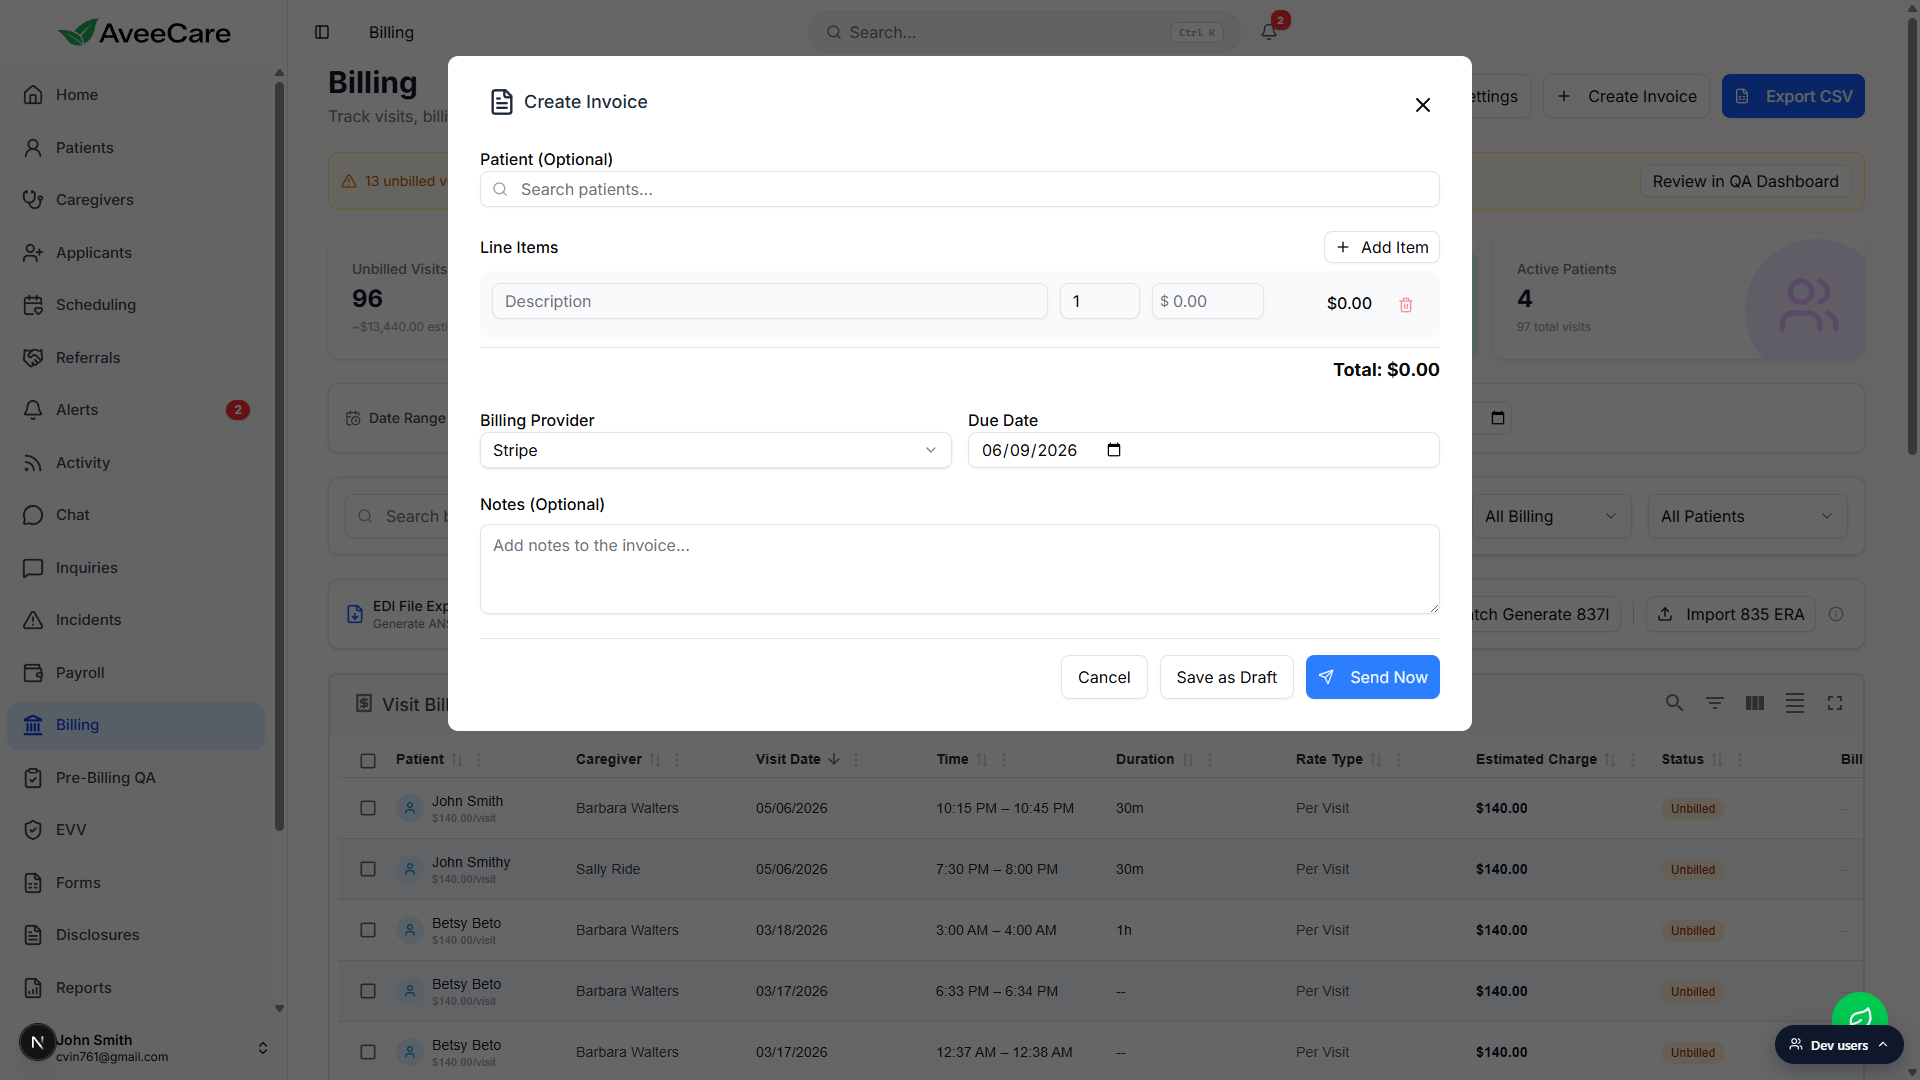
Patient is genuinely optional.
Because the field is labeled Patient (Optional), you can leave it blank for a one-off invoice that is not tied to a specific patient record (for example, a misc charge to a guarantor). The invoice will save without a patient link.
3. Add line items and watch the Total update
Fill in the first Description, Qty, and unit price row.
Each line item has four pieces: a free-text Description, a numeric Qty, a dollar unit price (the field is prefixed with $), and a computed line total. As soon as Qty and unit price are both non-zero, the right-side line total fills in and the bottom-line Total updates.Click Add Item to insert another row.
Add Item sits in the top-right of the Line Items section. Each new row gets its own description, qty, price, and a trash icon to remove it. The trash icon is disabled on the final remaining row so the invoice cannot end up with zero line items.The Total at the bottom right updates as you type.
The bold Total: $X.XX line under the Line Items table is the sum of every row. It is recomputed each time a Qty or unit price changes, so you can sanity-check the math before sending.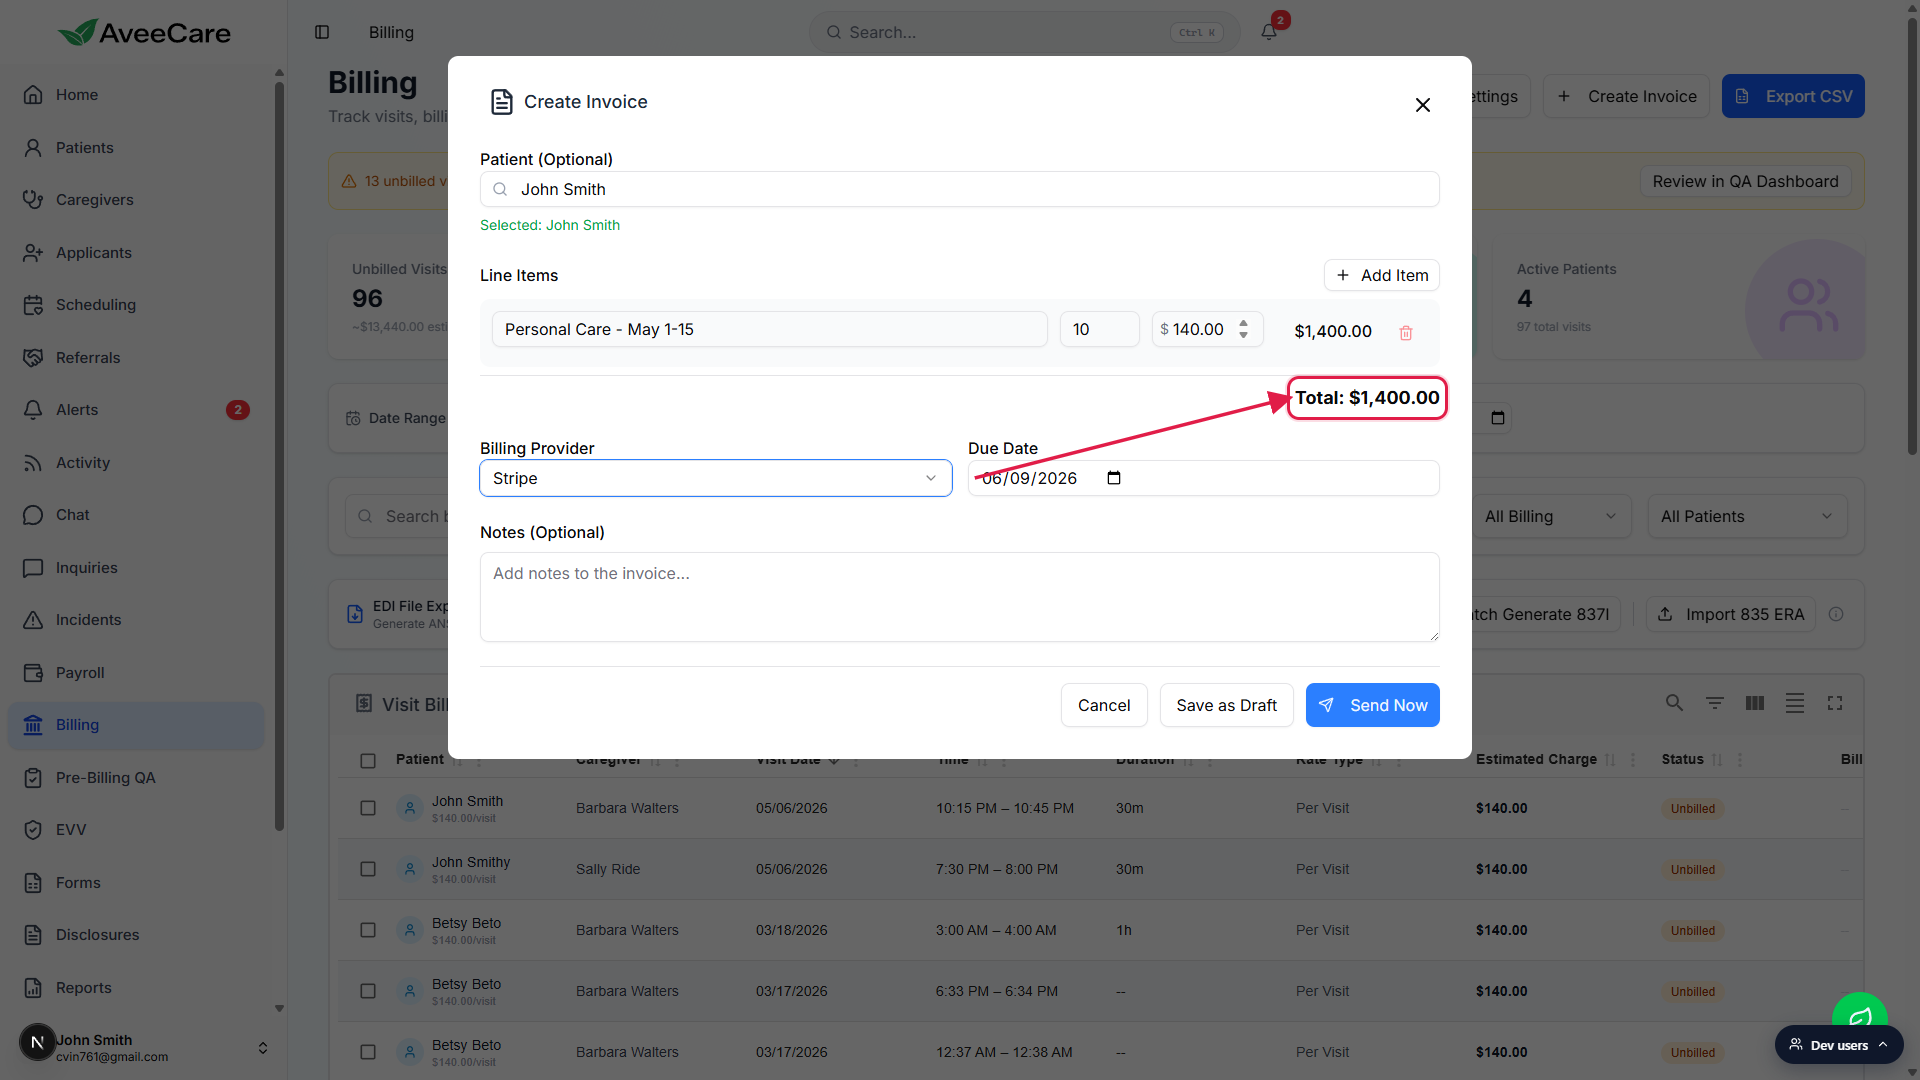
4. Set Billing Provider, Due Date, and Notes
Pick a Billing Provider from the dropdown.
The dropdown lists every payment integration you have connected on the Billing settings page, plus a built-in Manual Invoice option. Typical entries are Manual Invoice, Stripe, QuickBooks, Square, and PayPal. If your agency has set a default integration, the dropdown preselects it. If no providers are connected, the field collapses to a read-only Manual Invoice row.Set the Due Date.
The Due Date field defaults to 30 days from today. Adjust it with the native date picker if the patient or payer expects a different terms window.Add Notes if useful (optional).
The Notes (Optional) text area is a free-text field that gets attached to the invoice record. Use it for context the recipient should see on the invoice itself.
5. Save as Draft or Send Now
Use Save as Draft when the invoice is not ready to send.
Save as Draft writes the invoice with status Draft. Drafts stay editable. You can come back later, change line items, swap the patient, or adjust the due date.Use Send Now to push the invoice into Pending.
Send Now is the blue button on the right of the action row. It writes the invoice with status Pending through your chosen billing provider and closes the modal back to the Billing page. The new invoice is now a real billing record that the patient can pay.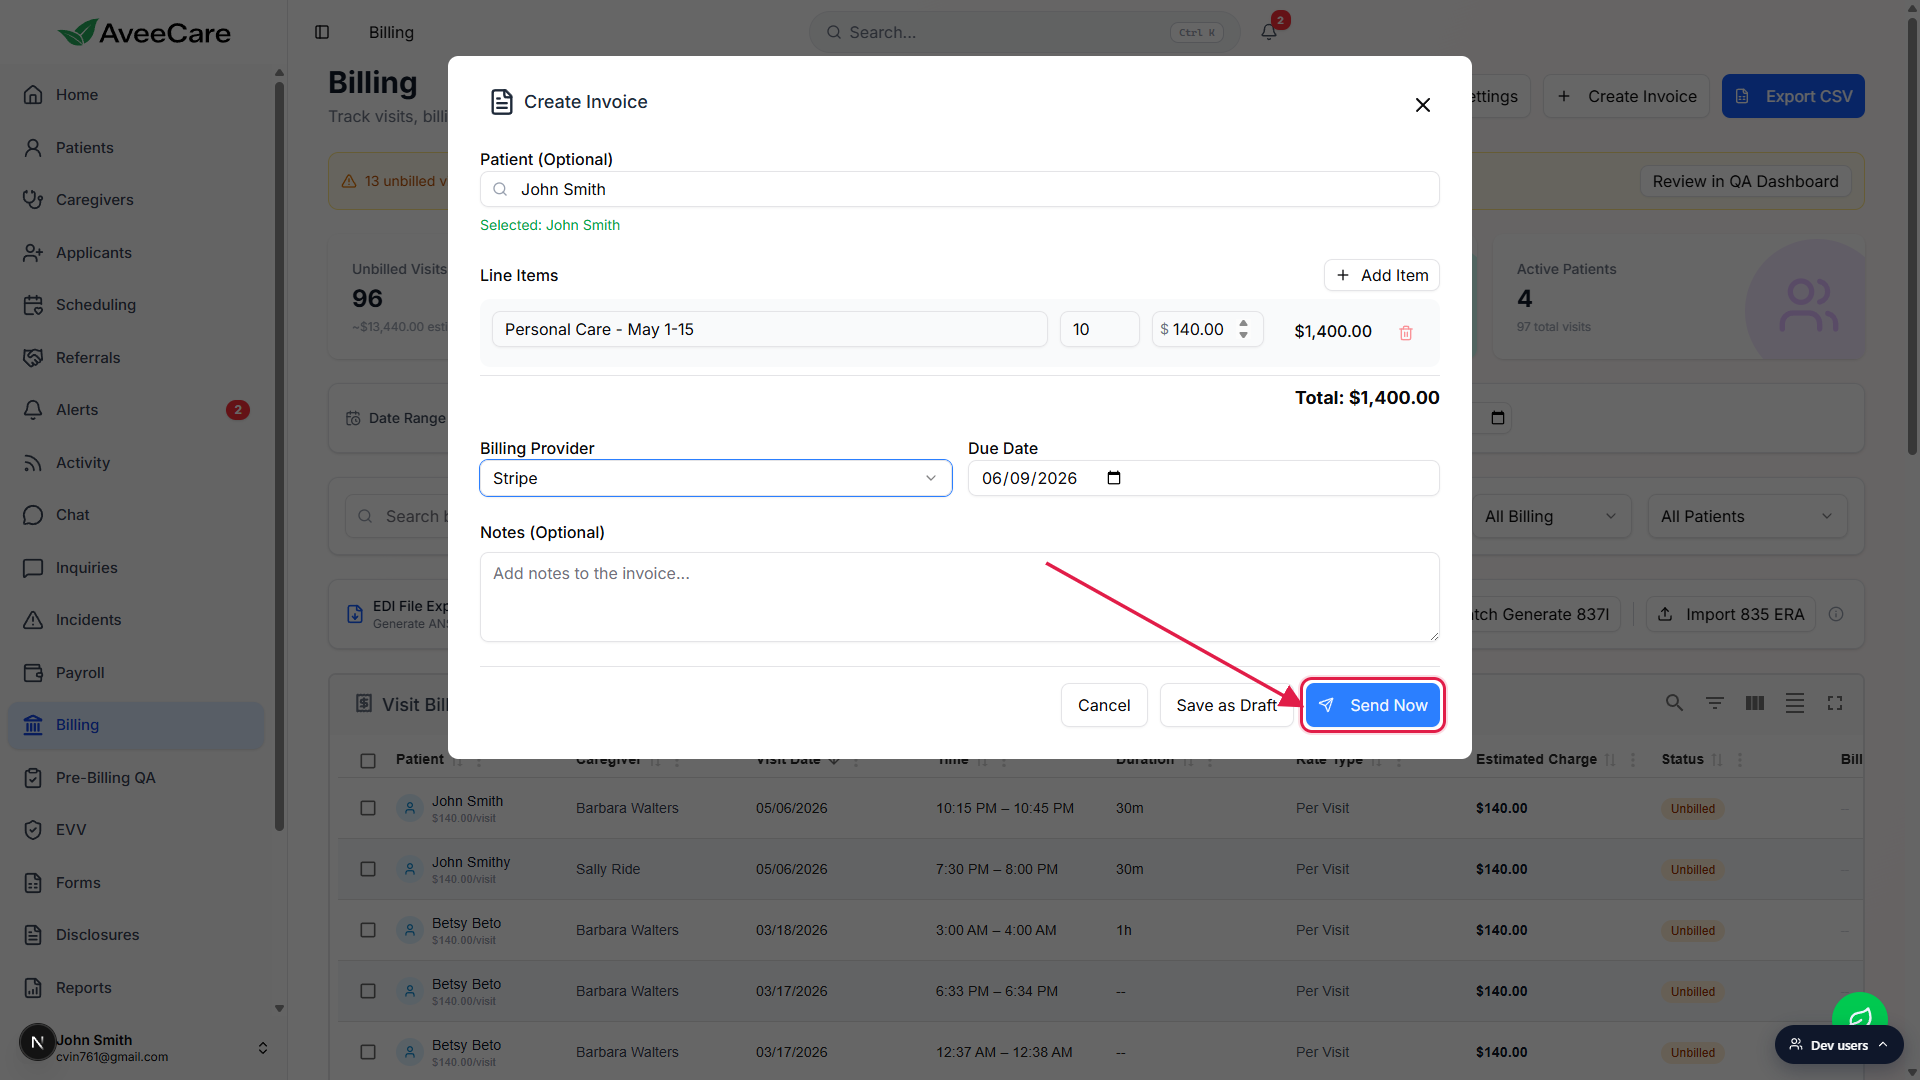
Cancel discards everything.
Cancel closes the modal without saving. The same happens if you click the X in the top-right corner of the modal. There is no auto-save while the modal is open.
Common pitfalls
- Expecting a date-range visit picker. The Create Invoice modal is line-item based. To bill from actual visits, work from the Visit Billing table on the main Billing page and use Mark Billed plus the Stripe charge action per row.
- Sending without picking a patient. Patient is optional in the modal, but if you forget to pick one, the invoice will not appear in that patient's Billing tab history. Pick the patient first if you want it tied to their record.
- Editing a sent invoice. Once an invoice moves out of Draft, treat it as immutable. Refund and reissue instead of editing in place, otherwise reconciliation against the payment provider gets messy.
- Billing Provider dropdown shows only Manual. That means no payment integrations are connected. Open Billing Settings, enable Stripe, QuickBooks, Square, or PayPal, then come back. The dropdown picks them up automatically.
- Forgetting to set a non-zero Qty or price. The Total stays at $0.00 until both fields are non-zero. Save as Draft still works on a $0 invoice, but Send Now on $0 is rarely what you want.