Caregivers hit the end of a visit and sometimes need a little longer. Bath went over, family arrived late, patient asked for more help. Instead of clocking out and waiting for an office decision later, they send a shift-extension request from the caregiver app. It lands on the Scheduling toolbar as a purple Extensions badge. You approve or deny in one click and the caregiver stays clocked in.
1. Open Scheduling and look for the purple Extensions badge
Extensions don't have their own page. They live on the Scheduling toolbar, conditionally rendered when at least one request is pending.
Open Scheduling. Look between Add Visit and the Day/Week/Month controls.
The purple Extensions (N) badge sits there when there are pending requests. N is the count across the whole agency. If you don't see the badge, there's nothing to review.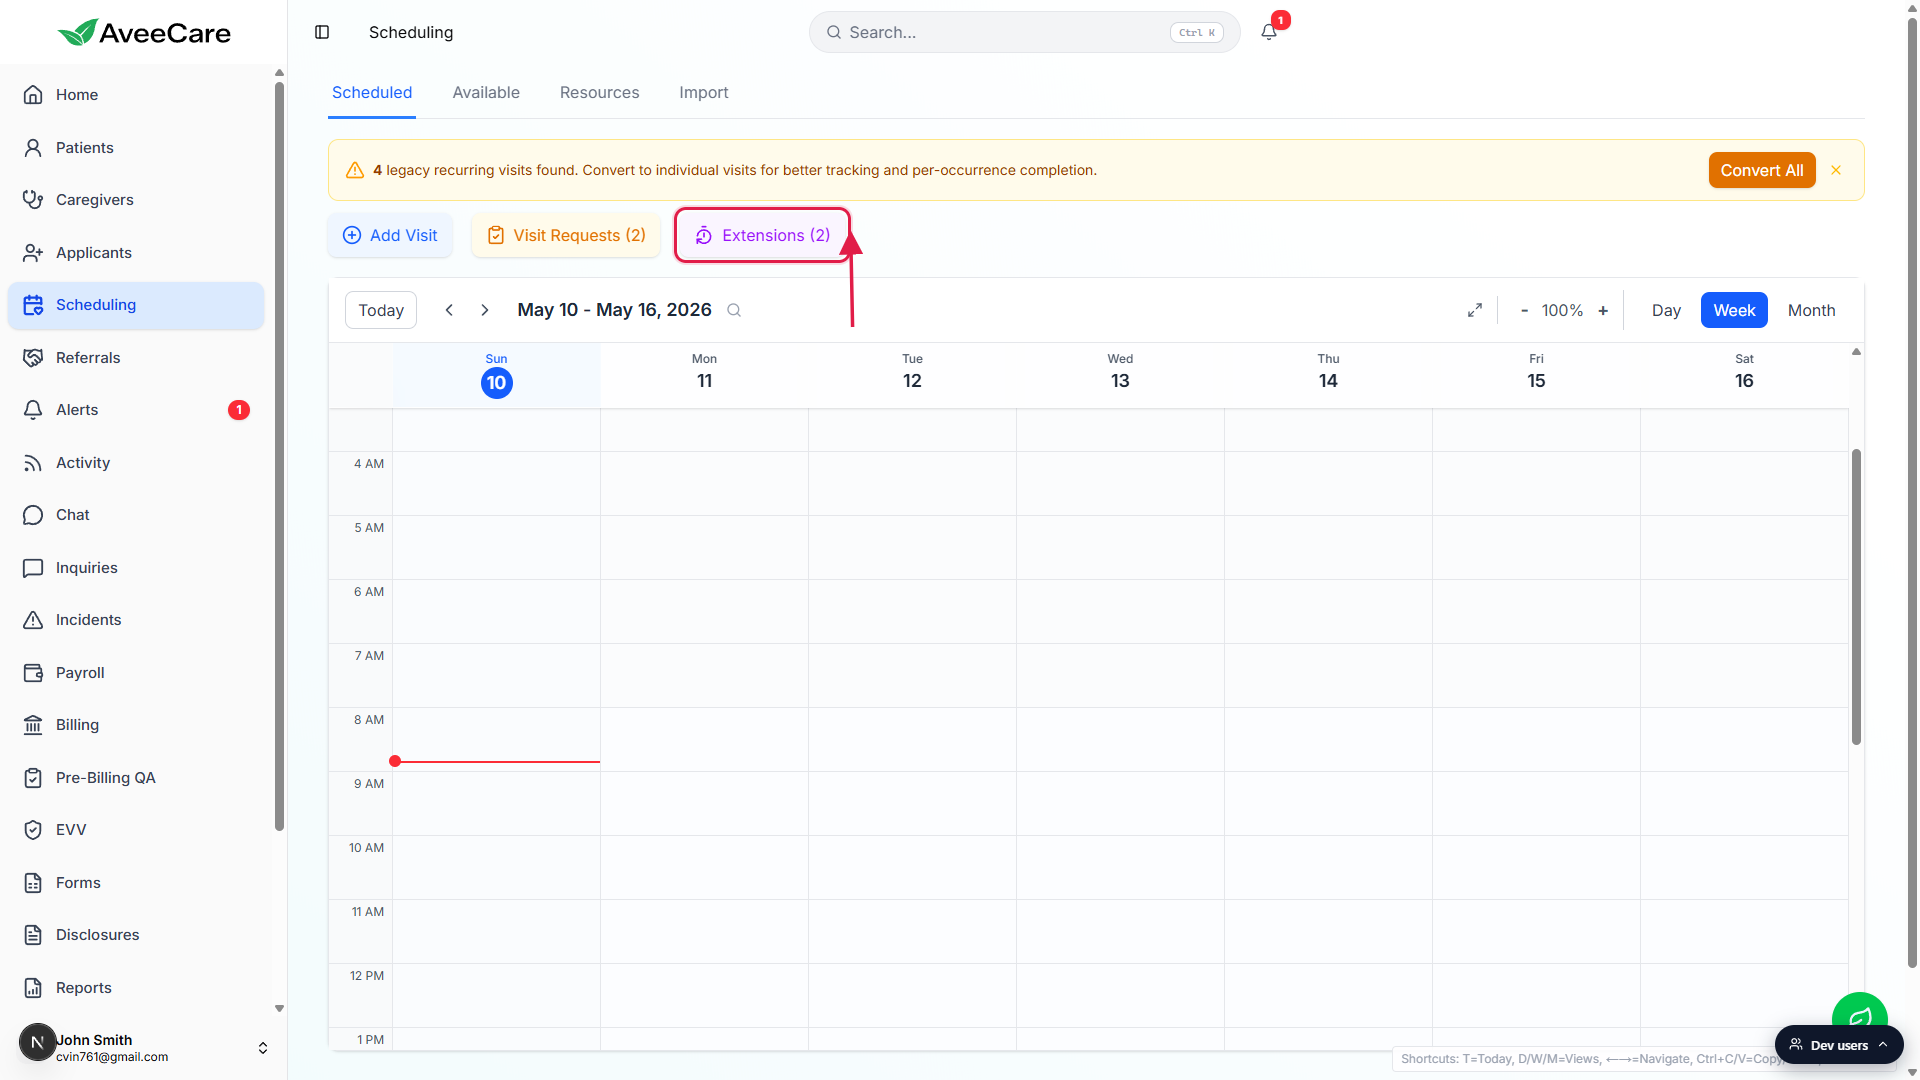
Click the badge to open the Pending Shift Extensions panel.
The panel slides open below the toolbar, with one card per request. Click the badge again or the X on the panel header to collapse it.
2. Read the card: who, how many minutes, why
Every card has the same shape so coordinators can scan a stack of them in seconds.
Each card lists caregiver, patient, requested extra minutes, original end → new end, and reason.
The purple chip in the corner is the requested extra minutes (for example, +30 min). Below it, the original end time and requested new end time are joined by an arrow. Underneath that, the caregiver's reason text, or a quiet “No reason provided” if they skipped it.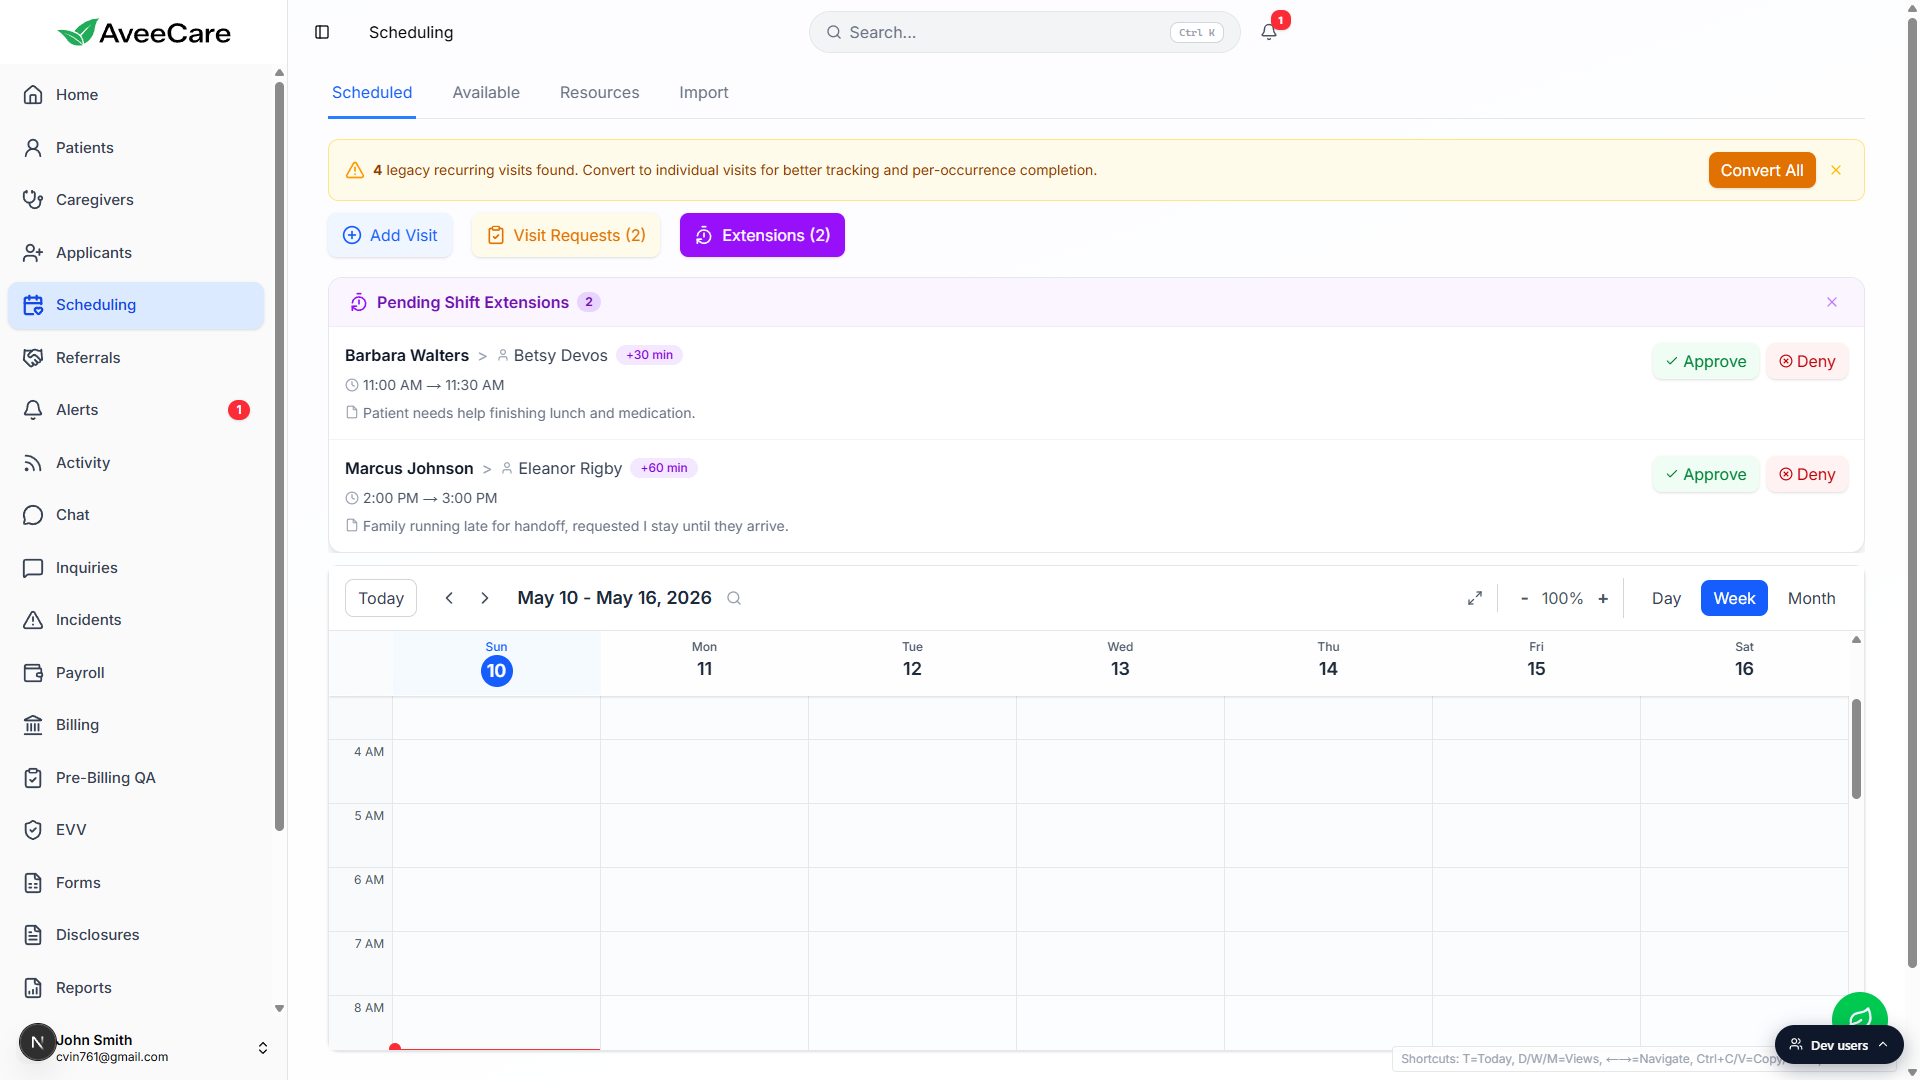
Decide quickly. The caregiver is clocked in waiting for an answer.
Unlike Visit Requests (which are not time-sensitive), the caregiver on a shift extension is sitting at the patient's home waiting for you to decide. Most coordinators decide within a few minutes.
3. Approve and push the visit end time forward
Click the green Approve button on the card.
The card disappears as soon as the decision is recorded. AveeCare pushes the visit's scheduled end forward to the requested new end time. Reference: Shift Extension Request queue.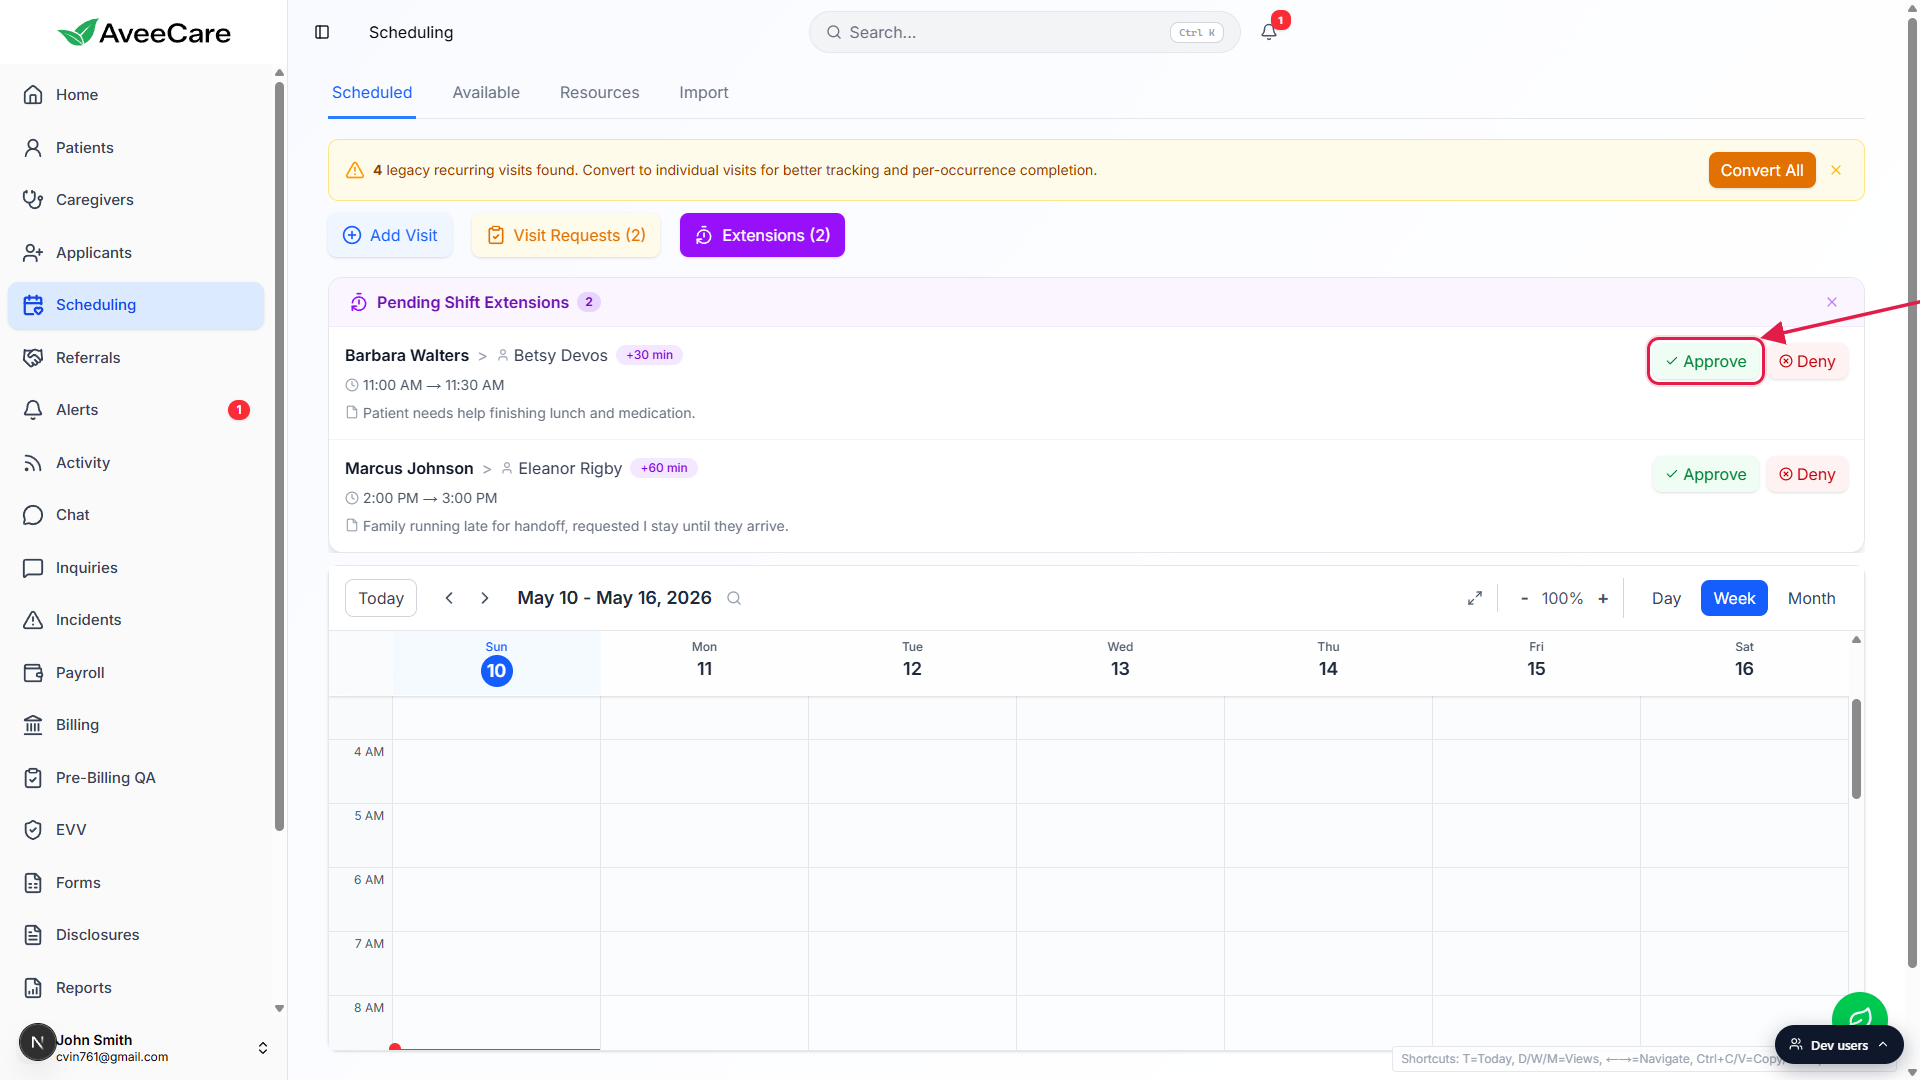
The caregiver gets a push notification and keeps working.
They stay clocked in. The new end time becomes the scheduled end for clock-out, EVV, and payroll. The extra minutes flow into payroll automatically as billable time, and any overtime threshold logic kicks in normally.
4. Deny with a short reason if you can’t approve
Most denied extensions are for billing or labor reasons (the authorization doesn't allow more units, OT would blow the budget, the patient's family asked the caregiver to leave). The caregiver app shows your reason inline, so two sentences saves a call back.
Click Deny on the card.
The Approve and Deny buttons swap for a single Confirm Deny button and a small textarea opens for an optional reason. A small X next to Confirm Deny cancels the deny without sending anything.Type a short reason and click Confirm Deny.
A two-line note like “Patient's authorization is capped at 4 hours, please clock out at 3pm” tells the caregiver what to do next. The card closes and the visit keeps its original end time.The caregiver gets the decision and the reason on their app.
They clock out at the original scheduled end. The visit proceeds to billing and payroll like a normal completed shift.
5. Tune the auto-approval thresholds so this happens less often
If you're approving every request anyway, raise the max auto-extension on Settings so caregivers don't have to ask for short extensions. If you're denying most of them, lower the cap so the request never reaches the coordinator.
Open Settings and scroll to Visit Monitoring on the Business Settings tab.
The Visit Monitoring card holds the late-clock-in, no-show, overtime, early-window, and max-extension thresholds in one place. Reference: Visit monitoring thresholds.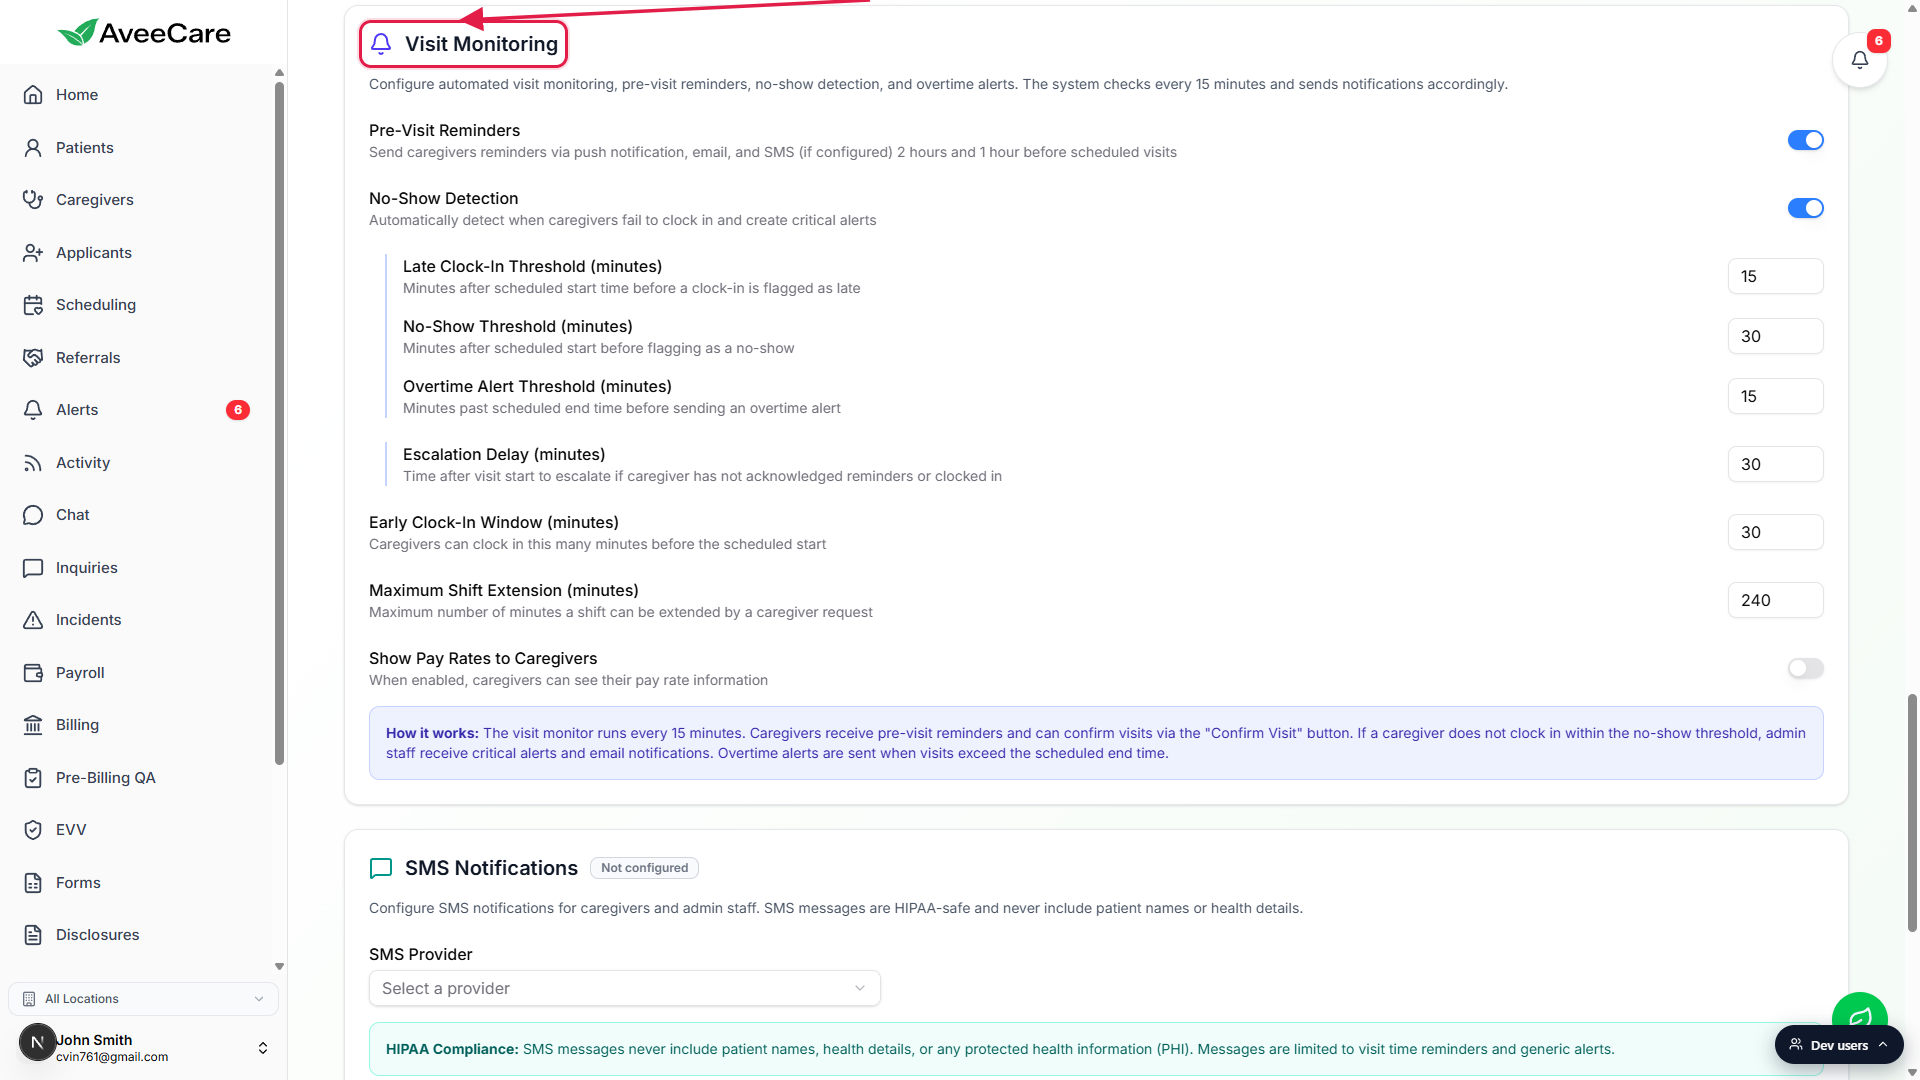
Adjust the Max Extension threshold to match your contracts.
Requests beyond the cap auto-deny before they ever reach the panel. Adjust the cap higher to send more requests through (and approve faster); adjust it lower to filter more out automatically.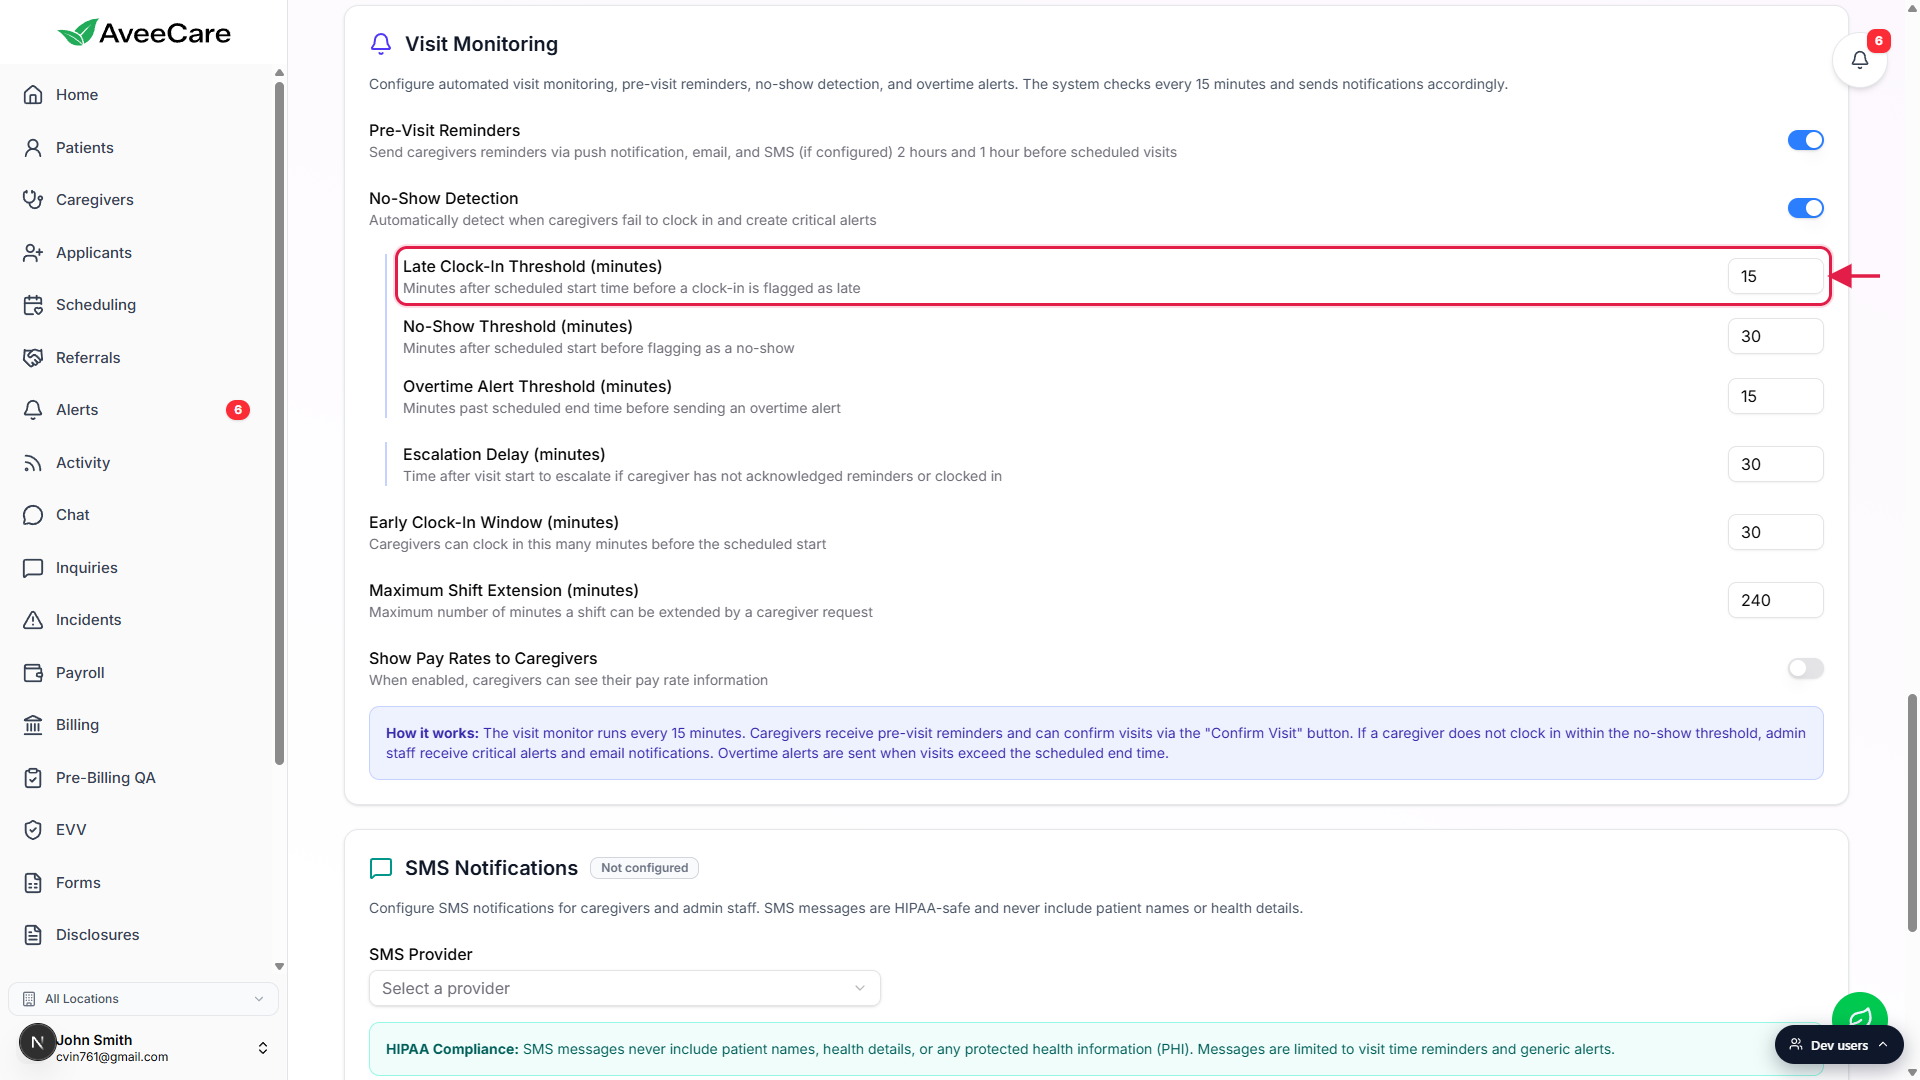
Click Save Business Settings at the bottom of the tab.
Every change on the Business Settings tab saves through one button at the bottom. The new threshold applies to the next extension request that comes in.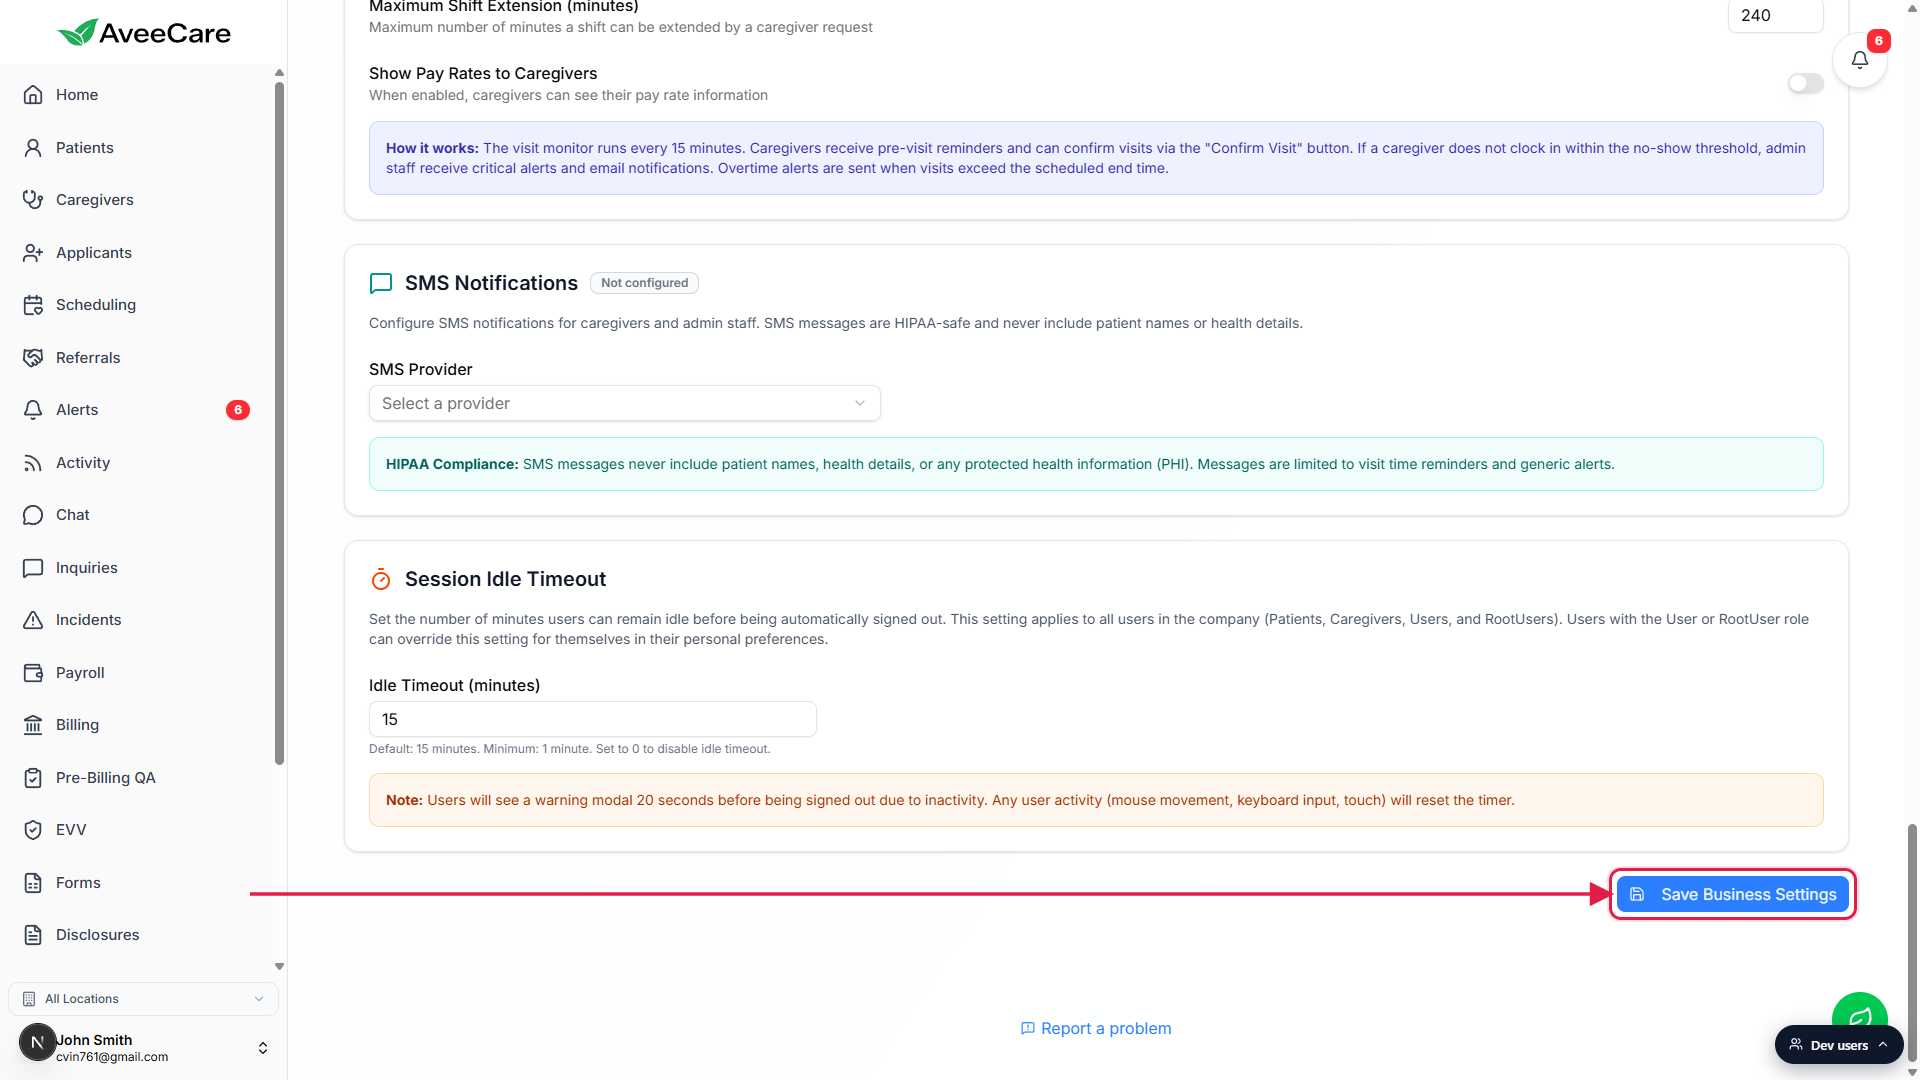
Related
- Shift Extension Request queue
- Visit monitoring thresholds
- Visit Request queue
- Alert detail and action history