Every agency runs care a little differently. The Caregiver Experience tab lets you shape the caregiver app around how you work: which pages they see, what is on each page, what they must do at the start and end of every visit, and your own pages for things like a handbook or uniform rules. A live phone beside the settings shows exactly what your caregivers will see while you make changes.
Quick answer
Open Settings and pick the Caregiver Experience tab. Use the panels on the left (The whole journey, Menu, Pages, Your own pages, The visit, Training) and watch the phone on the right update as you go. Nothing reaches your caregivers until you click Save now. The Patient Experience tab works the same way for the client and family app.
1. Open Settings → Caregiver Experience
Open Settings and click the Caregiver Experience tab.
The phone on the right is the real caregiver app running on sample data, so you can tap around it without touching a real visit.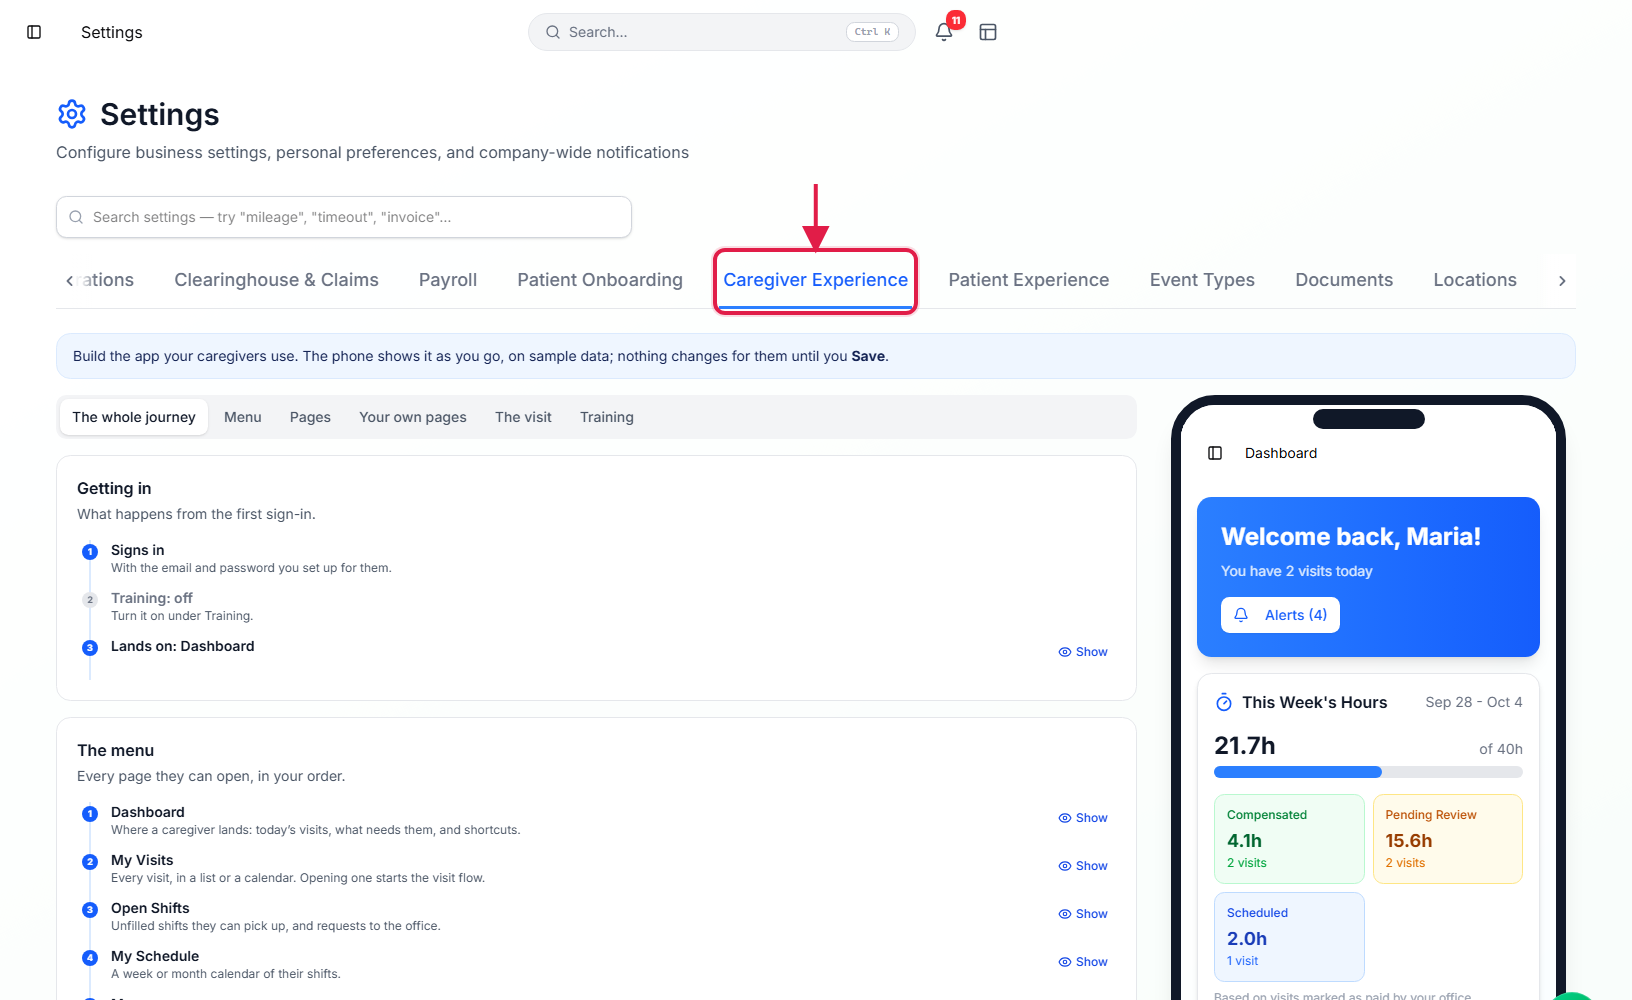
Start with The whole journey to see every screen in order.
It lists each page and each step of a visit the way a caregiver goes through them. Click any line to show that screen in the phone.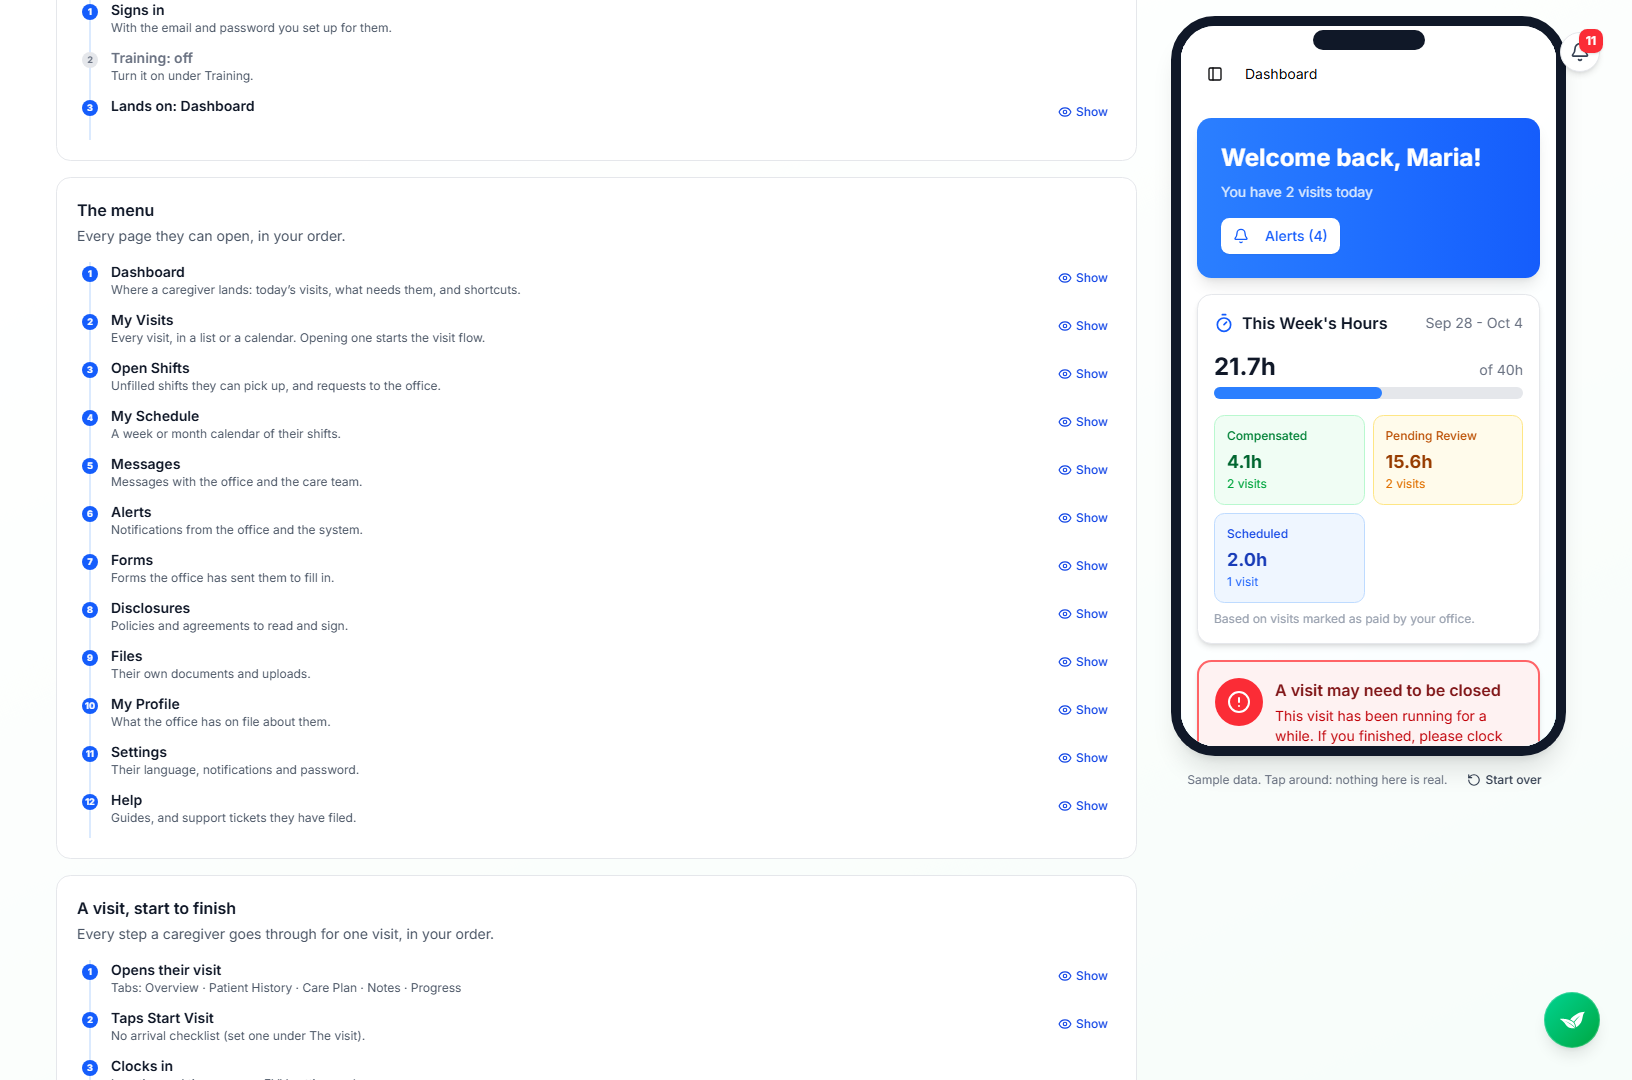
2. Rename, reorder or switch off menu pages
In Menu, type a new name over any page.
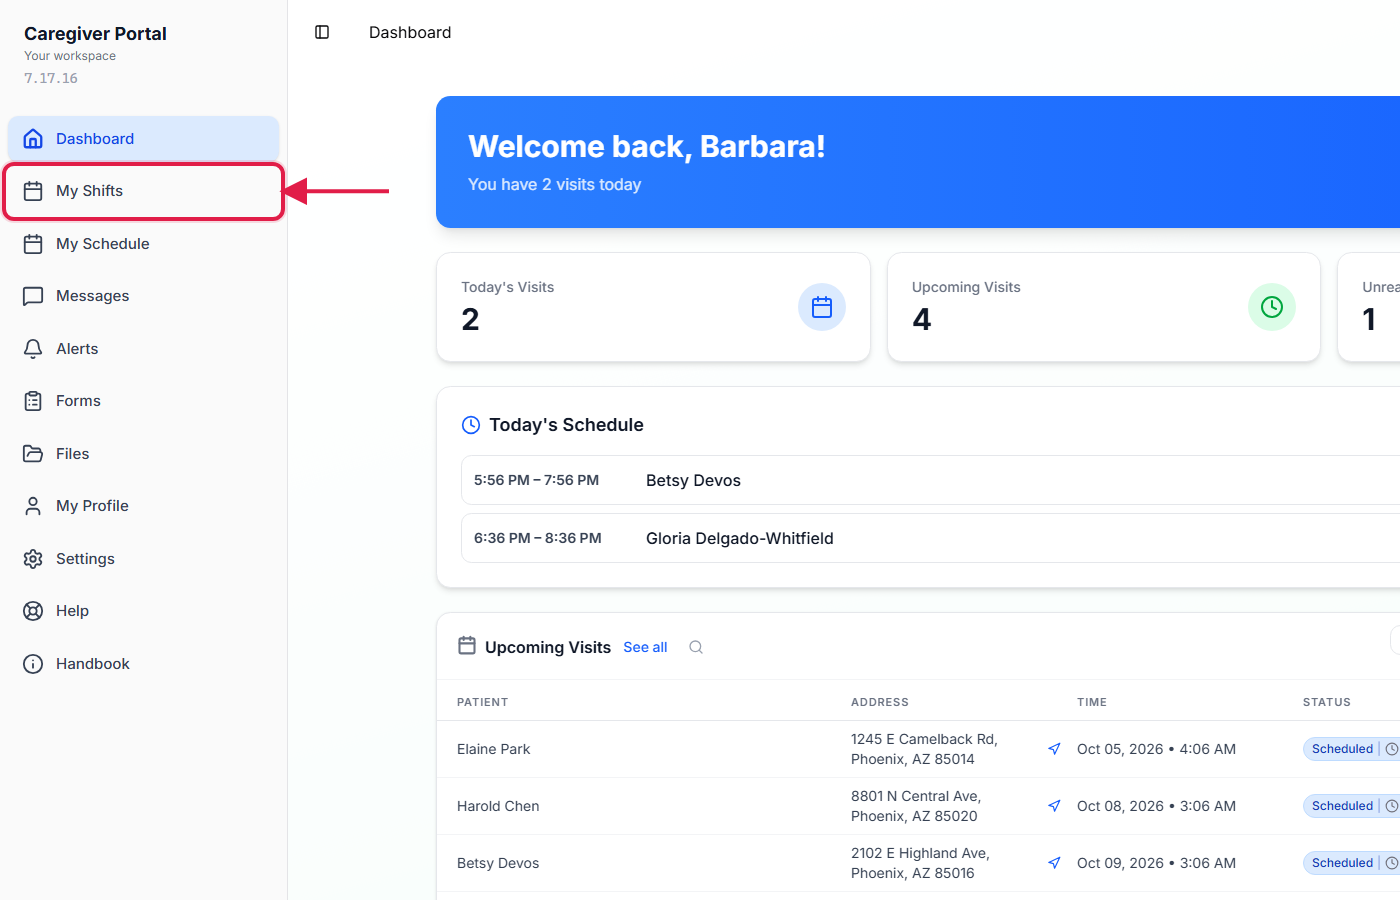
The new name is used in the menu and as the page title. Here My Visits becomes My Shifts. Use the arrows to move a page up or down.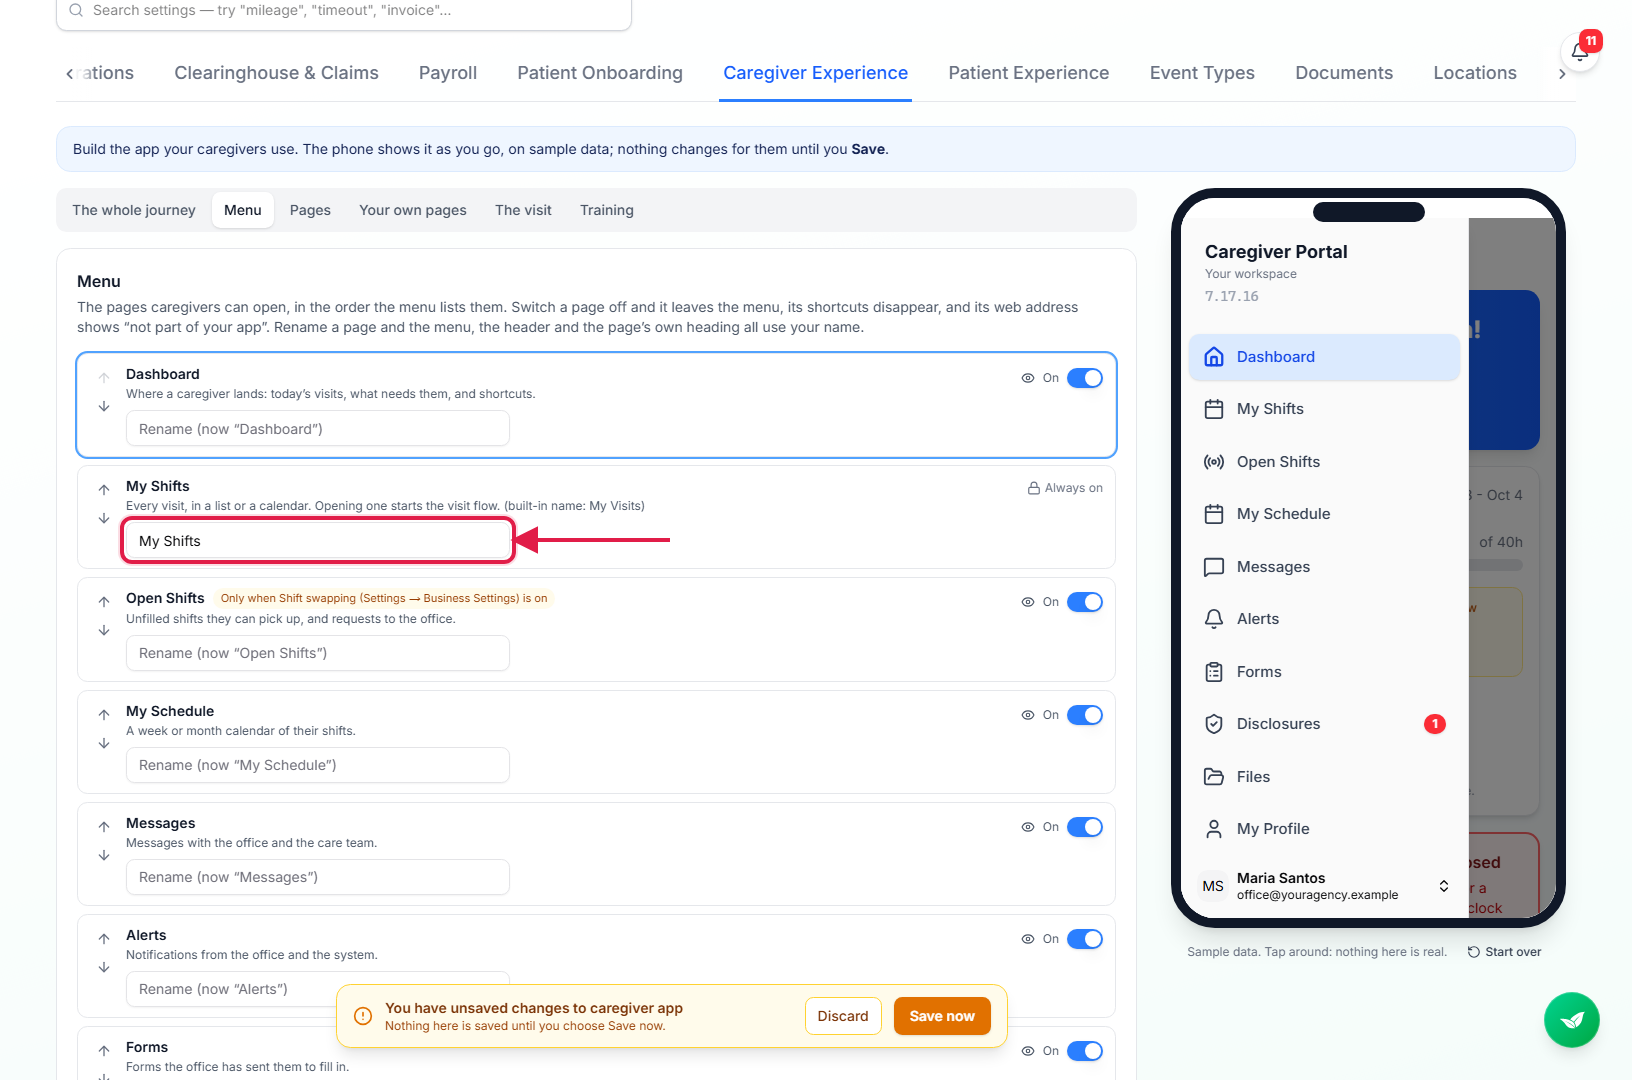
Switch a page off to hide it from caregivers.
A switched-off page leaves the menu, and a caregiver who opens an old link to it sees “This page isn’t part of your app”. My Visits and Settings can't be switched off, because caregivers need them to do visits and manage their account.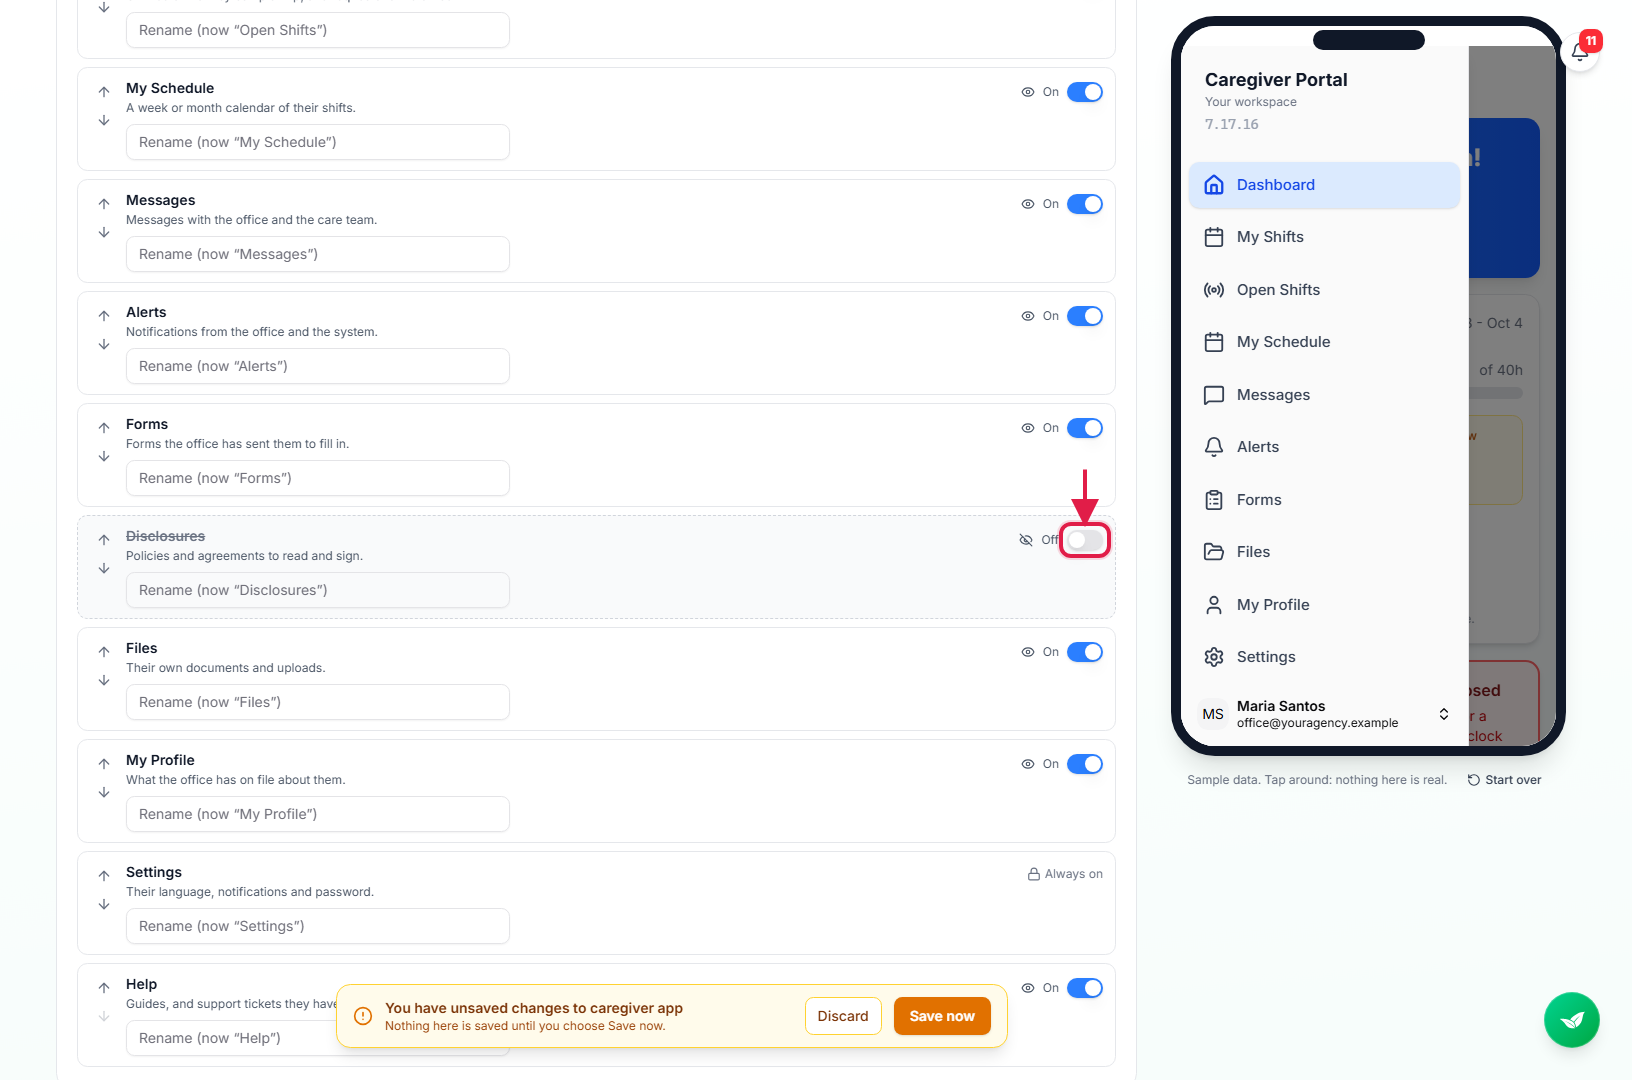
3. Choose what each page shows
In Pages, pick a page and switch its sections on or off.
You can also move sections up or down and rename some section headings. Sections marked as required, like Visit in progress, stay on because caregivers need them to finish a visit.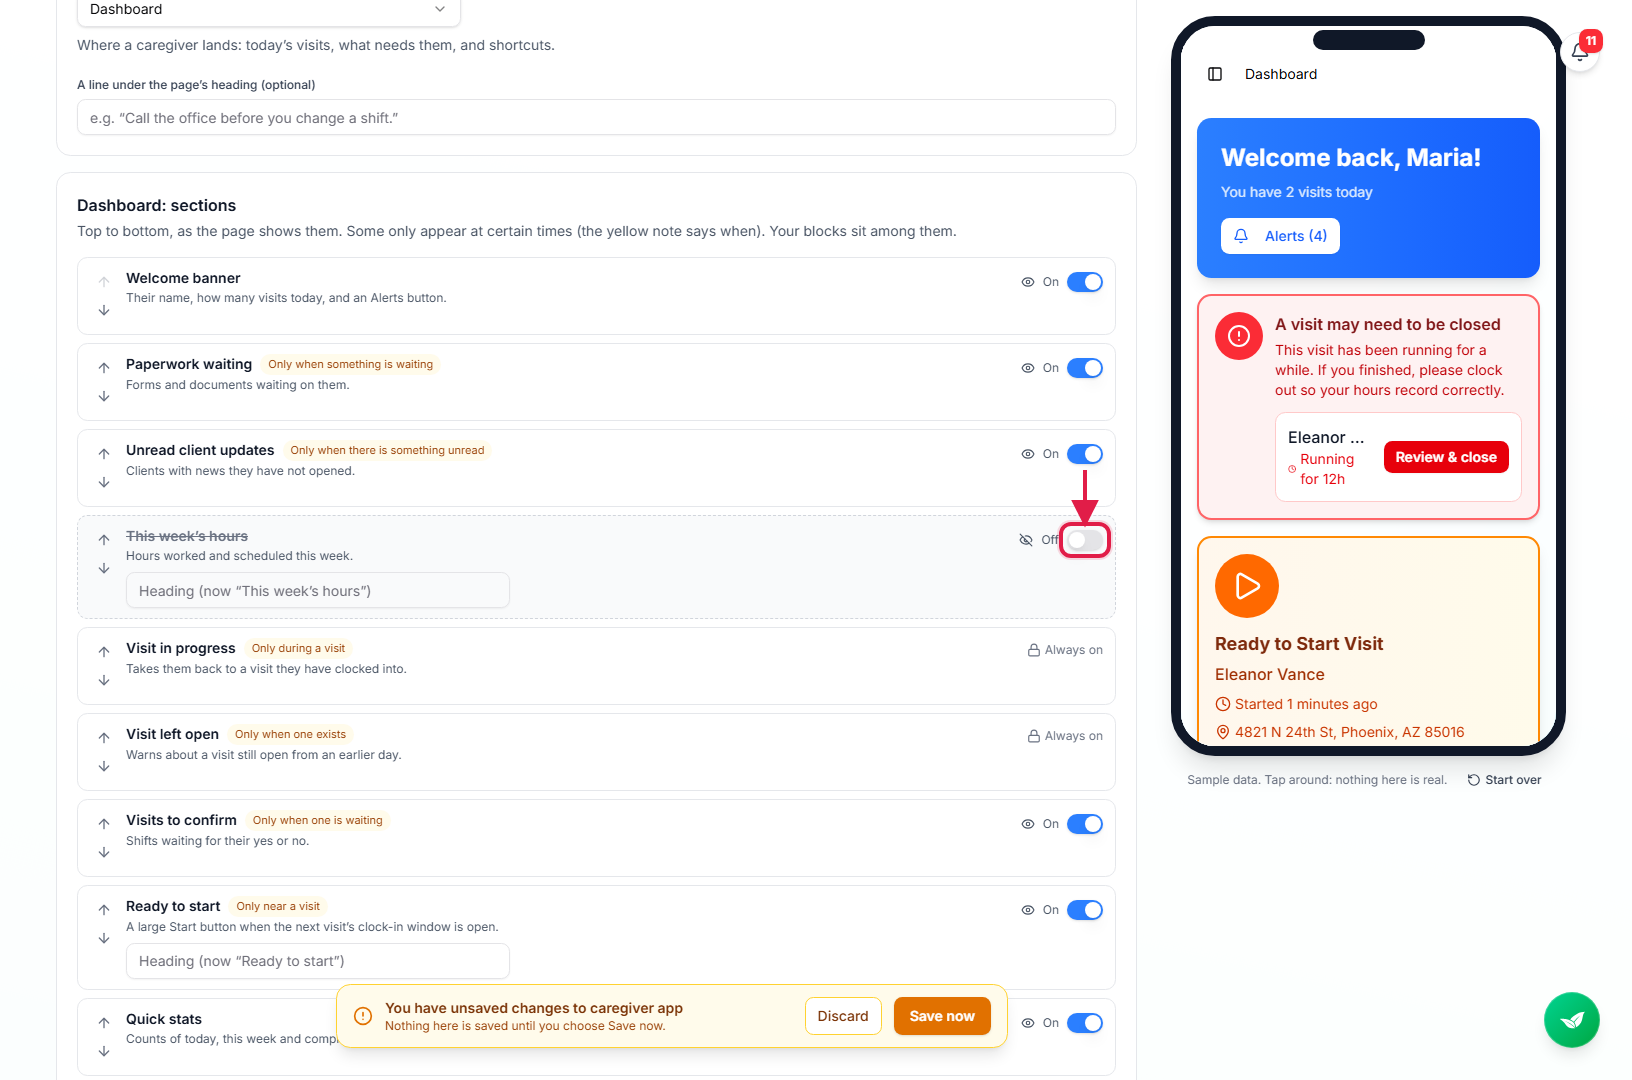
4. Add your own pages
In Your own pages, name a page and click Add page.
Then click Add a block to put content on it: a coloured notice, text, a checklist, a link, a training video or a phone number or email to tap. The page joins the caregiver menu. Each page holds up to 25 blocks, and you can add up to 12 pages.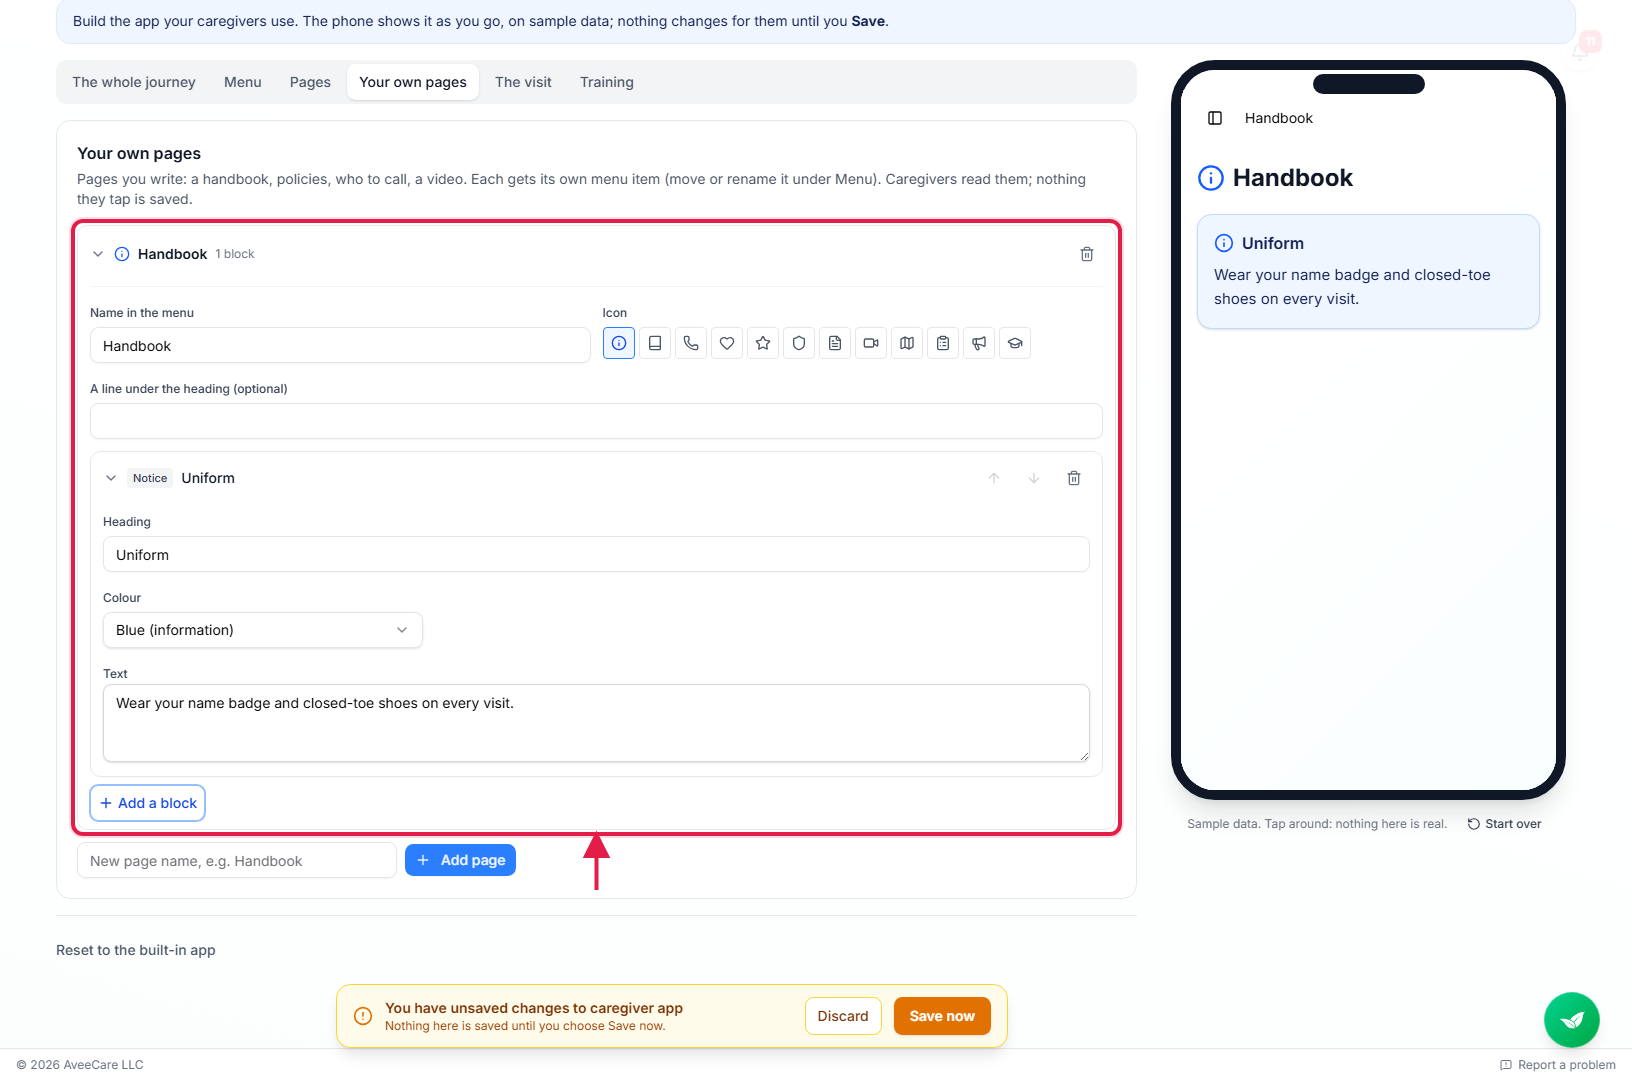
5. Set how a visit is done
The visit panel controls the visit page and the check-out a caregiver walks through when they tap End Visit:
- Arrival checklist. Items they tick before Start Visit, such as “Hands washed”.
- Tabs and buttons. Hide visit-page tabs or buttons you don't use, or rename tabs.
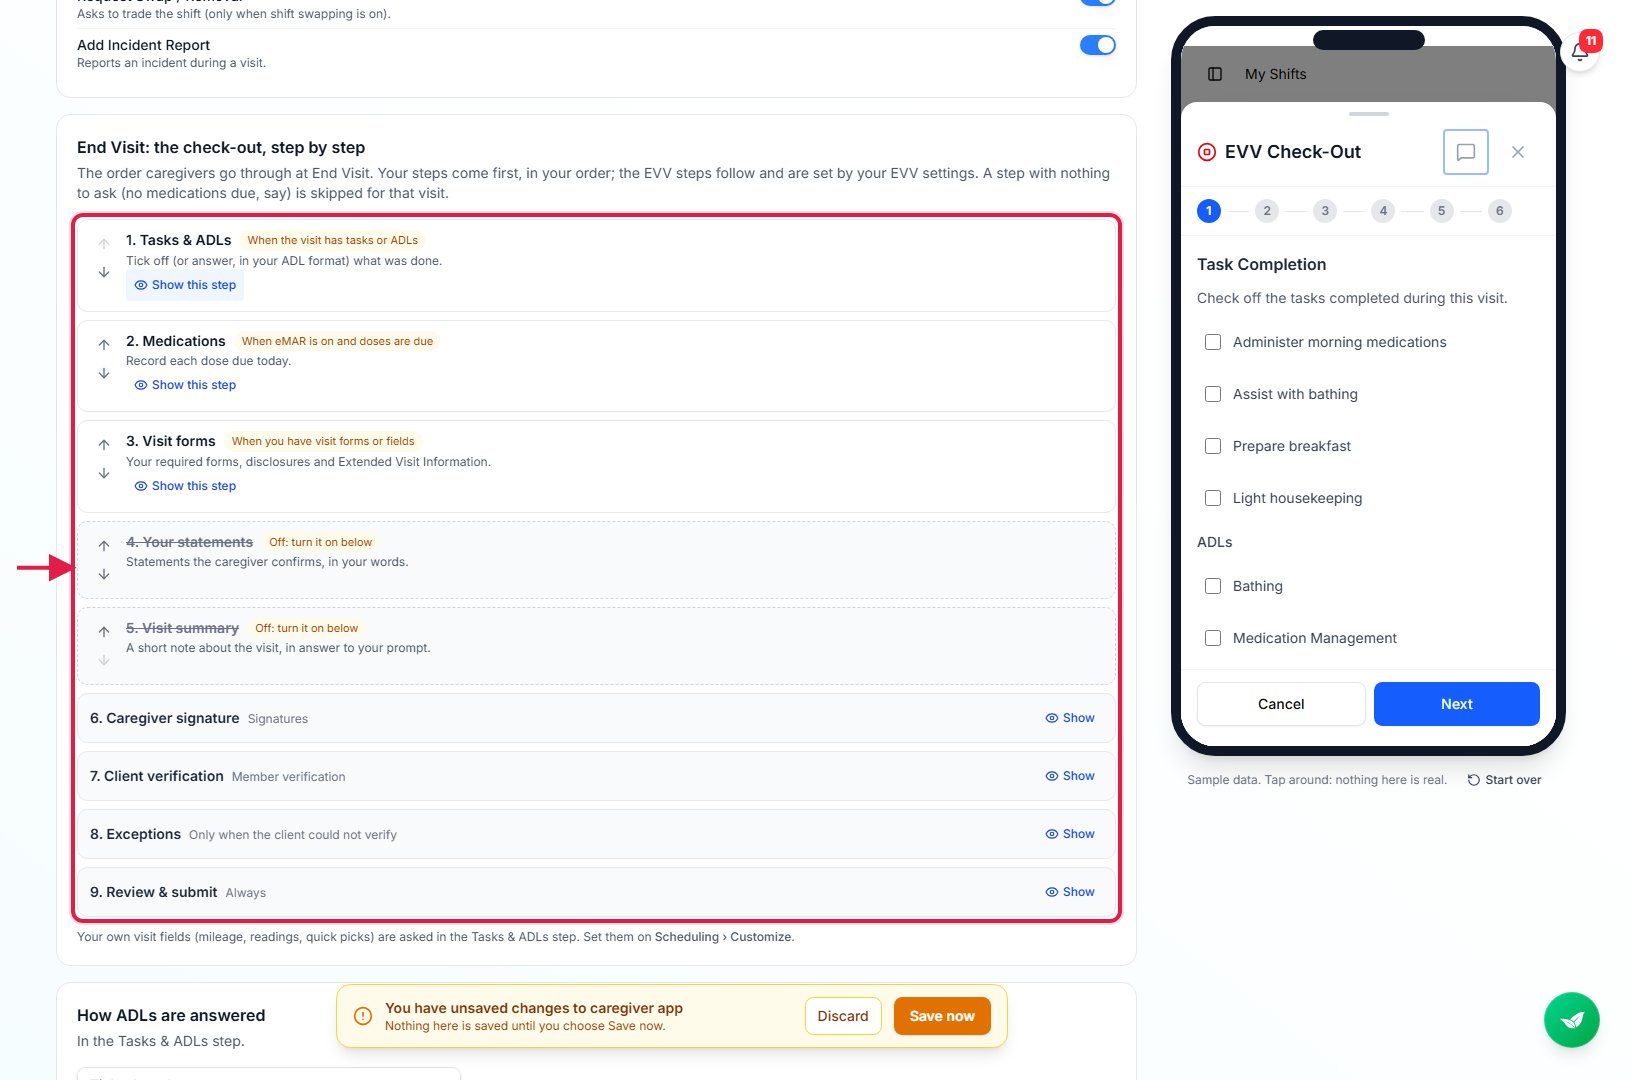
- Check-out steps. Put your steps in your order. The EVV steps always come last and follow your EVV settings. A step with nothing to ask on a visit, like no medications due, is skipped.
- How ADLs are answered. A tick, Done / refused / not needed, or the level of help given.
- Statements. Sentences in your words that the caregiver must confirm, like “I followed the care plan”.
- Closing note. Your question, with a minimum length if you want one.
Order the check-out steps and click Show this step to preview one.
Pick how ADLs are answered.
With Done / refused / not needed, a caregiver must answer every ADL and give a reason when one is refused. The answers are stored on the visit and shown to your office in the visit details.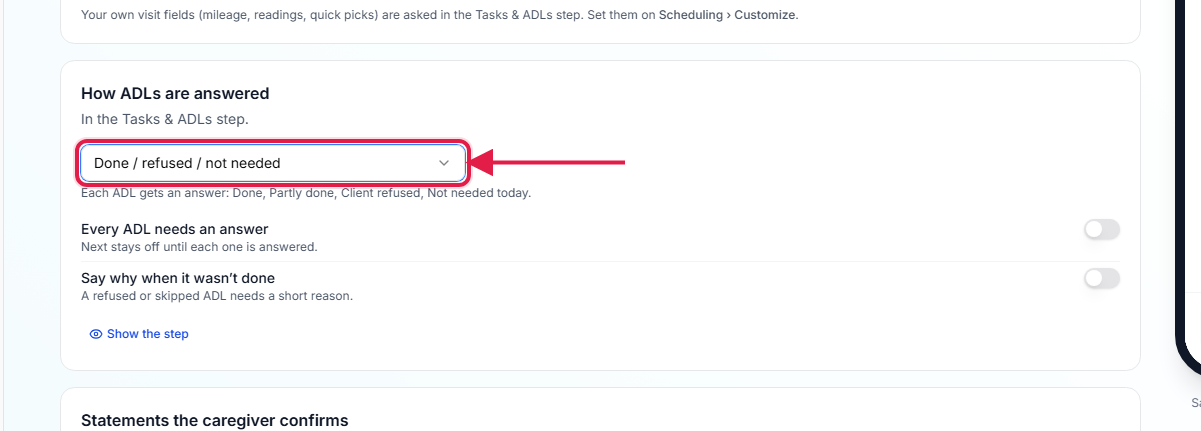
6. Save
Click Save now in the bar at the bottom.
Caregivers get the new app the next time they open or refresh it. To undo everything, click Reset to the built-in app and save.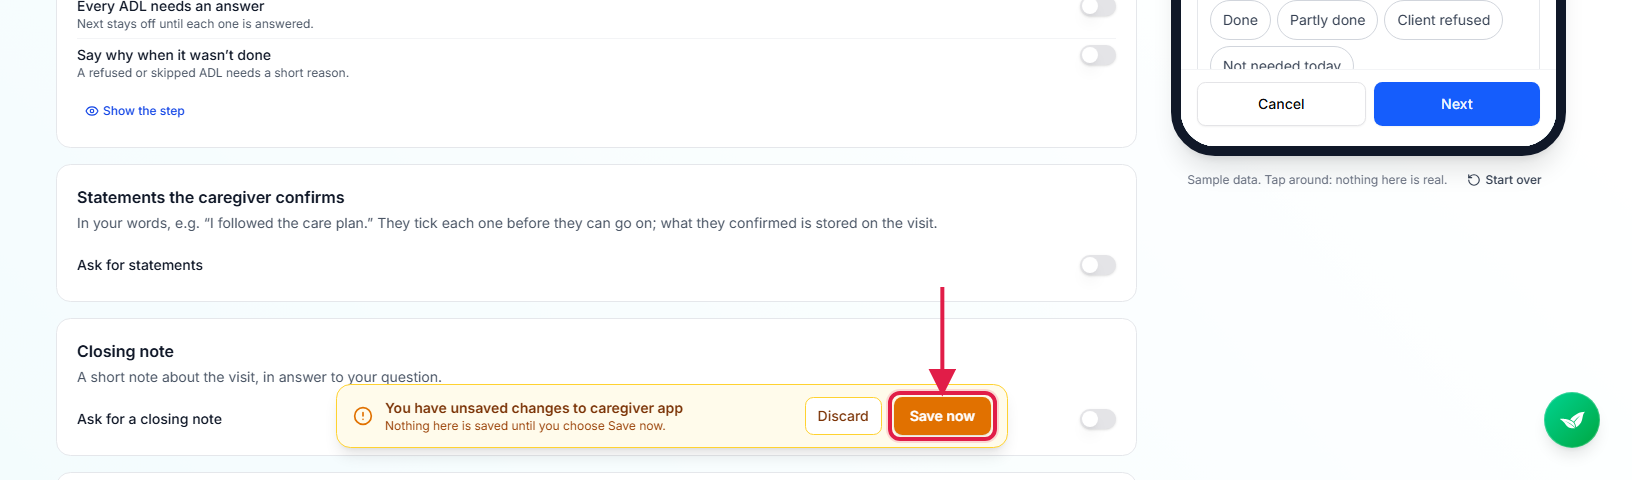
Your caregivers see your version of the app.
Common pitfalls
- Leaving without saving. The phone shows your draft. Caregivers only see it after Save now.
- Changing the visit flow without retraining. If you changed how visits are done, use Ask everyone to retake it in the Training panel so caregivers learn the new steps. See App training for caregivers and families.
- Expecting a switched-off ADL format to change old visits. Settings apply to visits finished after you save. Earlier visits keep the answers they were finished with.